Once Human Shrapnel Build Guide: Best SOCR - The Last Valor Setup & Mods
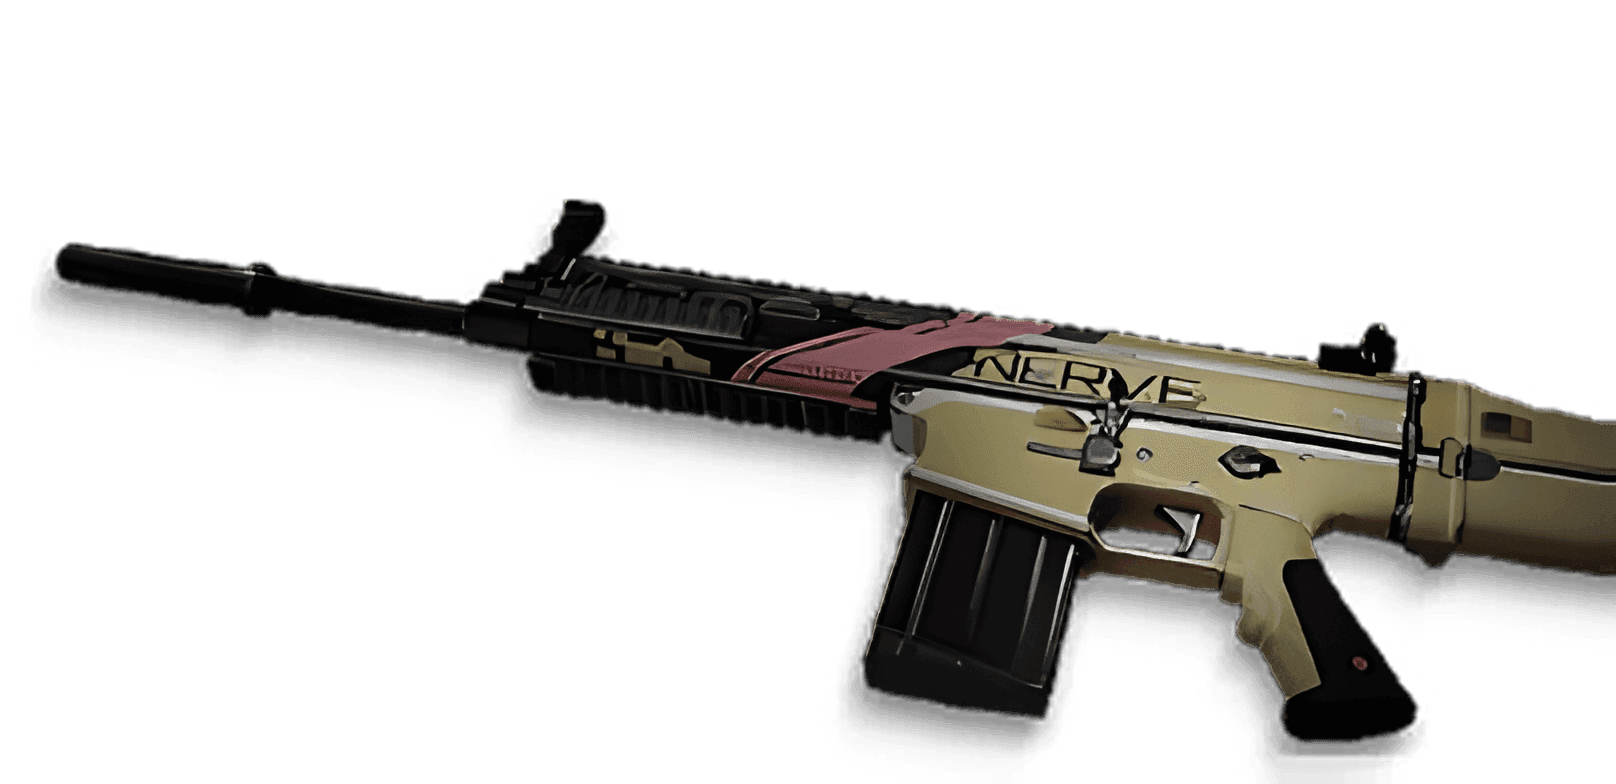
Building around the Shrapnel keyword and the legendary SOCR - The Last Valor assault rifle remains one of the most reliable, hard-hitting physical DPS setups in Once Human. While nearly every player used this rifle for all content back at launch, the 2026 meta—shaped by elemental reworks and high-tier armor updates—has given the archetype a sharp, irreplaceable specialization: melting complex single-target bosses, clearing the LEA Research Lab, and farming Nightmare Manibus with pinpoint efficiency.
Quick take: Shrapnel deals pure physical weapon damage (buffed to a baseline of 60% of Attack) to secondary enemy body parts and completely ignores Psi Intensity. Your primary scaling stats are Crit Rate, Crit DMG, and Weapon DMG. SOCR - The Last Valor serves as the flagship single-target boss killer, while the newly reworked MG4 - Conflicting Memories (Patch 3.0.6) solves the build's crowd-clearing needs.
How the Shrapnel Keyword Works & Its Role in the 2026 Meta
Unlike elemental status effects such as Burn or Frost Vortex, the Shrapnel keyword operates purely as an extension of your firearm's physical bullet impact. Whenever your shot triggers Shrapnel, secondary fragmentation projectiles ricochet inside the target's model, automatically striking a random body part that was not hit by the initial bullet. For example, if you fire straight into a boss's torso, the Shrapnel proc will independently seek out an arm, leg, tentacle, or exposed weakspot on the enemy's back.
To maximize your damage output and avoid wasting resources on dead stats, keep four core mechanical rules in mind:
- Pure Weapon Scaling (60% of Attack): Following official combat balance buffs, each Shrapnel hit deals base damage equal to 60% of your Attack (up from the original 50%) and scales exclusively with Weapon DMG. Armor Psi Intensity, Status DMG, and Elemental DMG bonuses have zero effect on Shrapnel.
- Shrapnel Can Crit and Hit Weakspots: Every secondary fragment inherits your character's overall Crit Rate (plus any dedicated Shrapnel Crit Rate bonuses) and Crit DMG. Whenever a fragment selects a weakspot as its target part, your Weakspot DMG multiplier is applied on top.
- Auto-Targeting Awkward Hitboxes: Many elites and bosses in Once Human feature erratic, fast-moving, or poorly angled weakspots—such as the Siren elite, the shoulder and chest nodes on the Forsaken Giant, or the floating appendages in Manibus encounters. By firing into the easiest-to-hit center mass, your Shrapnel procs automatically pop distant weakspots without requiring pixel-perfect aim.
- Prime 2026 Niche — Nightmare Manibus & Boss Farming: For clearing dense waves of trash mobs in open-world settlements, AoE elemental builds (like KVD - Boom! Boom! Burn or Power Surge) are naturally faster. However, Shrapnel never suffers from elemental immunities and dominates Nightmare Manibus runs, where endgame players farm guaranteed Level 17 Mod Crates with selectable keyword suffixes.
Primary Weapons: SOCR – The Last Valor & Shrapnel Alternatives
Four primary ranged weapons in Once Human feature the built-in Shrapnel keyword. Three are Legendary (Gold) blueprints unlocked via the Wish Machine using Starchrom, while the fourth is an accessible Epic (Purple) rifle for early-season progression.
The flagship Legendary assault rifle (Beyonder brand; baseline stats: 6% Crit Rate, 60% Weakspot DMG, 27% Crit DMG). Its intrinsic passive creates an explosive feedback loop with critical hits:
- Hitting an enemy 4 times triggers Shrapnel.
- Critical hits count as 2 hits toward the 4-hit counter (meaning high Crit Rate lets you proc Shrapnel every 2 bullets!).
- After landing a Critical Hit, your next Shrapnel activation triggers +1 additional time.
- Passively grants +30% Shrapnel Crit DMG.
Because crits both halve the hit requirement and double the proc count, pushing your combat Crit Rate to at least 45–55%+ is the single highest priority for this rifle.
A Legendary light machine gun (Beyonder brand; 8% Crit Rate, 35% Weakspot DMG, 30% Crit DMG). Previously overlooked due to a sluggish 12-hit requirement, it received a massive overhaul in Patch 3.0.6 (September 2026):
- The Shrapnel trigger threshold was cut in half from 12 hits down to 6 hits, with Shrapnel hit parts increased by +1.
- After reloading or every 12 cumulative hits, the next proc upgrades into Memory Storm, dealing simultaneous Shrapnel damage to all enemies within range.
- Each Shrapnel application grants stackable Super Armor for 0.5s, letting you stand your ground and fire uninterrupted through enemy attacks.
It serves as a phenomenal secondary or swap weapon for mob-heavy Silos, or a standalone primary if you prefer heavy LMG sustained fire.
A Legendary bolt-action sniper rifle (10% Crit Rate, 45% Weakspot DMG, 30% Crit DMG) that pairs Shrapnel with Reverb stacks. Standard hits have a chance to proc Shrapnel, while weakspot hits guarantee it and build Reverb. Each stack increases the number of body parts hit by Shrapnel, reduces recoil, and supercharges the final bullet in the magazine for multi-million burst damage rotations.
An Epic assault rifle (Wanderer brand). The ideal transitional weapon during Phase 1 and Phase 2 of a new scenario while you save up Starchrom, allowing you to slot and test your Shrapnel mods right away.
Secondary & Melee Weapons for Damage Buffing (Stat-Sticks)
Because SOCR - The Last Valor handles 95% of your active shooting, your secondary firearm and melee slot function strictly as quick-swap buff tools to multiply your damage right before unloading into a boss.
| Slot | Weapon Name | Rarity | Role in Rotation & Exact Buff |
|---|---|---|---|
| Secondary (Best-in-Slot) | AWS.338 - Bullseye | Legendary (Gold) | The undisputed #1 secondary weapon. Upon switching to this sniper, your very next shot is guaranteed to inflict The Bull's Eye mark even on a body shot (15s cooldown). The mark increases target damage taken by +8% (further boosted by the Vulnerability Amplifier mod), grants +15% Fire Rate on weapon swap, and activates the Targeted Strike mask mod (+10% Crit Rate and +25% Crit DMG). |
| Secondary (Budget) | DE.50 - Wildfire or Recurve Crossbow | Epic (Purple) | Accessible early-game alternatives. DE.50 - Wildfire has a 60% chance on hit to apply The Bull's Eye, while the Recurve Crossbow marks targets on weakspot hits and grants bonus Crit Rate against marked enemies. |
| Melee (Best-in-Slot) | Kukri | Legendary (Gold) | The premier physical melee stat-stick. Striking or defeating a target triggers its Wilderness Hunter passive, granting all weapons +30% Attack and +15% Crit Rate for 10 seconds. |
| Melee (Budget) | Long Axe | Epic (Purple) | Performing a Heavy Strike slams the ground to deploy a Fortress Warfare zone for 10 seconds, granting +20% Weapon DMG and Super Armor while standing inside. |
In practice, your opening sequence takes less than three seconds: proc your Kukri buff, tap a single shot from AWS.338 - Bullseye to tag the boss with vulnerability, and immediately swap to SOCR - The Last Valor to unload a full magazine at peak critical multipliers.
Best Weapon Calibration for SOCR – The Last Valor (2026 Rules)
Quick take: The best-in-slot calibration for SOCR - The Last Valor in the 2026 meta is Heavy Style with a Crit Rate bonus attribute. It boosts your magazine capacity by +75% (to 52–58+ rounds), allowing you to maintain the full +45% Crit DMG stack from the Deadshot pants mod for nearly the entire magazine. Remember: after the 2026 calibration overhaul, calibration blueprints must be slotted directly while crafting the weapon!
Before selecting a style, make sure you account for the major Weapon Calibration system overhaul introduced in 2026. Older guides will instruct you to craft a base rifle first, level it from +1 to +10 at a workbench, and swap calibration blueprints onto the finished gun. That post-crafting calibration menu has been permanently removed to eliminate repetitive resource grinding.
Under the current system, you attach a Calibration Blueprint into the dedicated optional slot directly on the weapon crafting screen at a Gear Workbench. Your newly crafted rifle immediately comes with its calibration style, a primary Attack bonus (scaling up to +50% on Legendary calibration blueprints), and a streamlined bonus attribute baked right in. If you loot a stronger calibration blueprint later, you cannot overwrite an existing gun—you must re-craft the rifle with the new blueprint, while old legacy blueprints can be exchanged at a Disassembly Bench.
For a Shrapnel assault rifle, your choice comes down to two top-performing calibration styles:
| Calibration Style | Weapon Stat Modifiers | Best Bonus Attribute | Build Synergy & Playstyle |
|---|---|---|---|
| Heavy Style (#1 Meta Choice) | Magazine Capacity +75%, Attack +15%, Reload Speed -30%, slight Movement Speed penalty. | Crit Rate (Priority #1) or Crit DMG | The undisputed king for boss melting and Nightmare Manibus farming. Expands your base 30-round magazine to 52–58+ rounds (with magazine attachments and set bonuses). This allows you to fire nearly 40 consecutive bullets while sitting at the maximum +45% Crit DMG cap from the Deadshot pants mod (which resets on reload), paired with the Shatter Them All weapon mod. |
| Rapid Shot Style ("Infinite Ammo" Alternative) | Fire Rate +20%, Recoil +30%, Range -20%, Attack -10%. | Crit Rate | Tailor-made for the high-comfort "no-reload" setup utilizing the Shrapnel Souvenir weapon mod and the Beret key helmet. Because weakspot shrapnel hits automatically refill bullets into your magazine from reserve, a smaller base magazine is never an issue, and the +20% Fire Rate turns the rifle into a bullet hose. |
Why is Crit Rate mandatory on your calibration blueprint's bonus attribute? SOCR - The Last Valor has a modest baseline Crit Rate of only 6%. Since its entire passive engine relies on critical hits counting as double-hits and generating +1 extra Shrapnel proc, pushing your combat Crit Rate toward 50–60% is the most impactful upgrade you can make.
Best Weapon Accessories (Attachments)
All four weapon attachment slots (Muzzle, Optic, Tactical, and Magazine) are unlocked permanently by solving open-world riddles and mystical crates on the interactive map and carry over across every scenario. For SOCR - The Last Valor, your attachments should prioritize Magazine Capacity, Effective Range (preventing damage falloff against massive raid bosses), and Stability / Accuracy.
| Attachment Slot | Best Gold Accessory | Where to Find & Key Stat Benefits |
|---|---|---|
| Muzzle | Hammer Compensator or Stretched Muzzle Brake | Provides maximum Stability and Accuracy without penalizing effective range, letting you laser targets at 30–40 meters. Obtained from riddle chests in high-level zones (Red Sands and Blackheart). |
| Optic | Compact Reflex Sight or Alpha Sight | Boosts Accuracy, Stability, and Aim Down Sights (ADS) speed. Pick whichever clean 1x reticle feels best for tracking moving bosses while jumping. |
| Tactical | Small Infrared Indicator or Compact Infrared Indicator | Delivers the best balance of Stability, Accuracy, and ADS Speed. Laser indicators are essential when counteracting the recoil of rapid fire or aerial shooting. |
| Magazine | Small Capacity Rifle Mag (Gold) or Tactical Rifle Mag | The Gold rifle magazine grants the highest bonus to Magazine Capacity (+ rounds) without the severe reload speed penalty of heavy drum mags, synergizing perfectly with Heavy Style calibration. |
Ammunition Choice: Daily Farming vs. Endgame Bosses
Because Shrapnel scales directly off your base Attack and bullet damage multiplier, upgrading your ammunition tier provides a multiplicative boost to your final DPS. To manage your material economy efficiently, always carry two types of rifle ammo in your backpack:
- For Daily Settlement Runs & Standard Silos — Tungsten Rifle Ammo: Standard Tier 5 ammunition that can be mass-produced by the thousands using Tungsten Ingots and Acid. Pairing this with the Supplies Workbench: Ammo Factory Memetic Specialization yields +50% extra standard rounds per craft.
- For Nightmare Manibus, LEA Lab & World Bosses — Tungsten AP Rifle Ammo: High-end Armor-Piercing ammunition crafted using Stardust Source. It provides a massive multiplicative damage boost (+10% to +15% raw damage over standard Tungsten rounds). Always look for a workbench upgraded with the Supplies Workbench: Anti-Armor Memetic Specialization, which increases AP ammo output by +30% and cuts crafting time by 50%.
Key Helmet Showdown: Gas-tight Helmet vs. Beret vs. Cage Helmet
Quick take: In Once Human, you can only equip one standalone Key Armor piece at a time, and for Shrapnel builds it always occupies the Helmet slot. The undisputed #1 choice for boss melting and Nightmare Manibus farming is the Legendary Gas-tight Helmet, which condenses your fragments into a single massive hit with +150% Shrapnel DMG. The Epic Beret is the top budget option and the core of the "Infinite Magazine" setup, while the Cage Helmet shines with the SN700 - Finale sniper.
Understanding the difference between the three Shrapnel headgear pieces is essential because each one fundamentally alters how your fragmentation procs behave:
Official Effect: Shrapnel can hit a maximum of 1 part(s), but Shrapnel DMG is increased by +150%.
Why It Dominates the 2026 Meta: Instead of spreading smaller hits across multiple limbs, the Gas-tight Helmet concentrates all of your power into a single devastating strike with a 2.5x multiplier. Because you are no longer relying on multi-part spread, you free up your Mask mod slot to run Targeted Strike (+10% Crit Rate and +25% Crit DMG against The Bull's Eye targets). Combined with the Shatter Them All weapon mod and Canned Steak food buff (+1 Shrapnel part), it delivers the fastest time-to-kill against bosses in the game.
Official Effect: Shrapnel hit parts +1.
When to Use It: The Beret excels in two scenarios. First, as an Epic (Purple) blueprint, it is cheap to upgrade to 5 Stars early on and serves as an easy stepping stone for Blueprint Conversion. Second, it is mandatory if you run the Shrapnel Souvenir weapon mod (which reloads 1 bullet into your magazine whenever Shrapnel hits a weakspot). Hitting an extra body part per proc dramatically increases your odds of striking a weakspot and firing non-stop without reloading.
Official Effect: Shrapnel trigger times +1.
How It Differs from the Beret: While the Beret adds an extra simultaneous hit within a single proc, the Cage Helmet fires a second sequential wave of Shrapnel immediately after the first. This doubles how fast you build the 20-hit counter for the Explosive Shrapnel mask mod (+300% guaranteed crit explosion) and pairs exceptionally well with the SN700 - Finale sniper rifle's last-bullet burst.
Armor Setup #1 (Nightmare Manibus Meta): Shield & Low-HP (Savior + Treacherous Tides)
In high-end 2026 content—specifically Nightmare Manibus and Dream Zones—the highest-performing setup combines 3 pieces of the Savior Set with 2 pieces of the Treacherous Tides Set. This hybrid engine leverages automatic shield generation and controlled low HP to unlock massive multiplicative damage while staying virtually unkillable.
Why Patch 3.0.6 Made This Setup Even Stronger: In the September 2026 (3.0.6) balance update, Starry Studio completely removed the cumbersome Sanity requirement from the Treacherous Tides Set! You no longer need to eat spoiled food or stand in pollution to drain your Sanity—which previously conflicted with the Whimsical Drink buff (+25% Weapon DMG at 100% Sanity). Now, Treacherous Tides scales purely off your current HP percentage, while the 3-piece Savior Set automatically consumes 6% of your current HP on weapon hit to wrap you in a massive protective Shield!
| Armor Slot | Equipped Piece | Active Set Bonus & Mechanical Synergy |
|---|---|---|
| Helmet (Key Piece) | Gas-tight Helmet | Key Armor slot: limits Shrapnel to 1 hit part and grants +150% Shrapnel DMG. |
| Mask | Savior Mask | 3-Piece Savior Set Bonus: • 1-Pc: Medicine cooldown reduction +20%. • 2-Pc: While shielded, Weapon DMG and Status DMG are increased by +10%. • 3-Pc: Hitting an enemy consumes 6% of current HP (0.5s cooldown) to generate a temporary Shield equal to 6% of Max HP for 30s (stacks up to 60% Shield). |
| Gloves | Savior Gloves | |
| Shoes | Savior Shoes | |
| Top (Chest) | Treacherous Tides Top | 2-Piece Treacherous Tides Set Bonus: • 1-Pc: Incoming Weapon DMG Reduction +10%. • 2-Pc: When HP is below 70%, Weapon DMG and Status DMG are increased by +10%. |
| Bottoms (Pants) | Treacherous Tides Pants |
How the Engine Works in Combat: As soon as you open fire on a boss, the 3-piece Savior Set gently drains your HP below the 70% threshold within a few seconds while building a 60% Max HP white Shield over your health bar. This simultaneously triggers +10% Weapon DMG from 2-piece Savior, +10% Weapon DMG from 2-piece Treacherous Tides, up to +16%–24% DMG from the Rush Hour boots mod, and full critical bonuses from <Lunar> and <Crescent> seasonal mods!
Armor Setup #2 (Classic Full-HP Crit): Lonewolf + Ghost Link
If you prefer playing at 100% HP, haven't farmed specialized <Lunar> mods yet, or want an effortless all-purpose critical setup for standard dungeons, the classic 4-piece Lonewolf Set remains a powerhouse:
- Key Helmet: Gas-tight Helmet (for peak single-target burst) or Beret (for multi-hit sustained fire).
- 4 Pieces of the Lonewolf Set (e.g., Mask, Gloves, Pants, and Boots):
— 1-Pc: Magazine Capacity +10% (adds even more rounds for Deadshot uptime).
— 2-Pc: Crit Rate +5%.
— 3-Pc: Gain 1 stack of Lone Shadow every 4 weapon critical hits (+6% Crit DMG for 20s, base cap of 8 stacks).
— 4-Pc: Increases max stacks to 10 (total +60% Crit DMG!) and grants +10% Crit Rate for 2s after reloading. - 1 Flex Piece (Top / Jacket): In the 2026 meta, the best standalone 1-piece filler is 1 piece of the Ghost Link Set, which grants an unconditional +3% Crit Rate. Alternatively, use 1 piece of the Bastille Set for +10% Weapon DMG while HP is above 70%.
Starter Budget Setup (Epic Gear): During the opening days of a scenario before unlocking Gold armor blueprints, craft the Beret + 3 pieces of the Falcon Set (+12% Crit DMG from 2-pc; +5% Crit Rate and +20% Crit DMG above 90% Stamina from 3-pc) + 2 pieces of the Scout Set (+8% Weapon DMG).
Armor Crafting Secret: Rabbit Hide & Gold Wool
When crafting Tier V armor at a Gear Workbench, substituting basic rawhide with specialized animal hides and wool (covered in detail in our Farming, Taming & Cooking Guide) unlocks a hidden damage multiplier:
- In the Mask — Gold Wool: Sheared from rare mutated sheep/rams. Crafting your mask with Gold Wool grants a powerful conditional boost to your offensive and critical parameters.
- In 4 Other Armor Pieces (Helmet, Top, Gloves, Pants, or Boots) — Rabbit Hide: Each piece crafted with rabbit hide reduces jump stamina cost and increases jump height. More importantly, equipping 4 armor pieces crafted with Rabbit Hide activates the Soaring Jump set bonus, granting +20% Weakspot DMG while airborne! Paired with the double jump from Stardust Energy Drink and <Aero> mods, simply hopping while spraying a boss gives you a free 20% damage multiplier.
- Grounded Alternative — Wolf Hide: If you prefer firing with your feet planted on the ground, craft your Gloves, Boots, and Top using high-grade Wolf Hide for flat increases to Crit Rate and Weapon DMG.
Best Primary & Secondary Weapon Mods
Quick take: For maximum boss-melting DPS, slot Shatter Them All into SOCR - The Last Valor (up to +45% Shrapnel DMG) and Vulnerability Amplifier into your secondary AWS.338 - Bullseye. Across your armor, combine Weapon Symphony (Helmet), Targeted Strike (Mask), Deadshot (Pants), Crit Boost (+15% Crit Rate on Gloves), and Rush Hour or Covered Advance (Shoes).
Dedicated Shrapnel weapon mods drop from the Shadow Hound (Rabizex) boss at the Monolith of Thirst, as well as from selectable Level 17 Mod Crates farmed in Nightmare Manibus (see our Bosses, Silos & LEA Lab Guide for exact farming routes). Depending on your helmet choice and playstyle, slot one of these three mods into your primary rifle:
- Shatter Them All — #1 Choice for Peak Boss DPS: Increases Shrapnel DMG by +15% for each body part hit by Shrapnel, stacking up to +45% (at Mod Level 5). Even when running the Gas-tight Helmet (which limits baseline Shrapnel to 1 part), this remains the highest-performing mod in the slot: it provides an unconditional +15% multiplicative boost on every proc and scales up to +30%–45% whenever you consume Canned Steak (+1 Shrapnel hit part) or use multi-part weapons.
- Shrapnel Souvenir — Core of the "Infinite Magazine" Build: Hitting an enemy weakspot with Shrapnel automatically refills 1 bullet directly into your magazine from your reserve ammo. When paired with the Beret helmet (+1 hit part) and the Shrapnel Carnage mask mod, you can fire 150–200 rounds non-stop without ever reloading. While it has slightly lower burst than Shatter Them All, its sustained comfort in dungeon runs is unmatched.
- Shrapnel Smash — Early-Season Crit Rate Bridge: Triggering Shrapnel increases your Shrapnel Crit Rate by +2% for 2 seconds (stacks up to 20 times for +40% Shrapnel Crit Rate). A solid transitional option early in a scenario before your armor set and calibration provide enough baseline Crit Rate.
In your secondary weapon (AWS.338 - Bullseye or DE.50 - Wildfire), always equip Vulnerability Amplifier (The Bull's Eye mod family). It enhances the vulnerability debuff inflicted by the mark by an additional +8% (and higher with mod upgrades), directly amplifying the damage dealt when you swap back to your primary rifle.
Best Armor Mods by Slot (Meta & Alternatives)
The table below outlines the best-in-slot Gold armor mods for SOCR - The Last Valor, separating the primary meta choices (optimized for quick-swapping with AWS.338 - Bullseye and the Gas-tight Helmet) from no-swap or Beret alternatives:
| Armor Slot | Best-in-Slot Mod | Exact Effect (Level 5) | Alternative Mods & When to Use Them |
|---|---|---|---|
| Helmet | Weapon Symphony | After switching weapons, grants +10% Fire Rate and +25% Weapon DMG (decays by 10% per second, up to -60%). Synergizes seamlessly with your sniper mark swap right before unloading! | Momentum Up (+10% Fire Rate for the first 50% of the mag, +30% Weapon DMG for the second 50%) — best if you dislike frequent weapon swapping. Fortune's Favor (Fateful Strike) (cannot deal bonus Weakspot DMG, but grants +10% Crit Rate and +30% Crit DMG) — for relaxed center-mass shooting. |
| Mask | Targeted Strike (The Bull's Eye Family) | When hitting enemies marked with The Bull's Eye, grants +10% Crit Rate and +25% Crit DMG. The undisputed #1 choice when using the Gas-tight Helmet and a Bullseye secondary. | Shrapnel Carnage (Shrapnel weakspot hit chance +100%, Weakspot DMG +25%) — use with the Beret and Shrapnel Souvenir. Explosive Shrapnel (every 20th Shrapnel explodes for +300% guaranteed crit DMG) — use with the Cage Helmet or MG4. |
| Top (Chest) | Any Gold Mod with God-Roll Substats (e.g., Ardent Shield or Rejuvenating) | The Chest slot lacks dedicated offensive weapon perks, so simply equip whichever Gold mod has your highest offensive substats (Crit DMG + Weapon DMG) and your desired seasonal suffix. | Healing Fortification or Quick Comeback — great defensive utility for soloing the LEA Research Lab or Nightmare Silos. |
| Bottoms (Pants) | Deadshot | Each ranged Critical Hit grants +5% Crit DMG, stacking up to +45%! Resets upon reloading—which is why Heavy Style calibration's massive magazine is so powerful. | Bullet Siphon or Three Strikes — early-game placeholders until you farm a strong Deadshot roll. |
| Gloves | Crit Boost | Grants a flat +15% Crit Rate! Essential for reaching the critical hit threshold required to make The Last Valor double-proc consistently. | Crit Amplifier (+10% Crit Rate and +15% Crit DMG) — swap to this once your base Crit Rate is already capped via calibration and the Lonewolf Set. |
| Shoes (Boots) | Rush Hour (For Savior Low-HP Setup) | Grants +4% Melee, Weapon, and Status DMG for every 10% HP lost. Stays active permanently underneath your Savior Set Shield without risking death. | Covered Advance (+20% DMG for 30s after taking no HP damage for 4s) or Slow and Steady (+30% DMG while HP is above 90%) — best for Full-HP Lonewolf builds. |
Mod Suffixes & Substat Priority Guide
Selecting the right core mod is only half the equation; optimizing its suffix (shown in angle brackets) and its four upgradable substats (pushing the mod to Level 17 total pip value) is what separates average builds from multi-million DPS monsters:
- Weapon & Mask — <Shrapnel> or <The Bull's Eye> Keyword Suffixes: When opening selectable Level 17 Mod Crates from Nightmare Manibus, always roll your Shatter Them All weapon mod with the <Shrapnel> suffix. This unlocks exclusive keyword substats such as Shrapnel Crit DMG and Shrapnel DMG alongside standard Crit DMG and Weapon DMG. If you run Targeted Strike on your Mask, pair it with <The Bull's Eye> or <Violent> substats.
- Helmet & Top (Chest) — Seasonal Suffixes (<Lunar>, <Crescent>, or <Aero>):
— If you run the 3-pc Savior + 2-pc Treacherous Tides setup, target <Lunar> mods (massive Crit DMG scaling when HP is lowered) or <Crescent> mods (Crit DMG scaling based on active Shield) for your Helmet and Top.
— If you utilize aerial combat with 4 pieces of Rabbit Hide, the <Aero> suffix from the Gravity Abyss update provides stellar airborne damage bonuses. - Remaining Armor Slots (Pants, Gloves, Shoes) — <Violent> Suffix: Guarantees a top-row +15% Crit DMG substat (at Level 5) on every piece.
- Best-in-Slot Substat Priority Across All 7 Mods:
1. Crit DMG — #1 priority on every single mod.
2. Weapon DMG — mandatory second line across all pieces.
3. Damage to Great Ones (Boss DMG) — best third line for raid and Silo bossing (or Damage to Normal/Elite Enemies for general clearing).
4. Magazine Capacity or Weakspot DMG — ideal fourth substat.
Best Cradle Override Perks Setup
Quick take: In your Cradle Override tree, prioritize nodes that buff Assault Rifles, Shrapnel, weapon-swap damage, and active Deviation synergy. Your top combat Deviations are ZapCam for ranged bossing in Nightmare Manibus and Lonewolf's Whisper for aggro management in Silos. For consumables, pair Canned Steak (up to +50% Shrapnel DMG with chef buffs) with Whimsical Drink (+25% Weapon DMG) and Stardust Energy Drink (Double Jump).
The Cradle Override system provides 8 active passive slots unlocked by clearing Monoliths and scenario phases (covered in full in our Memetics, Specializations & Cradle Guide). While minor utility nodes rotate across Manibus, The Way of Winter, and Endless Dream scenarios, your core Shrapnel loadout should always lock in the following perks:
| Cradle Slot | Recommended Node | Combat Benefit & Trigger Condition |
|---|---|---|
| 1. Weapon Class | Automatic Weapon (or Precision Weapon Mastery for SN700) | Boosts baseline Assault Rifle / LMG damage and increases magazine capacity or reload efficiency. |
| 2. Keyword Node | Shrapnel Master / Shrapnel Enhancement | Direct seasonal multiplier: increases the base damage of every Shrapnel fragment by +25%–35% (and adds bonus shield/cradle breaking power against seasonal elites). |
| 3. Weapon Swap | Tactical Combo | Switching weapons increases Weapon DMG by +15%–25% for several seconds. Stacks multiplicatively with the Weapon Symphony helmet mod right after firing your sniper mark! |
| 4. Bull's Eye Synergy | Bounty Hunter / Marked Strike | Increases Weapon DMG and Crit DMG when attacking enemies afflicted with The Bull's Eye vulnerability status. |
| 5. Deviation Link | Deviant Pact / Deviant Sync | While your combat Deviation (ZapCam or Lonewolf's Whisper) is actively deployed, you gain up to +20%–25% Weapon DMG. |
| 6–8. Flex Utility & Defense | Deadly Combo, Fleet-Footed, or Deviant Energy Defense | Boosts damage after throwing tactical items, increases movement speed after healing, or mitigates incoming damage from endgame bosses. |
Best Combat Deviations: ZapCam vs. Lonewolf's Whisper
Unlike elemental builds that rely on pets to apply status effects, a physical Shrapnel build uses combat Deviations as multiplicative incoming Weapon DMG debuffers. You can find capture locations for every pet in our Complete Once Human Deviations Guide; for SOCR - The Last Valor, two companions stand above the rest:
How It Works: When activated (Auto Photograph mode), ZapCam mounts directly onto your character's shoulder. It never wastes time running across an arena, cannot get stuck on terrain, and cannot be killed by boss AoE slams. As you continuously fire down sights, ZapCam repeatedly photographs the target, stacking a debuff that dynamically ramps up the target's incoming Weapon DMG.
Why Endgame Players Prefer It on Nightmare Manibus: Against floating or out-of-bounds bosses (Manibus, Forsaken Giant), ground-based melee pets simply cannot reach the boss's hitbox. ZapCam works at any range from the very first bullet you fire!
How It Works: Summons a shadow hound that mauls enemies, increasing the Weapon DMG they take by +21.6% to +43.2% (scaling with the Deviation's Skill Rating from 1 to 5). Whenever an enemy dies nearby, the hound spawns a clone of itself (up to 3 hounds active at once).
Where It Excels: Inside enclosed dungeons (Securement Silos, LEA Research Lab) and against grounded bosses. Three shadow hounds completely taunt and hold aggro on every mob in the room, letting you stand safely behind the boss and unload uninterrupted. Farmed from the Shadow Hound boss (Monolith of Thirst).
Soul Summoner weakens targets with cursed arrows, while Whalepup creates an underwater field that amplifies incoming Weapon DMG—both serve as excellent co-op team debuffers if a teammate is already running Lonewolf's Whisper.
Best Food & Drink Buffs: How to Reach +50% Shrapnel DMG & Double Jump
In Once Human, you can maintain 1 primary Food buff, 1 primary Drink buff, and secondary utility buffs simultaneously. When you cook your meals at a base equipped with the Advanced Stove: Gourmand Memetic Specialization (+30% dish effect bonus) and a high-rating Chefosaurus Rex territory Deviation (up to +38%–40% cooking effect), your consumable multipliers skyrocket (all recipes and ingredient locations are listed in our Farming & Cooking Recipes Guide):
| Category | Dish or Drink Name | Exact Combat Effect (Base ➔ With Gourmand Stove & Chefosaurus) |
|---|---|---|
| Food (#1 Shrapnel Choice) | Canned Steak (Canned Meat) | The signature food of the build! Increases Shrapnel DMG by +20%–25% at base (scaling all the way up to +40%–50% when cooked with a maxed Chefosaurus Rex and Gourmand Stove!) and grants +1 Shrapnel hit part. Because it is canned, it never spoils in your inventory! |
| Food (All-Rounder Alternative) | Crumbly Bread | Increases all Weapon DMG by +25% base (up to +35%–42% with chef buffs). Crafted using Scarlet Calamus and Deviated Wheat. |
| Food (Bossing Alternatives) | Bone-in Deviated Sausage or Pan-Fried Hot Dog | The sausage grants +15%–25%+ Damage against Bosses, while the hot dog stacks rapid bonus damage on consecutive hits against the same target. |
| Primary Drink (Damage) | Whimsical Drink | Increases physical Weapon DMG by +25% base (up to +35%+ with chef buffs) while Sanity is full. Following Patch 3.0.6, it works flawlessly alongside the Treacherous Tides Set! |
| Utility Drink (Mobility & Rabbit Hide) | Stardust Energy Drink | Unlocks the ability to perform a Double Jump in mid-air! Essential for dodging boss shockwaves and maintaining high airborne uptime for the +20% Weakspot DMG bonus from 4 pieces of Rabbit Hide armor. |
Boss Combat Rotation: How to Maximize Your Burst DPS
Quick take: The optimal Shrapnel burst rotation revolves around a quick 3-second setup window before unloading your rifle: deploy ZapCam or Lonewolf's Whisper ➔ trigger your Kukri melee buff (+30% Attack and +15% Crit Rate) ➔ fire a single tagging shot with AWS.338 - Bullseye ➔ swap to SOCR - The Last Valor and empty your entire magazine while double-jumping without reloading early.
While SOCR - The Last Valor is forgiving enough to perform well by simply holding down left-click, executing a proper buff sequence multiplies your effective boss damage by 2.5x to 3x. Follow this step-by-step rotation to melt boss phases in Nightmare Manibus and the LEA Research Lab in a single magazine:
- Pre-Fight Consumable Check: Make sure your Sanity bar is completely clean (100%), eat Canned Steak (+Shrapnel DMG and +1 hit part), drink Whimsical Drink (+25% Weapon DMG) alongside Stardust Energy Drink (Double Jump), and load Tungsten AP Rifle Ammo into your primary weapon.
- Deploy Your Combat Deviation (Key E): Activate ZapCam on your shoulder (for floating or long-range bosses) or direct Lonewolf's Whisper onto the boss. This immediately activates your Cradle Override Deviation damage link and applies the pet's incoming Weapon DMG debuff.
- Proc Your Melee Stat-Stick: Land a quick strike or finish off a nearby add with the Kukri to gain +30% Attack and +15% Crit Rate for 10 seconds (or perform a Heavy Strike with the Long Axe to drop a Fortress Warfare pool for +20% Weapon DMG). Min-Maxer Note: Speedrunners sometimes perform a triple inventory melee swap (Kukri ➔ Butcher's Knife ice-cube shatter ➔ Long Axe) for roughly 1.5x higher burst, though a single Kukri proc is plenty for all standard endgame farming.
- Tag with Your Secondary Sniper (Key 2): Switch to AWS.338 - Bullseye and fire one quick shot into any part of the boss. Thanks to the rifle's swap passive, even a torso hit is guaranteed to apply The Bull's Eye vulnerability mark, amplified by your Vulnerability Amplifier mod.
- Main Rifle Unload & Aerial Jumps (Key 1): Immediately switch to SOCR - The Last Valor. Swapping weapons simultaneously triggers the Weapon Symphony helmet mod (+10% Fire Rate and +25% Weapon DMG) and the Tactical Combo Cradle perk, while the marked boss activates your Targeted Strike mask mod (+10% Crit Rate and +25% Crit DMG). Hold down the trigger and weave in Double Jumps to maintain the +20% Weakspot DMG bonus from 4 pieces of Rabbit Hide armor and <Aero> mods.
- Strict Magazine Discipline (Never Reload Early): Do not reload prematurely while half your magazine is still left! Your first 9 critical hits ramp up the Deadshot pants mod to its full +45% Crit DMG cap, meaning the final 35–40 bullets of your expanded Heavy Style magazine deal the highest damage per shot. Empty the magazine completely to 0 before reloading, then re-apply your sniper mark and repeat.
Three-Stage Build Progression: Starter to Endgame Min-Max
You do not need Level 17 <Lunar> mods on Day 1 of a scenario to enjoy this archetype. Progress your character smoothly across three distinct tiers as server phases unlock and you accumulate Starchrom for the Wish Machine:
| Progression Stage | Weapons & Key Helmet | Armor Set Layout | Core Mods & Stage Milestones |
|---|---|---|---|
| Stage 1: Scenario Start (Levels 1–39, Phases 1–2) Budget Starter Setup | • Primary: OIC-8 - Last Carnival (Epic AR) or early SOCR - The Last Valor unlock. • Secondary: Recurve Crossbow or DE.50 - Wildfire. • Helmet: Epic Beret. | 3-Pc Falcon Set (+Crit stats above 90% Stamina) + 2-Pc Scout Set (+8% Weapon DMG). | Purple or early Gold mods (Shrapnel Smash, Shrapnel Souvenir). Focus on clearing story Monoliths, unlocking all Gold weapon accessories on the map, and farming a high-rating Lonewolf's Whisper from the Shadow Hound. |
| Stage 2: Mid-Game (Level 50, Phases 3–4, Tier V) Classic Full-HP Crit | • Primary: SOCR - The Last Valor (Heavy Style or Rapid Shot Style calibration with Crit Rate). • Secondary: AWS.338 - Bullseye. • Helmet: Gas-tight Helmet or 5-Star Beret. | 4-Pc Lonewolf Set (up to +60% Crit DMG and +15% Crit Rate) + 1-Pc Ghost Link Set (+3% Crit Rate) or Bastille Set. | Farm Pro-mode Securement Silos and the LEA Research Lab. Assemble a full set of Gold <Violent> mods (Shatter Them All, Momentum Up / Weapon Symphony, Deadshot, Covered Advance). |
| Stage 3: Endgame Min-Max (Phases 4–6, Nightmare Manibus) Shield + Low-HP Meta | • Primary: 6-Star SOCR - The Last Valor (Heavy Style double Crit roll) + MG4 - Conflicting Memories for AoE. • Secondary: AWS.338 - Bullseye + Kukri. • Helmet: 6-Star Gas-tight Helmet. | 3-Pc Savior Set + 2-Pc Treacherous Tides Set. Craft all Tier V pieces using Gold Wool (Mask) and 4-Pc Rabbit Hide. | Swap boots mod to Rush Hour, slot seasonal <Lunar> or <Crescent> mods into Helmet and Top, and farm selectable Level 17 Mod Crates in Nightmare Manibus using Canned Steak and ZapCam. |
Shrapnel Build Pros and Cons in the 2026 Meta
Quick take: The Shrapnel build centered on SOCR - The Last Valor is the gold-standard boss killer in Once Human and the premier choice for farming Nightmare Manibus, where ricocheting fragments automatically seek out hidden weakspots. Its primary limitation—lack of wide AoE wave-clear on dense trash packs—is effortlessly solved in Patch 3.0.6 by keeping the reworked MG4 - Conflicting Memories LMG in your bag or secondary loadout.
To help you decide whether this archetype fits your seasonal goals and playstyle, here is an objective breakdown of its real-world strengths and weaknesses:
| Strengths (Pros) | Weaknesses (Cons) |
|---|---|
| Automatic Multi-Part Weakspot Tracking: Shrapnel fragments automatically target hard-to-reach weakspots on a boss's back, shoulders, and appendages (Siren, Forsaken Giant, Nightmare Manibus) even while you fire straight into center mass. | Limited AoE Wave-Clear on the SOCR Rifle: Unlike elemental explosions or bounce builds, SOCR - The Last Valor fragments only strike limbs within a single target's hitbox and do not jump to nearby monsters (requiring a swap to MG4 - Conflicting Memories for dense mobbing). |
| Zero Elemental Immunities: Several endgame anomalies and dungeon bosses are completely immune to elemental statuses (Burn, Frost, or Shock), whereas every single enemy across all scenarios takes full physical damage from Shrapnel. | High Crit Rate & Mod Substat Investment: Below the 45–55%+ Crit Rate threshold, your rifle's hit counter fills at half speed, and missing high-tier Crit DMG and Weapon DMG substats hurts physical builds noticeably more than budget elemental setups. |
| Exceptional Survivability in the Shield Setup: Running 3-pc Savior Set + 2-pc Treacherous Tides Set maintains a permanent 60% Max HP white shield, letting you shrug off lethal one-shot mechanics in Nightmare silos. | High Ammo Consumption & Durability Drain: Because of its rapid fire rate and constant multi-hit procs, the rifle burns through Tungsten AP Ammo and weapon durability faster than slow-firing weapons during extended farming sessions. |
| Instant Hitscan Damage Registration: Every bullet and shrapnel proc lands the exact millisecond you pull the trigger—no waiting for damage-over-time ticks to ramp up or delayed ice crystals to detonate. | Active Buff Maintenance for Peak Speedruns: Reaching top-tier dummy and speedrun numbers requires keeping up your AWS.338 - Bullseye mark, Kukri melee buff, and Canned Steak + Whimsical Drink food buffs. |
Comparing Alternative Meta Builds: Which Archetype Should You Play Next?
If you have already mastered SOCR - The Last Valor or want a secondary loadout tailored for wide-area mobbing in Public Crisis Events and Securement Silos, check out these top-performing archetypes from our Once Human Best Builds & Weapons Tier List:
- For Total AoE Room Clearing — Burn Build (KVD - Boom! Boom!): The undisputed king of elemental LMGs, igniting entire rooms with chain pyro-explosions scaled by Psi Intensity and the 4-pc Shelterer Set. Requires zero weakspot aiming or Crit Rate farming.
- For an All-Round Crit + Explosion Hybrid — Unstable Bomber Build (DE.50 - Jaws): Because you already own a 4-pc Lonewolf Set and <Violent> Crit DMG mods from your Shrapnel setup, you can seamlessly transition to DE.50 - Jaws or KV-SBR - Little Jaws, whose explosive procs also critically strike.
- For Crowd Control & Effortless Solo Sustain — Frost Vortex Build (M416 - Silent Anabasis & KAM - Abyss Glance): Pulls enemies into freezing blizzards, locks down elite packs, and provides constant self-healing for stress-free solo dungeon clears.
- For High-RPM Electric Damage in PvE & PvP — Power Surge Build (MPS7 - Outer Space & ACS12 - Corrosion): Unleashes rapid lightning arcs; notably, the ACS12 - Corrosion shotgun lets you reuse your exact same Lonewolf Set and Crit DMG mods!
Frequently Asked Questions (FAQ) — Shrapnel Build
1. Does Psi Intensity increase Shrapnel damage?
No, not at all. Shrapnel is a 100% physical weapon keyword. Each fragment deals base damage equal to 60% of your weapon's Attack and scales exclusively with Weapon DMG, Crit DMG, Weakspot DMG, and Shrapnel DMG. That said, you should still upgrade your armor blueprints and calibration stars to Tier V, as higher armor tiers massively increase your Max HP pool and the size of your Savior Set shield.
2. Should I run Crit Boost (+15% Crit Rate) or Crit Amplifier (+10% Crit Rate & +15% Crit DMG) on my Gloves?
Always prioritize Crit Boost (+15% Crit Rate) until your unbuffed Crit Rate on the character stat sheet reaches at least 45–50%. Because SOCR - The Last Valor counts every critical hit as 2 hits toward its 4-hit threshold, missing a crit cuts your Shrapnel proc frequency in half. Only players with maxed-out 6-star Lonewolf Set blueprints and god-roll <Violent> mods who already sit above 55% Crit Rate should swap to Crit Amplifier.
3. Does the Fortune's Favor (Fateful Strike) helmet mod work well with the Gas-tight Helmet?
It works mechanically, but on endgame Nightmare Manibus bosses, running Fortune's Favor (Fateful Strike) actually costs you significant peak DPS. Fortune's Favor disables all Weakspot Damage in exchange for +10% Crit Rate and +30% Crit DMG. However, SOCR - The Last Valor boasts a generous 60% base Weakspot DMG multiplier, which we boost by another +20% mid-air using 4-pc Rabbit Hide (Soaring Jump). Preserving your ability to hit weakspots while running Weapon Symphony or Momentum Up yields much higher ceiling damage.
4. Why don't I need to lower my Sanity with the Treacherous Tides Set after Patch 3.0.6?
In Patch 3.0.6 (September 2026), the developers overhauled the Treacherous Tides Set and completely removed its Sanity requirement. The 2-piece bonus (+10% Weapon and Status DMG) now activates automatically whenever your current HP is below 70%. When paired with the 3-pc Savior Set—which naturally drains 6% HP per shot down to 40% HP to generate a 60% Max HP shield—the damage bonus stays active permanently while your Sanity remains at 100%, allowing full uptime on Whimsical Drink (+25% Weapon DMG at full Sanity).
5. How do I repair my rifle mid-raid if SOCR loses durability during long boss fights?
First, try to craft your rifle at a Gear Workbench built by a teammate with the Gear Workbench: Customization Memetic Specialization, which boosts maximum durability by +30%. Second, always carry a stack of All-Purpose Hand consumables crafted from resources produced by the Artisan's Touch territory Deviation—activating one in your inventory instantly repairs your equipped primary weapon to 100% right in the middle of a dungeon.