Clan Boss Guide for RAID: Shadow Legends — Unkillable, Infinity, 2:1/3:1 and Defensive Teams Explained
Anatomy of the Demon Lord: Skills, Element Shifts & Hidden Stat Caps
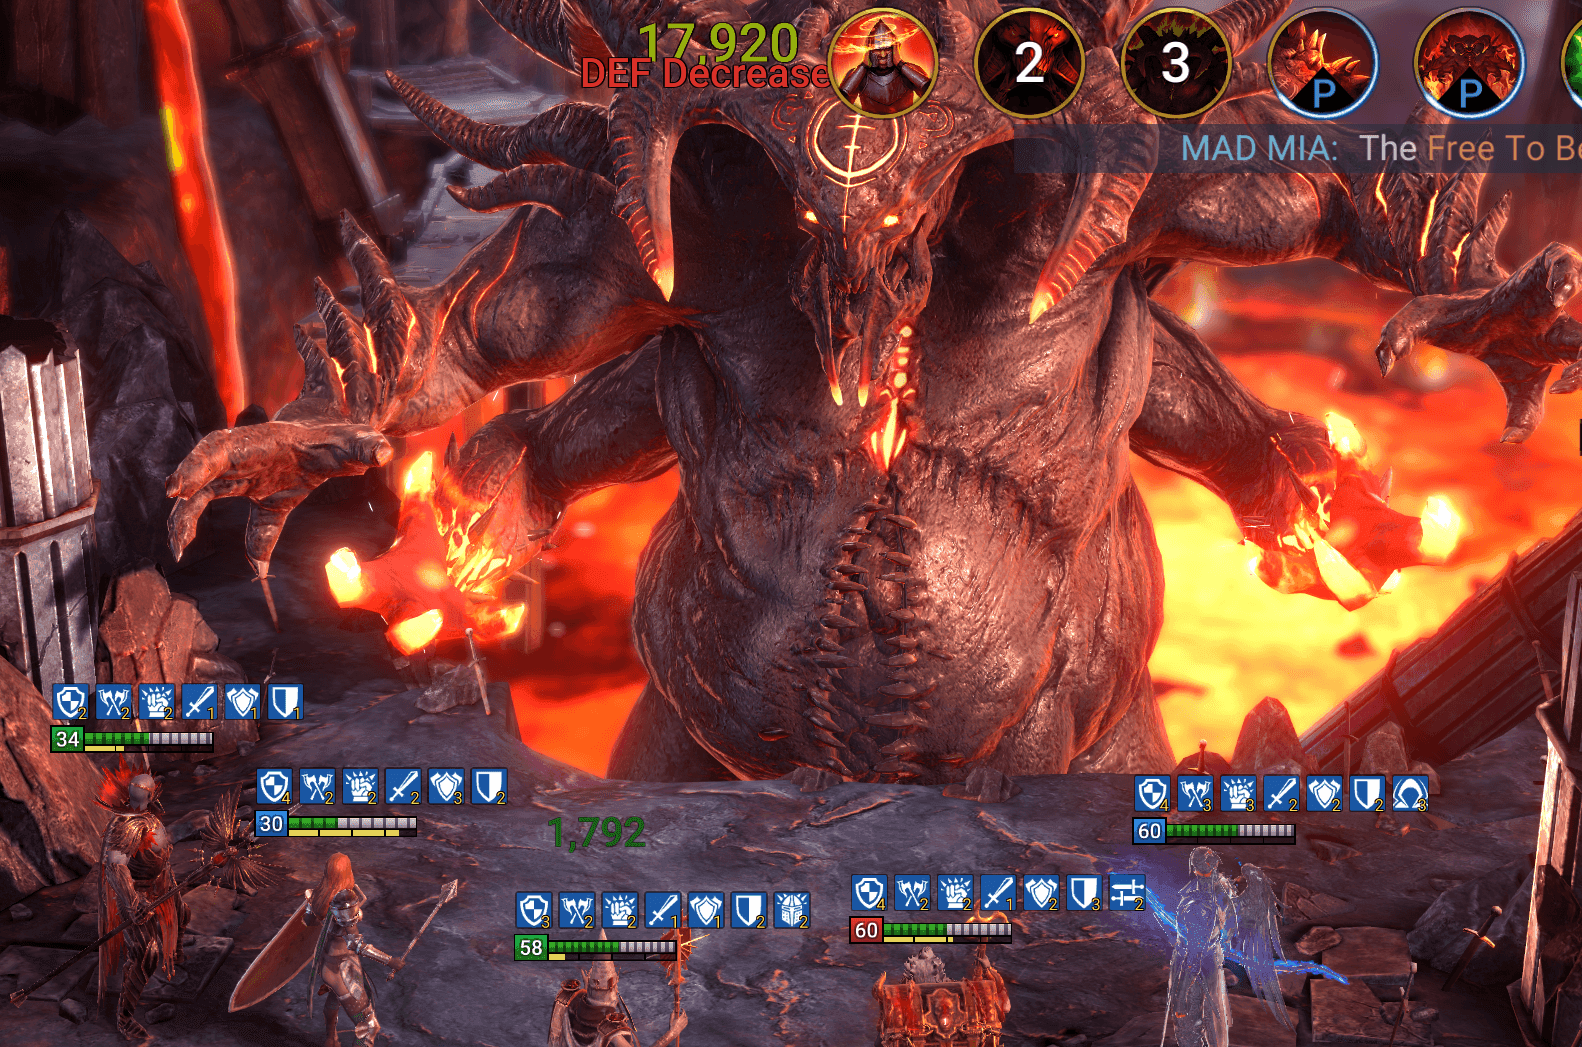
If there is a single activity in RAID: Shadow Legends that dictates your account's progression speed, it is the Demon Lord (universally known to players as the Clan Boss or CB). Clan Boss keys regenerate every six hours (four keys per day). Securing top-tier reward chests provides a steady influx of Sacred Shards, Void Shards, and Legendary Skill Tomes. No dungeon in the game comes close to matching this value on a daily basis.
Every viable team — whether a budget unkillable setup, a lightning-fast 2:1 speed tune, or a fortified defensive shield comp — is anchored around one immutable constant: the boss's attack pattern. The Demon Lord operates on a strict, predictable three-turn loop: two devastating area-of-effect strikes (AoE 1 and AoE 2), followed by a lethal single-target smash (the Stun).
Crucial Affinity Shift Mechanic: From 100% down to 50% HP, the Demon Lord is always locked to the Void element. Once his health drops below 50%, he randomly assumes one of three colored affinities (Magic, Force, or Spirit) until the daily server reset. This shift fundamentally alters his AoE attack properties and disrupts unprepared teams.
Active Boss Skills
The Demon Lord's abilities recycle on exact turn counters and shift behavior based on his active affinity:
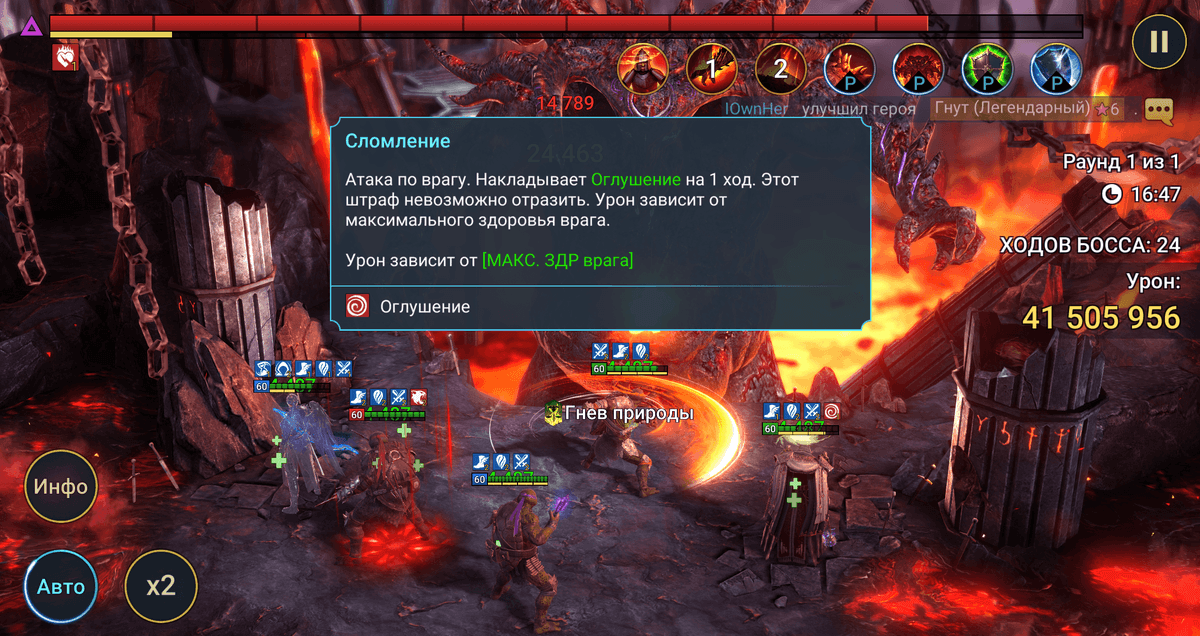
A1 — Crushing Force — single-target strike deployed on Turn 3 of every rotation. Applies a 1-turn Stun that cannot be resisted by normal Resistance stats. Crucially, its damage scales directly off the target's Maximum HP: the higher your champion's HP pool, the harder this skill hits. Crushing Force functions identically across all elemental affinities.
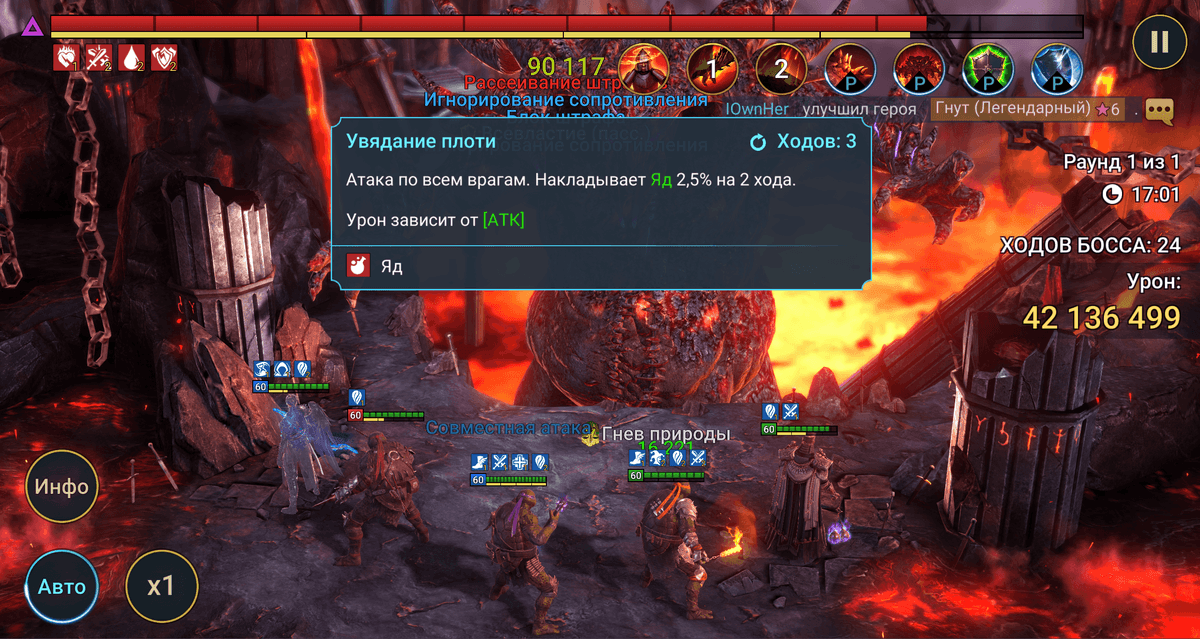
A2 — Flesh Wither — team-wide AoE strike (AoE 1, 3-turn cooldown) on Void affinity. Hits all five champions, applying a 2.5% Poison debuff for 2 turns across the entire team. Raw damage scales off the Demon Lord's Attack stat.
A2 — Belittle — the colored affinity variant of AoE 1. Replaces the standard Poison debuff with punishing elemental penalties for 2 turns: Force places a 25% Decrease ATK; Magic inflicts Decrease ACC; Spirit lands a devastating 30% Decrease SPD. On Spirit affinity, if that speed penalty lands without Block Debuffs active, your carefully tuned turn-meter sequence crumbles instantly.
A3 — Dark Nova — team-wide AoE strike (AoE 2, 3-turn cooldown) on Void affinity. A clean, devastating physical hit without auxiliary debuffs, scaling purely off the boss's Attack stat. In traditional survival comps, Dark Nova is the primary culprit behind team wipes as the fight progresses.
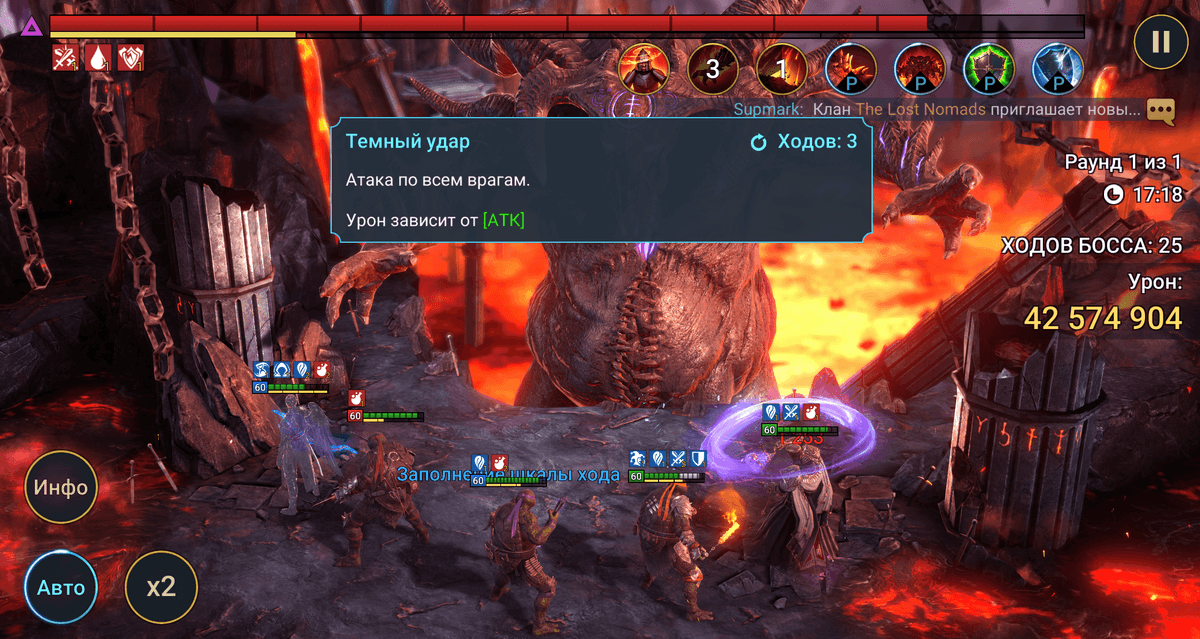
A3 — Crash Through — the colored affinity counterpart to AoE 2. Lands 4 rapid sequential hits across the entire team and grants the Demon Lord a 25% Increase ATK buff for 2 turns. This self-buff drastically amplifies incoming damage for subsequent turns.
The Four Passive Skills: Total Immunities & The Turn 50 Wall
The Demon Lord is protected by four distinct passives that completely neutralize 90% of standard crowd control kits used in Dungeons:
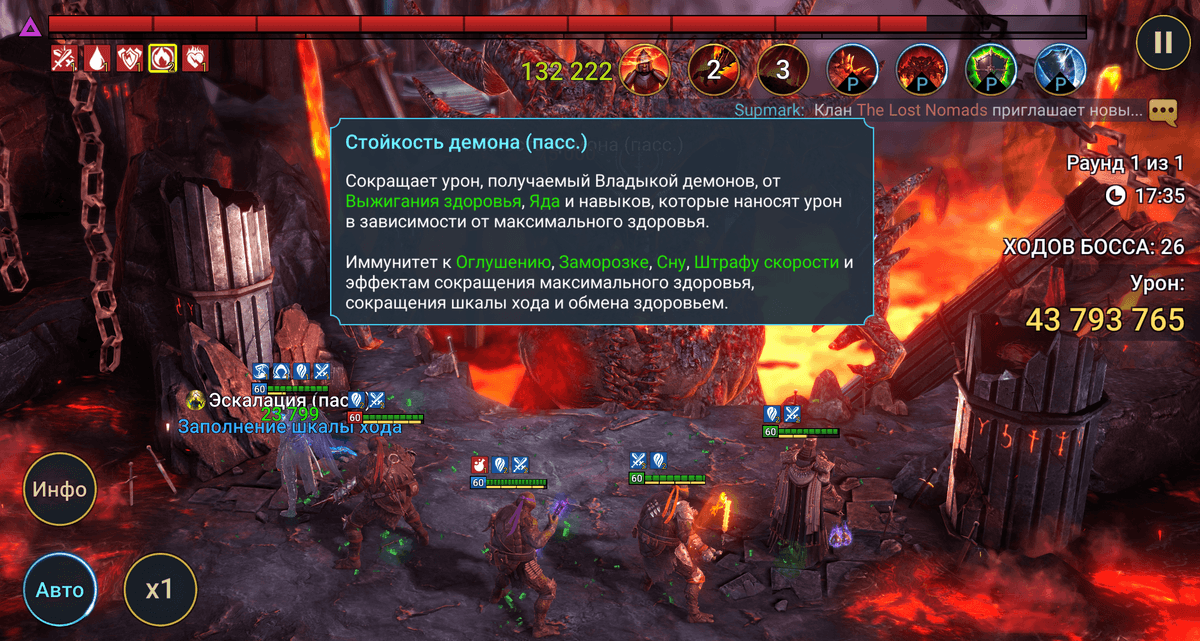
Infernal Resilience [P] — severely mitigates incoming damage from Poison, HP Burn, and Enemy MAX HP skills (capping burst damage from champions like Coldheart and Royal Guard). Grants total immunity to Stun, Freeze, Sleep, Decrease SPD, Max HP destruction, and HP exchange effects.
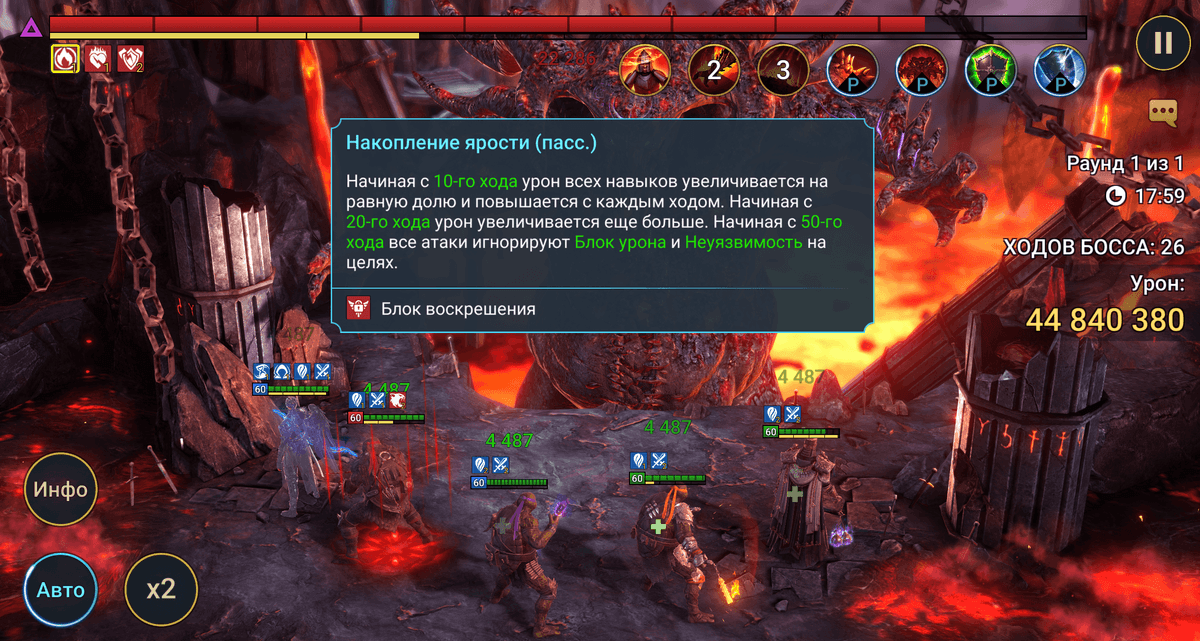
Gathering Fury [P] — the fight's built-in enrage timer. Beginning at Turn 10, all boss damage ramps up with every subsequent cycle. Past Turn 20, this scaling accelerates exponentially. Starting on Turn 50, all attacks ignore Block Damage and Unkillable buffs entirely. "Surviving 50 turns" is not an estimate — it is an ironclad engine limitation coded directly into the encounter.
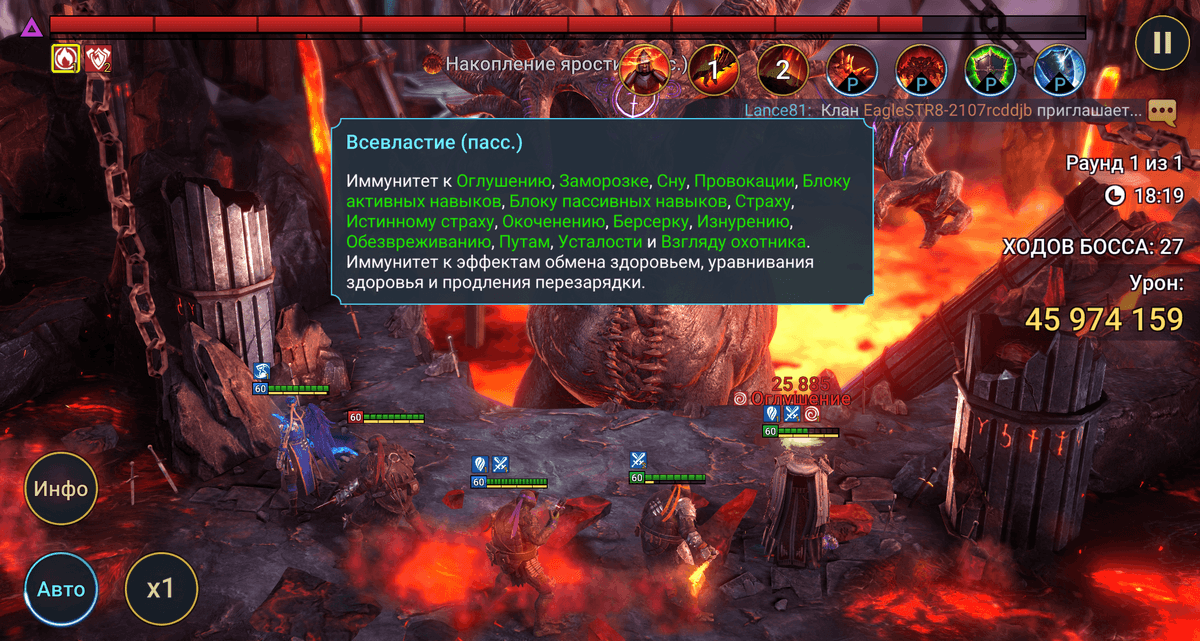
Almighty Immunity [P] — comprehensive suppression of all tactical manipulation: immune to Stun, Freeze, Sleep, Provoke, Block Active Skills, Block Passive Skills, Fear, True Fear, Petrification, Berserk, Enfeeble, Nullify, Ensnare, Fatigue, Hunter's Gaze, HP balancing, and cooldown increase effects. Dungeon control kits are utterly useless here.
Unfaltering Speed [P] — reinforces immunity against Decrease SPD debuffs and Turn Meter reduction effects. You cannot slow the Demon Lord down or deplete his turn meter under any circumstances.
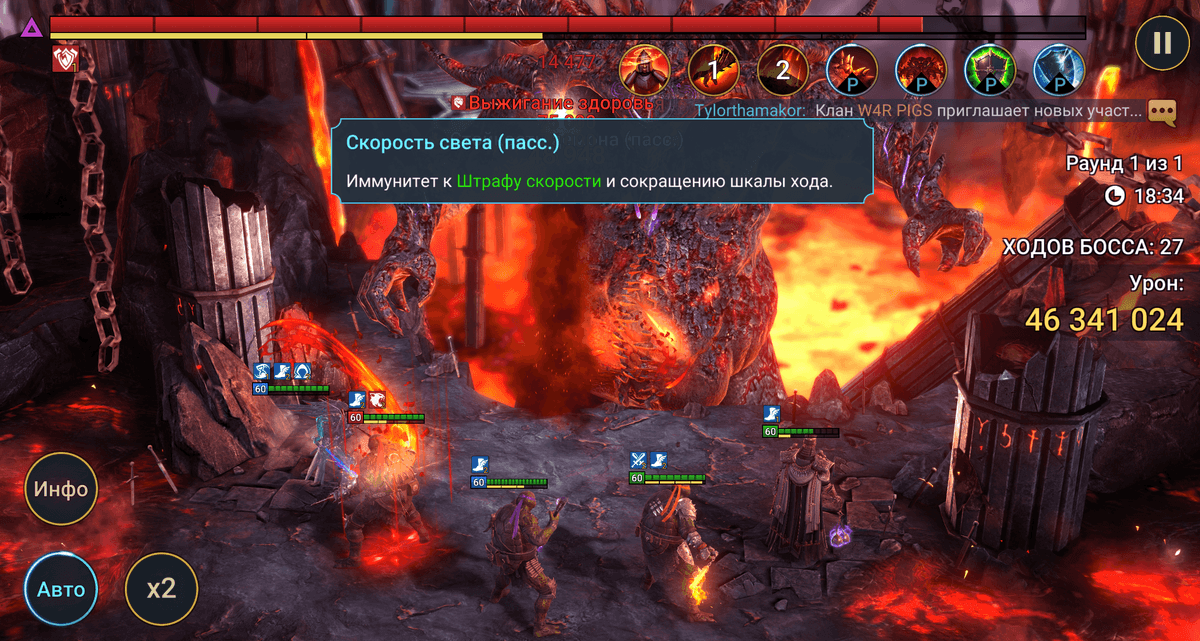
Demon Lord Baseline Stats Across All Difficulties
Below are the verified base parameters for the Demon Lord on every difficulty tier. These figures are the mathematical benchmarks required to calibrate team speeds and hit minimum Accuracy thresholds.
| Difficulty | Level | Health (HP) | Speed (SPD) | Defense (DEF) | Resistance | Accuracy |
|---|---|---|---|---|---|---|
| Easy | 60 | ~19,035,000 | 90 | 294 | 30 | 0 |
| Normal | 90 | ~60,637,500 | 120 | 369 | 50 | 30 |
| Hard | 120 | ~194,040,000 | 140 | 442 | 75 | 40 |
| Brutal | 150 | ~361,507,500 | 160 | 598 | 100 | 75 |
| Nightmare (NM) | 185 | ~652,700,000 | 170 | 847 | 150 | 150 |
| Ultra-Nightmare (UNM) | 250 | ~1,170,000,000 | 190 | 1,520 | 225 | 225 |
Note: The Demon Lord's Crit Rate is permanently locked at 15%, and his Crit Damage is set at 50% across every single difficulty tier.
Two Fatal Rookie Pitfalls:
- Speed Does Not Port Over: The boss's speed increases with each tier (from 90 on Easy up to 190 on UNM). A "2:1" tune running at 210 SPD that worked flawlessly on Brutal will fall completely out of sync on Ultra-Nightmare. Every difficulty tier demands its own specific speed-tune recalculation.
- The 230+ Accuracy Rule: UNM Resistance jumps to 225. Running 170 Accuracy (which was plenty for Nightmare) will cause debuffs to fail frequently on UNM. Your debuffers need a minimum of 230–240+ Accuracy. Period.
The 10-Debuff Limit & Slot Management
The game engine enforces a rigid ceiling of 10 active debuffs simultaneously on any target. Exceeding this limit causes new debuffs to bounce off harmlessly.
The Kael Trap: A common mistake is bringing Kael alongside two dedicated poisoners. Kael's default A1 places weak 2.5% Poisons. These low-value debuffs instantly clog the 10-debuff limit. When your main debuffer attempts to place a game-saving 50% Decrease ATK or 60% Decrease DEF, the skills are rejected, cutting your overall damage output and team survivability in half.
An optimal 10-debuff budget on the Demon Lord should always follow this exact hierarchy:
- Decrease DEF 60% — Mandatory (doubles raw physical and Warmaster/Giant Slayer damage).
- Weaken 25% — Mandatory (provides a pure 1.25x damage multiplier across all hits).
- Decrease ATK 50% — Non-negotiable for standard and counterattack survival teams.
- HP Burn or the Brimstone Blessing (Суровая кара) — Reliable millions of passive damage.
- Leech (Паразит) — Restores 18% of damage dealt as healing, freeing your team from cumbersome Lifesteal gear.
- The remaining 4–5 slots are reserved strictly for potent 5% Poison stacks (never 2.5% versions!).
Stun Targeting Algorithm: Forcing the Demon Lord to Strike the Right Champion
The most common failure point in budget unkillable and traditional defensive setups is an uncontrolled turn 3 from the boss. His single-target skill, Crushing Force, lands a devastating blow and places an irresistible Stun for 1 turn. If that Stun strikes Maneater or your primary cooldown engine, their skill cooldowns freeze for a turn. The speed tune collapses instantly, and the very next AoE wipes the squad.
Many players assume the boss picks targets at random. He does not. The Demon Lord's artificial intelligence obeys a rigid, 6-step priority hierarchy. Master this hierarchy, and you will dictate exactly who eats every single Stun.
The 6-Step Demon Lord AI Targeting Hierarchy
- Block Damage and Unkillable Filter: The boss actively avoids attacking any champion protected by Block Damage or Unkillable, provided there is at least one living teammate without that buff. If all five champions have the buff up (the standard unkillable state), this filter is bypassed entirely and the AI moves down the list.
- Counterattack Check: The boss prefers not to strike a target carrying an active Counterattack buff if unprotected targets exist. In counterattack teams, this is why the designated stun target is deliberately left without Counterattack.
- Elemental Affinity Disadvantage: Once the boss drops below 50% HP, he assumes a random colored affinity. The AI gains an immense hidden weight to attack champions with a weak affinity (Affinity Disadvantage). A Force boss hunts Magic champions; a Spirit boss hunts Force champions; a Magic boss hunts Spirit champions. Void champions have no affinity disadvantage and remain completely neutral.
- Current HP Percentage (% HP, Not Raw Pool): The single most critical in-combat trigger. The boss targets whoever has the lowest percentage of remaining HP at the moment the skill fires. If your designated stun target has a 60,000 HP pool and sits at 45,000 HP (75%), while a frail damage dealer has 35,000 HP and sits at 24,000 HP (68%), the boss will slam your damage dealer every time.
- Leader Position (Slot 1): If all champions share identical buffs, neutral affinity, and sit at 100% full health, the boss targets the champion in the team leader position with 100% certainty.
- HP to DEF Ratio: Crushing Force deals damage scaled from the target's maximum HP. The higher a champion's maximum HP and the lower their Defense (DEF), the softer and more attractive they appear to the boss AI.
The Golden Rules for Tuning a Dedicated Stun Target:
- Higher Maximum HP: Set the stun target's maximum HP pool 15–20% higher than every other champion on the roster (aim for 45,000–55,000+ HP).
- Low Defense: Keep the stun target's Defense strictly between 1,300 and 1,800 DEF. Never push armor past 2,000, or the AI will consider them too resilient and look elsewhere.
- Zero Passive Regeneration: Never equip the stun target with Lifesteal, Regeneration, or Immortal sets. Ban the Life Drinker mastery. After taking AoE hits, their HP must stay depleted so they enter turn 3 with the lowest HP percentage on the team.
- Immortal Set on Pain Keeper: In the classic "Maneater + Pain Keeper" comp, equip Pain Keeper with exactly one 2-piece set of Immortal. This guarantees she tops herself back to 100% HP before the stun hit, ensuring the boss never turns on her.
Speed Tuning Fundamentals: Turn Meter Ticks and Ratios
Combat in RAID: Shadow Legends is not standard turn-based gameplay. Action order is determined entirely by Turn Meter (TM) ticks.
Every champion and the boss possesses a Turn Meter bar holding 100 units (100%). At the start of each virtual tick, the game engine awards every participant a batch of TM points equal to their Speed multiplied by an engine constant (0.07). The moment a combatant's bar reaches or exceeds 100%, they take their turn. Once their action completes, their meter empties to zero and the ticks resume. If multiple combatants cross 100% on the same tick, whoever accumulated the highest overflow acts first.
This tick engine produces distinct, mathematical speed ratios relative to the Demon Lord:
- 1:1 Ratio (Synchronous): Your team takes exactly 1 turn for every 1 turn the boss takes. The backbone of traditional counterattack and ally protection compositions. Champion speeds are tuned just above the boss speed (171–189 for Nightmare, 191–209 for Ultra-Nightmare).
- 4:3 Ratio (Lapping): A champion takes 4 turns for every 3 turns of the Demon Lord, lapping the boss cycle by one action. Essential for defensive champions running skills with 4-turn cooldowns (such as Sepulcher Sentinel). By running 4:3, she cycles her 2-turn Block Debuffs fast enough to place it before every single stun strike.
- 2:1 Ratio (Double-Turn Speed): Pure high-velocity execution. Every champion on your squad takes 2 complete turns for every single turn the boss takes. Reaching this requires either massive raw speed (250–270+) or dedicated Turn Meter boosters like Seeker paired with a 30% Increase SPD buff. At 2:1, your team inflicts double the damage, and 3-turn cooldown skills refresh every single boss cycle.
True Speed and Hidden Decimals
The biggest pitfall in the game is the champion stat sheet. The interface displays Speed rounded to the nearest whole integer. A profile might read "240", while inside the battle engine that champion's actual velocity is 239.55 or 240.42.
In normal Dungeons, a quarter-point of speed is meaningless. In an unkillable tune, a discrepancy of just 0.2 True Speed creates cumulative tick drift over 15 to 20 turns. Your Unkillable buff drops a split second before the Demon Lord strikes. The wipe is instant.
What Creates Hidden Decimal Speed (True Speed)?
- Artifact Set Multipliers: A Speed set gives +12%, Divine Speed gives +12%, and Perception gives +5% Speed. These bonuses calculate strictly from the champion's Base Speed (the white number in the champion profile), not total gear speed. Base speeds vary widely (98 for Maneater, 100 for Martyr, 103 for Seeker). The exact same gear pieces will award different decimal fractions depending on who wears them.
- The Lore of Steel Mastery: This Tier 3 Support mastery increases the stat bonuses of base artifact sets by 15% (multiplicative). Under Lore of Steel, a Speed set grants 13.8% of base speed instead of 12% ($12 \times 1.15 = 13.8$). This introduces floating-point fractions invisible in the tavern.
- Leader Speed Auras: Speed auras apply exclusively to the base speeds of your champions at the start of battle.
How to Verify Your True Speed: Never build a speed-tuned team blind. Always enter your champions into the DeadwoodJedi Clan Boss Calculator. The calculator factors in equipped sets (Speed, Perception), the Lore of Steel mastery, and your leader's aura. It models turn meter ticks all the way through turn 50, flagging dangerous desynchronizations in red before you spend a single Clan Boss key.
Budget Maneater ("Maneater + Pain Keeper"): Speed Tunes, Builds, and Fine-Tuning
The Budget Maneater comp ("Maneater + Pain Keeper") is the most accessible unkillable team in the history of RAID: Shadow Legends. You don't need top-tier Void Legendaries to build it: all it takes is one Epic Void champion — Maneater, and one Rare Void champion — Pain Keeper. The remaining three slots are filled by two high-octane damage dealers and a single dedicated slow stun target.
Properly tuned, this composition runs like clockwork for exactly 50 boss turns on both Nightmare (NM) and Ultra-Nightmare (UNM), unlocking the top Transcendent Chest in 1–2 keys even in modest, mid-game artifacts.
Core Synergy: Maneater and Pain Keeper
The stability of the entire engine relies on seamless cooldown manipulation:
- Maneater: The anchor. His signature ability, Ancient Blood (A3, fully booked to a 5-turn cooldown), places an Unkillable buff and a Block Debuffs buff on all allies for 2 turns. This covers the Demon Lord's two catastrophic AoE strikes (AoE 1 and AoE 2).
- Pain Keeper: The cooldown reduction engine. Her skill Combat Tactics (A3, fully booked to a 4-turn cooldown) reduces the cooldowns of all allies' skills by 1 turn. This single mechanic allows Maneater to cycle Ancient Blood back up in time for the next round of AoEs, despite its natural 5-turn cooldown. Meanwhile, her Spectacular Sweep (A2) provides a team-wide heal based on her own MAX HP, and her basic attack helps cycle her own turns.
Mandatory Skill Book Requirements: Maneater's A3 (Ancient Blood) must be fully booked to reach its 5-turn cooldown. Pain Keeper's A2 and A3 must both be fully booked to their minimum cooldowns. Without these books, the turn math breaks and the team cannot function.
Speed Bracket: Universal UNM and NM Tune
Below is the definitive universal speed tune for Budget Maneater. This configuration hits both Ultra-Nightmare (UNM) and Nightmare (NM) with the exact same roster and gear—zero artifact swapping required between difficulties.
| Team Role | Champion | Speed Range (SPD) | Gear & Stat Requirements |
|---|---|---|---|
| Unkillable Anchor | Maneater | 240 – 241 | A3 fully booked. Offensive stats: 100% Crit Rate, high Crit DMG. Warmaster mastery. |
| Cooldown Reducer | Pain Keeper | 218 – 222 | EXACTLY 1 Immortal set! A2 and A3 booked. High HP pool to maximize her team heal. |
| Fast DPS | DPS 1 (Fayne / Dracomorph / Frozen Banshee) | 175 – 178 | Accuracy 230–250+, maximum damage output. True speed must sit higher than DPS 2. |
| Slow DPS | DPS 2 (Geomancer / Fahrakin the Fat / Ninja*) | 175 – 178 | Accuracy 230–250+, maximum damage output. True speed slightly below DPS 1. |
| Slow Stun Target | Any reliable tank or debuffer | 118 – 121 | HP 45,000–55,000+, Defense strictly < 1,600. STRICTLY NO REGENERATION! |
*Warning regarding Ninja: Ninja's A1 basic attack fills his own Turn Meter by 15%. You cannot plug Ninja into these standard speeds, or he will lap the cycle by turn 5. Running Ninja in Budget Maneater requires a custom tune (typically 161–165 SPD) specifically designed around his passive meter boosts.
Fine-Tuning the Slow Stun Target
The stun target is the only champion taking the single-target Crushing Force hit on turn 3 without an active Unkillable buff. Your primary goal is to manipulate the boss AI into striking this champion every single cycle without fail.
- HP Discrepancy: The stun target's maximum HP should be 15–20% higher than Maneater and your DPS champions. A target pool of 48,000–55,000 HP works best (against 38,000–42,000 HP on your squishy champions).
- Low Defense: Keep the stun target's Defense strictly in the 1,300 – 1,500 DEF window. Never use DEF% chestplates or gloves. The softer the target appears, the more aggressively the boss AI locks onto them.
- Zero Passive Healing: The stun target must never wear Lifesteal, Regeneration, or Immortal sets, and must never take the Life Drinker mastery. Their sole source of healing must be Pain Keeper's A2. Because the stun target has a massive HP pool, Pain Keeper's heal restores them to only 70–80% health. Meanwhile, Pain Keeper (boosted by her Immortal set) and your DPS champions recover to 100% full health. When turn 3 arrives, the stun target has the lowest HP percentage on the board, securing the hit.
- Leader Position: In neutral affinity conditions (Void), place your stun target in the team leader slot (Slot 1). This provides an additional priority anchor for the boss AI.
Skill AI Presets: Full Auto Setup
To set up full auto-battle straight from the start without manual interventions, configure skill priorities in the Team Setup menu:
Ultra-Nightmare (UNM) AI Setup
- Maneater:
- A3 (Ancient Blood): Priority 1, Delay = 0 turns. Casts immediately on turn 1 ahead of AoE 1.
- A2 (Syphon): Priority 2.
- Pain Keeper:
- A3 (Combat Tactics): Priority 1, Delay = 1 turn. Opens with A1, casts A3 on turn 2.
- A2 (Spectacular Sweep): Priority 2, Delay = 2 turns. Casts strictly after A3.
- Remaining Champions: Set top priority on debuffs (Decrease DEF, Weaken, Poisons, HP Burn).
Deployment: With these presets, press "Auto" as soon as the battle loads. The team locks into its unkillable loop by boss turn 2 and runs untouched all the way to turn 50.
Nightmare (NM) Setup Nuance
Because the Nightmare boss is slower (170 SPD compared to UNM's 190 SPD), the opening cycle requires a minor timing adjustment:
- Maneater: Uses his basic A1 on his opening turn. He casts A3 (Ancient Blood) right before the boss's first AoE (Delay = 1 turn in Team Setup).
- Pain Keeper: A3 Delay = 1 turn; A2 Delay = 2 turns.
- After the boss completes his second turn, the squad syncs perfectly into full-auto rhythm.
Top Tier Champions for DPS and Stun Roles
| Champion | Role | Why They Excel in Budget Maneater |
|---|---|---|
| Fayne | Primary DPS | The complete debuff package: 100% Decrease DEF (60%), Weaken (25%), and two 5% Poison stacks. In an unkillable setup, her natural squishiness is irrelevant. |
| Geomancer | Primary DPS | His A3 places HP Burn and a passive 15% damage reflection that mitigates 15% damage. The harder the boss strikes on later turns, the more millions of reflected damage Geomancer dishes out. |
| Dracomorph | Primary DPS | The premier Poisoner in the game, bundling Decrease DEF and Weaken. Enables effortless 1-key UNM performance. |
| Frozen Banshee | Budget DPS | Accessible Rare champion. Under her Poison Sensitivity debuff, she floods the boss debuff bar with 5% Poisons off her basic A1 attack. |
| Fahrakin the Fat | DPS / Stun Target | Brings an Ally Attack (team-up), Poisons, HP Burn, and team-wide 30% Crit Rate and 30% Crit DMG buffs. Can double as a durable stun target. |
Next-Generation Unkillable Teams with Demytha: Myth-Nicholas, Myth-Tower, and Myth Heir
The introduction of Demytha, an Epic Void champion from the Dwarves faction, completely revolutionized Clan Boss speed-tuning. Prior to her release, Maneater was the undisputed gold standard with his 5-turn unkillable cycle. Demytha upended the meta: her Block Damage ability sits on a blistering 3-turn cooldown when fully booked, paired with a secondary skill that extends ally buffs and trims debuff durations.
Because of this tight 3-turn engine, Demytha synchronizes cleanly with traditional heavy defensive anchors (Sir Nicholas, Roshcard the Tower, Warcaster, and Helicath). More importantly, when paired with Seeker and Heiress, she forms the cornerstone of Myth Heir—widely considered the single most consistent and comfortable 1-key full-auto UNM composition across every affinity in the game.
"Demytha + Sir Nicholas" (Myth Nicholas) and "Demytha + Roshcard" (Myth Tower)
A frequent goal for accounts holding top-tier defenders is pairing Demytha with either Sir Nicholas or Roshcard the Tower. In this configuration, the squad achieves 100% total immunity across all three boss strikes. Zero damage penetrates on AoE 1, AoE 2, or the single-target stun.
Defensive Coverage Mechanics
- Sir Nicholas / Roshcard the Tower (245–248 SPD): Their primary defensive skills (Good Cheer for Sir Nicholas provides 2 turns of Unkillable; Zone of Ambivalence for Roshcard provides 2 turns of Block Damage; both 4-turn cooldowns). Running in a 4:3 ratio, they blanket the team across the boss's two massive initial strikes: AoE 1 and AoE 2.
- Demytha (274–277 SPD): Moves immediately before the Demon Lord's third turn and places Block Damage for 1 turn via Channel the Bloodline (A3). This completely absorbs the crushing blow of Crushing Force.
- Stun Cleansing (Doompriest, 186–189 SPD): Even though Crushing Force strikes into Block Damage (dealing 0 damage), the boss's Stun debuff still lands. To prevent the target's skill cooldowns from freezing, Doompriest is deployed at 186–189 SPD. Her passive, Bolster, clears the Stun from the affected ally at the start of every turn, keeping the rotation locked in perfect synchronization.
| Champion | Role | Speed (SPD) for UNM / NM | Setup & Gear Requirements |
|---|---|---|---|
| Demytha | Block Damage on Stun | 274 – 277 | A3 and A2 fully booked (3-turn cooldowns). High base speed gear. |
| Sir Nicholas / Roshcard | Defense for AoE 1 & AoE 2 | 245 – 248 | A3 booked to 4-turn cooldown. Sir Nicholas can be built for pure MAX HP nuke damage. |
| Doompriest | Stun & Affinity Cleanser | 186 – 189 | Cleanses Stun, Poisons, and Decrease SPD across all affinities. Toxic set recommended. |
| Fast DPS | Primary Damage Dealer | 178 – 182 | Geomancer, Fayne, Ninja, or Dracomorph. Accuracy 230–250+, 100% Crit Rate. |
| Slow DPS | Secondary Damage / Utility | 156 – 160 | Poisoner or Ally Attack champion (e.g., Fahrakin the Fat). |
Skill AI Presets for Myth Nicholas / Myth Tower (UNM)
- Demytha: A3 (Channel the Bloodline) — Priority 1, Delay = 2 turns (fires right before the boss's stun hit). A2 (Feel No Pain) — Priority 2.
- Sir Nicholas / Roshcard: A3 (Good Cheer / Zone of Ambivalence) — Priority 1, Delay = 0 turns (fires immediately before AoE 1).
- Doompriest: Default auto-battle settings (her Bolster cleanse is purely passive).
The Core Advantage of Myth Nicholas / Myth Tower: Complete affinity independence. Because the Stun lands into Block Damage and Doompriest cleanses it off instantly, you never need to micro-manage HP and DEF thresholds on a dedicated stun target. The team performs flawlessly on Void, Force, Magic, and Spirit.
The Undisputed King of the Meta: "Myth Heir" (1-Key All-Affinity UNM)
If you want a team that hits the 70M+ UNM top chest with a single key on full auto from turn 1 across Void, Force, Magic, and Spirit, your ultimate destination is Myth Heir.
This comp operates in a blistering 2:1 speed ratio. Every champion takes 2 full turns for every single turn the Demon Lord takes.
Myth Heir Core Roster
- Demytha: Maintains permanent Block Damage over every single boss attack cycle.
- Seeker: The 2:1 catalyst. His skill Tailwind (A2) boosts team Turn Meters by 30%, grants an Increase ATK buff, and awards an Extra Turn, operating on an effective 2-turn cooldown.
- Heiress: Rare champion from the High Elves faction (farmable directly from Campaign Stage 6, Palace of Aravia). Her A2 (Cleanse) removes the Stun debuff and places a team-wide 30% Increase SPD buff for 2 turns. Her passive triggers a counterattack with 5% Poison on A1 whenever the boss strikes.
- Deacon Armstrong or Doompriest: Deacon acts as speed lead, TM manipulator, and Leech / Decrease DEF enabler. Alternatively, Doompriest secures the Spirit affinity cleanse safety net.
- Solo DPS: Geomancer, Ninja, Fayne, or Dracomorph. Running at 2:1 velocity, a single dedicated damage dealer easily pumps out 45M to 65M+ damage on their own.
Exact Speed Tuning Table: Myth Heir (Classic 2:1)
| Champion | Role | True Speed Requirement | Critical Gear & Mastery Notes |
|---|---|---|---|
| Demytha | Block Damage Anchor | 274 – 279 | A3 and A2 booked. Usually requires 6★ Speed boots and multiple Speed/Perception sets. |
| Heiress | Cleanser + 30% Speed Buffer | 245 – 247 | Warning: Must NOT take the Stun on Magic affinity! Equip with a Toxic set for extra DPS. |
| Seeker | Turn Meter Booster | 179 – 186 | A2 booked. Offensive stats (Crit Rate, Crit DMG, ATK) to push bonus damage. |
| Deacon Armstrong / Doompriest | TM Lead / Cleanser | 182 – 185 | True speed must sit slightly higher than Seeker. |
| Solo DPS | Primary Nuke | 156 – 169 | Accuracy 230–250+, 100% Crit Rate, 220%+ Crit DMG. Geomancer or Fayne work best. |
The Critical Magic Affinity Pitfall for Heiress:
Heiress belongs to the Force affinity. When the Demon Lord drops below 50% HP and switches to Magic affinity, he gains Affinity Disadvantage against Heiress. However, if your Solo DPS is a Void champion, the boss AI may calculate Heiress as the target if her current HP% dips. If Heiress takes the Stun, she cannot use her A2 cleanse. The 30% Increase SPD buff drops, the 2:1 speed loop collapses, and the team dies.
The Solution: When facing Magic affinity, swap your Solo DPS to a Force affinity champion (such as Geomancer), or lower your DPS's HP/DEF pool slightly so the boss AI locks onto the DPS instead, leaving Heiress unhindered to cleanse the Stun.
Classic Block Damage Unkillables: Roshcard, Warcaster, Skullcrusher, Sir Nicholas, and Helicath
If your account lacks Maneater or Demytha, you are far from locked out of unkillable Clan Boss compositions. In RAID: Shadow Legends, an entire family of hyper-reliable, battle-tested setups revolves around champions built around Block Damage: Roshcard the Tower, Warcaster, Sir Nicholas, Skullcrusher, and Helicath.
These compositions have stood the test of time for years. They consistently survive all 50 boss turns, reliably securing top Transcendent Chests on Nightmare (NM) and Ultra-Nightmare (UNM).
---
1. WarTower: The "Roshcard + Warcaster" Dual Block Damage Engine
WarTower is one of the most stable and accessible Block Damage comps in the game. It pairs an Epic Void Banner Lord, Warcaster, with the Sacred Order Legendary, Roshcard the Tower (Sir Nicholas can also substitute for Roshcard).
How WarTower Works
- Roshcard the Tower (A3 "Zone of Ambivalence", 4-turn cooldown): Places Block Damage on all allies for 2 turns. Running in a 4:3 speed ratio, Roshcard completely neutralizes the boss's two opening mass attacks: AoE 1 and AoE 2. His A2 skill (Sanction) is turned off in Team Setup.
- Warcaster (A3 "Invincible Aura", 4-turn cooldown): Places Block Damage on all allies for 1 turn. Warcaster moves immediately before the boss takes his third turn, completely absorbing the single-target Crushing Force (Stun) hit. His A2 skill (Sealing Strike) is turned off in Team Setup.
- Cleanser (Doompriest): Because all three boss attacks strike into Block Damage, the team takes zero damage throughout the fight. However, the Stun debuff from Crushing Force still applies. Running at 175–177 SPD, Doompriest passively cleanses the Stun at the start of each round via her Bolster passive, guaranteeing all-affinity stability.
| Champion | Role | UNM Speed (True Speed) | Key Requirements & Presets |
|---|---|---|---|
| Warcaster | Block Damage on Stun (1 turn) | 246 – 249 | A3 booked. Disable A2 (Sealing Strike) in AI presets! Must not be the stun target. |
| Roshcard the Tower | Block Damage on AoE 1 & AoE 2 (2 turns) | 240 – 241 | A3 booked. Disable A2 (Sanction) in AI presets! |
| Doompriest | Stun & Affinity Cleanser | 175 – 177 | Acts first after the boss to clear the Stun. Toxic set recommended for extra damage. |
| DPS 1 | Primary Damage Dealer | 175 – 178 | Geomancer, Fayne, Dracomorph, or Frozen Banshee. Accuracy 230–250+. |
| DPS 2 | Secondary Damage Dealer | 171 – 175 | True speed must sit strictly lower than DPS 1. |
Critical AI Preset Rule for WarTower: Secondary attacking skills (Roshcard's A2 and Warcaster's A2) can derail the rotation if the AI prioritizes them over Block Damage. In the Team Setup menu, completely disable Roshcard's A2 and Warcaster's A2. Both champions must use only their basic A1 attacks and trigger their Block Damage abilities strictly on cooldown.
---
2. Batman Forever: Ultra-Fast 2:1 Unkillable with Seeker
If you want to extract maximum damage from a "Roshcard + Warcaster" or "Sir Nicholas + Warcaster" core to guarantee a 1-key UNM finish, accelerate the engine into a 2:1 speed ratio with Seeker. In the global community, this iconic composition is known as Batman Forever.
Batman Forever Speed Tuning (2:1 Ratio)
| Champion | Role | Speed Range (SPD) | Setup Notes |
|---|---|---|---|
| Warcaster | Fast Blocker (4-turn UK) | 265 – 285 | Highest speed bracket on the squad. Heavy Speed and Perception sets. |
| Seeker | Turn Meter Catalyst | 248 – 254 | A2 booked. Offensive stats (Crit Rate, Crit DMG, ATK) to push bonus damage. |
| Roshcard / Sir Nicholas | Second Blocker (4-turn UK) | 245 – 247 | Maintains 2-turn Block Damage / Unkillable across the AoE hits. |
| DPS / Block Debuffs | Fast DPS or Buffer | 245 – 247 | If not running Doompriest, place a 2-turn Block Debuffs champion here (Brogni, Sepulcher). |
| Doompriest / DPS | Stun Cleanser | 218 – 227 | Guarantees clean status effects against all affinities. |
With Seeker feeding continuous Turn Meter fills, every champion takes 2 full turns for every 1 turn of the boss. Your damage dealers comfortably output 75M to 95M+ damage over 50 turns.
---
3. Slow Tower Skullcrusher: Counterattack Synergy
A brilliant synergy between the Legendary Roshcard the Tower and the Epic Orc Skullcrusher. Rather than merely surviving, this composition punishes the boss through near-permanent team-wide Counterattack across every AoE hit.
How the Coverage Functions
- Boss Turns 1 & 2 (AoE 1 & AoE 2): Roshcard acts first and drops Block Damage for 2 turns using Zone of Ambivalence. The entire team is completely impervious to incoming damage.
- Team Counterattack: Skullcrusher casts Stonewall (A2), placing Counterattack on the entire squad, while putting 50% Ally Protection and Unkillable on himself for 2 turns. The boss slams into an invulnerable team and eats five counterattack hits to the face.
- Boss Turn 3 (Crushing Force / Stun): Because the rest of the team still carries active Block Damage, while Skullcrusher carries Ally Protection and Unkillable, the boss AI locks onto Skullcrusher with 100% certainty. Skullcrusher absorbs the blow directly into his Unkillable buff and cannot die.
| Champion | Role | UNM Speed Range | Gearing & Setup Notes |
|---|---|---|---|
| Roshcard the Tower | Block Damage on AoE 1 & 2 | 240 – 243 | A3 fully booked. A2 disabled. |
| Skullcrusher | Counterattack & Stun Sponge | 221 – 222 | Exactly 1 Immortal set or Life Drinker mastery to ensure he recovers above 1 HP after the stun. |
| DPS 1 (4:3 ratio) | Primary DPS / Support | 220 – 221 | Laps the boss cycle (takes 4 turns per 3 boss turns). |
| DPS 2 | Standard DPS | 191 – 193 | Steady damage output, Poisons, and debuffs. |
| DPS 3 | Anchor DPS | 171 – 174 | Bottom bracket of the synchronous speed band. |
Strict Mastery Warning for Skullcrusher: Never take the Retribution mastery or any mastery with random counterattack triggers on Skullcrusher. If Skullcrusher counters out of turn, his Turn Meter accelerates unexpectedly, causing his Unkillable buff to expire prematurely before Crushing Force lands.
---
4. Solo Helicath (Slow Hellcat)
The Legendary Demonspawn fusion champion, Helicath, transformed Clan Boss progression for thousands of accounts. His skill Devoted Servants (A3, booked to a 4-turn cooldown) places Block Damage for 2 turns on all allies, followed by an automatic 60% Increase DEF buff when Block Damage expires.
Unlike Roshcard, Helicath can carry an entire Ultra-Nightmare unkillable team completely solo, with no secondary unkillable champion required:
- Running in a 4:3 ratio (speed 246–248), Helicath's Devoted Servants blankets the team across both mass strikes (AoE 1 and AoE 2).
- His secondary skill, Wind's Whistle (A2), places a colossal team-wide Shield scaled directly from his own Defense (DEF).
- On turn 3 (Crushing Force), Block Damage expires. However, because Helicath is built with massive Defense (4,500–5,500+ DEF), the Shield absorbs 40,000 to 50,000+ damage. The boss's single-target blow is completely swallowed by the Shield, leaving the stun target's actual HP bar completely untouched.
- His passive, Agony Feast, boosts Helicath's DEF by 5% per ally under Block Damage and triggers a counterattack with his A1 (Fiery Claws), maintaining a continuous 25% Weaken debuff on the boss.
Speed Tuning Table for Solo Helicath (UNM / NM Universal)
- Helicath: Speed strictly 246 – 248 (A3 Priority 1, A2 Priority 2). Minimum 4,500+ DEF.
- Block Debuffs Champion / Doompriest: Speed 173 – 178 (blocks or cleanses the stun debuff).
- DPS 1: Speed 175 – 178.
- DPS 2: Speed 175 – 178.
- Stun Target: Speed 171 – 174 (high HP, ~2,000 DEF, absorbs the stun hit into Helicath's Shield).
The Solo Helicath Advantage: Slow Hellcat requires only one core champion (Helicath himself), syncs seamlessly across UNM and NM without gear changes, and frees up three entire team slots for dedicated damage dealers.
Top-Tier Zero-Roster-Swap Comps: Bateater and Easy Double Maneater
While budget setups demand surgical tuning of the stun target's HP and Defense, compositions running two Maneaters eradicate stun-targeting headaches permanently. Maneater's signature ability, Ancient Blood, grants both Unkillable for 2 turns and Block Debuffs for 2 turns. By chaining their casts back-to-back, two Maneaters keep your entire roster completely shielded 100% of the fight.
The Demon Lord cannot stun anyone. He cannot inflict Poisons, Decrease ATK, or Decrease SPD on colored affinities. The team is completely affinity-blind: it tackles Void, Force, Magic, and Spirit with the exact same five champions and gear—zero champion swaps, zero artifact tinkering.
---
1. The Legendary Bateater (2 Maneaters + Pain Keeper + Seeker + DPS)
The Bateater composition (Dual Maneaters + "Batman" Turn Meter engine Seeker) is widely regarded as the gold standard of speed-tuned efficiency in RAID: Shadow Legends. Operating in a blistering 2:1 speed ratio, every champion on your squad takes two full turns for every single turn the Demon Lord takes.
Core Advantages of Bateater
- 1-Key Across All Difficulties: Pumps out 75M to 110M+ damage on Ultra-Nightmare (UNM), Nightmare (NM), and Brutal.
- Pure Full-Auto: Press "Auto" the split-second the encounter begins. No manual piloting through the opening rounds.
- No Dedicated Stun Target: The boss's single-target strike, Crushing Force, dissolves harmlessly into Block Debuffs. No low-defense builds, no HP math to micromanage.
Speed Tuning Table for Bateater (True Speeds)
Speeds in Bateater must be dialed in down to fractional decimals. When built within these precise parameters, the identical team handles UNM, NM, and Brutal without changing gear:
| Champion | Role | Speed (SPD) | Build & Gear Guidelines |
|---|---|---|---|
| Fast Maneater | First Unkillable Shield | 265 – 277 (Ideal: 268) | A3 fully booked. Offensive build: 100% Crit Rate, high Crit DMG, Warmaster. |
| Seeker | 2:1 Turn Meter Engine | 248 – 254 (Ideal: 248) | A2 fully booked. Cruel or Toxic set to maximize secondary damage. |
| Pain Keeper | Cooldown Reset Anchor | 245 – 247 | A3 fully booked. In Bateater, she does NOT need an Immortal set. |
| Slow Maneater | Second Unkillable Shield | 239 – 242 | A3 fully booked. True speed must sit strictly lower than Pain Keeper. |
| Solo DPS | Primary Nuke | 218 – 227 (Ideal: 220) | Fayne, Dracomorph, or Geomancer. Accuracy 230–250+, maximum damage build. |
Strict Mastery Ban: In Bateater, not a single champion may take Rapid Response, Arcane Celerity, or Cycle of Revenge. A random 10% Turn Meter boost will instantly desynchronize the 2:1 loop and cause a premature wipe!
Skill AI Presets for Bateater (UNM / NM / Brutal)
- Fast Maneater: A3 (Ancient Blood) — Priority 1, Delay = 0 turns. Casts immediately on turn 1.
- Slow Maneater: A3 (Ancient Blood) — Priority 1, Delay = 1 turn. Opens with basic A1 attack, casts A3 on his second action.
- Seeker: A2 (Tailwind) — Priority 1, Delay = 0 turns. Casts immediately.
- Pain Keeper: A3 (Combat Tactics) — Priority 1, Delay = 1 turn. Opens with A1, then triggers her cooldown reduction. A2 (Spectacular Sweep) — Priority 2.
- Solo DPS: Set highest priority on primary damage abilities (A3 and A2).
---
2. Easy Double Maneater (2 Maneaters + 3 DPS)
If you hold two Maneaters but lack a built Seeker, or simply prefer fielding three full-fledged damage dealers simultaneously, the classic Easy Double Maneater configuration is your optimal path.
Here, the squad operates in a standard 1:1 ratio, with both Maneaters running in a 4:3 cycle to maintain continuous coverage. Speed requirements are significantly lower than Bateater, making this composition exceptionally accessible with mid-tier artifacts.
Speed Tuning Table for Easy Double Maneater (UNM / NM)
| Champion | Role | Speed (SPD) | Notes |
|---|---|---|---|
| Fast Maneater | Primary Shield | 240 – 242 | A3 booked. On UNM, casts A3 on turn 1. |
| Slow Maneater | Secondary Shield | 218 – 222 | A3 booked. Chains Unkillable after Fast Maneater's buff expires. |
| DPS 1 | Decrease DEF / Weaken | 175 – 178 | Fayne or Dracomorph. Accuracy 230–250+. |
| DPS 2 | Passive Damage | 175 – 178 | Geomancer or a secondary Poisoner (Frozen Banshee). |
| DPS 3 | Ally Attack / Raw Nuke | 168 – 173 | Fahrakin the Fat, Brakus the Shifter, or pure raw damage. |
In Easy Double Maneater, three dedicated damage dealers combine for 55M to 75M+ damage, locking in a comfortable 1–2 key UNM performance.
---
Selecting the Premier Solo DPS for Bateater
Because Bateater allocates only a single roster slot to pure offensive output, that champion shoulders immense responsibility: they must reliably maintain Decrease DEF (60%), Weaken (25%), and output massive personal damage.
| Champion | Bateater Tier Rating | Performance Profile & Nuances |
|---|---|---|
| Fayne | Top-Tier Pick (S-Tier) | The ideal kit: A3 applies 60% Decrease DEF and 25% Weaken; A2 places two 5% Poison stacks. In a 2:1 cycle, Fayne easily dishes out 38M to 48M damage entirely on her own. |
| Dracomorph | Top-Tier Pick (S-Tier) | Decrease DEF and Weaken combined on a single ability, backed by four 5% Poison debuffs. Dracomorph regularly propels Bateater compositions past 90M to 105M+ damage per key. |
| Geomancer | Outstanding Pick (A-Tier) | HP Burn and passive 15% damage reflection. Outstanding against Force and Void affinities. Consistently locks down a 1-key finish. |
| Ninja | Requires Custom Tune (Hazardous) | Ninja's A1 basic attack boosts his Turn Meter by 15%. If inserted at the standard 220 SPD, he laps the rotation by turn 5, drops his Unkillable buff, and dies. Running Ninja requires dropping his speed down to 205–208 SPD, rigorously verified in the DeadwoodJedi calculator. |
Alternative Strategies: 1:1 Counterattack, Traditional Defensive Comps, and the Infinity Engine
If your collection currently lacks Maneater, Demytha, or Roshcard the Tower, you do not need to put your Clan Boss progression on hold. Before unkillable compositions became ubiquitous, players reliably conquered Nightmare (NM) and Ultra-Nightmare (UNM) for years using traditional defensive teams and Counterattack compositions.
A properly constructed defensive comp survives 35 to 45+ boss turns, comfortably securing the top UNM Transcendent Chest in 2–3 keys and guaranteeing an effortless 1-key finish on Nightmare.
---
1. Counterattack Compositions: The 1:1 Synchronous Ratio
Counterattack mechanics offer the most elegant way to double your squad's damage output without requiring absurd speed thresholds. The principle is straightforward: your champions take exactly one turn for every one turn the boss takes (a 1:1 ratio), but on both mass attacks (AoE 1 and AoE 2), all five champions retaliate simultaneously with their basic A1 attacks.
Premier Counterattack Anchors
- Martyr: The premier Sacred Order Legendary support. Her A3 applies team-wide Counterattack and 60% Increase DEF for 2 turns. Her basic A1 attack places a 50% Decrease ATK debuff, while her A2 applies 60% Decrease DEF. She single-handedly covers nearly every vital debuff needed in the encounter.
- Valkyrie: Grants team-wide Counterattack paired with a massive Shield scaled directly from her Defense stat. Your team not only retaliates on every AoE, but their health bars remain essentially untouched through the first 25–30 turns.
- Skullcrusher: The most accessible Epic counterattack champion. His skill Stonewall places Counterattack on the entire squad while granting himself 50% Ally Protection and Unkillable for 2 turns. He acts as the dedicated stun sponge and cannot die.
Speed Tuning Table for 1:1 Counterattack
The fundamental tuning rule: every champion must be slightly faster than the Demon Lord, with your counterattack champion tuned to act dead last in your turn order immediately before the boss attacks:
| Difficulty | Boss Speed | Team Speed Window | Counterattack Champion Speed |
|---|---|---|---|
| Nightmare (NM) | 170 | 174 – 189 | 171 – 173 (acts dead last before the boss) |
| Ultra-Nightmare (UNM) | 190 | 194 – 209 | 191 – 193 (acts dead last before the boss) |
Why the Counterattack Anchor Must Act Last: If Skullcrusher or Martyr buffs at the head of your team's turn order, your damage dealers will immediately take their turns, burning 1 turn of their Counterattack buff uselessly before the boss even strikes. By the time the boss unleashes AoE 2, the buff will have expired. Your counterattacker must always anchor the rear of the turn order!
---
2. Traditional Defensive Comps: The Ally Protection Triple-Layer
When operating without Unkillable or Block Damage buffs, surviving against the Demon Lord's scaling damage requires stacking three interlocking layers of damage mitigation:
- 50% Decrease ATK on the boss: Slashes incoming AoE damage in half before it lands. Must maintain 100% uptime.
- 60% Increase DEF on the team: Multiplies armor, mitigating residual damage by an additional 40–50%.
- 50% Ally Protection on a defensive anchor: The caster absorbs half of the raw damage dealt to all allies onto themselves.
Combined, this defensive triumvirate neutralizes up to 85–90% of incoming damage. A boss strike that would obliterate a team for 60,000 damage on turn 30 hits for a manageable 6,000 to 8,000.
The Pillar of Defensive Comps: Sepulcher Sentinel in a 4:3 Ratio
The Epic Knight Revenant, Sepulcher Sentinel, was practically tailored for Clan Boss survival:
- Her A2 (Sepulcher's Shield): Places team-wide 60% Increase DEF and Block Debuffs for 2 turns (4-turn cooldown booked).
- Basic A1 attack: Features a 60% chance to land the crucial 50% Decrease ATK debuff for 2 turns.
- Passive skill: Carries a 25% chance to completely nullify all incoming damage directed at a random ally.
Tuning Sepulcher Sentinel at 4:3: Because her A2 operates on a 4-turn cooldown while the boss runs on a 3-turn cycle, Sepulcher must be tuned to 238–242 SPD (for UNM). In this 4:3 rhythm, she takes 4 turns for every 3 turns of the boss, cycling her Block Debuffs and Increase DEF buffs right before AoE 2 and the stun on every single rotation!
---
3. The Infinity Shield Engine: Underpriest Brogni and Corpulent Cadaver
An Infinity Shield Composition is a unique team archetype that utilizes zero Block Damage or Unkillable buffs, yet routinely survives 80 to 120+ boss turns, bounded only by the game engine's absolute limit (1,500 total turns).
How the Infinite Shield Engine Works
- Underpriest Brogni: His A3 places a team-wide Shield and Block Debuffs. Crucially, his passive ability holds a unique mechanic: whenever an ally strikes while shielded, the value of that shield grows by 30% of the damage inflicted.
- Buff Extenders: The team runs 2 to 3 dedicated buff extenders (Krisk the Ageless, Lydia the Deathsiren, Godseeker Aniri, or Sandlashed Survivor). With relentless buff extension, Brogni's shields never expire.
- Corpulent Cadaver: A Rare champion from the Shadowkin faction. The damage on his basic A1 attack scales directly from the current size of the shield protecting him.
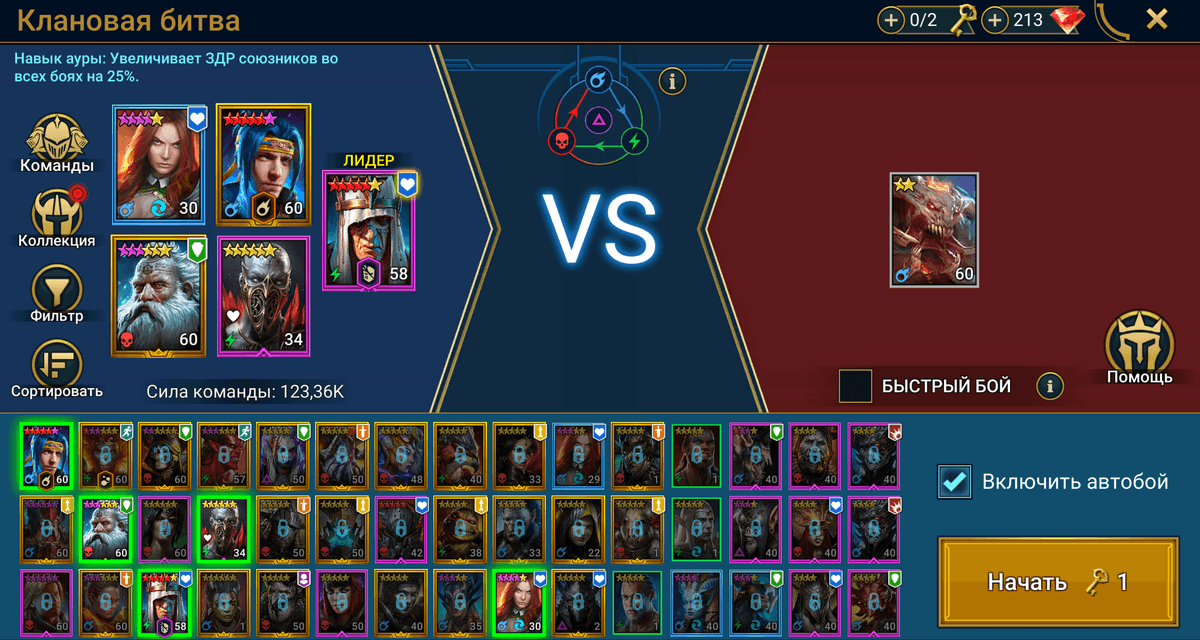
The Reality of the Cadaver Balance Patch
In legacy iterations of RAID, Cadaver's shield scaling had no upper ceiling. Brogni's shields would swell into hundreds of millions of points, producing preposterous runs exceeding 1 to 2 billion total damage. Developers subsequently intervened:
Current Mechanics State: Corpulent Cadaver's bonus damage from shield scaling is strictly capped at approximately 200,000 damage per strike. Billion-damage vanity runs are gone. However, because the composition still comfortably endures over 100 turns, it routinely outputs 150M to 220M+ damage, making it a rock-solid, unconditional 1-key UNM machine.
---
4. Team-Up Blender Comps (Ally Attack)
A high-speed archetype focused entirely on the Ally Attack (Team-Up) mechanic.
Key facilitators include Fahrakin the Fat, Cardiel, Lanakis the Chosen, and Kreela Witch-Arm. When triggering an Ally Attack, they command three allies to immediately fire their basic A1 attacks simultaneously.
- The team unleashes 2 to 3 times more attacks per cycle than a standard composition.
- Poison champions like Frozen Banshee and Dracomorph continuously flood the boss's debuff bar with 5% Poison debuffs off their basic attacks.
- Mandatory Sustain: The boss must carry a permanent Leech debuff (recovering 18% of damage dealt) or the entire squad must wear Lifesteal sets to immediately restore their HP bars on every team-up volley. While these squads generally survive 25 to 35 turns, their extreme hit density produces 45M to 65M+ damage.
Masteries, Blessings, Artifact Sets, and Top DPS Tier List
A properly dialed speed tune ensures your team survives all 50 turns. But whether that survival yields 25 million or 90+ million damage depends entirely on Tier 6 masteries, optimal blessings, and artifact synergy.
---
1. Masteries: Choosing Your Tier 6 Keystone
For Clan Boss, the Offense tree is mandatory across virtually all five champions. The crown jewel is the final Tier 6 keystone. There are only two viable choices:
| Tier 6 Keystone | Mechanics & Proc Rates | Who Needs It |
|---|---|---|
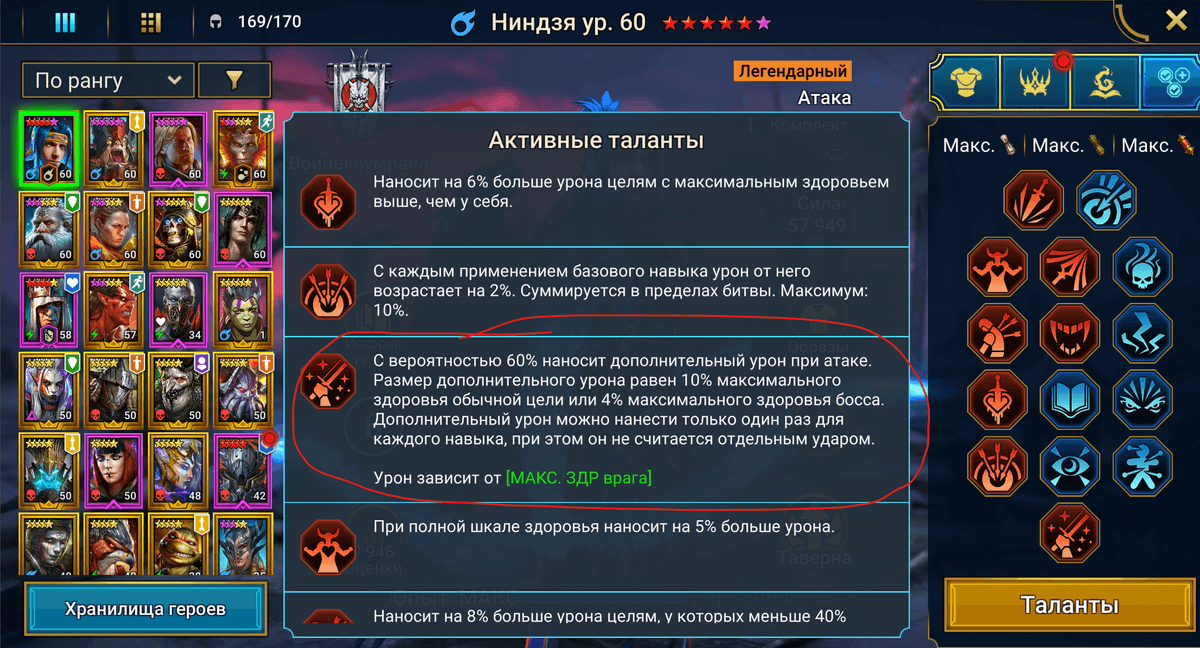
| Warmaster (WM) | 60% chance to inflict bonus damage equal to 4% of target MAX HP (yielding 60,000 to 75,000 damage per proc on UNM). Can trigger only once per skill, even if the attack hits multiple times. | Champions with 1 or 2 hits on their basic A1 attack (Maneater, Demytha, Roshcard the Tower, Geomancer, Sepulcher Sentinel, Fayne, Warcaster). |
| Giant Slayer (GS) | 30% chance to inflict bonus damage equal to 3% of target MAX HP (~50,000 to 58,000 damage per proc on UNM). The chance rolls independently on every single hit of an ability! | Champions with 3 or 4 hits on their basic A1 attack (Fahrakin the Fat, Ninja, Rhazin Scarhide, Brakus the Shifter). For multi-hit attackers, Giant Slayer mathematically outperforms Warmaster by 35–45%. |
BANNED MASTERIES LIST FOR SPEED-TUNED & UNKILLABLE COMPS:
Picking even a single mastery from this blacklist will desynchronize your turn order and wipe your team:
- Rapid Response (Support Tier 3): 30% chance to gain 10% Turn Meter when a buff expires. Causes out-of-order turns and immediate desync.
- Arcane Celerity (Support Tier 4): 30% chance to gain 10% Turn Meter when a debuff on the boss expires. Destroys speed tunes instantly.
- Cycle of Revenge (Defense Tier 3): 50% chance to gain 15% Turn Meter when an ally takes a critical hit from the boss. Strictly forbidden!
- Master Preserver (Support Tier 5): 30% chance to extend a buff duration by 1 turn. If Unkillable or Block Damage gets extended on one ally and drops off another, the boss switches targets or wipes the team.
- Life Drinker (Offense Tier 3): Heals for 5% of damage dealt when HP falls below 50%. Banned on dedicated stun targets in budget unkillables (disrupts lowest HP% targeting).
- Lore of Steel (Support Tier 3): Permitted, but MUST be accounted for in the DeadwoodJedi calculator, as it injects hidden fractional speed decimals from base artifact sets.
---
2. Blessings: Millions in Passive Damage
The Awakening system completely elevated Clan Boss output. Selecting the right Blessings injects 12M to 20M+ damage into your run without touching a single artifact:
Brimstone: The Undisputed Clan Boss MVP
A Legendary Blessing from the Corruption tree. Even at 1★ Awakening, striking with an active skill places a 2-turn Brimstone debuff on the Demon Lord (irresistible and cannot be blocked).
- Whenever the boss uses an active ability (AoE 1, AoE 2, or the single-target stun), a smoldering meteorite crashes down, inflicting a massive 200,000 to 250,000 damage per impact!
- Across 50 boss turns, Brimstone reliably accounts for 10M to 15M+ damage from a single awakened champion.
- Crucial Rule: Only one active Brimstone debuff can exist on the boss at a time. Equipping Brimstone on multiple champions is completely wasted—assign it to a single Legendary anchor (e.g., Maneater, Roshcard, Sir Nicholas, or Helicath).
Other High-Impact Blessings
- Cruelty: Chaos tree. Every strike reduces the Demon Lord's Defense by 1% (stacking up to 8–20% based on awakening level). This reduction is permanent and stacks on top of standard 60% Decrease DEF, amplifying raw damage across the entire team. Only one champion on the team needs this.
- Phantom Touch: Darkness tree. The premier choice for Rare and Epic damage dealers (Fayne, Geomancer, Pain Keeper, Frozen Banshee). Provides a high chance to land an additional true damage hit scaling from the champion's ATK stat on every attack. Consistently yields 2M to 4M+ bonus damage over a 50-turn run.
---
3. Artifact Sets: Lifesteal vs. Leech
In non-unkillable and counterattack teams, sustaining team health against incoming AoE strikes dictates how long you survive:
- Lifesteal Set (4-piece): Restores 30% of damage dealt. Striking a debuffed boss with a Warmaster proc for 65,000 damage restores nearly 20,000 HP instantly, topping off the champion's health bar. The drawback: consuming 4 artifact slots severely restricts your ability to stack Crit Rate, Crit DMG, and Speed.
- Leech Debuff: Heals any attacker for 18% of damage inflicted. If your team fields a consistent Leech placer (such as Deacon Armstrong, Vogoth, or Fayne on A1), you can completely discard Lifesteal sets! All damage dealers can transition into lethal pure-damage artifact configurations.
Premier Sets for Unkillable Damage Dealers
Because unkillable compositions eliminate defensive requirements, every single stat slot is dedicated to maximizing offensive output:
- Savage / Lethal (4-piece): Ignores 25% of boss Defense. The absolute pinnacle for direct physical damage.
- Cruel (2-piece): ATK +15%, ignores 5% enemy Defense (farmed directly from Clan Boss reward chests). Superb for pairing in 2-piece sets.
- Toxic Set (4-piece): 50% chance to place a 2.5% Poison for 2 turns on any attack. Exceptional on high-turn support champions (Heiress, Doompriest, Seeker).
- Perception (2-piece): Accuracy +40, Speed +5%. The premier forge set to hit accuracy caps while maintaining precise speed thresholds.
---
4. Top-Tier Clan Boss Damage Dealers Tier List
| Champion | Tier | Strengths & Damage Benchmarks |
|---|---|---|
| Geomancer | S-Tier | The supreme master of reflected damage. His A3 inflicts HP Burn, 25% Weaken, and a passive 15% damage reflection that also mitigates team damage by 15%. The harder the boss strikes in late turns, the more millions Geomancer hurls back. Consistently puts out 30M to 45M+ damage solo. |
| Dracomorph | S-Tier | The undisputed gold standard for Poisoners. His A3 applies 60% Decrease DEF and 25% Weaken in a single turn, while his A2 saturates the boss with four 5% Poison stacks. In a 2:1 tune, effortlessly reaches 45M to 55M+ damage. |
| Fayne | S-Tier | The premier Epic damage dealer in the game. Combines 60% Decrease DEF, 25% Weaken, 50% Decrease ATK, and two 5% Poison debuffs. In unkillable comps, regularly outputs 35M to 45M+ damage. |
| Frozen Banshee | A-Tier | An accessible Rare champion who out-damages most Legendaries in Poison volume. Her A3 lands 25% Poison Sensitivity, turning her basic A1 attack into a double 5% Poison powerhouse. In counterattack teams, generates 20M to 28M+ damage. |
| Fahrakin the Fat | A-Tier | An all-in-one damage multiplier. Provides team-wide Ally Attack, 30% Crit Rate, 30% Crit DMG, HP Burn, and Poisons. Elevates an average squad into a 1-key machine. |
| Ninja | S-Tier (With Caveats) | Skyrocketing scaling damage, Decrease DEF, and HP Burn. Warning: His A1 basic attack fills his Turn Meter by 15%. Requires specialized speed tuning in the calculator (tuned down to 205–209 SPD in fast setups) to prevent desynchronization. |
Troubleshooting: Why Unkillable Comps Fail and Pre-Flight Checklist
The most demoralizing experience in RAID: Shadow Legends: spending millions of silver, legendary skill tomes, and prized glyphs to build a speed-tuned unkillable team, hitting auto, and watching your entire squad face-plant on turn 12.
There is zero randomness in the Demon Lord's behavior. His Turn Meter and skill rotations obey rigid mathematical formulas. If an unkillable composition fails, 99% of the time it traces back to a minor, hidden configuration error.
---
The 10-Point Pre-Flight Battle Checklist
Before spending a precious Clan Boss key, verify your squad against this checklist item by item:
- True Speed Verification: Have you verified every champion's speed in the DeadwoodJedi Clan Boss Calculator? The number displayed on the in-game champion card is rounded. Make sure the actual True Speed (factoring in gear sets and fractional decimals) falls strictly inside the viable operational bracket.
- Mastery Blacklist Audit: Inspect the mastery tree of all five champions. Not a single champion on your team may have:
- Rapid Response (Support T3) — Turn Meter boost when a buff expires;
- Arcane Celerity (Support T4) — Turn Meter boost when a debuff on the boss expires;
- Cycle of Revenge (Defense T3) — Turn Meter boost when an ally takes a critical hit.
- Lore of Steel Accounting: If any champion took the Lore of Steel node in the Support tree, did you tick the box in the DeadwoodJedi calculator? It amplifies base set bonuses by 15%, introducing hidden decimal speed fractions that shift your True Speed.
- Mandatory Cooldown Tomes: Are skill books invested into all primary survival skills?
- Maneater — A3 strictly booked to a 5-turn cooldown;
- Demytha — A3 and A2 strictly booked to 3-turn cooldowns;
- Pain Keeper — A3 and A2 strictly booked to 4-turn cooldowns;
- Roshcard / Sir Nicholas / Helicath / Warcaster — protective skills strictly booked to 4-turn cooldowns.
- Team Setup AI Presets: Did you assign the correct opening turn delays (Delays)? Are conflicting secondary abilities turned off (such as A2 on Roshcard and Warcaster in WarTower)?
- Stun Target HP and Defense Ratios (Budget Comps):
- Stun target MAX HP is 15–20% higher than the rest of the team;
- Stun target Defense is strictly below 1,600 DEF;
- Zero Lifesteal, Regeneration, or Immortal sets on the stun target, and no Life Drinker mastery.
- Immortal Set on Pain Keeper: In Budget Maneater, is Pain Keeper equipped with exactly one 2-piece Immortal set? Without it, she will fail to heal herself back to 100% HP before the stun turn, causing the boss to target her.
- Affinity Disadvantage Check: Has the Demon Lord dropped below 50% HP? If he has assumed a colored affinity (Force, Magic, Spirit), verify that his elemental preference doesn't target an essential support (such as Heiress on Magic affinity in Myth Heir).
- Accuracy Thresholds: Do all debuffers maintain at least 230–250+ Accuracy for Ultra-Nightmare (UNM)?
- Innate Turn Meter Boosting Skills: If your roster features Ninja (who boosts his own TM by 15% on A1) or Seeker, is the team tuned specifically around their mechanics rather than standard flat speeds?
---
Turn-by-Turn Failure Diagnostics: When Does Your Team Wipe?
The exact turn on which your squad collapses points directly to the underlying cause:
| Turn of Failure | Symptom | Root Cause & Solution |
|---|---|---|
| Turns 1 – 3 | Unkillable or Block Damage failed to land before the boss's opening attack. | Flawed AI opening delays in Team Setup, or missing skill tomes on a core defensive ability. |
| Turns 5 – 6 | The boss landed Crushing Force (Stun) on a primary support or DPS instead of the designated stun target. Cooldowns froze, and the subsequent AoE wiped the squad. | Imbalanced HP/DEF ratios. The stun target overhealed to 100% HP, a DPS dropped to a lower remaining HP%, or elemental affinity disadvantage overrode targeting. Re-audit item 6 on the checklist. |
| Turns 10 – 14 | The team began in sync, but a champion slowly drifted in the Turn Meter order until their buff dropped a split-second before the boss attacked. | Hidden decimal speed variance (True Speed). A champion is off by 0.2–0.5 speed due to an uncalculated Speed/Perception set or the Lore of Steel mastery. Plug exact gear into the DeadwoodJedi calculator. |
| Turns 15 – 25 | The squad ran smoothly, but on an intermediate turn a champion unexpectedly surged forward and dropped their shield. | A banned mastery triggered! A champion has Rapid Response, Arcane Celerity, or Cycle of Revenge. A buff expiring or a boss crit triggered a 10–15% TM boost, breaking the tune. |
| Turn 50 | The Demon Lord attacked and wiped the team straight through active Block Damage and Unkillable buffs. | This is NOT a bug! The boss passive, Gathering Fury, penetrates all Unkillable and Block Damage buffs starting on turn 50. Your team has executed its absolute maximum theoretical performance. |
---
Key Conservation Pro-Tip: The Free Battle Reset
The greatest fear when testing a new unkillable team is wasting an expensive Clan Boss key due to a gear error. The game includes a built-in mechanic that lets you test without risk:
The Emergency Exit Protocol: If during a battle you notice a champion desync on turn 6 or 12, or the boss stuns the wrong target, do not wait for the defeat screen! Tap the pause button in the top right corner of the screen and select "Quit Battle". Alternatively, force-close the game client (press Alt+F4 on PC or swipe away the app on mobile).
The battle outcome is never submitted to the game servers, and your Clan Boss key is refunded in full! You can recalibrate your speeds, reset masteries, or refine your AI presets and retry immediately with zero resource loss.