ArcheAge: The Complete Beginner’s Guide from Scratch to Endgame
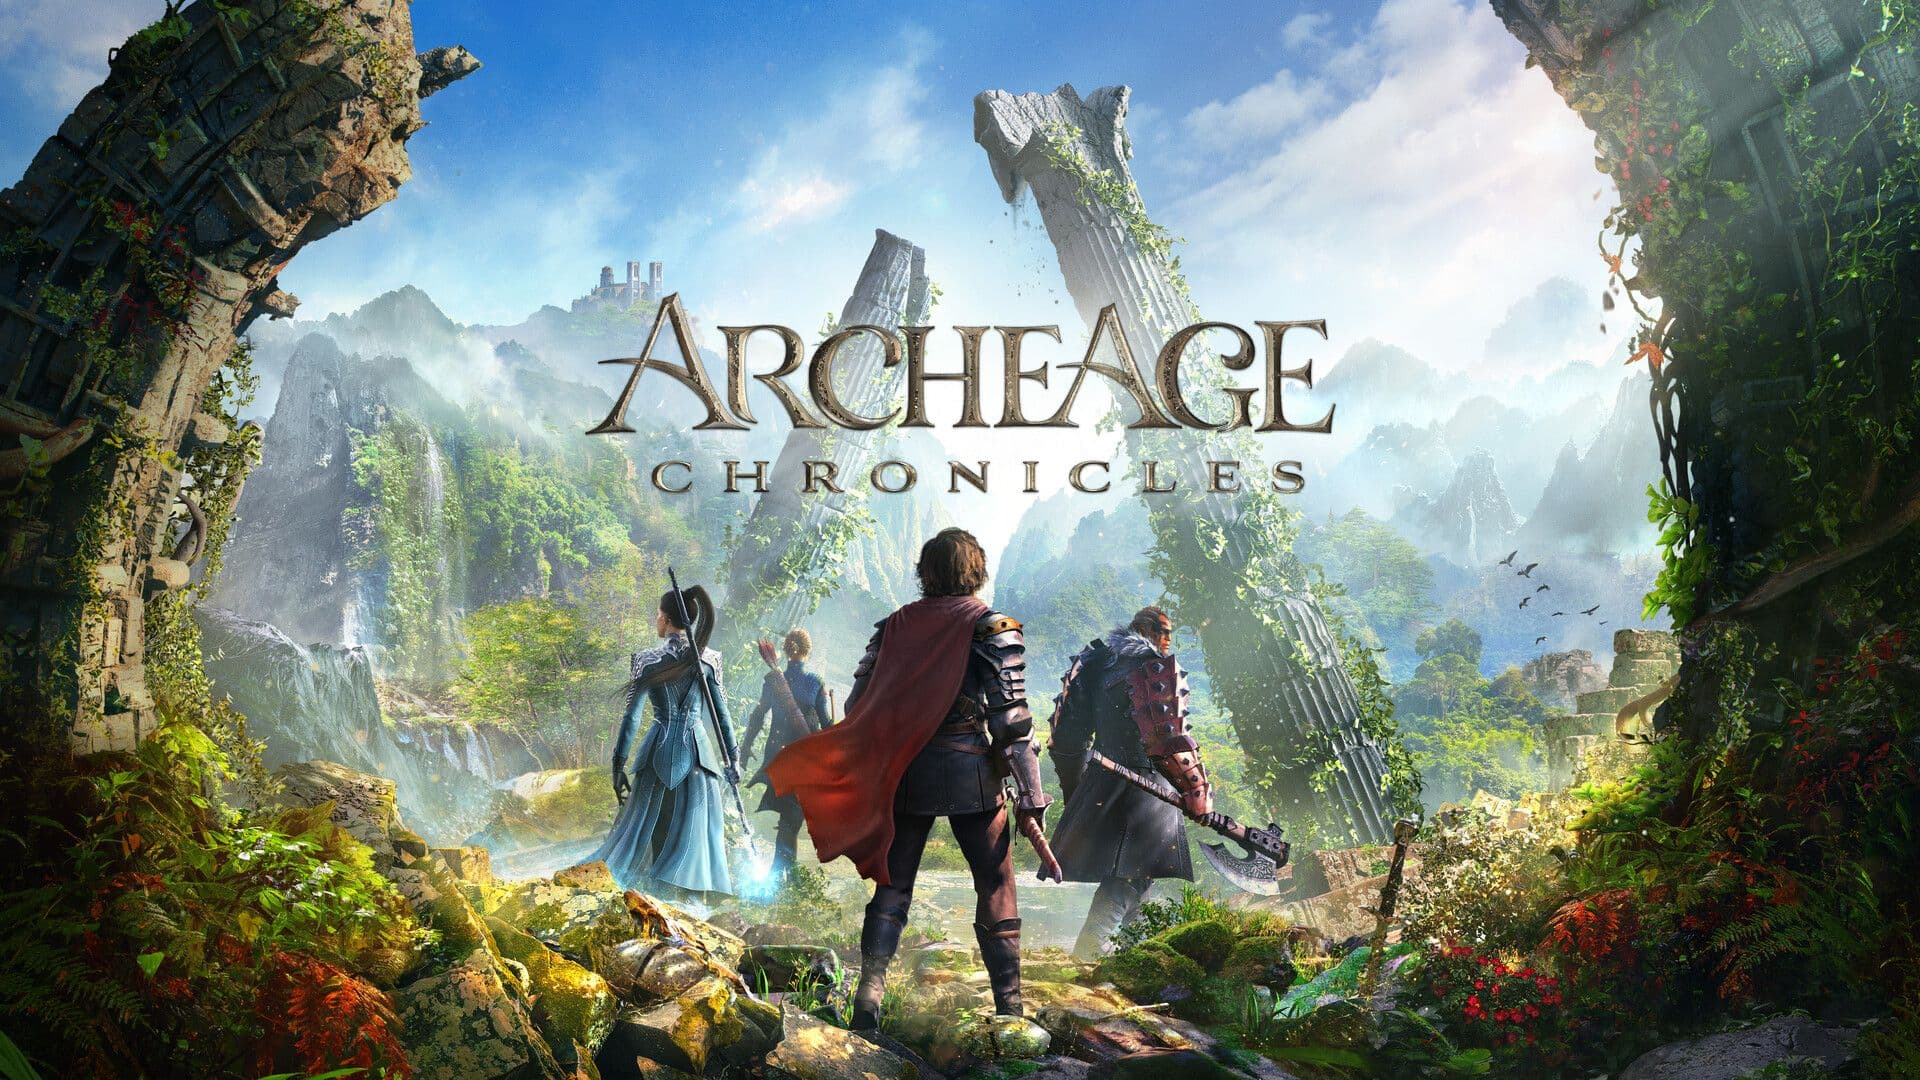
If you are exhausted by corridor MMOs where gameplay boils down to mindless sprinting from one quest marker to the next dungeon queue, ArcheAge will feel like a revelation. Crafted by XLGames under legendary designer Jake Song (the creator of Lineage), the game was engineered as the ultimate hybrid MMO. It fuses the structured progression of a theme-park with the absolute, unscripted freedom of a seamless medieval sandbox.
Quick take: The official Russian service on VK Play (published by Astrum Entertainment) remains the sole active, fully supported live home of original ArcheAge in the world, receiving continuous client updates, dense server populations, and massive oceanic fleet wars.
The Hybrid MMORPG Concept: Why ArcheAge Stands Apart
Most modern MMORPGs funnel players down rigid, pre-built tracks. You level up, equip whatever gear the questline hands you, and park your character in an endless dungeon queue. ArcheAge breaks this formula completely. This is a rare breed of online RPG where social life, economy, and physical environmental interactions carry just as much weight as your combat DPS meter.
You can sink hundreds of hours into the game without entering a single instanced dungeon. You are entirely free to claim open land on a scenic hillside, cultivate a cherry orchard, and raise a herd of dairy cows. You can assemble an overland trade caravan of heavy farm tractors, hauling manufactured regional goods across continents while hiring bodyguards to fend off player ambushes. Or you can hoist black sails on a high-speed combat galleon and hunt player-manned merchant schooners across stormy waters. The world operates on authentic real-time physics: ships heel into ocean swells, arrows arc under gravity, and gliders catch rising thermal winds across mountain ridges.
World Geography: Three Continents and Contested Oceans
The world map in ArcheAge is truly colossal and completely seamless. You will never encounter a single loading screen when crossing borders between zones or sailing out into open ocean waters. The world is organized into four core geographic territories:
Quick take: Two warring continental alliances face each other across a lawless central ocean, while the northern continent of Auroria serves as an open battleground for guild castles and endgame gear farming.
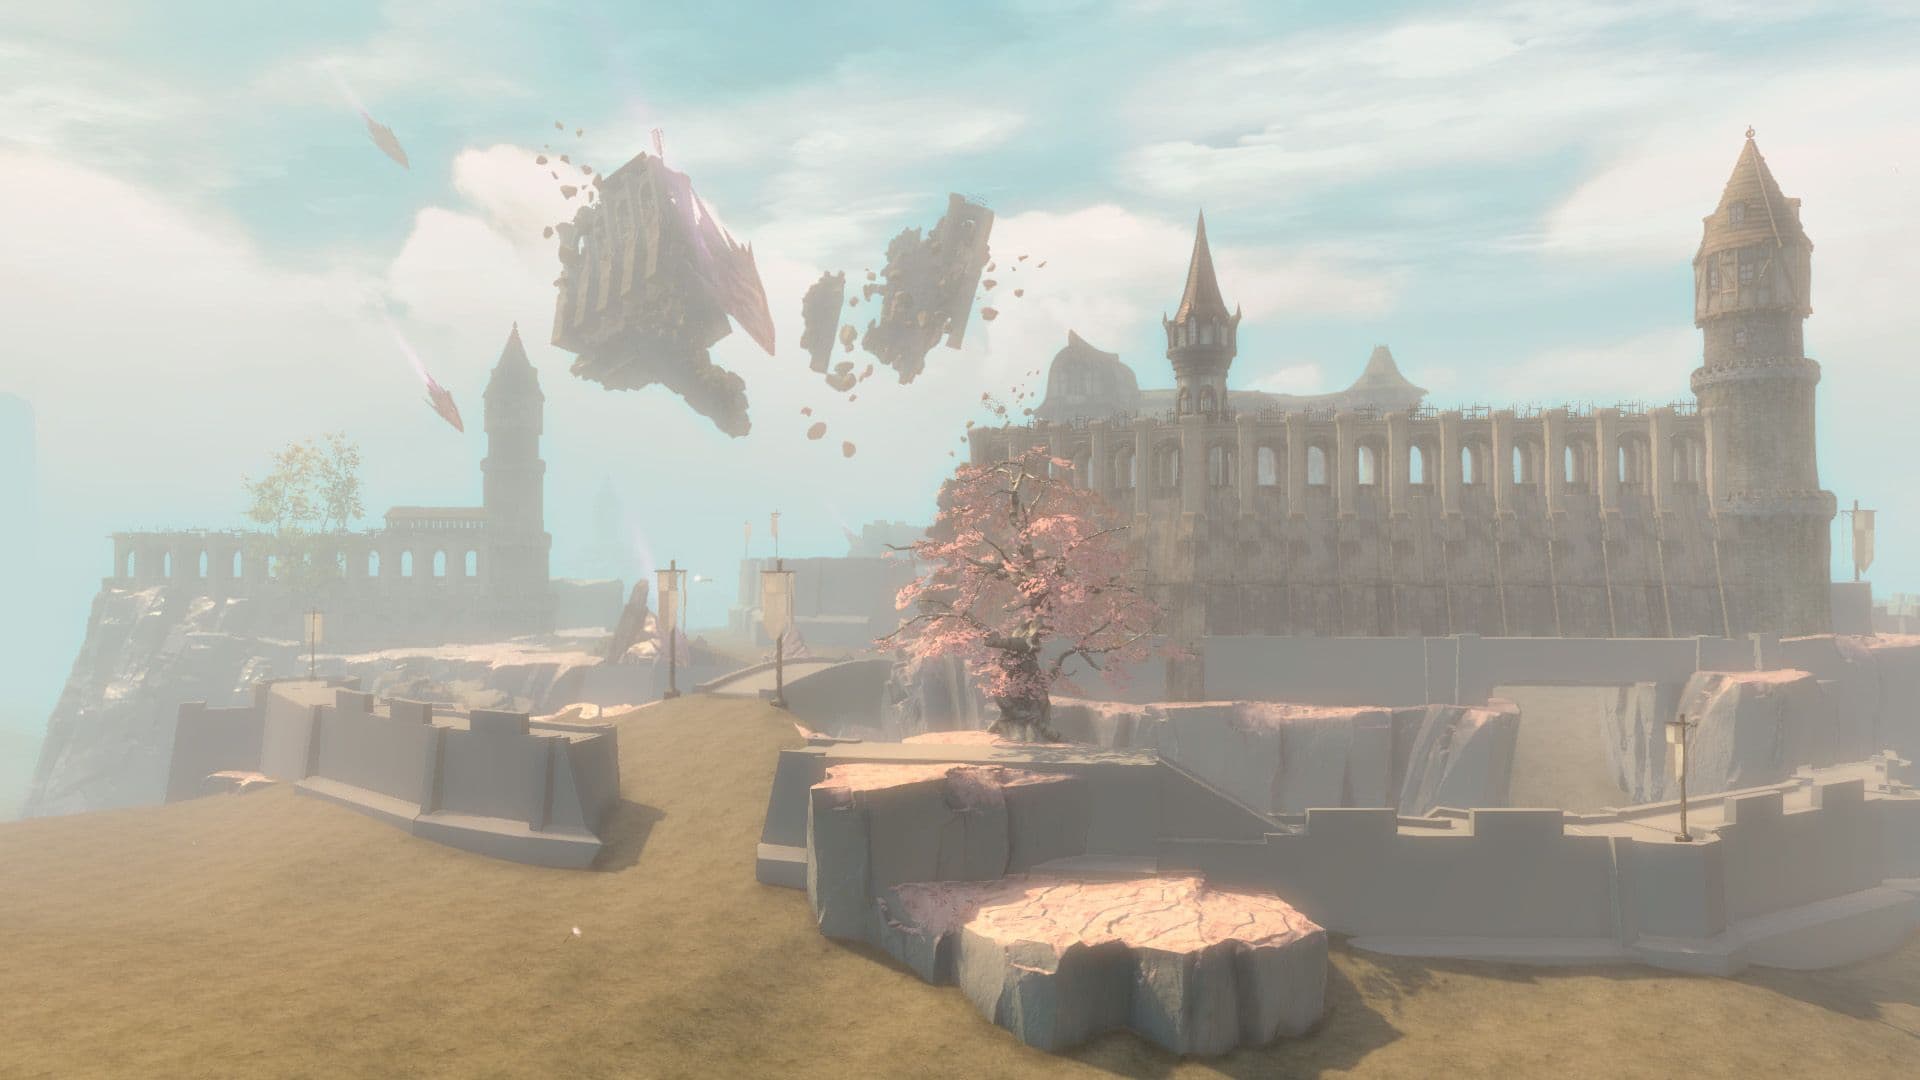
Nuia Continent (West): A vast landmass defined by a high-medieval European aesthetic. Here you will explore the dense evergreen canopies of Gweonid Forest, the sun-drenched coastal hills of Solzreed Peninsula, the towering stone keeps of Two Crowns, and the marble capital Marianople. These lands belong to the Nuia Alliance.
Haranya Continent (East): An exotic continent steeped in ancient East Asian and Silk Road architectural traditions. Bamboo groves in Villanelle, terraced valleys across Falconspire Plateau, the arid dunes of Arcum Iris, and bustling spice bazaars in Mahadevi all serve as the ancestral home of the Haranya Alliance.
Auroria (The North): The rugged, unforgiving continent across the sea. This is where high-level endgame warfare unfolds: sovereign player guilds construct modular stone fortresses and clash in territorial siege wars. Auroria also houses the primary Hiram Gear farming regions (the Hiram Mountains and Western Hiram Mountains), the mystical Garden of the Gods, and the sprawling Great Meadows.
The Arcadian Sea and Neutral Waters: A massive oceanic expanse separating the continental landmasses. This is a lawless, free-for-all open-PvP zone where any passing vessel could be an outlaw pirate or an enemy fleet. Sunken trade galleons with salvageable relics litter the seabed, while legendary aquatic terrors—such as the Kraken and the Leviathan—roam the abyssal deeps.
Faction Politics: Nuia, Haranya, Outlaws, and Hero Councils
Faction warfare serves as the operational backbone of player society in ArcheAge. When creating your character, you pledge allegiance to one of two native alliances:
The Nuia Alliance unites Nuians, noble Elves, and industrious Dwarves equipped with mechanized combat suits. The Haranya Alliance rallies industrious Harani, feline nomadic Firran, and demonic Warborn juggernauts. Opposing faction members are flagged hostile: cross-faction chat is disabled, and encounters on disputed soil almost inevitably turn lethal.
However, the political landscape is not strictly binary. The game features a fully realized third faction: Pirates (Outlaws). If a player repeatedly steals from allies, uproots guild farms, and assassinates members of their own faction via bloodlust mode, they accumulate crime points. Once convicted in a player-run court, they are exiled from their home alliance and declared an outlaw. Pirates operate out of a fortified stronghold on Growlgate Isle, receive unique naval combat buffs, and stand hostile to both continents simultaneously.
At the summit of player governance sits the Faction Council. Every month, active combatants elect Heroes—elite guild leaders who earn ceremonial golden cloaks with massive raid-wide stat auras, exclusive weapons, and the authority to mobilize entire faction armies via server-wide war horns.
Server Selection and the State of the Game
ArcheAge stands as a battle-tested classic with over a decade of continuous development. Following the closure of Western services, the Russian regional service published by Astrum Entertainment on VK Play remains the definitive official live environment, receiving regular patches, balance revisions, and content updates directly from the developers.
New players often wonder whether starting now makes sense in light of the announced ArcheAge Chronicles. The answer is an emphatic yes. Chronicles is being developed as a completely different, session-focused action game with a distinct combat model. Original ArcheAge remains an unmatched benchmark for seamless naval sandbox MMOs, with no direct competitors on the modern market.
The largest active realm featuring an established economy, high-stakes guild rivalries, and a bustling auction house at all hours of the day. This is the prime destination if you are hunting for large-scale open-world PvP, contested world boss fleets, and high-tier political drama.
A relaxed staging ground for fresh beginners. Housing zones offer significantly more open plots for your starter scarecrows and farmhouses, overland trade routes face lower ganking pressure, and contested questing zones remain far calmer during peak hours.
Technical Setup: Client Installation and Essential Settings
To start your journey, install the VK Play Game Center launcher and download the official game client. The game features full voice acting and localization.
Upon loading into the game world, hit Esc immediately and dedicate five minutes to optimizing your interface and camera:
- View Distance & Object LOD: Crank both sliders to maximum. In naval engagements, spotting enemy sails and silhouettes against the sea horizon minutes before they close into broadside cannon range is a life-or-death requirement.
- Spell Effect Detail: In massive raid clashes (40 to 100 combatants), reduce non-party visual effects to minimum while leaving your own party's spells visible. This single change prevents devastating framerate drops during overlapping AoE bombardments.
- Camera Zoom Distance: Maximize your camera pull-back range in gameplay options. A wide panoramic field of view grants immense tactical awareness in PvP, preventing stealth flankers from catching you unawares.
- Helmet & Cloak Display: Under character gear settings, you can hide bulky helmets and cloaks for a cleaner aesthetic without losing any defensive stats.
With your client optimized and your server chosen, you are ready to take your first steps. In the next section, we examine the true lifeblood of ArcheAge progression—the economic engine, Labor Points, and subscription mechanics.
The economy of ArcheAge is one of the most sophisticated, self-regulating financial ecosystems in MMORPG history. You cannot simply kill infinite monsters and generate millions of gold coins out of thin air. Every wooden log, every iron ingot, and every harvested tomato requires real-time investment and a baseline expenditure of physical energy. To establish your footing from your very first hours, you must understand exactly how the project's business model operates and what drives the market.
Quick take: All character progression is powered by Labor Points (LP) with a hard ceiling of 5,000 points. While competitive play requires an active subscription (Patron), you can easily sustain your status with in-game gold using Apex tokens traded on the open auction house.
Free-to-Play vs Patron Subscription: What You Actually Need
ArcheAge is nominally distributed under a Free-to-Play model. You can download the client for free, level your character across the full story campaign, explore the continents, and join open-world raids. But make no mistake: a free account functions essentially as an extended demo for exploring the world.
The fundamental differences between account tiers come down to energy regeneration and core privileges:
- Free-to-Play (F2P): Regenerates only 5 LP every 5 minutes, and strictly while your character remains logged in. The moment you close the client, your labor regeneration freezes entirely.
- Patron Subscription: Restores 10 LP every 5 minutes both while online and in deep offline sleep. This delivers a guaranteed passive trickle of 2,880 LP per day, even if you never launch the game. Patron also grants unrestricted land ownership rights, +20% bonus combat and crafting XP, and substantially slashes auction house listing commissions.
- Blessing of Siole: An auxiliary service booster. It provides an exclusive daily labor potion, grants a permanent +10% bonus to monster loot drop rates, and enables discounted express teleports in your memory book.
The game features an invaluable economic bridge: Apex Tokens. Paying players purchase these tokens with real currency and sell them on the auction house, while dedicated free players buy them up with earned in-game gold. Once you establish a modest operational income, you can maintain your Patron subscription purely through gameplay profits.
Labor Points (LP): The Core Engine of Progression
Labor Points represent the unified energetic pool of your account, shared across all characters on your chosen server. The standard baseline cap is strictly fixed at 5,000 LP.
Quick take: Allowing your Labor bar to sit at 5,000 is the cardinal sin of an ArcheAge beginner. Every minute spent sitting at cap burns your potential daily profit and stunts your profession leveling.
Labor Points fuel virtually every constructive action in the game:
- Harvesting farm plots, watering plants, milking cows, and shearing sheep;
- Felling wild timber and quarrying raw iron and stone from mountainside veins;
- Identifying trophy coinpurses and silver crates dropped by defeated mobs;
- Synthesizing and ranking up your Hiram weapons and armor pieces;
- Manufacturing regional trade packs at craft benches and turning them in at outposts;
- Printing tax certificates to pay weekly property upkeep on your houses and scarecrows.
How do you accelerate your labor recovery? The most reliable daily method for any landowner is sleeping in a crafted bed inside a personal house or guild hall. A quick nap restores anywhere from 80 to 200+ LP once per day, scaling with the luxury tier and decorative bedding of your furniture. Beyond sleeping, you can consume labor flasks (such as Worker's Compensation potions) acquired through regional events, login rewards, or auction listings.
The Currency Basket: What to Earn and Where to Spend
ArcheAge uses a multi-tiered currency system. Gold alone will not buy you supremacy: the most potent ship blueprints, combat scrolls, and socket gems require specialized currencies that cannot simply be traded player-to-player.
Quick take: Gold drives gear upgrades and the open market, Gilda Stars buy ship and mansion blueprints, Honor Points purchase combat socket gems, and Vocation Badges supply farm seeds and livestock.
Gold, Silver, and Copper: The bedrock transactional coinage. Essential for bidding on the auction house, paying gear synthesis labor fees, buying daily consumables, and settling direct trades. Primarily generated by identifying mob coinpurses and turning in regional trade packs at domestic continental outposts.
Gilda Stars: Ancient golden sun-coins. This is the master architectural currency of ArcheAge. Gilda Stars are spent on Mirage Isle to purchase blueprints for merchant schooners, combat galleons, motorized farm wagons, sprawling mansions, and exotic mounts. Gilda is awarded for completing the main story, undertaking daily oceanic quests, and delivering dangerous overseas trade packs.
Honor Points: Military currency. Earned by competing in arena duels, participating in open-world wars in contested zones, and joining daily server rifts (Crimson Rift, Grimghast Rift). Honor is used to purchase top-tier socket gems (Lunagems), Hiram awakening scrolls, and powerful combat draughts.
Vocation Badges: The laborer's reward. Accrues automatically alongside spent Labor Points during gathering, farming, logging, and crafting. Spent at the Blue Salt Brotherhood vendor for specialized high-yield seeds, rare tree saplings, livestock feed, and mineral water.
Kyrios Badges: Competitive PvP tokens. Awarded exclusively for participation in cross-server battlefields, including the 100v100 Golden Plains Battle (Halcyona) and gladiatorial arenas. Traded for unique combat mounts, high-tier titles, and specialized synthesis materials.
The Auction House and Accumulating Starter Capital
The auction house in ArcheAge is unified across server clusters. Demand and supply remain consistently massive, meaning any liquid trade commodity sells within minutes of listing.
As a fresh player, do not attempt to flip high-end crafted gear or speculate on volatile market items. The safest, most lucrative way to build your first war chest of several thousand gold coins is supplying veteran players with primary raw materials that high-level characters have no spare Labor Points to gather themselves:
- Raw Lumber and Logs: Always in monstrous demand for building ships, siege tanks, and player housing. Planting fast-growing timber plots (such as cedar and pine) provides a steady, reliable stream of raw profit.
- Raw Stone and Stone Bricks: Mined with a pickaxe at rocky quarries. Stone bricks are the sole ingredient used to manufacture Tax Certificates, without which no player can pay their weekly property taxes. Stone sells instantly every single day of the week.
- Trophy Coinpurses: Farming mobs in northern Auroria (the Western Hiram Mountains or Sungold Fields). Unlocking coinpurses requires Labor, but rewards raw gold, pure archeum dust, and valuable ore shards.
- Starter Trade Packs: Crafting simple regional specialties and hauling them short distances across peaceful starter provinces on your beginner donkey or public carriage.
Once you master the discipline of managing your Labor pool without letting energy go to waste, you will possess a rock-solid financial foundation. Next, it is time to choose your combat identity: in the following section, we break down the modular class builder and select the best starter builds for a smooth leveling run.
The crowning glory of combat in ArcheAge is absolute class freedom. You will never encounter the dreaded dilemma of «I picked the wrong class at character creation and wasted an entire month of playtime». The specialization architecture is modular: you construct your hero from three independent skill trees, with the freedom to completely wipe and rebuild your specialization at any nearby shrine in seconds.
Quick take: The game features 14 distinct skillsets. Combining any 3 trees unlocks one of more than 220 custom classes. You cannot ruin your character: resetting and leveling new trees is virtually free at any Goddess Nui shrine.
Races and Racial Passives: West vs East
Your choice of race dictates not only your cosmetic appearance and starter territory, but also your allegiance to one of the two warring continental factions. every race carries unique passive and active traits that provide subtle advantages across your adventures:
Nuia Alliance (Western Continent):
- Nuians: Noble humans of the West. Possess architectural efficiency (house and castle construction times are noticeably reduced) and receive the Blessing of Nui, temporarily buffing primary combat stats upon reviving at a statue.
- Elves: An ancient race hailing from the ancient canopies of Gweonid Forest. Capable of holding their breath underwater significantly longer than other races and swim with elevated base velocity. Essential for deep-sea shipwreck salvage.
- Dwarves: Sturdy engineers and stonemasons. Process raw masonry and mechanical components faster than any other people. Their signature active ability allows them to summon and pilot a heavy combat exoskeleton («Iron Colossus»), temporarily transforming into an armored frontline brawler.
Haranya Alliance (Eastern Continent):
- Harani: Industrious and pragmatic humans of the East. Gather wild herbs and fell timber faster than competing races, while their cast time when channeling Recall portals in the memory book is substantially shortened.
- Firran: Agile feline nomads. Scale trees and vertical ship rigging ropes with double standard climbing speed, while taking drastically reduced falling damage from extreme heights.
- Warborn: Towering warriors with demonic heritage. Transport heavy trade packs on their backs with higher base movement speed and can briefly tap into an intimidating Ravager metamorphosis, amplifying raw physical destructive impact.
The «3 of 14» Formula: How the Class Builder Functions
At character creation, you select your initial primary skillset. Upon reaching Level 7, you unlock your second tree, followed by your third tree at Level 15. The intersection of these three paths forms your named class archetype.
Players have access to 14 self-contained specializations:
- Battlerage: Heavy melee physical combat, gap-closing charges, trip knockdowns, and crushing strikes (Triple Slash, Precision Strike).
- Defense: Shield-based survivability, health pool amplification, physical blocks, and crowd-control immunities (Redoubt, Invincibility).
- Shadowplay: High mobility, stealth concealment, backstabs, and Bloodthirst point stacking (Rapid Strikes, Shadowsmite).
- Sorcery: High-impact elemental direct magic, including devastating Fireballs, Meteor Strikes, and Freezing Tracks.
- Archery: Long-range physical projectile combat, mobile kiting, and evasive disengages (Endless Arrows, Deadeye).
- Occultism: Dark crowd-control magic, ground-rupturing impaling spears, raven curses, and explosive death combos.
- Vitalism: Dedicated single-target and raid-wide restorative healing, resurrection, and defensive barrier shields (Antithesis, Mend).
- Songcraft: Melodic bardic performances, continuous party-wide movement and damage songs, enemy charm debuffs, and instant heals.
- Auramancy: Spatial teleports, magical damage conversion shields, crowd-control cleanses, and party mana utility.
- Witchcraft: Oppressive mental crowd control for PvP—deep sleep, disorienting fears, telekinetic bubble lifts, and buff purges.
- Malediction: Dark rapid-fire magic without cooldowns, fueled by accumulated Malice charges.
- Swiftblade: Ultra-fast dual-wield swordplay, slicing through targets with blinding blink strikes.
- Gunslinger: Tactical ranged firearm combat, directional fire lanes, and explosive area traps.
- Spelldance: Mobile healing and supportive utility built around rhythmic, kinetic momentum.
Top Tested Starter Archetypes for Beginners
While hundreds of theoretical combinations exist, many lack internal synergy. Beginners should anchor themselves to battle-tested archetypes offering intuitive rotations and forgiving defense:
The undisputed king of physical burst. Capable of deleting targets in milliseconds, initiating from stealth with instant charges, tripping opponents onto the turf, and executing lethal backstabs. Incredible for deleting questing mobs and winning 1v1 skirmishes.
Monstrous area-of-effect and burst damage. Songcraft anthems elevate your spell critical rates and cast speeds to astronomical levels, while Sorcery combos obliterate tightly packed clusters of enemies in seconds. Thrives in open-world raid battles.
The most elusive class in the game. Fires continuous arrow volleys while sprinting at full speed up to 28 meters from the target. If an enemy closes in, Primeval resets the engagement with backflips and instant teleports. Extremely safe for solo land navigation.
Impervious frontline endurance. Chewing through an Abolisher's active shield barriers or outpacing a Cleric's burst heals is borderline impossible for uncoordinated groups. These pillars are snapped up for dungeons and siege rosters the second recruitment opens.
Combo Synergies: How to Deal Triple Damage
Mindlessly clicking illuminated buttons is useless in ArcheAge. Real damage potential is unlocked strictly through status effect chains (Combos). Every primary ability inflicts a distinct condition (Slow, Bleed, Snare, Vulnerability), and following up with the correct secondary skill against that status deals massive amplified critical damage.
Quick take: A grounded target is a dead target. The foundational combo mechanic across both PvP and PvE centers on tripping your opponent (Knockdown), leaving them utterly helpless and primed for critical damage.
Core examples of foundational synergy chains:
- Charge + Triple Slash (Melee): Activating Charge snares the opponent for 3 seconds; striking a snared target with the third strike of Triple Slash guarantees a trip knockdown, grounding them for several seconds.
- Freezing Arrow + Fireball (Mage): Chilling a target inflicts deep frostbite, causing your follow-up Fireball to trigger a thermal detonation dealing massive amplified damage and burning the foe.
- Dissonance + Stun / Silence (Support/Control): Playing Dissonance inflicts Charmed status on an enemy, increasing all subsequent spell damage they take by +20% to +30% and extending crowd-control durations.
Ancestral Skills: Elemental Tweaks at Endgame
Hitting maximum level 55 is not the end of your skill evolution. The game unlocks the progression of Ancestral Levels spanning from rank 1 to 35+.
With each ancestral milestone, you unlock elemental modifications for core skillset abilities. You can infuse these baseline skills with primal elements:
- Flame: Enlarges blast radius or significantly increases raw, unmitigated damage output;
- Wave: Introduces powerful movement slows and attack-speed debuffs onto the target;
- Earth: Adds defense-penetrating attributes or bestows a temporary protective absorption shield;
- Mist: Eliminates cast times entirely, converting slow channeled nukes into instant casts usable while running;
- Chaos: Bestows unpredictable, erratic secondary procs upon each activation.
With your class selected and the logic of skill synergies mastered, you are ready to venture into the wild. In the next section, we chart the high-speed leveling corridor from level 1 to 55 and discover how to acquire complete endgame-ready gear without spending a single copper coin on the market.
Leveling your character in modern ArcheAge is completely unrecognizable from the punishing grind veteran players endured during the original 2014 launch. The developers have entirely eradicated the exhausting requirement to slaughter thousands of field boars. Today, the journey from level 1 to 55 is a high-speed narrative sprint that can be cleared across two relaxed evenings, equipping your character with battle-ready gear without spending a single dime.
Quick take: Level strictly along the green main story questline, completely ignoring yellow side quest icons. The story campaign supplies a complete set of «Story Equipment» that automatically upgrades and awakens as you level, transforming at level 55 directly into your endgame Hiram Gear.
The Green Story Questline: Express Lane to Level 55
The single most devastating blunder of a fresh beginner is attempting to «vacuum» every crossroads hamlet, accepting dozens of trivial yellow side quests to gather wild pumpkins or slay ten spiders. In modern ArcheAge, this is a colossal waste of dozens of precious hours.
Main story quests (designated by a distinctive green shield icon hovering over NPC heads) are balanced to escort you naturally along the geographical arc of your native continent. Every completed chapter showers you with hundreds of thousands of experience points, free recovery potions, spatial teleport scrolls, and, most importantly, the exclusive synthesis materials required to upgrade your starter armor. When followed with discipline, the journey from character creation to level 55 requires just 10 to 14 hours of comfortable play.
Story Equipment: Self-Upgrading Starter Gear
You never need to hoard gold to buy weapons from gear vendors or browse early-game auction listings. During the earliest chapters of the narrative, the game prompts you to select a free, personalized set of Story Equipment:
- Armor Type: Plate (maximum physical defense against melee warriors and archers), Leather (balanced hybrid defense, critical hit scaling, ideal for archers and melee skirmishers), or Cloth (high magic defense, reduced cast time, optimal for mages and healers).
- Weapons: Two-handed sword/greataxe (maximum burst damage for warriors), dual-wield blades (elevated attack speed), staff (for mages), healing club/greatclub (for dedicated healers), defensive shield (for frontline tanks), alongside mandatory ranged bows and musical instruments (flutes or lutes).
Alongside your weapons and armor, main story milestones continuously reward you with Story Infusions and Story Awakening Scrolls. The upgrade cycle is intuitive:
- Open your character inventory and click the circular button at the bottom of the window: «Gear Synthesis».
- Place the desired armor piece or weapon into the primary target slot, then feed the quest-awarded story infusions into the experience slots.
- Click synthesize: the experience bar fills to 100%, maxing out the item's current grade (Uncommon → Rare → Arcane → Heroic → Unique → Celestial).
- Switch over to the «Awakening» tab and apply your Story Awakening Scroll. The success chance is fixed at 100%! The item instantly advances to the next tier, drastically increasing its base damage and defensive stats.
By the climax of your continental storyline (quests running through Mistmerrow and into Auroria), your story gear reaches its absolute pinnacle. Your final story awakening scroll converts these items directly into T1 Hiram Guardian Gear. You enter the endgame fully armored and battle-ready.
The Explorer's Starter Toolkit: Mount, Glider, and Memory Book
In parallel with your gear progression, the narrative supplies you with three indispensable instruments for traversing the world:
Quick take: You unlock your first combat mount and personal glider completely free by levels 15–20. Never discard your starter glider—it upgrades progressively at any carpentry workbench!
Combat Mount: The mount questline opens around level 10. You receive an infant cub (a foal for Nuians, an elk calf for Elves, a snowlion cub for Firran). Place the cub onto the grass, hydrate it with water drawn from a nearby well, feed it a medicinal root, and brush its coat. Within three minutes, it matures into an adult rideable steed. Immediately visit the stablehand vendor to purchase starter barding (saddle, leg guards, and mask) to boost its movement speed.
Experimental Glider: Deployable wings worn on your back, allowing you to leap from mountain cliffs and castle ramparts to soar across zones. As you complete regional quests, you receive blueprints for the carpentry workbench: your Experimental Glider upgrades into the Improved Glider, followed by the Enhanced Glider, and culminates in the Biplane Glider, equipped with an active rocket booster for vertical ascension.
Memory Book (Traveler's Atlas): Every settlement features a spatial beacon or roaring campfire. Approaching it automatically records the geographic coordinate into your permanent teleport atlas. To warp, you consume Hereafter Stones (crafted from raw stone at any masonry bench or purchased directly from general merchants).
World Zone States: Peace, Danger, and the War Phase
As you roam the continents, always pay close attention to the zone status indicator nestled in the upper-right corner of your screen. All territories fall into two legal categories:
- Peaceful Zones: Starter provinces across each continent (up to level 30). Open-world PvP is entirely disabled. Hostile alliance members cannot initiate attacks against you, and NPC road guards instantly obliterate transgressors. The ideal environment for stress-free leveling.
- Contested Zones (Disputed Lands): Mid- and high-level provinces (such as Halcyona, Hellswamp, Sanddeep, Hasla, and Rookborne Basin). These regions follow a dynamic conflict cycle.
The contested cycle functions like clockwork:
- Danger Levels 1 to 5: Tension builds as players slay monsters and engage in skirmishes. Higher danger levels grant escalating bonuses to item drop rates.
- War Phase: The zone erupts into active war for 1 to 2 hours. Slaying enemy faction members awards valuable Honor Points. Travel with utmost caution: open season is declared on major thoroughfares. If your gear is still fragile, keep your finger over stealth or travel high along mountain ridges via glider.
- Peace (Truce): Following the conclusion of war, a mandatory two-hour truce descends upon the province. No player can draw weapons against another. This represents the golden window for hauling regional trade packs and turning in quests without fear of ambush.
Reaching Level 55 and Unlocking Ancestral Ranks
The moment your level 55 experience bar reaches 100%, the game congratulates you on conquering the standard level cap and directs you to cross the open sea to Auroria.
In territories such as the Ruins of Hariharalaya and the Hiram Mountains, faction elders unlock your Ancestral Levels. Unlocking your first ancestral rank requires only a brief introductory dialogue and a button press. A radiant golden wing sigil appears above your character's nameplate, and your experience bar begins soaking up millions of ancestral XP, paving the way for elemental skill customization.
You have officially entered the endgame arena. Your starter story gear has served its purpose and stands transformed into baseline Hiram armor. In the next section, we explore the core progression engine of the game: synthesizing, rerolling, and awakening your Hiram Gear to mythical power.
The gear progression system in modern ArcheAge has undergone extensive structural overhauls, culminating in a transparent, deterministic synthesis pipeline. The punishing Korean RNG of the past—where a failed regrade attempt could permanently shatter a legendary weapon into worthless dust—has been entirely eradicated. Your equipment grows alongside your character, absorbing experience with zero risk of destruction as it advances toward mythical power.
Quick take: For every fresh adventurer, there is only one correct path: Hiram Gear. It is 100% free, earned naturally through Auroria daily quests and narrative progression, and upgraded through deterministic synthesis from Tier 1 up to Tier 5.
Gear Architecture: Why Hiram is the Supreme Beginner Choice
Three distinct equipment lineages coexist within the endgame landscape of ArcheAge:
- Hiram Gear: Accessible to every player without monetary barriers. Awarded directly from the main story campaign and expanded through Auroria daily quests. Upgraded by infusing specialized experience stones. Boasts exceptional combat parameters, zero real-money cost, and steady, guaranteed progression.
- Erenor Gear: The pinnacle of artisanal craftsmanship. Crafted exclusively by master armorers and weaponsmiths using astronomically rare materials. Outfitting a full Erenor kit requires hundreds of thousands of gold. This realm is strictly reserved for hardcore guild leadership and elite spenders.
- Dungeon & Instance Gear (Abyssal Library / Garden of the Gods): Acquired directly from dungeon and raid bosses. Offers powerful set bonuses, yet remains heavily gated behind coordinated raid groups and lacks the versatile secondary stat customization native to Hiram armor.
The verdict is indisputable: do not look at Erenor until you have spent months mastering the game. Your overarching priority for your first six months is assembling and steadily polishing a full Hiram kit.
Tier Hierarchy: The Evolution from T1 to T5
Hiram weapons and armor evolve across five distinct technological tiers (T1–T5):
Quick take: You feed experience infusions into an item until it reaches the maximum level of its current tier, then apply an Awakening Scroll. The item advances to the next tier, escalating its base damage, defense, and stat limits.
- T1 — Hiram Guardian Gear: The starter tier, inherited seamlessly from your level 55 main story questline.
- T2 — Awakened Hiram Guardian Gear: Awakened using standard Hiram Awakening Scrolls. The baseline threshold for efficient open-world farming.
- T3 — Radiant Hiram Guardian Gear: Awakened with Radiant Hiram Awakening Scrolls. Expands gem sockets for advanced lunagems and elevates your gear grade to Epic and Legendary tiers.
- T4 — Brilliant Hiram Guardian Gear: Awakened through Brilliant Hiram Awakening Scrolls obtained in the Eastern Hiram Mountains. Delivers substantial battle power suitable for cross-server faction conflicts.
- T5 — Glorious Hiram Guardian Gear: The ultimate synthesis tier, demanding elite materials from high-level Auroria frontiers and the Garden of the Gods. Rivals top-tier crafted armaments in sheer combat performance.
The Synthesis Engine: Hiram Infusions, Experience, and Resource Costs
Gear progression operates directly through the embedded synthesis window inside your inventory. The primary fuel driving your equipment forward is Hiram Infusions.
Hiram Infusions are awarded primarily through daily quest loops across key Auroria territories: Western Hiram Mountains, Eastern Hiram Mountains, Sungold Fields, Calmlands, and Marcala. Every evening, massive public raid groups (often termed «Hiram Trains» or «Dailies Raids») sweep across these zones, enabling fresh characters to complete all kill quests in minutes under the protection of geared veterans.
Stat Optimization: Perfecting Your Secondary Rolls
Every piece of Hiram equipment rolls with exactly three attributes: one primary stat and two secondary modifiers. Unlike older game versions, these stats are not locked into permanent dead-ends; you can customize and reroll them!
Each time an item advances to a higher quality grade during synthesis, the system grants you one free stat replacement attempt. If your free rerolls are exhausted and you have not obtained your desired stat, you can use specialized items called Serendipity Stones or Hiram Reroll Scrolls (obtained via guild prestige shops, Honor merchants, and seasonal events).
Optimal stat templates for primary combat archetypes:
- Melee DPS Weapons: Strength (primary) + Melee Critical Rate + Melee Critical Damage (or Melee Defense Penetration).
- Ranged Archer Weapons: Agility (primary) + Ranged Critical Rate + Ranged Critical Damage (or Ranged Defense Penetration).
- Magic DPS Weapons: Intelligence (primary) + Magic Critical Rate + Magic Critical Damage (or Magic Defense Penetration).
- Healer Weapons: Spirit (primary) + Healing Critical Rate + Healing Critical Bonus.
- All Armor Pieces (Armor Slots): Primary Class Attribute + Toughness (PvP damage reduction) + Resilience (Crit damage reduction). This exact defensive pairing prevents your character from being instantly vaporized during open-world skirmishes.
Awakening: Success Rates and Crystallization Protection
Once an item caps its experience bar at 100% on its current tier, further synthesis is locked until you transition it to the next tier via the «Awakening» interface tab.
Baseline awakening success probabilities generally hover between 10% and 25%. Do not let these modest percentages discourage you! ArcheAge incorporates a cumulative pity system: each failed attempt permanently adds a +5% success bonus to all subsequent attempts on that item. With persistence, awakening is a mathematical inevitability.
To accelerate progression, you can insert a Hiram Feather into the awakening window to boost base odds. If an attempt fails and the item incurs the «Crystallized» condition, do not panic: the item does not break, its stats remain entirely intact, and the crystallized debuff is instantly cleared using an inexpensive Decrystallization Scroll purchased from any general merchant.
Lunagems and Lunafrosts: Socketing Your Battle Power
The crowning touch of any competitive build is socketing your weapon and armor sockets:
Quick take: Modern Honor-based Lunagems never break or shatter upon insertion. You can safely fill sockets sequentially as you accumulate currency without risking prior gems.
- Lunagems: Purchased directly from the Honor Points shop and upgraded progressively from T1 to T3. Socket Critical Damage or Defense Penetration into primary weapons; socket Toughness and Resilience into chest and leg guards; socket Movement Speed gems into boots.
- Lunafrosts: Permanent enchantments applied directly across each armor and weapon piece. Apply a 3% flat damage reduction frost to your cuirass, a critical hit boost to your gloves, and active skill-damage amplifications to your weapons.
With a properly tuned Hiram kit, your adventurer is equipped to stand tall in arena combat and high-end faction raids. However, financing daily synthesis and socketing gems demands a reliable stream of gold. In the next section, we venture into the agricultural heart of the sandbox: claiming land, placing scarecrow farms, and mastering the tradecraft of the Blue Salt Brotherhood.
Land ownership in ArcheAge is not merely a charming diversion between dungeon runs; it serves as the beating heart of the entire sandbox economy. This is where the raw materials for top-tier gear crafting, alchemical elixirs, siege weaponry, and regional trade commodities originate. The ability to claim a physical, permanent plot of land in the seamless open world without a single loading screen transforms humble farmers into formidable commercial tycoons.
Quick take: You unlock your first Small Scarecrow (8x8), Pack Donkey, Large Scarecrow (16x16), and the construction blueprints for your first trade cart completely free through the light-blue questline of the Blue Salt Brotherhood.
The Blue Salt Brotherhood: Your Tradesman Academy
Around levels 20 to 30 while progressing through your continental storyline, you will encounter NPCs marked with distinctive cyan quest shields. These are agents of the Blue Salt Brotherhood—the worldwide fraternity of artisans, architects, agronomists, and merchants.
This questline systematically tutors you through every foundational tradecraft mechanic:
- Small Scarecrow (8x8): Your initial proving ground. Awarded for cultivating your first seed crops and hydrating garden beds. Accommodates several small trees or a few dozen plants under impenetrable legal protection.
- Pack Donkey: The premier early-game transport mount for traders. Unlike warhorses, the donkey maintains respectable overland movement speed when burdened by a heavy trade pack strapped to its saddle. Dangle a carrot on a stick ahead of its nose, and it breaks into an eager sprint.
- Large Pumpkin Head Scarecrow (16x16): A full-scale commercial farm. Accommodates dozens of dense crop beds, expansive orchards, livestock enclosures, and personal crafting stations.
- Farm Cart: The grand finale of the apprentice storyline awards the blueprints and base components to construct your first motorized four-wheeled vehicle, engineered to transport multiple trade packs simultaneously.
Real Estate Mechanics: Claiming Land, Taxes, and Demolition
In ArcheAge, you cannot arbitrarily drive fence stakes into a city square or pitch a tent inside a dungeon. Construction is restricted to expansive Residential Areas, prominently designated on the world map by cottage icons.
The staking process is intuitive: withdraw the design schematic from your bag, navigate into an open clearing within a designated housing zone, right-click the blueprint, and rotate the property boundary with your mouse wheel. The plot boundary projects as a glowing border. When the boundary turns solid white, confirm placement and drive the foundation stakes into the earth. The land is legally yours.
Quick take: Every piece of real estate incurs a recurring weekly tax paid via Tax Certificates. If your taxes fall delinquent for 14 consecutive days, your scarecrow collapses into demolition status, allowing any passing player to claim the vacated ground.
Land taxation principles every landowner must memorize:
- Crafting Tax Certificates: Certificates can be manufactured directly at your personal scarecrow or at spatial memory beacons. Creation requires only Labor Points (300 LP per batch), demanding zero gold expenditure.
- Progressive Land Monopoly Tax: Holding up to two properties incurs baseline standard taxation. However, placing a third building activates a steep progressive surcharge, multiplying the maintenance cost of each subsequent property exponentially to discourage hoarding.
- Land Rush Demolitions: When a property enters tax default, a visible public demolition countdown displays to the exact second. Dozens of eager landless players assemble at the site. The instant the timer expires and the structure crumbles, the quickest player to plant a fresh blueprint secures the territory.
Architectural Variety: From Humble Plots to Stately Manors
Beyond standard scarecrows, the commercial paradise of Mirage Isle sells dozens of architectural schematics in exchange for Gilda Stars:
- Thatched Farmhouse (24x24): The universal favorite among dedicated agronomists. Alongside comfortable domestic quarters, the foundation features integrated hydroponic planters (enabling mass-planting hundreds of seeds with a single click), a freshwater well, and a basement mining vein that regularly yields rare gems and metals. Can later be upgraded into specialized harvester laboratories.
- Stilt Bungalows and Underwater Farms: Erected on ocean shallows and coastal reefs. Used to cultivate pearls, delicate sea corals, and kelp necessary for crafting naval diving equipment, breathing apparatuses, and specialized ship components.
- Two-Story Luxury Manors: Majestic dwellings suited for housing dozens of storage chests, merchant workstations, and ornate royal beds. Resting in a royal bed restores 150 to 200 Labor Points every 24 hours.
Agronomy and Animal Husbandry: Climates and Rare Procs
All crops, timber trees, and domestic livestock adhere strictly to regional environmental climates: Temperate, Tropical, Arid, and Arctic.
Quick take: Cultivating crops within their native climate zone slashes their maturation timers by 30% to 40%. Bananas in the tropics ripen within two hours, while languishing for half a day in frigid climates.
In animal husbandry, diligent upkeep is paramount. Dairy cows yield fresh milk, yaks supply thick wool, and pigs provide raw meat. Neglecting to feed animals specialized combined feed causes them to fall ill, requiring expensive Blue Salt tonic remedies to prevent starvation and death.
Thunderstruck Tree: The legendary jackpot resource of ArcheAge. Whenever a timber tree transitions between growth phases, there exists a tiny mathematical probability (approximately 1%) that a bolt of lightning strikes the trunk. The scorched bark transforms into a Thunderstruck Tree. This is among the costliest commodities in the game, required for constructing tractor engines, high-speed sports cars, and naval submersibles. Veteran farmers cultivate sprawling plantations of pines and cedars specifically to harvest lightning strikes.
Playing Without Patron: Public Nurseries and Secret Farms
If you lack an active Patron subscription, placing permanent land in residential housing zones is legally restricted. However, this does not bar you from farming:
Public Protected Nurseries: Specialized municipal plots guarded by Blue Salt sentinels in early leveling territories. You can plant a limited quota of crops or juvenile poultry. Your plantings enjoy absolute theft immunity for 24 hours, though space is strictly limited.
Hidden Secret Farms: The romantic, adrenaline-fueled extreme pastime of ArcheAge. Adventurers take wing on gliders to scale inaccessible alpine peaks, navigate vertical ocean ravines, or vanish into deep wilderness at the map perimeter to plant hundreds of secret pine groves or ginseng patches.
There are no NPC guards and zero legal protections here. Any wandering scout can harvest your entire forest and pocket the profit. However, doing so leaves glowing purple footprint indicators of theft upon the earth. Witnesses can collect these crime clues to report the perpetrator to the criminal justice system, sending the thief before a jury of real players.
Once your harvest is gathered and your barns are overflowing, it is time to convert raw produce into heaps of gold. In the next section, we explore the circulatory system of world trade: transporting regional trade packs via heavy farm haulers and merchant schooners.
Commerce and regional trade in ArcheAge is far removed from the dry menu shuffling common to traditional MMOs; it is a full-scale logistical military operation. Commodities possess physical weight, occupy the cloak slot on your character's back, and tempt opportunistic bandits from across the entire server. Transporting trade packs is one of the most lucrative and thrilling ways to amass an in-game fortune, uniting long-haul truckers on rumbling farm haulers with intrepid captains commanding trade schooners across hostile waters.
Quick take: You manufacture a Trade Pack at a crafting station in one region and haul it to a Trade Outpost in another. The longer the journey and the deadlier the terrain, the higher your reward in raw gold or scarce Charcoal Stabilizers.
Anatomy of a Trade Pack: Transportation Rules and Risks
You cannot simply pack twenty crates of commodities into your backpack. A trade pack is a bulky, physical crate strapped firmly to your character's spine:
Primary commodity tiers circulating through the economy:
- Standard Regional Specialties: Fabricated at municipal crafting stations from local agricultural harvests (such as bananas, grapes, or turmeric) combined with an inexpensive Quality Certificate purchased from general merchants.
- Aging Larders (Cheese, Honey, Salve): Placed directly onto your personal 16x16 or 24x24 scarecrow plot. They mature over 2 to 3 real-world days, evolving into premium aged packs that sell for up to double the payout of standard commodities.
- Community Center Goods: Crafted at specialized stations within provincial Community Centers that have reached Rank 3 development.
- Cargo Packs: Purchased directly from coastal trade outposts for overseas export across international shipping lanes.
Inland Overland Logistics: The Road of the Hauler
For beginners, the safest and most consistent pathway to wealth is overland freight within your home continent, terminating at regional Trade Outposts.
The cardinal rule of commerce is simple: distance dictates profit. If you produce a pack in Solzreed Peninsula and deliver it to the outpost in that exact same territory, your payout will be negligible. However, if you load commodities high in the alpine forests of Gweonid and haul them down across multiple provinces to the coast of Solzreed or Two Crowns, the delivery generates a substantial heap of pure gold.
Quick take: Across peaceful continental territories, faction members cannot attack your vehicle. To prevent hijackers from seizing your driver's seat, always toggle «Owner's Mark» on your vehicle action bar.
Evolution of the land transportation fleet:
- Pack Donkey: The entry-level milestone. Carries one pack on its saddle at running speed, spurred forward by dangling a carrot on a fishing rod. You can also ride public scheduled stagecoaches and airships that travel between major metropolitan hubs on clockwork timetables.
- Farm Cart: Features 2 cargo crates in the bed + 1 pack worn on the driver's back (3 packs total). The ultimate beginner upgrade unlocked via the Blue Salt Brotherhood questline.
- Farm Wagon: Upgrades capacity to 4 cargo crates + 1 pack on your back (5 packs total).
- Farm Hauler: The heavy commercial workhorse boasting 6 cargo crates + 1 on your back (7 packs total). Fueling the vehicle with Eco-Friendly Fuel (refined from livestock manure) grants sustained afterburner speed boosts to outrun highway ambushes.
Transoceanic Maritime Commerce: Schooners and Charcoal Stabilizers
Domestic markets provide gold, but they cannot supply the rarest industrial reagents. High-tier craftsmanship demands overseas maritime export:
When you ship trade cargo across the ocean from the Western to the Eastern continent (or vice versa), or unload goods at the lawless sanctuary of Freedich Island in the center of the ocean, the outpost pays not in gold, but in precious Charcoal Stabilizers and Gilda Stars.
The undisputed monarch of sea trade is the Merchant Schooner. Its blueprint is purchased on Mirage Isle for 400 Gilda Stars. The cargo hold houses 20 stationary pack crates, flanked by 2 additional stern crates and packs carried on crew backpacks. A single successful transoceanic voyage secures a staggering financial jackpot.
However, neutral waters are treacherous. Pirate galleons patrol radar corridors, and mercenary gankers lurk outside harbor outposts. For this reason, sea caravans typically depart under cover of darkness, escorted by guild warships, or timed precisely during coastal regional truces.
Dynamic Supply and Demand: Mastering Market Fluctuations
ArcheAge's economic model is governed by dynamic supply and demand curves. The maximum delivery baseline rate for any commodity is capped at 130% of its nominal value.
If hundreds of players grow complacent and flood the market with the exact same easy-to-run specialty, the outpost warehouse overflows. The payout rate plunges rapidly—from 130% down to 110%, 90%, and eventually into catastrophic 50% to 70% margins where running the route results in net financial loss.
Quick take: Before loading your hauler, press Shift + O. This hotkey opens the real-time Trade Price window, displaying live payout percentages for every commodity across every outpost on both continents.
Astute merchants never transport what the masses are hauling. If cheese or fruit jelly rates crash, pivot toward larders from distant territories or hold your inventory in personal scarecrows until outpost reserves drain and rates bounce back to the coveted 130% ceiling.
With your inland routes secured and gold flowing steadily into your vault, it is time to set sail and confront the open ocean. In the next section, we explore naval combat, custom warship engineering, and hunting the legendary ocean terror—the Kraken.
Seafaring in ArcheAge stands as the undisputed zenith of naval sandbox gameplay across the entire MMORPG genre. Water is not treated as a flat static texture coated with blue shaders, but as a living, tempestuous natural element governed by realistic wave mechanics, vessel momentum, and ocean currents. Ocean voyages unite the romance of grand geographic discovery with the adrenaline of pirate boardings and thunderous fleet battles between towering multi-deck warships.
Quick take: You can launch your very first high-speed Harpoon Clipper within your first week of play for just 50 Gilda Stars. It serves as your personal gateway to discovering ocean treasure troves and mastering naval skirmishes.
Naval Hydrodynamics: Why ArcheAge's Ocean is Legendary
The CryEngine 3 architecture equips the ocean with authentic hydrodynamics. Ships obey realistic physical principles:
Every vessel features structural hull integrity. Colliding with shallow coastal reefs at full speed or absorbing broadside cannon barrages tears breaches in your hull, causing the ship to lose buoyancy. If durability drops to zero, the vessel splits apart and sinks gracefully to the ocean floor.
A sunken vessel is never permanently lost. The wreck leaves floating debris marking the disaster site. The captain can restore the ship at any coastal lighthouse keeper by offering an inexpensive pouch of Shatigon's Sand.
Vessel Tier List: From Humble Skiffs to the Black Pearl
The naval registry offers vessels tailored for every maritime pursuit, from solitary sport fishing to sovereign naval warfare:
An indispensable must-have for every newcomer. Lightweight, agile, and blistering fast. Equipped with a bow-mounted swivel harpoon. The harpoon can grapple enemy hulls for boarding, reel your vessel onto dry land, or scale coastal cliffs to bypass hostile naval blockades.
The heavy three-masted flagship of battle squadrons (the Nuian Eznan Cutter or Haranyan Lutesong Junk). Carries 8 heavy broadside cannons, a radar station to detect targets through dense fog, onboard diving gear, and a crow's nest atop the mainmast for panoramic scouting.
The ultimate craft for dedicated anglers. Features an onboard sonar display to locate deep-sea fish schools, a livewell holding tank for hundreds of kilograms of small fish, and three heavy stern crane hooks designed to hoist trophy marlins, sailfish, and tuna weighing up to 100 kg.
Elite black-hulled warships armored with rare metal plating, possessing unrivaled top speeds and overwhelming broadside firepower. Assembling the Black Pearl design from scattered sea chart fragments is a prestigious long-term campaign undertaken by top guild alliances.
Drydock Customization and Shipwright Upgrades
A newly purchased ship design represents merely an initial chassis. At any coastal shipyard, you can overhaul and customize every component of your vessel:
- Sails: Square sails maximize downwind speed records; lateen sails offer superior agility and rapid turning within tight ocean inlets. All sails can be upgraded with shipwright scrolls up to Mythic grades.
- Cannons: High-angle long-range cannons bombard targets across immense distances; naval shotguns shred enemy boarding parties with grapeshot at point-blank range; heavy siege mortars pulverize coastal castle ramparts.
- Figureheads: Dragon figureheads project streams of liquid fire to incinerate enemy sails; reinforced ramming prows amplify collision burst damage upon impact; scarecrow figureheads trigger temporary engine superchargers.
- Radars and Rudders: Advanced navigational radars detect distant hulls miles away, projecting enemy icons onto your minimap long before visual contact occurs.
Naval Warfare and Boarding Operations
Combat on the open sea demands flawless crew coordination. Aboard a battle galleon, every crew member performs a dedicated role:
Quick take: The captain grips the helm and maneuvers the vessel. Gunners load heavy iron shot and lead their firing arcs over surging ocean crests. Harpooners lock enemy hulls with grapple cables, while glider marines launch from the rigging to storm the enemy deck.
Once you eliminate the defending crew of an enemy galleon or trade schooner, the vessel falls temporarily under your control. You can plunder trade packs from its cargo hold, crack its supply crates, or scuttle the ship directly into the abyss.
Beneath the turbulent waves lies a thriving underwater ecosystem. Equipping an air-supply tank (Aqualung) and diving fins allows adventurers to explore deep ocean trenches. Hundreds of historical shipwrecks rest upon the seafloor, concealing valuable relic chests. Securing a recovery balloon to a sunken chest hoists the cargo to the surface, rewarding you with rare antiquities.
Lords of the Deep: Kraken, Leviathan, and Ghost Ships
The ocean expanse of ArcheAge is stalked by titanic world bosses whose multi-hour encounters assemble hundreds of naval combatants:
The Kraken: The iconic marine terror dominating the center of the Arcadian Sea. A gargantuan cephalopod whose tentacles dwarf ship masts, the Kraken can wrap its limbs around a combat galleon, snap the wooden hull in two, and drag the entire crew into a raging vortex. Slaying the beast demands dozens of coordinated warships. Victory rewards legendary sea armaments (Kraken's Tentacle, Wave Staff), an elite glider, and valuable trophy tentacles worth thousands of gold. The Kraken encounter remains a perpetual flashpoint between Nuia, Haranya, and Pirate coalitions.
Leviathan: A colossal armored sea serpent roaming the northern frigid ocean. The Leviathan raid represents the peak of naval fleet maneuvering: dozens of galleons tether the monster with heavy harpoon cables to restrict its dives while uninterrupted artillery barrages batter its plated scales.
Delphinad Ghost Ship: A cursed phantom vessel manned by an undead crew patrolling international shipping lanes. The phantom ship bombards passing merchant schooners with cursed spectral broadsides, dropping relic Delphinad treasure charts upon defeat.
Having conquered the ocean waves, you will inevitably confront the unforgiving laws of faction warfare. In the next section, we explore open-world PvP mechanics, northern castle sieges, the player jury justice system, and the rogue life of piracy.
The combat dynamics and social fabric of ArcheAge are fueled by a relentless clash of competing interests. There are no sanitized, hand-holding reservations where adventurers are walled off from consequence. You are free to walk the path of a law-abiding citizen, a guardian of the vulnerable, a ruthless betrayer of your own countrymen, or a bloodthirsty pirate of the high seas. However, every transgression must eventually be answered before an authentic court of your fellow players.
Quick take: Thefts and murders committed against your own faction accumulate crime karma. Accumulating 50 Crime Points flags your character as Wanted; upon death, you are remanded directly into the Jury Courtroom, where real players debate your guilt and sentence you to hours of authentic prison time.
The Justice System: Physical Clues, Player Juries, and Incarceration
ArcheAge features one of the most innovative and memorable legal mechanics in gaming history. Players can commit anti-social criminal offenses:
- Looting Secret Plantations: Chopping down wild trees or harvesting unprotected gardens planted by other players leaves glowing purple footprints of theft behind.
- Assaulting Faction Allies (Player Killing): Toggling bloodlust mode via Ctrl + F allows you to attack members of your own alliance. Slashing down a countryman leaves pools of bright crimson bloodstains.
Any passing player can approach these clues, press their interaction key, and «report the crime». The evidence is logged into your permanent criminal record, saddling your character with Crime Points and Infamy.
How an authentic player jury trial unfolds:
- The jury is composed of 5 real players (level 50+) who queued for civic duty at municipal courthouse clerks.
- Jurors review the defendant's detailed rap sheet: how many pine groves they clear-cut, how many allies they backstabbed, and how many stolen trade packs they fenced.
- The defendant has the floor in public trial chat to make a closing plea (you can beg for leniency, feign accidental keyboard slips, or brazenly taunt the bench).
- Jurors cast their votes: «Innocent» or «Guilty». A guilty verdict sees the bailiff march your character off to prison for a sentence spanning 15 minutes up to several real-world hours.
Inside the prison compound, all combat abilities and gear stats are neutralized. You can serve your time breaking wooden crates in the exercise yard, kicking soccer balls with fellow convicts, or… engineering a prison escape! By unearthing a hidden spoon, you can dig a secret crawlspace beneath the fortress walls and flee through the sewer conduits. However, you remain under the fugitive debuff until your sentence clock fully expires.
The Pirate Faction: Life Outside the Law
If you consciously commit to a life of outlawry and amass 3,000 Infamy Points, your native continent permanently exiles you from the Nuian Alliance or Haranyan Coalition. You officially defect to the Pirate Faction.
Quick take: Pirates function as a sovereign third faction based out of Growlgate Isle. Both continental alliances view pirates as kill-on-sight hostiles, yet pirates enjoy unique ocean combat buffs and total freedom to plunder the seas.
A pirate cannot casually stroll through continental metropolises; urban NPC sentinels attack on sight. Yet the pirate sanctuary possesses its own taverns, contraband dealers, and raid bosses (Captain Rangora and Morpheus the Forsaken). Should you ever desire to return to civilian life, you can undertake arduous penitence quests scrubbing municipal floors and donating commodities, or purchase costly draughts of forgiveness.
Massive Faction Skirmishes: Armies at War
Every day across fixed global server schedules, the war horns sound, summoning hundreds of fighters to cross-server battlegrounds:
- Golden Plains Battle (Halcyona): A monumental clash of two sovereign armies fielding 100 warriors per side. Combatants storm forward camps, construct defensive artillery, operate armored siege tanks, escort vanguard shock troops, and protect their supreme supreme general. The battle is the primary source of Honor Points and Kyrios Badges.
- Mistmerrow: A fast-paced territorial skirmish focused on dominating ancient binding obelisks. The faction amassing the highest tower capture score claims victory.
- Eye of the Storm: A chaotic naval engagement encircling a floating celestial beacon in the ocean vortex. Fleets trade cannon fire while landing parties fight to extract volatile spark energy.
Castle Sieges and Faction Heroes
Endgame geopolitics unfolds across the northern continent of Auroria. Northern territories (Calmlands, Heedmar, Marcala, Nuimari) are sovereign domains where premier guilds erect colossal stone fortresses.
Every few weeks, Castle Sieges erupt. Attacking alliances unleash battering rams, scaling siege ladders, and heavy trebuchets to breach outer ramparts, while defenders pour molten fire from defensive towers. The guild holding sovereign territory collects gold taxes from all regional transactions and secures abundant mineral deposits.
Every month, server populations elect their Faction Heroes. The chosen champions receive magnificent golden cloaks granting immense stat augmentations, illustrious ceremonial weapons, and the authority to sound the faction rallying horn, instantly mobilizing armies across the server.
Solo Arenas: Honing Dueling Mastery
If you favor pure individual tactical execution over chaotic mass faction brawls, the instance portal offers competitive dueling arenas:
The Gladiator Arena (1v1) and Sparring Arena (3v3) allow duelists to refine combo timings, crowd-control rotations, and stance switches. In Equalized Arena modes, gear score disparities are completely stripped away—victory hinges purely on situational reflexes, knowledge of opposing classes, and disciplined break-free execution.
Having mastered the art of war, politics, and justice, one final puzzle remains: how do you structure your daily playtime efficiently without burning out or wasting weeks of progress? In our final section, we assemble the daily beginner loop and examine the most devastating beginner pitfalls.
The most daunting challenge in ArcheAge for any fresh player is not overcoming difficult monsters, but navigating the overwhelming abundance of available activities. When thrust into an expansive seamless world featuring dozens of professions, open-ocean naval expeditions, castle sieges, and agricultural empires, it is easy to scatter your focus and squander dozens of hours without tangible progress. Establishing disciplined priorities and mastering the daily gameplay loop will empower you to elevate your character at peak velocity while investing just 90 to 120 minutes of playtime per day.
Quick take: The core engine of rapid endgame progression rests on three pillars: the daily «Hiram Train» (Auroria daily raids for Hiram Infusions), the evening Golden Plains Battle for Honor Points, and diligent consumption of regenerating Labor Points.
The Optimal Beginner Daily Routine
To ensure your equipment steadily advances through synthesis tiers while your treasury accumulates gold, structure your daily gaming sessions around a disciplined operational rhythm:
- Labor Point Management (15 minutes): Upon logging in, immediately inspect your Labor pool. If it approaches the 5,000 cap, burn off the excess: harvest maturing crop beds on your scarecrow, refine raw raw commodities (such as timber or stone), or open coinpurses gathered during previous hunts. Do not forget to sleep in a residential bed to claim your daily bonus energy restoration.
- Auroria Daily Raids («Hiram Trains», 30 minutes): Every evening in faction chat, raid commanders assemble open public trains sweeping across the northern continent (Western Hiram Mountains, Eastern Hiram Mountains, and Sungold Fields). Join the raid squad, follow the leader's raid marker, and complete monster extermination objectives. In half an hour, you will amass hundreds of Hiram Infusions and stacks of awakening scrolls.
- Honor Rifts (20 minutes): Participate in scheduled world rift events—the Crimson Rift (CR) and Grimghast Rift (GR). These recurring public battles serve as the most dependable and effortless source of Honor Points required to purchase and upgrade your combat Lunagems.
- Cross-Server PvP Arenas (20–30 minutes): Always queue through the instance portal for the evening Golden Plains Battle (Halcyona). Even in defeat, participation guarantees a generous haul of Kyrios Badges and an abundant supply of Honor Points.
Guilds: Why Solo Play is Severely Handicapped
ArcheAge was deliberately engineered as an ultra-social sandbox ecosystem. Choosing to remain an isolated lone wolf voluntarily locks you out of half the endgame landscape:
Essential advantages provided by an active player community:
- The Prestige Guild Shop: Completing simple daily guild missions awards personal prestige currency, used to acquire exclusive combat mounts, tactical gliders, socketed gems, and direct spatial warp scrolls to allied guildmates.
- Naval Caravan Escorts: Venturing across the ocean with a fully laden Merchant Schooner alone is sheer financial suicide. Under the protective escort of a coordinated guild battle squadron, it becomes a joyous, highly profitable pleasure cruise.
- Raid Dungeons and Fortresses: Conquering demanding group dungeons (Mistsong Summit, Ipnysh Sanctuary) and fielding armies in Auroria castle sieges is possible strictly within the ranks of an organized guild organization.
Top 5 Fatal Beginner Pitfalls
Learn from the painful blunders of those who came before: these five mistakes ensnare nine out of ten newcomers, incinerating weeks of hard-earned progress:
Every single minute your character spends parked at maximum Labor capacity represents pure financial destruction. Labor must continuously be transformed into liquid gold, trade proficiency experience, or synthesized equipment.
Novices marvel at the peak stat ceilings of crafted Erenor armaments and attempt to craft a set from scratch, sinking into insurmountable debt. Focus exclusively on Hiram Gear—it costs zero real money and forgives early mistakes.
Constantly shuffling skillsets leaves you at level 55 with 14 unlocked trees, but none sufficiently leveled to unlock high-tier passives. Select 3 core disciplines and maximize them to cap before experimenting with off-meta variations.
Pumping millions of infusion XP into an item with opposing stats (such as Agility on a magic staff) is devastating. Always reroll optimal secondary attributes at early grades (T1–T2) when reroll costs are virtually non-existent!
Driving a freight hauler across continents only to arrive at an outpost whose demand rate has cratered to 60% is a rookie tragedy. Always inspect the live trade price window before loading cargo crates onto your transport.
Strategic Progression Roadmap: First 60 Days
Your definitive strategic roadmap navigating your first two months within the sandbox:
Quick take: Clear the story sprint during week one, achieve T3 Radiant Hiram within the first month, launch your personal ocean warship, and march confidently into sovereign faction warfare.
- Week 1 (The Narrative Sprint): Channel all playtime strictly into the green story questline. Attain level 55, collect your complete Story Equipment kit, mount, and Biplane Glider. Complete the Blue Salt Brotherhood questline: plant your Small and Large Scarecrows, and assemble your initial Farm Cart.
- Week 2 (Stabilization & Ancestral Rank 1): Unlock Ancestral Level 1. Execute the final story awakening to convert your gear into T1 Hiram Guardian equipment. Secure correct primary and secondary stats using free grade rerolls and Serendipity Stones. Join your first Auroria Hiram Train in the Western Hiram Mountains. Purchase your Harpoon Clipper schematic on Mirage Isle for 50 Gilda Stars and launch your first ship.
- Weeks 3–4 (Maturity & Progression): Awaken your armor into T2 Awakened and T3 Radiant Hiram Gear. Socket your initial equipment slots with Honor Lunagems. Join an active guild; participate routinely in the Golden Plains Battle and Crimson Rifts. Transition to exporting aged cheese larders for Charcoal Stabilizers to Freedich Island.
- Month 2 and Beyond (The Sovereign Endgame): Elevate Hiram weapons and armor to T4 Brilliant status, and upgrade Lunagems to T3 rank. Construct your personal Combat Galleon or Merchant Schooner. Deploy in grand ocean raids against the Kraken, participate in northern Auroria castle sieges, and venture deep into the mysteries of the Garden of the Gods.
ArcheAge is not an anxious race against time, but a magnificent grand adventure where every player carves their personal legacy across land and sea. Adhere to the principles in this guide, respect the sacred value of your Labor Points, dare to conquer the open ocean—and may favorable winds forever fill the sails of your flagship!