The Ultimate Frost Vortex Build Guide in Once Human
Building around the keyword Frost Vortex with the legendary assault rifles KAM - Abyss Glance and M416 - Silent Anabasis represents the gold standard of crowd control, massive area-of-effect damage, and safe tactical positioning in Once Human. While pure ballistic builds force marksmen to constantly line up weakspot shots against erratic monsters, and melee fighters risk lethal counterattacks from elite foes, a frost specialist freezes entire rooms in a single burst, draws mutants into crushing vortexes, and shreds bosses through an unbroken cascade of elemental frost damage ticks.
Quick Take: Frost Vortex is an area-of-effect status effect (Frost Elemental DMG) that generates a swirling vortex with a 4.5-meter radius lasting 4 seconds. It deals continuous damage every 0.5 seconds (and every 0.25 seconds when wielding KAM - Abyss Glance!) scaling from a baseline of 50% Psi Intensity. By default, vortex ticks cannot crit, cannot trigger weakspot bonuses, and suffer no range-based damage falloff. The build's true endgame power is unlocked by stacking Psi Intensity on armor, maintaining a strict 1:1 balance between Elemental DMG and Status DMG multipliers, and expanding the maximum number of concurrent active vortexes.
How Frost Vortex Works: Mechanics, Tick Rate & Damage Formula
Many newcomers to Once Human transition to frost weapons from standard ballistic setups and fall into a common pitfall: stacking weapon physical Attack and Critical Hit Rate. However, Frost Vortex operates strictly under the mechanics of elemental status damage, rendering traditional raw bullet attributes secondary.
To squeeze the highest possible DPS from your cryogenic arsenal and avoid misallocating valuable Starchrom on sub-optimal blueprints, keep the following foundational rules in mind:
- Vortex Radius and Crowd Control: Upon triggering, a pulsating cryogenic vortex spawns beneath the target with a 4.5-meter radius, persisting on the battlefield for exactly 4 seconds. Standard enemies caught within this zone suffer significant movement speed reduction and are pulled toward the vortex epicenter, making it an exceptional tool for locking down threatening mob swarms.
- Damage Scales with Psi Intensity, Not Weapon Attack: Each periodic vortex tick deals baseline Frost Elemental DMG equal to 50% of your total Psi Intensity. Your character's Psi Intensity is determined exclusively by the tier, enhancement level, and star rating of your equipped armor pieces (with the Mask and Gloves slots serving as the primary stat sources). Weapon physical Attack only affects the direct ballistic impact of fired rounds—it provides zero scaling to vortex tick damage.
- Tick Rate and Weapon Impact: Under baseline conditions, a vortex pulses every 0.5 seconds (yielding 8 damage ticks across its 4-second lifespan). However, the legendary assault rifle KAM - Abyss Glance features a built-in signature passive: +100% Frost Vortex damage frequency. With this weapon equipped, the tick interval is halved to 0.25 seconds (16 ticks per vortex duration!), effectively doubling boss melting speed.
- No Crits and Zero Distance Falloff: Periodic Frost Vortex damage ticks cannot trigger critical hits by default, nor do they benefit from hitting monster weakspots. Furthermore, vortex tick damage experiences no damage falloff over distance. Spawning a vortex at extreme sniper range deals the exact same devastating damage per tick as summoning one point-blank.
- Multiplicative Scaling Formula: The final damage of each tick is calculated through a multiplicative formula: base Psi Intensity scaling is multiplied by your total Elemental DMG (Frost DMG) bracket, then multiplied by your Status DMG bracket, and finally multiplied by any specific Frost Vortex final damage bonuses. Because Elemental and Status damage sit in separate multiplicative brackets, optimal DPS is achieved by balancing both stats in a clean 1:1 ratio rather than over-investing in just one.
- Active Vortex Cap: By default, only 1 active Frost Vortex generated by your weapon can exist on the field at a time. Spawning a new vortex before the previous one expires causes the older vortex to instantly dissipate. Overcoming this limitation requires the essential weapon mod Vortex Multiplier, which raises the cap to 2 concurrent vortexes, dramatically multiplying your burst and sustained output against stationary boss encounters.
Primary Weapons: KAM - Abyss Glance vs. M416 - Silent Anabasis
The arsenal in Once Human includes four distinct firearm blueprints built around the Frost Vortex mechanic. The two premier S-tier legendary (Gold) rifles can be acquired from the Wish Machine using Starchrom. Each supports a distinct, highly competitive combat style.
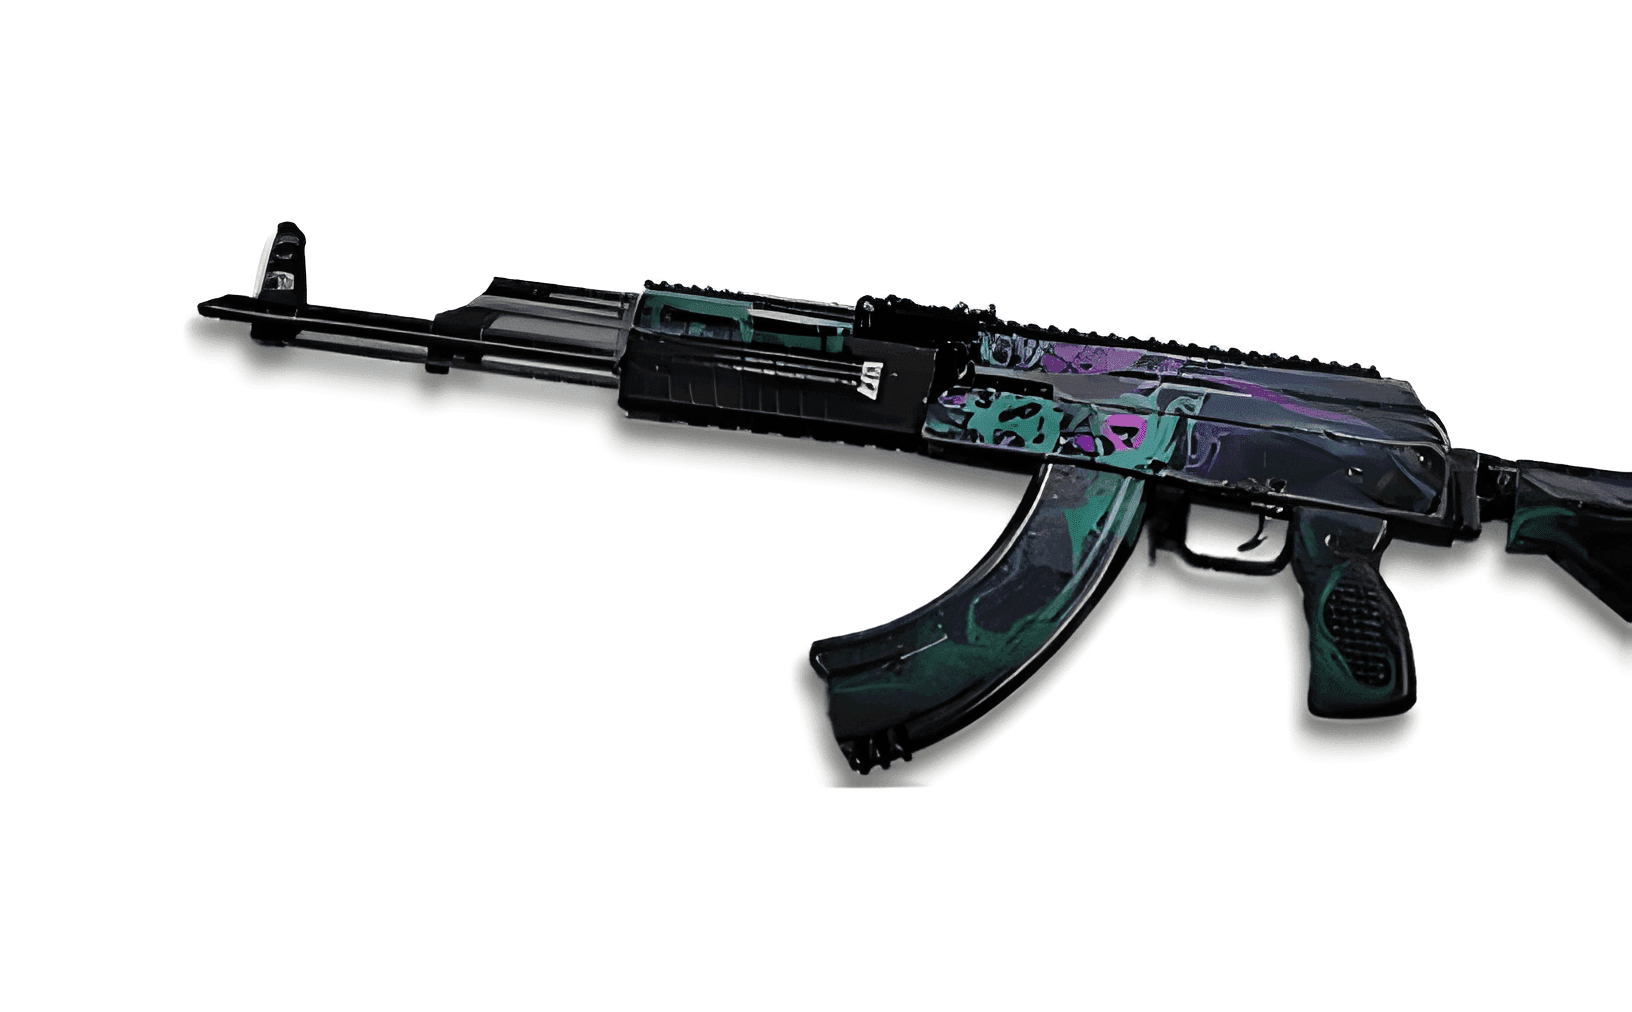
A legendary heavy assault rifle (Stranger brand, base magazine size of 40 rounds, 600 RPM fire rate, base stats: Crit Rate 6%, Weakspot DMG 55%, Crit DMG 30%). This is the undisputed meta weapon for maximum sustained single-target DPS and boss encounters:
- Bullet hits trigger a Frost Vortex with a baseline internal cooldown of 7 seconds (PvP damage against players is reduced by 30%).
- Infinite Vortex Reset: Every bullet hit with this weapon reduces the remaining cooldown of your Frost Vortex by 0.5 seconds. Under sustained automatic fire, the cooldown resets far faster than the vortex expiration timer, guaranteeing 100% vortex uptime on bosses!
- Stacking Damage Buff: Shooting enemies trapped inside an active vortex grants a stacking buff of +5% Frost Vortex final damage per hit (stacks up to 10 times, providing a massive +50% final vortex damage increase).
- Built-In Multipliers: The weapon passively provides +30% Frost Elemental DMG and an inherent +100% vortex damage frequency (halving the tick interval to 0.25 seconds).
Between its rapid cooldown resets and double tick frequency, KAM - Abyss Glance effortlessly siphons health pools from Monolith and dungeon bosses.
A legendary fast-firing assault rifle (Wanderer brand, base magazine size of 36 rounds, 750 RPM fire rate, base stats: Crit Rate 6%, Weakspot DMG 60%, Crit DMG 27%). It features an interactive tactical gameplay loop centered on detonating cryogenic structures:
- Bullet hits feature a chance to spawn a standard Frost Vortex at the target's location.
- Ice Crystal Generation: Sustained fire routinely constructs Ice Crystals on the battlefield (internal cooldown of 1.5 seconds). Crystals persist for up to 15 seconds; if left untouched, they shatter upon expiring for 100% Psi Intensity damage.
- Manual Bullet Detonation: Shifting your crosshair to shoot and shatter an Ice Crystal escalates its explosion damage to a devastating 300%–350% Psi Intensity area-of-effect blast!
- Frost Damage Amplification: The rifle grants a native +30% Frost Elemental DMG, and shattering crystals grants a stacking buff that further amplifies cold damage for 10–15 seconds.
Following engine balance updates, previous inconsistencies where the initial shattered crystal failed to award elemental stacks have been completely resolved. In the tight corridors of Securement Silos, shattering Ice Crystals obliterates entire elite packs in a split second.
An epic (Purple) submachine gun (Operator brand, blistering 1000 RPM fire rate, base stats: Crit Rate 10%, Weakspot DMG 45%, Crit DMG 30%). It operates via a critical-strike synergy loop:
- Every critical hit has a 30% chance to trigger a Frost Vortex.
- Ammo Refund Engine: Spawning a vortex immediately restores 20% of your magazine capacity directly from reserves, enabling extended full-auto firing sequences without frequent reloads.
- Passively increases Frost Vortex damage by +30%.
An exceptional budget-friendly firearm for seasonal starts and leveling stages before securing sufficient Starchrom for a gold weapon blueprint.
A legendary semi-automatic marksman rifle (Wanderer brand, base stats: Crit Rate 5%, Weakspot DMG 50%, Crit DMG 40%). Precision hits summon a Frost Vortex (5-second base cooldown, reduced by 1 second per subsequent hit) and fire piercing Ice Spikes that inflict heavy status damage along their flight path. Balance updates have refined Ice Spike mechanics, ensuring they reliably trigger helmet and mask mod synergies.
Secondary Weapons & Melee: Stat-Sticks, Debuffs & Utility
Because your primary rifle (KAM - Abyss Glance or M416 - Silent Anabasis) commands the bulk of active field time for clear and DPS, your sidearm and melee slots serve primarily as stat-sticks and utility triggers for high-value multiplicative debuffs.
| Slot | Weapon (EN / Role) | Rarity | Rotation Purpose & Exact Frost Vortex Synergy |
|---|---|---|---|
| Secondary Weapon | Recurve Crossbow | Epic (Purple) | #1 BiS Secondary Slot. Landing a single shot on an enemy weakspot prior to starting your primary firing rotation inflicts The Bull's Eye status, amplifying incoming damage to the target and granting +15% Critical Hit Rate for 10 seconds. When paired with the utility mod Vulnerability Amplifier, incoming damage vulnerability increases by an additional +8%. |
| Secondary (Alternative) | DE.50 - Wildfire | Epic (Purple) | A reliable handgun alternative for players who prefer sidearms over bows: a single body or weakspot shot applies The Bull's Eye for 10 seconds and reliably triggers Vulnerability Amplifier for +8% damage taken. |
| Melee Weapon | Frozen Northern Pike | Epic (Purple) | Dedicated Cryo Melee Weapon. An exotic frozen fish club: heavy melee strikes are guaranteed to summon a Frost Vortex (4-second cooldown) and freeze the target. Striking targets already trapped in a vortex restores 5% of missing HP! Additionally, holding the pike lowers your character's body temperature by 5°C, providing vital passive thermal regulation in The Way of Winter scenario. |
| Melee (Alternative) | Long Axe | Epic (Purple) | Performing a heavy power strike deploys a Fortress Warfare circle at your feet for 5 seconds. This grants super-armor against knockdowns and awards a temporary +20% Weapon DMG boost before switching back to your assault rifle. |
With our core weapon choices locked in, we move to the foundational layer of weapon customization: the modern calibration system and attachment selection required to maximize fire rate and vortex generation speed.
Weapon Calibration Overhaul 2026: How to Craft Firearms Correctly
Quick Take: The undisputed best calibration blueprint for both KAM - Abyss Glance and M416 - Silent Anabasis is Rapid Shot Style rolling an additional secondary attribute for Elemental DMG. Because Frost Vortex periodic ticks and Ice Crystal detonations scale exclusively off armor Psi Intensity, the calibration's -10% Attack penalty does not reduce your vortex damage output by a single point! In exchange, you gain +20% Fire Rate, enabling the KAM rifle to reset its 7-second vortex cooldown in just 1.15 seconds of sustained fire. Remember the golden rule of the 2026 calibration rework: calibration blueprints must be embedded at the exact moment of crafting on the workbench.
Before spending precious tungsten ingots, electronic parts, and crystals, it is essential to understand the comprehensive Calibration Overhaul introduced to Once Human. Outdated launch guides frequently advised crafting a base firearm first, upgrading its enhancement level from +1 to +10 at a workbench, and subsequently rolling calibration blueprints onto the finished gun. In the modern meta, developers completely overhauled this multi-step process to eliminate redundant grinding.
In the current live client, calibration blueprints are slotted directly during weapon fabrication inside a dedicated slot on the crafting interface of your Gear Workbench:
- Calibrations Cannot Be Replaced on Crafted Weapons: If you later uncover a superior golden calibration blueprint with flawless substats while clearing dungeons or opening high-tier crates, you cannot simply overwrite your existing rifle. To apply a new calibration style or secondary roll, you must craft a brand-new weapon from scratch at the workbench with the preferred blueprint inserted.
- Consolidated Calibration Parameters: Rather than rolling a chaotic pool of random attributes, modern calibration blueprints provide a guaranteed baseline bonus to Weapon Attack (scaling up to +50% on legendary gold blueprints) alongside one focused secondary attribute (such as bonus Elemental DMG or Status DMG).
- Disassembling Obsolete Blueprints: Sub-optimal or unused calibration blueprints can be dismantled at your Disassembly Bench into refinement materials. In update 3.1.1, convenient UI filters were added to sort blueprints by weapon class and firing style, streamlining inventory management.
Rapid Shot vs. Heavy Style: Why the Attack Penalty Does Not Affect Frost Vortex
Your choice of calibration blueprint defines weapon handling, reload cadence, armor set stack acceleration, and trigger frequency for cryogenic mechanics. For assault rifles tailored to Frost Vortex, several distinct styles exist:
| Calibration Style | Attribute Modifiers | Priority Substat | Optimal Weapon Synergy & Combat Role |
|---|---|---|---|
| Rapid Shot Style (#1 Meta Pick) | Fire Rate +20%, Magazine Capacity +15%, Stability -20%, Weapon Attack -10%. | Elemental DMG or Status DMG | The undisputed champion for KAM - Abyss Glance and M416 - Silent Anabasis. The core advantage lies in the damage formula: because both periodic vortex pulses (50% Psi Intensity) and Ice Crystal detonations (300%–350% Psi Intensity) calculate exclusively from armor Psi Intensity, the -10% physical Attack penalty has zero effect on your cryogenic DPS. Simultaneously, the +20% Fire Rate elevates the KAM rifle from 600 to 720 RPM, allowing you to fire the 14 rounds required to fully reset its 7-second cooldown in just 1.15 seconds. This guarantees unbroken 100% dual-vortex uptime when paired with the Vortex Multiplier mod! |
| Heavy Style (Extended Boss Comfort) | Magazine Capacity +50%..+75%, Weapon Attack +15%, Reload Speed -30%, minor movement speed penalty. | Elemental DMG | A reliable sustained-fire alternative for massive raid encounters (Forsaken Giant, Monolith bosses). It expands your rifle magazine to 65–75 rounds. Because the meta Shelterer Set sheds half its accumulated stacks whenever you reload, a giant magazine allows you to maintain unbroken continuous fire without forfeiting the maximum +38% Elemental DMG set bonus. |
| Assault Style (Balanced Standard) | Evenly balanced increases to Fire Rate and Magazine Capacity with zero penalties to Stability or Attack. | Elemental DMG | A comfortable middle-ground option for players who find the vertical and horizontal muzzle climb of the KAM assault rifle difficult to control during extended full-auto sprays. |
| Precision / Crit Style (Exclusive to KV-SBR "Icy Rain") | Critical Hit Rate +10%..+15%, Critical Damage +25%. | Crit Rate | Exclusively utilized when your primary firearm is the epic submachine gun KV-SBR - Icy Rain. Because its signature passive triggers a Frost Vortex with a 30% chance strictly upon landing a critical hit, stacking Crit Rate on your calibration blueprint is vital to sustaining vortex generation. |
Best Tactical Attachments & Weapon Accessories
The assault rifles KAM - Abyss Glance and M416 - Silent Anabasis display divergent recoil impulses: the heavy KAM rifle features pronounced vertical climb, whereas the rapid-firing M416 tends toward horizontal drift under continuous fire. Gold-tier weapon accessories, once unlocked via world exploration puzzles and mystical crates, permanently bind to your account and effortlessly offset calibration stability penalties:
| Attachment Slot | Recommended Module | Exact Combat Attributes & Vortex Value |
|---|---|---|
| Muzzle | Hammer Compensator or Large Muzzle Brake | #1 BiS Muzzle Slot. Delivers the highest overall boost to Stability and Accuracy. This accessory completely negates the -20% Stability penalty from Rapid Shot Style, turning the KAM rifle into a laser-focused firearm during prolonged sustained bursts. Discovered in mystical crates across the Red Sands region. |
| Optic | Compact Reflex Sight or Alpha Sight | Provides a noticeable boost to Accuracy and substantially accelerates Aim Down Sights (ADS) speed without cluttering peripheral vision. Because Frost Vortex tick damage does not rely on pinpoint precision against microscopic weakspots, an open reflex sight with a clean reticle is far more practical and agile than bulky high-magnification scopes. |
| Tactical | Angled Tactical Grip or Small Infrared Indicator | Significantly improves Stability under continuous automatic fire, increases hip-fire grouping, and accelerates reticle stabilization following combat rolls or rapid sprint repositions. |
| Magazine | Extended Rifle Mag or Drum Rifle Mag | Expands the base rifle magazine capacity from 36–40 rounds to 55–60 rounds. Combined with the Rapid Shot Style calibration bonus (+15% magazine size), this ensures ample ammunition to instantly refresh your vortex cooldown and detonate multiple Ice Crystals without being interrupted by lengthy reloads. |
Ammunition Selection: Standard Tungsten vs. Armor-Piercing (AP) Ammo
When running a high-tempo Frost Vortex build, ammunition consumption routinely reaches hundreds of rounds per dungeon run. Players frequently ask whether it is worth expending valuable Stardust Source on crafting armor-piercing ammunition when cryogenic status damage deals the vast majority of total output.
- For Daily Farming (90% of Gameplay) — Standard Tungsten Rifle Ammo: In Securement Silos, open-world clearing, and territorial purification defenses, standard Tier V tungsten rounds offer the best economic return. They are crafted in bulk using basic tungsten ingots, copper, and acid without consuming Stardust Source. Because Frost Vortex ticks scale from armor Psi Intensity, the difference in trash mob clear speed between standard and AP rounds is virtually unnoticeable. Always enable the Memetic perk Supplies Workbench: Ammo Factory to increase your crafting output by +50%.
- For High-Tier Monoliths & Raids — Tungsten AP Ammo: Against high-level bosses on Nightmare Manibus difficulty and within LEA Research Lab, direct bullet impacts from your KAM or M416 contribute a meaningful 15–20% of your total overall damage profile. Armor-piercing rounds not only boost this direct ballistic damage but also accelerate depleting boss stagger and posture bars. Craft them utilizing the specialized Memetic specialization Supplies Workbench: Anti-Armor, which enhances AP ammo yield by +30% while slashing fabrication time by 50%.
With our weaponry perfectly tuned through calibration, attachments, and ammo, we proceed to the foundation of our survivability and elemental scaling: selecting legendary armor pieces, gear set bonuses, and animal leather materials for crafting Tier V gear.
Key Armor Selection: Snowline Elite Vest vs. Covert Walker vs. Snow Camo Gloves
Quick Take: In Once Human, your loadout permits exactly one Key Armor piece with a game-changing exotic perk. For maximum single-target and boss DPS, the undisputed gold standard is the legendary mask Snowline Elite Vest, which triggers secondary vortex effects an additional time while ramping up vortex damage by +25%. For clearing dense dungeon swarms in Securement Silos, the premier crowd control option is Covert Walker Shirt (also in the mask slot), expanding the vortex suction radius by 1.5x. For players running M416 - Silent Anabasis, the ideal pairing is Snow Camo Gloves, releasing 4 homing ice projectiles whenever an Ice Crystal shatters. For gear sets, 4 pieces of the Shelterer Set (Full-HP) or a 3-pc Savior + 2-pc Treacherous Tides setup (Endgame Low-HP / Shield meta) represent the top tier.
In the cryogenic archetype, most exotic key armor options occupy the Mask slot (with an alternative in the Gloves slot). Because the mask and gloves provide the highest baseline contribution to your overall Psi Intensity, selecting the proper exotic piece anchors your entire build progression:
Slot: Mask · Legendary (Gold) Blueprint.
Official Perk: When triggering Frost Vortex, effects triggered by it trigger 1 additional time. Does not generate an extra Frost Vortex. Each time Frost Vortex is triggered, Frost Vortex DMG increases by 5%, stacking up to 25%.
Why It Dominates the Meta: First, you gain an effortless, permanent +25% Frost Vortex damage amplification, sustained indefinitely through continuous fire from your KAM or M416. Second, the clause "effects triggered by it trigger 1 additional time" duplicates all secondary status procs, ice shred, and status-mod triggers tied to the vortex! This multiplier forms the backbone of record-breaking solo boss kill times in Monoliths and high-tier dungeons.
Slot: Mask · Legendary (Gold) Blueprint.
Official Perk: Frost Vortex collapses inward at the center and continues pulling enemies within a radius 1.5 times the standard vortex radius. (Pulls players instead of applying hard crowd control in PvP).
Where It Excels: A standard Frost Vortex has a 4.5-meter radius, but this mask expands the suction radius to nearly 7 meters! Scattered mutant snipers, swarming thralls, and fast melee mobs are instantly pulled into a dense cluster at the vortex epicenter. This makes it the most comfortable gear piece for clearing Securement Silos, territory purification defenses, and wave-defense events.
Slot: Gloves · Legendary (Gold) Blueprint.
Official Perk: When an Ice Crystal shatters, 4 ice projectiles fly toward nearby enemies, dealing status damage equal to 50% Psi Intensity each. (Benefits from Frost Vortex DMG bonuses, deals 40% damage to players in PvP).
Combat Value: Custom-tailored to synergize with the assault rifle M416 - Silent Anabasis. When you manually shoot to detonate a spawned Ice Crystal, you unleash not only the crystal's baseline 300%–350% Psi Intensity area blast, but also 4 homing shards (each inflicting 50% Psi Intensity), carpet-bombing all surviving targets. When equipping these gloves, slot a standard set piece (e.g. Shelterer) into your mask slot.
The legendary Doyen's Cloak (mask slot) deals frost damage equal to 50% of all damage dealt during the target's frozen window, useful in coordinated freeze-heavy group setups. For early seasonal progression during Phase 1–2, the epic (Purple) Frost Tactical Vest serves as an accessible stepping stone until you accumulate Starchrom for a gold blueprint.
Build Variant #1 (Full-HP Standard Meta): 4-Piece Shelterer Set + Snowline Elite Vest
For the vast majority of players, the most reliable and versatile setup is the classic full-health build anchored by 4 pieces of the Shelterer Set. Due to the high sustained fire rate of the KAM and M416 rifles, set stacks reach their maximum cap within seconds, providing an immense boost across all elemental damage categories.
| Armor Slot | Recommended Item | Set Bonus Activation & Strategic Role |
|---|---|---|
| Helmet | Shelterer Hat / Hood | 4-Piece Shelterer Set Bonuses: • 1-Pc: Status DMG Taken -15%. • 2-Pc: Elemental DMG (Burn, Frost, Shock, Blast) +8%. • 3-Pc: Every bullet hit generates 1 stack of Deviant Energy (+1% Elemental DMG per stack, base cap of 20 stacks). Reloading sheds half your active stacks. • 4-Pc: Max stack cap increased by +10 (up to 30 stacks = +30% Elemental DMG), and weakspot hits grant +2 stacks at once. In total, the complete 4-piece bonus yields an exceptional +38% Elemental DMG! |
| Chest (Top) | Shelterer Top / Jacket | |
| Gloves | Shelterer Gloves | |
| Shoes | Shelterer Shoes | |
| Mask (Key Exotic) | Snowline Elite Vest or Covert Walker Shirt | The keystone slot: run Snowline Elite Vest against Monolith bosses (+25% vortex DMG and proc duplication), or swap to Covert Walker Shirt for 1.5x suction radius in dungeon clearing. |
| Pants (6th Flex Slot) | Blackstone Pants or Savior Pants | The flexible 6th slot: a single piece of the Blackstone Set grants +2.5 Cold and Heat Resistance (indispensable in The Way of Winter), while a single piece of the Savior Set reduces First Aid Kit cooldowns by -20%. |
Build Variant #2 (Way of Winter Scenario): 4-Piece Blackstone Set
In the specialized scenario The Way of Winter, where players must battle extreme freezing blizzards and sub-zero temperatures, the Blackstone Set becomes a formidable alternative:
- 2-Piece Bonus: Dealing elemental damage grants 1 stack of Warm Sensation: +2% Elemental DMG for 2 seconds (stacks up to 5 times = +10% Elemental DMG).
- 3-Piece Bonus: While resting within a comfortable body temperature range between 10°C and 30°C, gain the Warm status, increasing Elemental DMG by +18%.
- 4-Piece Bonus: Reaching 5 stacks of Warm Sensation makes the Warm status permanent, and staying within 10°C–30°C grants an additional +7% Elemental DMG (totaling +35% Elemental DMG).
- Major Advantage Over Shelterer: Blackstone's elemental bonus does not reset upon reloading your weapon! You can freely swap magazines without dropping a single percentage of damage, provided you maintain your body temperature using campfires, torches, or thermal food items.
Build Variant #3 (Endgame Low-HP / Shield Meta): 3-Pc Savior + 2-Pc Treacherous Tides
For veteran players pushing high-tier leaderboards on Nightmare Manibus difficulty and clearing LEA Research Lab with optimal time limits, the low-health shield archetype delivers the highest theoretical burst DPS. Following engine updates that decoupled Treacherous Tides from Sanity mechanics, this setup operates with complete consistency:
- 3 Pieces of the Savior Set: Each bullet fired siphons 6% of current HP, converting it into a durable temporary Shield (capping at 60% of Max HP for 30 seconds). While protected by this shield, Weapon DMG and Status DMG increase by +10%.
- 2 Pieces of the Treacherous Tides Set: Whenever character HP drops below 70%, gain an additional +10% Weapon DMG and Status DMG.
- Flawless Synergy: By holding down the trigger, you safely bring your HP below 70% in under two seconds while remaining fully shielded by a massive 60% barrier! This enables top-tier seasonal mods featuring the <Lunar> suffix (massive damage at low HP) and the <Crescent> suffix (damage scaling with active shield magnitude), while permitting the consumption of Stargaze Drink at 100% Sanity without conflict.
Tier V Armor Crafting: Choosing Optimal Animal Leather
When crafting maximum Tier V armor at the Gear Workbench, the type of animal leather chosen directly dictates secondary offensive and defensive stats on each piece:
| Leather / Hide Type | Armor Slots to Craft | Combat Attributes & Value to the Build |
|---|---|---|
| Golden Wool | Mask and Helmet | #1 BiS Pick for Elemental DPS. Provides a direct boost to Psi Intensity and percentage elemental damage upon applying status effects. Because the mask and helmet form the core of your total Psi Intensity pool, always prioritize Golden Wool for these two pieces. |
| Wolf Skin or Deer Hide | Chest (Top) and Pants | Provides a substantial increase to maximum HP, reduces stamina expenditure for sprinting and combat rolls, and reinforces melee physical damage reduction. |
| Rabbit Hide (4-Piece Set) | Helmet, Top, Pants, Shoes | Grants increased jump height, reduced sprint stamina drain, and a passive +20% Airborne Damage multiplier. Synergizes exceptionally well with modern <Aero> suffix mods and Stardust Energy Drink for double-jumping combat styles. |
With our armor sets, exotic key pieces, and crafting materials locked in, we proceed to fine-tuning our setup: selecting weapon and armor mods, stat priorities, and Tier 17 endgame suffix bonuses.
Primary & Secondary Weapon Mod Selection
Quick Take: For your primary firearm (KAM - Abyss Glance or M416 - Silent Anabasis), the uncontested BiS weapon mod is Vortex Multiplier. It grants +1 to your active Frost Vortex limit and +15% Frost Vortex DMG, enabling you to maintain two concurrent vortexes under a boss and effectively doubling your continuous damage tick rate! For clearing packed rooms in Securement Silos, Vortex Overcharge is an outstanding alternative, while solo survivability is enhanced by Frosty Blessing. In your armor sockets, build around Elemental Havoc (Helmet), Elemental Resonance (Pants), Elemental Overload (Gloves), and Covered Advance (Shoes). Hunt for the <Deviant Energy> suffix across armor pieces, balancing Elemental DMG and Status DMG in an exact 1:1 ratio.
Weapon mods from the Frost Vortex family drop from Monolith bosses, high-tier Securement Silos, and guaranteed Tier 17 mod crates on Nightmare Manibus difficulty. Your weapon mod directly dictates your area-of-effect scaling and single-target ceiling:
- Vortex Multiplier — Absolute #1 BiS for Bosses & Single-Target DPS: Increases your maximum concurrent Frost Vortex cap by +1 (from 1 to 2 active vortexes) and passively increases Frost Vortex DMG by +15%. By default, the KAM rifle refreshes vortex cooldowns faster than the 4-second vortex duration, but without this mod, summoning a new vortex instantly snuffs out the older one. With Vortex Multiplier, two vortexes pulse simultaneously beneath a stationary boss, delivering a staggering 32 ticks across 4 seconds (8 ticks per second with KAM's doubled frequency!). This is the definitive damage multiplier of the build.
- Vortex Overcharge — Top Pick for Dense Dungeon Rooms: Dynamically amplifies the damage of your Frost Vortex for every enemy drawn into its area of effect (scaling up to +30%..+40% when pulling 4–5 targets). In mob-dense Silos and territorial purification events, this transforms the vortex into an inescapable black hole that disintegrates elite packs in a couple of shots.
- Frostwave & Frostwave Wither: Ramping damage modifiers where vortex tick damage progressively climbs as its 4-second lifespan elapses (final ticks deal double damage). Upon expiring, it inflicts a lingering wither and slow debuff, preventing surviving stragglers from escaping the kill zone.
- Frosty Blessing — Solo Farming Sustain: Instantly restores 5% of Max HP whenever an enemy is defeated inside your vortex or when a vortex naturally expires. Highly effective for clearing challenging Silos without consuming medical injectors or bandages.
For your secondary weapon (Recurve Crossbow or DE.50 - Wildfire), always install the legendary utility mod Vulnerability Amplifier. It enhances the incoming vulnerability debuff from The Bull's Eye by an additional +8% (yielding over +16% incoming damage taken), multiplicatively amplifying all subsequent Frost Vortex ticks and crystal detonations.
Best Armor Mods by Slot (Meta Picks & Alternatives)
Below is the optimized slot-by-slot breakdown for all six armor components. Pay close attention to your Helmet, Pants, and Gloves—these three sockets anchor your stat balance:
| Armor Slot | Recommended Mod | Exact Effect & Tactical Function | Alternative Option & Use Case |
|---|---|---|---|
| Helmet | Elemental Havoc (#1 Pick for Full-HP) | Grants +10% Elemental DMG at all times, and grants an additional +10% Elemental DMG when character HP is above 90% (totaling +20% pure elemental scaling with zero range penalties!). | Deviation Expert (Range -25%, Fire Rate +10%, Status DMG +20%) — superb for the KAM rifle in cramped Silo corridors where engagements stay within 20 meters. Work of Proficiency (+20% Elemental DMG after an empty reload). |
| Mask | Frost Construct (Or Suffix Mod for Exotic Masks) | Amplifies the durability, duration, and damage of cryogenic structures and vortexes. Slotted into a set mask (e.g. Shelterer) if your exotic armor piece is Snow Camo Gloves. | When equipping Snowline Elite Vest or Covert Walker Shirt, insert any mod rolling the targeted seasonal suffix <Frost Vortex> or <Deviant Energy> with flawless substat rolls. |
| Chest (Top) | Top-Stat Defensive Mod (Quick Comeback / Rejuvenating) | The chest slot lacks direct offensive scaling talents, so prioritize mods that roll top-tier substats: Status DMG + Elemental DMG. Quick Comeback heals +10% HP and grants +20% sprint speed when applying an injector. | Status Immune (+25% elemental damage resistance while above 60% HP) or Rejuvenating (recovers 15% HP on kill when at low health) are elite defensive options for Nightmare difficulty. |
| Pants (Bottoms) | Elemental Resonance (Absolute BiS) | Every instance of elemental damage dealt from the previous magazine grants the subsequent magazine +1% Elemental DMG for 15 seconds, stacking up to +24%! Because the KAM rifle fires dozens of rounds, this bonus maintains 100% uptime. | Abnormal Increase (grants +10% Status DMG upon emptying a magazine, stacking up to 3 times = +30% Status DMG). Reload Rampage (+10% Weapon and Status DMG on kill). |
| Gloves | Elemental Overload or Status DMG Mod | Provides a guaranteed, unconditional +18% Elemental DMG. Slotted into Shelterer gloves when using the Snowline Elite Vest mask. | If your character stats already lean heavily into Elemental DMG (such as when running the Blackstone Set), slot a gold mod granting +20% Status DMG to restore the 1:1 damage ratio. (When running exotic Snow Camo Gloves, this socket is fixed by the item). |
| Shoes | Covered Advance (For Full-HP Setups) | If you avoid taking damage for 4 seconds, gain a stable +20% Melee, Weapon, and Status DMG for 30 seconds. The premier modifier for disciplined ranged positioning. | Rush Hour (grants +4% Status DMG per 10% missing HP) — the unchallenged BiS choice for Low-HP builds using Savior + Treacherous Tides. Slow and Steady (+10% DMG while maintaining high HP). |
The 1:1 Golden Ratio & Tier 17 Endgame Mod Suffixes
To extract maximum value from Tier 17 mod crates (farmed on Nightmare Manibus difficulty and endgame dreamscape challenges), you must understand the underlying status arithmetic in Once Human:
Final Vortex Tick DMG = Base Psi Intensity × (1 + Snowline Bonus) × (1 + Elemental DMG) × (1 + Status DMG) × (1 + Target Type Bonus).
Because Elemental DMG and Status DMG occupy independent multiplicative brackets, maintaining a balanced 1:1 ratio across both attributes delivers the highest mathematical DPS in your detailed character sheet (press C ➔ Detailed Stats). Stacking 160% Elemental DMG alongside only 30% Status DMG is highly inefficient—a balanced profile of 95% Elemental DMG and 95% Status DMG yields vastly superior damage per tick!
When opening Tier 17 mod selector chests and calibrating secondary substats, follow this strict suffix hierarchy:
- Weapon & Mask — Suffix <Frost Vortex>: The signature archetype suffix. Roll for lower-tier lines prioritizing Frost Vortex DMG, Vortex Damage Frequency, Elemental DMG, and Status DMG.
- Armor (Helmet, Top, Gloves, Pants, Shoes) — Suffix <Deviant Energy>: The universal foundation for reliable builds. In Tier 17 crates, hunt for a golden trifecta of substats: Elemental DMG + Status DMG + DMG to Great Ones (Bosses) (with Psi Intensity or Normal Enemy DMG as a solid 4th roll).
- Seasonal Suffixes <Lunar> & <Crescent>: If running the Low-HP shield setup (Savior + Treacherous Tides), equip helmet and jacket mods with these suffixes. They unlock immense multiplicative scaling at reduced HP while your shield remains active.
- Suffix <Aero>: The modern 2026 specialization for players wearing 4 pieces of Rabbit Hide—triggers significant elemental amplification while airborne, double-jumping, or hovering.
Having locked in our mods, substats, and damage balance, we now align our auxiliary power: selecting combat Deviations (headlined by the indispensable Polar Jelly), Cradle perks, and Stardust culinary buffs.
Top Combat Deviations: Polar Jelly vs. Snowsprite & Chefosaurus Rex
Quick Take: The undisputed #1 combat companion for any cryogenic build is Polar Jelly. When summoned, this floating Deviation coats all surrounding targets in a signature vulnerability debuff, escalating incoming damage from Frost Vortex and cold attacks by up to +50%+! In your seasonal Cradle Override matrix, the indispensable anchor node is Frost Sense, stacking up to +36% Frost Elemental DMG. In the kitchen, your maximum DPS setup combines Whimsical Drink (+25%..+42% Status DMG at 100% Sanity) with Surprise Spring Roll (+15%..+25% Elemental DMG), cooked at your territory under the culinary supervision of Chefosaurus Rex.
Elemental status builds in Once Human draw tremendous synergistic power from combat Deviations. For a cryogenic specialist wielding Frost Vortex, choosing the right entity for your cradle containment pod is just as consequential as proper weapon calibration:
Combat Mechanics: Upon activation (hotkey E), this hovering jellyfish hovers above the frontline, continuously discharging waves of sub-zero arctic mist. Every wave inflicts a devastating vulnerability debuff on all targets struck, increasing all incoming damage from Frost Vortex and elemental cold attacks by +20%..+54% (scaling directly with the Deviation's Combat Rating from level 1 to 5)!
Acquisition: Captured while fishing in natural waterways, rivers, and coastal wetlands across Dayton Wetlands and Broken Delta, or farmed with elevated drop chances from reward cocoons in Securement Silos. Launching it into the center of an engagement room or directly beneath a boss sets the ultimate stage for your KAM - Abyss Glance and M416 - Silent Anabasis rifles.
Combat Functionality: Patrols the perimeter, generating brittle ice crystals that detonate when struck by gunfire, inflicting area-of-effect damage and minor cold vulnerability. In The Way of Winter scenario, an upgraded variant—Chaos Snowsprite—can be acquired. On isolated single-target bosses, it falls noticeably short of Polar Jelly due to lacking the continuous 50% vortex vulnerability debuff, though it remains a fun defensive support asset for control points.
Why It Is Mandatory on Your Territory: This territory-bound chef dino assists with food preparation on your Advanced Stove. Chefosaurus Rex passively boosts the numerical attributes of all prepared dishes and beverages by up to +38% (at Skill Rating 5/5)! Farmed from Securement Silo - Phi.
Production Deviations specializing in tactical cryogenic consumables. Ice Pot manufactures portable dry-ice blocks to regulate body temperature in The Way of Winter, while Snow Globe fabricates flash-freeze tactical grenades capable of paralyzing dangerous elite mutants instantly.
Cradle Override Configuration: The "Frost Sense" Keystone
The Cradle Override system provides 8 customizable sockets for seasonal passives. To maximize the output of your assault rifles and Frost Vortex, configure your Cradle nodes according to the following blueprint:
| Cradle Socket | Node Name | Combat Value & Vortex Synergy |
|---|---|---|
| 1. Weapon Category | Automatic Weapon | Improves baseline weapon damage, reload speed, and magazine capacity for assault rifles like KAM - Abyss Glance and M416 - Silent Anabasis. |
| 2. Archetype Keystone | Frost Sense (Core Seasonal Perk) | Each time you trigger a Frost Vortex, Ice Crystal, or Ice Spike, your Frost Elemental DMG increases by +3% for 8 seconds. Stacks up to 12 times, delivering an immense +36% pure cold damage boost! The rapid-firing KAM rifle reaches all 12 stacks within 3 seconds of sustained fire. |
| 3. Status Scaling | Status Enhancement or Slowed Reaction | Amplifies Status DMG by +20%..+25% against targets suffering from movement impairment or elemental crowd-control debuffs. |
| 4. Deviation Synergy | Deviant Pact or Deviant Master | While your combat companion Polar Jelly is deployed on the battlefield, gain a passive +20% Elemental DMG multiplier. |
| 5. Weapon Swap | Tactical Combo | Swapping from your secondary Recurve Crossbow to your primary KAM rifle after tagging a target with The Bull's Eye grants a temporary damage boost for the subsequent 5 seconds. |
| 6–8. Anomaly Counter & Mobility | Anti-Void, Anti-Phase, Sprint Master | Enables assault rifle rounds to pierce the immune barriers of Void and Phase mutant archetypes in high-tier Silos, alongside reducing sprint and dodge stamina consumption. |
Culinary Buffs & Consumables: Scaling Vortex Ticks & Crystal Explosions
In Once Human, your character can maintain one active buff from Food (Satiety) and one from Drink (Hydration) simultaneously. Preparing dishes on an Advanced Stove with the Memetic specialization Advanced Stove: Gourmand (+30% dish potency) assisted by Chefosaurus Rex provides exceptional stat gains:
- Premier Hydration Buff (Drink Slot) — Whimsical Drink: The cornerstone of every status build. While character Sanity is maintained at 100%, it grants a base +25% Status DMG, scaling up to +35%..+42% Status DMG under Chefosaurus Rex! Note that in patch 3.0.6, the Treacherous Tides armor set was completely decoupled from Sanity mechanics, allowing you to drink this beverage safely even in Low-HP shield builds.
- Premier Satiety Buff (Food Slot) — Surprise Spring Roll: Grants a direct percentage boost to Elemental DMG (scaling from +15% base to +25% under Chefosaurus Rex). To sustain our strict 1:1 mathematical ratio, pairing "Whimsical Drink for Status DMG + Surprise Spring Roll for Elemental DMG" flawlessly balances both multiplier brackets.
- Alternative Food Buff — Canned Spicy Rabbit Dices: Amplifies damage against Great Ones and Elite enemies. If you unlocked the Memetic perk Spicy Pepper, the efficacy of spicy dishes increases by an additional +30%.
- How to Retain Drink Buffs While Double-Jumping: The popular Stardust Energy Drink grants double-jumping mobility, but occupies the drink slot and erases Whimsical Drink, forfeiting up to +42% Status DMG! To gain airborne mobility for 4-piece Rabbit Hide and <Aero> suffix mod bonuses, use utility items from the production Deviations Frog the Leaper ("Spring Legs") or Atomic Snail (air dash)—these utilize separate potion/gadget slots and preserve your drink buff!
- Tactical Boss Opener — Snow Globe or Cryo Trap: Hurling a crafted tactical snow globe at a boss's feet upon spawning applies an immediate freeze/slow, creating the perfect stationary window to unload your initial burst from KAM.
With our Deviation deployed, Cradle wired, and culinary buffs active, we turn to the execution phase: master combat rotations on single-target bosses and rapid-clearing tactics for endgame dungeons.
Boss Combat Rotation: Solo-DPS Execution with KAM - Abyss Glance
Quick Take: The single-target boss rotation revolves around layering external multiplicative debuffs before opening fire with your primary assault rifle, KAM - Abyss Glance: deploy Polar Jelly (up to +54% vulnerability to Frost Vortex and cold damage) ➔ land a single shot with your Recurve Crossbow (applying The Bull's Eye for +16%..+20% damage taken) ➔ swap to KAM and open sustained automatic fire. Thanks to Rapid Shot calibration, your vortex cooldown refreshes in just 1.15 seconds, allowing the Vortex Multiplier mod to deploy two concurrent vortexes (32 ticks in 4 seconds!) while building Shelterer Set stacks to +38% Elemental DMG.
The foremost tactical strength of the Frost Vortex archetype is its absolute damage consistency: while a boss dashes across the arena or raises defensive shields, your deployed vortexes continue shredding its health bar without interruption. Executing the correct opener amplifies your total damage output by over 2.5x:
- Pre-Combat Buff Check: Ensure your character's Sanity is at 100%, drink your Whimsical Drink (+25%..+42% Status DMG), and consume a Surprise Spring Roll (+15%..+25% Elemental DMG). Position yourself at medium engagement distance (15–20 meters) to avoid melee swipes and preserve the passive shoe mod buff Covered Advance (+20% damage).
- Deploy Polar Jelly (Hotkey E): Two seconds before the boss becomes targetable, toss your combat companion Polar Jelly into its spawn point. The radiating arctic mist inflicts a continuous debuff elevating incoming damage from Frost Vortex by +20%..+54%, while activating the Cradle perk Deviant Pact (+20% Elemental DMG).
- Apply Vulnerability with Secondary Weapon (Hotkey 2): Swap to your Recurve Crossbow and land a precise weakspot hit. This applies The Bull's Eye, which, enhanced by the Vulnerability Amplifier mod, increases all damage taken by the boss by 16–20% and grants you +15% Critical Hit Rate.
- Swap to KAM - Abyss Glance and Open Fire (Hotkey 1): Swap to your KAM assault rifle (triggering the Cradle perk Tactical Combo) and hold down the trigger. The very first bullet spawns an initial Frost Vortex. With Rapid Shot Style calibration boosting fire rate to 720 RPM, the 14 rounds required to fully reset the 7-second cooldown fire in just 1.15 seconds!
- Deploy Concurrent Dual Vortexes: Equipped with Vortex Multiplier, the instant cooldown reset allows you to spawn a second concurrent Frost Vortex directly beside the first. Two vortexes pulse simultaneously with doubled tick frequency (totaling 8 ticks per second!). Every bullet hitting enemies trapped within a vortex stacks KAM's passive bonus (+5% per stack, up to +50% final vortex damage), while the Snowline Elite Vest mask duplicates secondary status procs and boosts vortex damage by an additional +25%!
- Strict Reload Discipline: Fire every magazine down to the absolute last round! Never manually reload at mid-magazine—the Shelterer Set sheds half its accumulated stacks on reload. Emptying the entire magazine sustains the maximum 30 stacks (+38% Elemental DMG) and activates the pants mod Elemental Resonance for a full +24% Elemental DMG boost on your next magazine.
Dungeon & Silo Clearing Tactics: Explosive Ice Crystal Detonation on M416
While KAM excels at single-target boss encounters, the premier weapon for speedrunning trash corridors in Securement Silos is M416 - Silent Anabasis:
- Gravitational Suction with Covert Walker Shirt: Equipping the exotic mask Covert Walker Shirt allows a single burst into a pack of charging mutants to spawn an expanded Frost Vortex. The vortex collapses inward, drawing scattered riflemen and thralls within a 7-meter radius into a tight cluster.
- Ice Crystal Spawning & Manual Detonation: Continue firing into the clustered pack. Within 1.5 seconds, the M416 rifle constructs an Ice Crystal in the center of the mob. Rather than waiting 15 seconds for it to naturally shatter, snap your crosshairs onto the crystal and fire 2–3 rounds directly into it! Manually detonating the crystal triggers a massive area-of-effect blast dealing 300%–350% Psi Intensity, obliterating the entire group in an instant.
- Homing Shard Cascade via Snow Camo Gloves: When running Snow Camo Gloves, shattering the crystal additionally releases 4 homing cryogenic shards (dealing 50% Psi Intensity each) that seek out and eliminate surviving elite stragglers hiding behind cover.
Positioning, Range Control & Temperature Management
Cryogenic builds possess exceptional inherent defensive survivability thanks to constant slowing and vortex suction. To conquer high-tier content without deaths, adhere to these three positioning principles:
- Maintaining "Covered Advance" (+20% Damage): The shoe mod Covered Advance requires avoiding damage for 4 seconds to grant +20% damage for 30 seconds. Because your vortexes pull and slow melee mutants, always maintain a 15–20 meter buffer. Utilize arena pillars and natural cover: vortexes continue ticking while you break line-of-sight during boss attack phases.
- Emergency Sustain with Frozen Northern Pike: If you suffer a heavy blow and your health dips, switch to your melee weapon Frozen Northern Pike and execute a sprint-attack against any enemy trapped inside a Frost Vortex. Every strike against a target inside a vortex instantly restores 5% of missing HP and freezes the target, recovering full health without burning medical injectors!
- Thermal Regulation in "The Way of Winter": When wearing the 4-piece Blackstone Set, you must keep your body temperature within 10°C to 30°C to maintain the +35% Elemental DMG set bonus. Equipping the Frozen Northern Pike cools your body by 5°C (valuable against scorching lava environments), while torches and thermal soups prevent freezing during blizzards.
Three-Stage Build Progression: From Level 1 to Nightmare Manibus
Because Frost Vortex damage scales from Psi Intensity rather than high Critical Hit Rate requirements, the cryogenic archetype boasts a smooth and rewarding progression curve across all seasonal phases:
| Progression Phase | Weapons & Key Exotic Slot | Equipped Armor Set | Mods, Deviations & Phase Goals |
|---|---|---|---|
| Stage 1: Early Season (Levels 1–39, Phases 1–2) Budget Cryo Foundation | • Primary: Epic KV-SBR - Icy Rain or M416 - Scorched Earth. • Secondary: DE.50 - Wildfire. • Melee: Frozen Northern Pike. • Key Armor: Epic Frost Tactical Vest. | 3-Pc Heavy Duty Set (+8% elemental DMG base, +40% after defeating an enemy) + 2-Pc generic HP set. | Basic vortex weapon mods (Frostwave, Frosty Blessing). First-week priorities: capture Polar Jelly in Dayton waterways and secure Chefosaurus Rex from Silo Phi! |
| Stage 2: Midgame (Level 50, Phases 3–4, Tier V) Classic Full-HP Shelterer Meta | • Primary: Gold Tier V KAM - Abyss Glance or M416 - Silent Anabasis (Rapid Shot Style calibration for Elemental DMG). • Secondary: Recurve Crossbow. • Key Armor: Gold mask Snowline Elite Vest (bosses) or Covert Walker Shirt (Silos). | 4-Pc Shelterer Set (+38% Elemental DMG) + 1-Pc Blackstone Set for thermal resistance. | Farm Pro-tier dungeons. Collect gold mods with the <Deviant Energy> suffix: Vortex Multiplier (weapon), Vulnerability Amplifier (crossbow), Elemental Havoc, Elemental Resonance, Elemental Overload, and Covered Advance. |
| Stage 3: Endgame Min-Max (Phases 4–6, Nightmare Manibus) Psi Intensity Cap & Low-HP Shield Meta | • Primary: 5–6★ calibrated KAM - Abyss Glance + M416 - Silent Anabasis. • Secondary: Recurve Crossbow + Frozen Northern Pike. • Key Armor: 6-Star Snowline Elite Vest mask. | Upgrade Mask and Gloves to 6 Stars to reach the maximum Psi Intensity cap! Transition to the low-health shield setup: 3-Pc Savior + 2-Pc Treacherous Tides (patch 3.0.6 rework). Craft gear using Golden Wool and a 4-piece Rabbit Hide set. | Farm Tier 17 mod crates on Nightmare Manibus: slot the <Frost Vortex> suffix on weapon/mask and seasonal <Lunar> / <Crescent> / <Aero> suffixes on armor. Perfect 1:1 Elemental and Status damage balance supported by Whimsical Drink and level 5 Polar Jelly. |
Having mastered the combat loop, clearing mechanics, and seasonal progression, we proceed to our final section: a balanced review of pros and cons, common beginner mistakes to avoid, and essential community FAQs.
Pros & Cons of the Frost Vortex Build in 2026
Quick Take: Building around Frost Vortex with the assault rifles KAM - Abyss Glance and M416 - Silent Anabasis stands as one of the safest, most comfortable, and destructive elemental setups in Once Human. The archetype delivers unrivaled crowd control (up to 7-meter gravitational suction), complete independence from hitting boss weakspots, and devastating sustained DPS through concurrent dual-vortex uptime (up to 32 ticks in 4 seconds). Its primary requirements are understanding the Psi Intensity scaling formula and securing the indispensable combat companion Polar Jelly.
To help you evaluate the cryogenic archetype before investing Starchrom at the Wish Machine, we have compiled its core strengths and operational limitations into an overview table:
| Strengths (Pros) | Limitations (Cons) |
|---|---|
| Unmatched Crowd Control & Continuous AoE: Equipped with the exotic mask Covert Walker Shirt, the vortex pulls all surrounding mutants within a 7-meter radius, preventing mobs from threatening your position. With M416 - Silent Anabasis, manually detonating Ice Crystals triggers 300%–350% Psi Intensity blasts, erasing entire waves in dungeons instantly. | Cold Resistance Vulnerability: Specific elite enemies and cryogenic bosses in The Way of Winter scenario possess innate cold resistances, reducing elemental clear speeds relative to neutral kinetic physical weapons. |
| Doubled Tick Cadence on Single Targets: Leveraging KAM - Abyss Glance (+100% damage frequency) and the weapon mod Vortex Multiplier (+1 active vortex cap), you sustain two concurrent vortexes beneath a boss, unleashing 32 ticks across 4 seconds (8 hits per second!). | Boss Mobility & Arena Relocation: If a boss frequently dashes across the battlefield or teleports away, it leaves the stationary radius of your vortexes, requiring you to redeploy them at the new coordinates. |
| Zero Weakspot Reliance & No Damage Falloff: Periodic Frost Vortex damage scales from armor Psi Intensity, requires zero weakspot precision, and suffers no damage drop-off over extreme engagement ranges. | Heavily Dependent on Armor Psi Intensity: Every tick of vortex damage scales exclusively off the Psi Intensity across your six armor pieces (especially Mask and Gloves), necessitating gear enhancement and star upgrades at the workbench. |
| Superior Survivability & Built-In Sustain: Maintaining a 15–20 meter buffer guarantees 100% uptime on the Covered Advance shoe mod (+20% damage), while the melee Frozen Northern Pike restores 5% of missing HP on every hit against targets inside a vortex. | Mandatory Reliance on Polar Jelly: Without the active debuff applied by Polar Jelly (+20%..+54% incoming damage taken), the build forfeits a substantial portion of its single-target burst ceiling. |
5 Critical Beginner Mistakes to Avoid in Cryo Builds
Many players abandon cryogenic weapons after initial testing due to fundamental misunderstandings of elemental mechanics. Avoid these five common pitfalls:
- Mistake 1: Stacking Critical Hit Rate and Weapon Attack for KAM and M416: The most common mistake made by players transitioning from traditional shooters. Periodic Frost Vortex ticks and Ice Crystal detonations cannot crit and do not use the rifle's physical Attack value! Stacking crit mods or Attack calibrations cuts your actual DPS drastically. The only stats that scale your cryogenic damage are Psi Intensity, Elemental DMG, and Status DMG.
- Mistake 2: Running Without the "Vortex Multiplier" Mod: By default, only one vortex can exist at a time. Without the weapon mod Vortex Multiplier, summoning a new vortex instantly erases the previous one. Installing this mod raises your active cap by +1 and maintains two simultaneous vortexes, effectively doubling your total damage output against stationary bosses!
- Mistake 3: Neglecting to Capture Polar Jelly: Running with Lonewolf's Whisper or combat drones deprives you of your single greatest damage multiplier. Polar Jelly is not just a combat pet—it acts as an independent multiplicative debuff amplifying vortex damage by up to +54%. Capture it in Dayton waterways during your first days of gameplay.
- Mistake 4: Prematurely Reloading Mid-Magazine: Every manual reload sheds half your accumulated Shelterer Set stacks. Always fire your magazine down to the final round—this preserves your maximum 30 stacks (+38% Elemental DMG) and charges the pants mod Elemental Resonance for a full +24% boost on your subsequent magazine.
- Mistake 5: Waiting for Ice Crystals to Naturally Shatter on M416: Ice Crystals constructed by M416 persist for 15 seconds and naturally burst for only 100% Psi Intensity upon expiring. Manually shooting and detonating the crystal with bullets escalates the blast to 300%–350% Psi Intensity. Train yourself to snap your crosshairs onto the crystal immediately upon spawning.
Comparison with Adjacent Meta Archetypes: Finding Your Playstyle
Within our comprehensive Once Human guides hub, several distinct combat archetypes compete for top-tier performance:
- Frost Vortex (KAM - Abyss Glance / M416 - Silent Anabasis): Premier choice for players who value absolute battlefield control, grouping mob packs into tight clusters, and delivering sustained boss damage from safe range without weakspot reliance.
- Burn (KVD - Boom! Boom! / Shelterer Set): A close elemental relative utilizing the same Shelterer Set base and <Deviant Energy> suffix mods. Characterized by colossal magazine sizes (up to 175 rounds) and pyro detonations pulsing every 2 seconds.
- Shrapnel (SOCR - The Last Valor): The quintessential physical kinetic crit archetype. Delivers exceptional single-target boss burst by triggering multi-part internal hits, completely ignoring elemental enemy resistances.
- Power Surge (MPS7 - Outer Space / SOCR - Outsider): Close-quarters electric status archetype featuring blistering fire rates, where lightning discharges arc between clustered foes in a chain reaction.
Frequently Asked Questions (FAQ)
1. Which should I craft first with Starchrom — KAM - Abyss Glance or M416 - Silent Anabasis?
Your choice depends on your primary content focus. If your main objective is conquering high-tier raid encounters, Monolith bosses, and maximizing single-target DPS, prioritize KAM - Abyss Glance (rapid cooldown reduction per bullet, +100% tick frequency, and up to +50% final vortex damage). If you spend more time farming Securement Silos, defending territory purifications, and enjoy explosive tactical gameplay detonating Ice Crystals, craft M416 - Silent Anabasis first.
2. Can you play Frost Vortex effectively at seasonal start without gold blueprints?
Yes, absolutely! The cryogenic archetype offers one of the strongest budget-friendly seasonal starts thanks to the epic submachine gun KV-SBR - Icy Rain. It possesses a native 10% Crit Rate, triggering a Frost Vortex on critical hits with a 30% chance while instantly refunding 20% of your magazine. Paired with the purple Heavy Duty Set (+8% elemental DMG base, +40% on kill), you can comfortably clear all Phase 1–3 content while saving Starchrom for gold blueprints.
3. Does weapon enhancement level (+1..+10) increase Frost Vortex damage?
Not directly for vortex ticks. Base vortex damage and crystal detonations calculate exclusively from the Psi Intensity on your armor. However, enhancing your rifle at the Gear Workbench increases its physical Weapon Attack. Because direct bullet impacts contribute 15–20% of your total boss damage during sustained fire, upgrading your gun to +10 remains valuable, though star rank upgrades on your Mask and Gloves should always take priority.
4. Does Frost Vortex work in PvP against other players?
Yes, but under specific balance adjustments: vortex damage against Meta-Humans (players) is reduced by 30–40%, and the exotic mask Covert Walker Shirt applies a gravitational suction pull instead of hard crowd control. Nevertheless, in team shootouts and territory GvG defense, Frost Vortex remains a lethal utility tool, slowing opposing players and disorienting aim.
5. What provides a bigger DPS increase — weapon blueprint stars or armor blueprint stars?
For a Frost Vortex build, armor blueprint stars provide a vastly superior damage increase. Each additional star on your armor blueprints (especially Mask and Gloves) directly increases your total Psi Intensity, which acts as the foundational base for every vortex tick. Adding a star to KAM only increases bullet kinetic attack. Therefore, always allocate blueprint conversion fragments into upgrading your Mask and Gloves first.