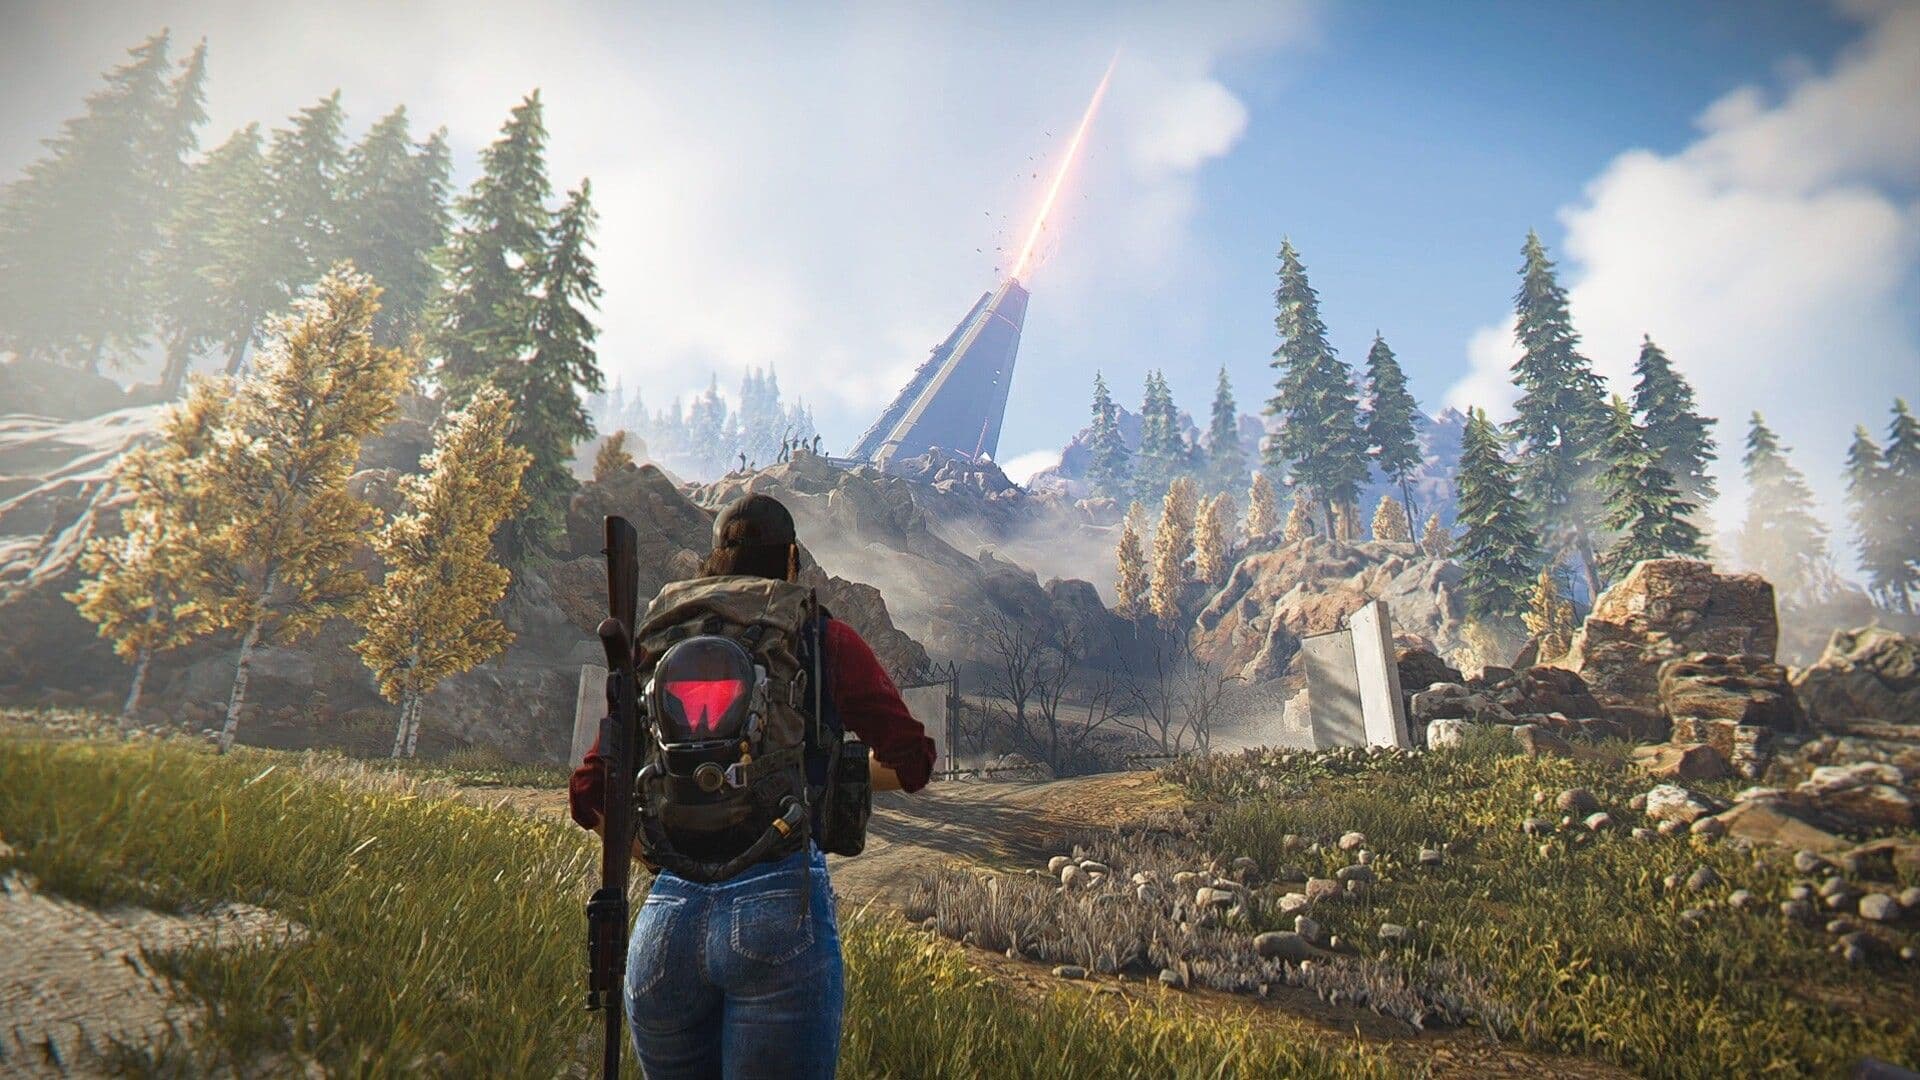
Once Human Unstable Bomber Build Guide: Best DE.50 Jaws and Bullseye Loadout
How the Unstable Bomber & The Bull's Eye Synergy Works: Explosive Burst & Vulnerability
The combination of Unstable Bomber and The Bull's Eye represents one of the most explosive and lethal combat archetypes in Once Human. While damage-over-time setups rely on ramping up stacks and area-control builds focus on slowing enemies, this build is built around sheer concentrated burst DPS: you attach delayed micro-charges to your target, mark it with vulnerability, and trigger a series of critical detonations capable of annihilating elite adversaries and boss health bars in seconds.
This lethal synergy is powered by the seamless interaction of two distinct mechanics:
- Unstable Bomber: A unique elemental blast status. When triggered under specific combat conditions (such as landing a critical hit with the legendary DE.50 - Jaws pistol), an explosive micro-bomb attaches to the target. After a short delay (1.0 to 1.5 seconds), the bomb detonates, dealing massive Blast DMG in an area around the victim.
- The Bull's Eye: A tactical mark and vulnerability debuff. Applied by specialized secondary weapons (such as the AWS.338 - Bullseye sniper rifle or the Recurve Crossbow) or by the combat deviation Mr. Wish. The marked target is outlined in glowing blue and takes +8% increased damage from all sources for 10 to 12 seconds (scaling up to +16% vulnerability with the Vulnerability Amplifier mod).
The core advantage of this pairing lies in multiplicative scaling: Unstable Bomber explosions detonate while the target is suffering from the maximum vulnerability debuff applied by The Bull's Eye. As a result, each explosion double-dips into damage multipliers, tearing through the defenses of endgame bosses in Pro Silos and the LEA Research Lab.
Core Combat Rule: Unlike automatic rifle setups where you hold down the trigger on a single weapon, this archetype thrives on dynamic quick-swapping. You initiate combat with a single shot from your Bull's Eye weapon to apply the blue vulnerability outline, then immediately switch to your DE.50 Jaws pistol to unleash a barrage of critical detonations.
Damage Scaling Mechanics: Blast Damage, Crits, and Psi Intensity
Most elemental reactions in Once Human (such as Burn or standard Power Surge) cannot critically strike. However, the DE.50 - Jaws pistol breaks this rule completely with its signature perk: Unstable Bomber explosions triggered by this weapon CAN critically strike and feature an innate +25% Critical Hit Rate bonus on the explosion itself.
This turns the build into a hybrid powerhouse, scaling both from status and blast multipliers as well as traditional firearm critical stats. The final detonation damage is calculated as follows:
Final Explosion DMG = Base Blast DMG (from Psi Intensity) * (1 + Blast DMG Bonus) * (1 + Status DMG Bonus) * Crit Multiplier * (1 + The Bull's Eye Vulnerability)
To reach peak damage numbers exceeding hundreds of thousands of damage per detonation, you must balance each parameter:
| Stat Name | In-Game Attribute | Role in Damage Calculation | Primary Sources in Game |
|---|---|---|---|
| Psi Intensity | Psi Intensity | The baseline numeric value driving the initial power of the explosion. The elemental equivalent of weapon attack power. | Armor tiers and star ratings (especially Mask and Gloves), gear calibration, high-grade crafting materials. |
| Blast DMG | Blast DMG | The primary percentage multiplier for the detonation. Directly amplifies all Unstable Bomber blast shockwaves. | "Reckless Bomber" weapon mod, "Delayed Blast" mask mod, tactical food buffs. |
| Status DMG | Status DMG | The secondary multiplier. Multiplies with the blast bonus, reinforcing the status nature of the bomb. | Legendary mod substats, seasonal Cradle perks, and specialty drinks. |
| Crit Rate & Crit DMG | Crit Rate & Crit DMG | Determines the probability and damage multiplier of critical bullets and explosions (scaling beyond 200%+ Crit DMG). | 4-piece Lonewolf Set, Shaman Vulture Top (+35% Crit Rate), "Deadshot" pants mod. |
| Vulnerability Multiplier | The Bull's Eye | The final external damage multiplier applied to all incoming damage taken by the marked target. | AWS.338 - Bullseye, Recurve Crossbow, "Vulnerability Amplifier" weapon mod (+16%). |
With the premier weapon mod Reckless Bomber, your Critical Hit Rate directly boosts your explosive power: for every 1% of Crit Rate, Unstable Bomber damage increases by +0.5%. With an 80% baseline Crit Rate, you gain a massive passive +40% pure blast damage bonus on every explosion.
The Bull's Eye Debuff: Blue Silhouette and Raid Utility
The The Bull's Eye status serves as the ultimate damage amplifier for this loadout. Unlike personal character buffs, this debuff attaches directly to the enemy, providing team-wide benefits:
- Baseline Damage Vulnerability: Any target marked with The Bull's Eye takes +8% increased damage from all sources—including your bullets, bomb blasts, allied fire, and turret attacks.
- Amplified to +16%: Equipping the Vulnerability Amplifier mod on your secondary weapon doubles the vulnerability value to a full +16% incoming damage for 10 seconds.
- Visual Target Highlighting: The luminous blue outline makes enemy silhouettes clearly visible through smoke, dust storms, fog, and visual blast clutter, allowing you to track and target boss weakspots effortlessly.
- "Bingo" Sniper Synergy: Damaging a target affected by The Bull's Eye with the AWS.338 - Bullseye grants the wielder a personal +15% Weapon DMG buff for 10 seconds, which remains active even after switching back to your DE.50 pistol.
In solo encounters, you can maintain this status through quick weapon swaps, or completely automate it by deploying the combat deviation Mr. Wish, whose rapid submachine gun bursts continuously refresh the debuff on your primary target.
Pros and Cons: Strengths and Tactical Limitations
Before committing valuable Starchrom to acquire blueprints, consider the specific advantages and playstyle demands of this build:
Build Advantages (Pros):
- Top-Tier Single-Target Burst: Unrivaled boss melting speed, making it an S-tier archetype for clearing Monolith bosses and high-tier Silos.
- Guaranteed Critical Explosions: The innate +25% explosion crit rate combined with the Shaman Vulture Top (+35% Crit Rate upon triggering a bomb) allows you to maintain an active 100% crit cap.
- Exceptional Team Utility: The Bull's Eye vulnerability debuff benefits your entire party in co-op raids and dungeons.
- Effective AoE Splash: While the pistol fires single rounds, the resulting Unstable Bomber detonations deal wide-area blast damage that wipes out clusters of surrounding adds.
Build Limitations (Cons):
- Small Magazine Capacity: The base DE.50 magazine holds only 7 rounds, requiring magazine mods, extended accessories, and the Lonewolf set to sustain fire.
- Strict Mod Requirements: Reaching maximum potential requires gold mods rolled with the <Violent> suffix and high Critical Damage substats.
- Quick-Swap Discipline: Optimal play requires disciplined switching between your secondary weapon and pistol to keep buffs and marks active.
- Effective Range Limits: Pistol damage falloff begins around 25 to 30 meters, requiring closer positioning compared to assault rifles and sniper setups.
Meta Comparison: Unstable Bomber vs Other Combat Archetypes
To understand where Unstable Bomber sits in the current meta, compare it to the other primary combat builds in Once Human:
| Archetype / Weapon | Damage Category | Primary Strengths | Key Weaknesses | Best Suited For |
|---|---|---|---|---|
| Unstable Bomber + Bull's Eye (DE.50 - Jaws + AWS.338) | Blast / Status + Critical | Unmatched boss burst DPS, guaranteed critical detonations, team-wide +16% vulnerability mark. | Small magazine size, requires active weapon swapping and tight mod optimization. | Players seeking peak burst damage, satisfying hand-cannon gameplay, and rapid boss clears. |
| Shrapnel (SOCR - The Last Valor) | Pure Physical | Extended range, generous assault rifle magazine, straightforward and forgiving rotation. | Entirely reliant on weakspot hits, zero elemental scaling. | Fans of classic assault rifles and steady mid-range tactical gunplay. |
| Burn (KVD - Boom! Boom!) | Fire Elemental (DoT) | Unrivaled horde clearing, massive LMG magazine, sustained passive burn damage. | Slow damage ramp-up, lower upfront burst against fast-moving solo bosses. | Players who enjoy heavy machine guns and clearing massive waves of Deviants. |
| Power Surge (MPS7 - Outer Space) | Shock Elemental | Blistering fire rate (850 RPM), zero damage falloff on shock procs, enemy accuracy debuff. | Rapid ammo consumption, SMG shock procs cannot critically strike. | Run-and-gun players who prefer fast-paced submachine guns and rapid elemental lightning. |
| Frost Vortex (M416 / KAM) | Frost Elemental | Superior crowd control (freeze and vortex pull), high personal survivability. | Bosses immune to crowd control reduce the overall utility of vortex effects. | Tactical players who prioritize survivability, battlefield control, and area suppression. |
In the next section, we examine the weapon loadout in detail: analyzing the DE.50 - Jaws pistol, the AWS.338 - Bullseye sniper rifle, optimal calibration blueprints, and essential weapon accessories.
Primary Firepower: DE.50 - Jaws Pistol
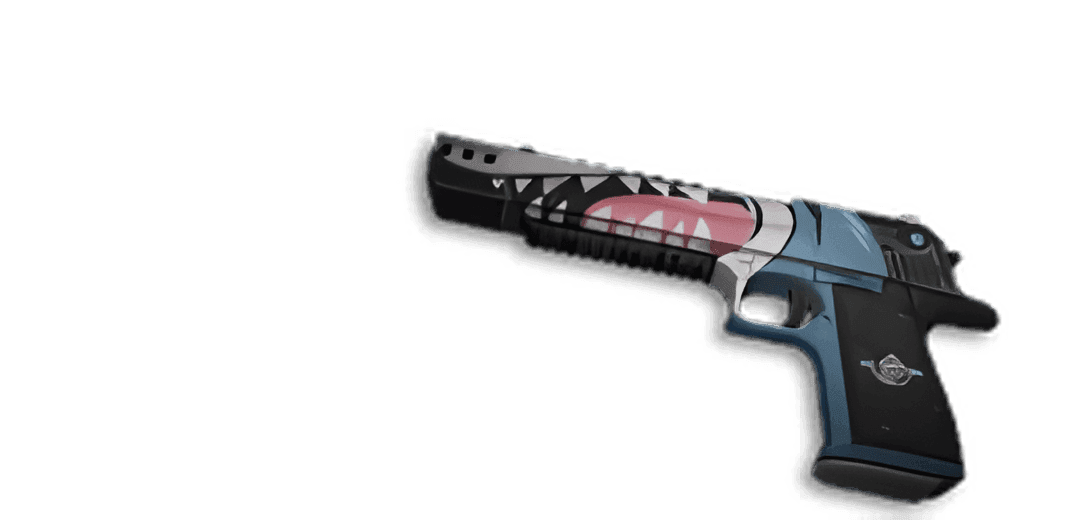
The legendary heavy-caliber handgun DE.50 - Jaws serves as the undisputed powerhouse and primary damage engine of this entire build. In the official client of Once Human, this weapon belongs to the "Beyonder" faction line and features a unique interaction with critical strikes that cements its place as one of the most devastating single-target boss killers in the game.
Base Tier V factory specifications:
- Weapon Type: Heavy Pistol.
- Rarity & Brand: Legendary (Gold Blueprint) / Beyonder.
- Base Critical Hit Rate: 6%.
- Weakspot Damage Multiplier: 60%.
- Base Critical Damage: 25%.
- Fire Rate: 240 rounds per minute.
- Base Magazine Capacity: 7 rounds.
- Effective Range: 28 meters.
The true lethality of the Jaws lies in its unique legendary weapon perks:
| Legendary Perk | Combat Trigger & Mechanics | Tactical Value for the Build |
|---|---|---|
| Guaranteed Bomb on Crit | Landing a Critical Hit has a 100% chance to trigger Unstable Bomber on the target. Internal cooldown: 1.5 seconds. | Removes all RNG from your rotation: whenever your shot crits, an explosive micro-bomb is guaranteed to attach to the target. |
| Inherent Explosion Crit (+25%) | Unstable Bomber detonations triggered by the DE.50 can critically strike and gain an innate +25% Crit Rate bonus on the blast. | A core mechanical anomaly. Standard status procs cannot crit, but Jaws transforms every detonation into a massive critical explosion. |
| Ammo Refund on Blast | Detonating an Unstable Bomber has a 50% chance to immediately refund 1 bullet into the magazine from reserves. | Helps offset the pistol's primary weakness—its modest 7-round magazine—allowing for extended shooting sequences. |
Starchrom Blueprint Tip: The DE.50 - Jaws blueprint can be directly purchased from the Wish Machine for 8,000 Starchrom in the designated pistol category, or pulled via prize pools. Avoid gambling Starchrom on early-game random banners—save your currency specifically to purchase the guaranteed Jaws blueprint as soon as you enter the endgame.
Secondary Utility #1: AWS.338 - Bullseye Sniper Rifle ("Bingo")
Occupying your secondary weapon slot in the meta loadout is the legendary bolt-action sniper rifle AWS.338 - Bullseye, widely known across the community as the "Bingo" sniper. In this build, the rifle is deployed strictly as a tactical quick-swap tool to apply debuffs and trigger offensive buffs:
- Guaranteed Mark on Draw: The signature perk of the Bingo states: "After switching to this weapon, the first shot is guaranteed to apply The Bull's Eye status, even on a body shot." You do not need to waste precious seconds lining up a pixel-perfect headshot—simply draw the rifle, fire once into the boss's center mass, and swap back to your pistol immediately.
- Team Vulnerability Debuff: The resulting mark illuminates the enemy with a glowing blue outline and applies an active +8% vulnerability debuff (+16% when paired with the Vulnerability Amplifier mod).
- Weapon Damage Buff (+15% for 10s): Damaging an enemy affected by The Bull's Eye grants the wielder a personal buff of +15% Weapon DMG for 10 seconds. Crucially, this +15% damage bonus carries over when switching back to your DE.50 Jaws, directly boosting the firepower of every pistol bullet.
Executing the quick rotation of "Swap to Bingo ➔ fire one body shot ➔ swap back to Jaws" takes under 1.5 seconds, but provides an immense 10-second window of amplified damage.
Secondary Utility #2: Recurve Crossbow — The Critical Hit Alternative
If you have not yet unlocked the legendary AWS.338 blueprint during your active scenario phase, the epic (purple) Recurve Crossbow from the "Huntsman" brand serves as an outstanding and accessible alternative:
- Guaranteed Mark on Hit: Landing a bolt on an enemy reliably inflicts The Bull's Eye status with standard vulnerability scaling.
- Personal Crit Rate Buff (+15% for 10s): The primary distinction of the Recurve Crossbow is its self-buff: striking an enemy grants your character +15% Critical Hit Rate for 10 seconds.
When to use the Crossbow over the Bingo: If your armor and mods are still being optimized and your baseline Crit Rate sits below 60–65%, the Recurve Crossbow is often the superior choice. The extra +15% Crit Rate ensures that every bullet from your DE.50 triggers an Unstable Bomber, maintaining your explosive loop without interruption.
Alternative Weapons: DE.50 - Wildfire & KV-SBR - Little Jaws
Depending on encounter mechanics and playstyle preferences, you can adjust your loadout with these alternative firearms:
| Weapon | Type & Rarity | Key Trait / Perk | Tactical Role |
|---|---|---|---|
| DE.50 - Wildfire | Pistol, Epic (Purple) | Weakspot hits have an 80% chance to inflict The Bull's Eye and spread the mark to 1 nearby enemy. | Superb utility sidearm for clearing dungeon rooms with clustered elite enemies. |
| KV-SBR - Little Jaws | SMG, Legendary (Gold) | Every 20 hits triggers an Unstable Bomber detonation; defeating enemies with bomb blasts boosts reload speed by 30%. | Fully automatic alternative for players who prefer continuous fire over semi-automatic pistol clicks. |
| Long Axe | Melee, Epic (Purple) | Heavy attacks create a "Fortress Warfare" zone on the ground for 5 seconds. | Grants +20% Weapon DMG and super armor. Used before initiating boss encounters for a massive burst opener. |
Weapon Calibration & Best Tactical Accessories
Proper calibration bench tuning and accessory selection can dramatically elevate the real-world handling and DPS of your DE.50 Jaws.
DE.50 - Jaws Calibration Tuning:
- Calibration Style: Choose Rapid Shot Style. This increases your rate of fire, allowing you to empty your cylinder rapidly and fit maximum shots within the 3-second buff window of the Shaman Vulture Top.
- Substat Calibration Priority:
- Dual Crit Rate (Crit Rate x2): The ultimate roll, granting +6% to +9% flat Crit Rate.
- Crit Rate + Crit DMG: An excellent balanced roll providing steady critical scaling.
- Crit Rate + Mag Capacity: A solid compromise if you are struggling with cylinder capacity.
Best Weapon Accessories for DE.50 - Jaws:
Weapon accessories in Once Human do not degrade and are unlocked permanently by completing spatial puzzles across the open world:
- Magazine: Extended Pistol Mag — The single most critical accessory for this build. Adds +2 to +4 rounds to your cylinder. Expanding the base 7-round magazine to 10 or 11 rounds provides an effective sustained DPS increase of nearly 50%!
- Optic / Sight: Compact Reflex Sight or Holo Sight. Improves Aim-Down-Sights (ADS) speed and target acquisition, allowing you to snap onto boss weakspots instantly.
- Muzzle: Pistol Compensator. Greatly reduces vertical recoil and muzzle climb from powerful .50 caliber rounds, ensuring follow-up shots land on target.
- Tactical Rail: Tactical Laser Sight. Enhances hipfire accuracy for close-quarters emergency encounters.
With your DE.50 calibrated and your secondary utility weapon equipped, we move to Section 03 to examine armor: the indispensable Shaman Vulture Top, the Lonewolf Set, and slot-by-slot gear distribution.
Key Exotic Armor Piece: Shaman Vulture Top
If the DE.50 - Jaws pistol is the engine of this build, the epic chest armor piece Shaman Vulture Top acts as its supercharger. Originating from the "Operator" faction brand, this specialized top features a unique combat perk that drives the entire critical detonation loop:
Official In-Game Perk: "After triggering Unstable Bomber, Crit Rate +35% for 3s."
Why this piece is universally recognized as the undisputed Best-in-Slot (BiS) choice for DE.50 Jaws:
- Closing the Infinite Crit Loop: To reliably attach an Unstable Bomber using the DE.50 Jaws, you must score a Critical Hit. Once that bomb attaches and detonates, the Shaman Vulture Top instantly grants your character a massive +35% Critical Hit Rate buff for 3 seconds.
- Sustaining 100% Critical Strike Chance: With baseline endgame gear providing roughly 55% to 65% Crit Rate, the +35% bonus from this top pushes your effective Crit Rate to 90%–100%. As a result, subsequent shots in your cylinder are guaranteed critical hits, planting fresh bombs and refreshing the 3-second buff indefinitely!
- Double-Dip Scaling via Weapon Mod: Because the signature Reckless Bomber weapon mod converts every 1% of Crit Rate into +0.5% Unstable Bomber damage, the +35% Crit Rate granted by the Shaman top automatically boosts the damage of every single detonation by an additional +17.5% pure blast damage!
Heavy Exotic Alternative: Explosive Front Top
For players seeking maximum single-explosion burst, the legendary chest piece Explosive Front Top from the "Beyonder" brand offers a hard-hitting alternative:
- Perk Mechanics: "Unstable Bomber detonation delay +0.3s. Unstable Bomber DMG multiplier +30%."
- Tactical Application: This piece trades fire-rate cycling and easy crit chaining for pure, unadulterated one-shot burst damage. It is best suited for deep endgame players who already possess 75%–80%+ natural Crit Rate without relying on temporary buffs. The extra 0.3-second detonation delay also allows you to land more shots to stack the Delayed Blast mask mod before the bomb goes off.
Exotic Footwear for The Bull's Eye: Old Huntsman Boots vs Tactical Combat Shoes
If you choose to run a set piece in your chest slot, you can transfer your exotic slot to your boots. Two standout legendary footwear options synergize directly with The Bull's Eye debuff:
| Footwear | Brand & Rarity | Unique Perk | Combat Role |
|---|---|---|---|
| Old Huntsman Boots | Huntsman, Legendary (Gold) | After marking a target with The Bull's Eye, subsequent hits count as Weakspot hits. Weakspot DMG +30% against marked targets. | The ultimate pairing when using the AWS.338 sniper rifle. Enables you to deal weakspot-tier damage even on body shots against heavily armored bosses. |
| Tactical Combat Shoes | Stranger, Legendary (Gold) | Hitting a target marked by The Bull's Eye grants a 40% chance to refill 1 bullet into the magazine and restore 1% of lost HP. | Supreme quality-of-life choice for the DE.50 Jaws. Solves cylinder starvation issues while providing continuous passive healing during sustained fire. |
| Bloodstained Tracker Boots | Juggernaut, Legendary (Gold) | Re-applying The Bull's Eye to an already marked target boosts Attack by +20% for 5s and spreads the mark to 1 nearby enemy. | Outstanding utility for clearing packed rooms containing multiple elite enemies in Silos and raids. |
Core Set Foundation: 4-Piece Lonewolf Set
The structural backbone of this loadout is the legendary Lonewolf Set. It is the premier endgame armor set in Once Human for any build prioritizing critical hit multipliers:
- 1-Piece Bonus: Magazine Capacity +10%. For a hand cannon like the DE.50 with a default 7-round cylinder, every percentage increase is invaluable. Combined with extended magazine accessories, this bonus provides crucial extra shots before reloading.
- 2-Piece Bonus: Critical Hit Rate +5%. A clean, passive boost bringing your baseline crit closer to cap.
- 3-Piece Bonus: Every 4 critical hits grant 1 stack of "Lone Shadow." Each stack increases Critical Damage by +6% for 20 seconds (stacking up to 8 times = +48% Crit DMG).
- 4-Piece Bonus: Expands the Lone Shadow stack ceiling to 10 (totaling +60% Critical Damage!) and grants an additional +10% Crit Rate for 2 seconds immediately after reloading.
Combined, the 4-piece Lonewolf Set infuses your loadout with +15% Crit Rate, +60% Crit DMG, and expanded magazine size, transforming each Unstable Bomber detonation into a catastrophic blast.
Completing the Loadout: 1-Piece Bastille Set
In a 6-slot armor setup, 5 slots are allocated: 1 exotic piece (Shaman Vulture Top) and 4 Lonewolf set pieces. The final remaining slot is best filled with a single piece from another set offering a potent 1-piece bonus:
- 1-Piece Bastille Set: Grants the passive: "While HP is above 70%, Weapon DMG +10%." Because an experienced pistol marksman maintains mid-range distance behind cover, this +10% multiplier remains active for nearly the entire duration of boss fights. Slotting Bastille Pants or Bastille Boots is standard practice.
- 1-Piece Renegade Set (Alternative): Grants +10% Reload Speed. A solid alternative if you prefer faster cylinder swaps.
- 2-Piece Falcon Set (3+2+1 Transition): If you are still farming your 4th Lonewolf piece, you can temporarily run 3 pieces of Lonewolf (+48% Crit DMG) and 2 pieces of Falcon (+12% flat Crit DMG).
Recommended Slot-by-Slot Armor Loadout Table
Below is the definitive endgame armor layout optimized for Unstable Bomber and The Bull's Eye synergy:
| Armor Slot | Recommended Piece | Set / Brand | Primary Bonus | Slot Justification |
|---|---|---|---|---|
| Helmet | Lonewolf Mask | Lonewolf Set | Activates 1-piece set bonus (+10% Magazine Capacity). | Provides high base defense and houses the critical "Momentum Up" helmet mod. |
| Torso / Top | Shaman Vulture Top | Exotic / Operator | +35% Crit Rate for 3s after triggering Unstable Bomber. | Heart of the build. Enables the infinite 100% crit loop for shots and detonations. |
| Pants | Bastille Pants | Bastille Set | +10% Weapon DMG while character HP is above 70%. | Ideal filler slot delivering unpenalized raw weapon scaling. |
| Gloves | Lonewolf Gloves | Lonewolf Set | Activates 2-piece set bonus (+5% Critical Hit Rate). | Primary slot for scaling Psi Intensity alongside the mask. |
| Boots / Shoes | Lonewolf Boots | Lonewolf Set | Activates 3-piece set bonus (up to +48% Crit DMG from stacks). | Accommodates the "Covered Advance" footwear damage mod. |
| Mask | Lonewolf Hood | Lonewolf Set | Activates 4-piece set bonus (up to +60% Crit DMG & +10% Crit on reload). | Critical slot for the signature "Delayed Blast" Unstable Bomber mod. |
With our armor framework established, Section 04 details the essential weapon and gear mods, substat priorities, and targeted farming locations across Silos and Monoliths.
Premier Weapon Mod for DE.50 - Jaws: Reckless Bomber
Modifications (mods) in Once Human dictate nearly 40% to 50% of your character's real combat effectiveness. For the DE.50 - Jaws pistol, one gold-tier weapon mod stands supreme above all others: Reckless Bomber.
Official In-Game Mod Effect: "For every 1% Crit Rate, Unstable Bomber DMG +0.5%."
Why this modifier triggers an explosive surge in your damage output:
- Direct Crit-to-Blast Conversion: Conventional builds are forced to choose between physical critical strike stats and elemental status damage. The Reckless Bomber mod bridges these two systems: by stacking Critical Hit Rate to sustain your weapon and chest perks, you simultaneously amplify the raw base damage of every detonation.
- Massive Scaling at 80% to 100% Crit Rate: With a baseline character Crit Rate of 80%, this mod grants an automatic, permanent +40% damage bonus to all Unstable Bomber explosions. When the Shaman Vulture Top triggers (+35% Crit Rate) and caps your crit chance at 100%, your explosion damage reaches peak devastation.
- Mandatory <Violent> Suffix: Your weapon mod must roll with the <Violent> suffix, which adds an intrinsic +15% to +28% Critical Damage bonus directly to the firearm. Versions featuring survival or handling suffixes cannot compete with the sheer damage output of a violent roll.
Alternative Mod: Eruptive Bomber. If you have not yet acquired a gold Reckless Bomber, the Eruptive Bomber mod serves as a capable placeholder: landing 5 hits on a target tagged with an Unstable Bomber before it detonates increases the final explosion damage by +20%.
Secondary Weapon Mod: Vulnerability Amplifier
Your secondary utility firearm (the AWS.338 - Bullseye sniper rifle or the Recurve Crossbow) should be equipped with the premier support mod — Vulnerability Amplifier:
- Doubling the Debuff Potency: By default, The Bull's Eye status increases incoming damage to the marked target by +8%. Equipping Vulnerability Amplifier doubles this value to a full +16% incoming damage debuff.
- Team-Wide Multiplier: This 16% vulnerability affects all incoming damage, meaning your entire squad in dungeons and raid bosses benefits from the increased multiplier.
- Recommended Suffix: For the sniper rifle, seek the <Precision> suffix to improve aim-down-sights responsiveness, or standard <Violent>.
Slot-by-Slot Armor Mod Setup: Maximizing Criticals & Explosions
Each of your six armor slots must be fitted with targeted mods that synergize with aim-down-sights (ADS) fire and blast mechanics:
1. Mask — Delayed Blast <Violent>
Effect: For every 4 hits landed on an enemy before their Unstable Bomber detonates, the final explosion damage increases (scaling up to +25% final damage at Tier 5). With the rapid fire rate of the calibrated DE.50, you easily land 4 to 5 bullets before detonation, guaranteeing the maximum 25% blast amplification.
2. Helmet — Momentum Up <Violent>
Effect: Continuous hits grant stacking Weapon DMG and Critical Damage buffs, while scoring a kill instantly awards maximum stacks. Alternative: Pinpoint Strike for front-loaded damage on your initial magazine rounds.
3. Torso / Top — Quick Comeback <Violent>
Effect: Scoring a critical hit or defeating an enemy boosts movement speed by 15% and increases your next reload speed by 25%. This allows you to reposition effortlessly during boss encounters and cuts down DE.50 cylinder reload downtime.
4. Pants — Deadshot <Violent>
Effect: While firing in Aim-Down-Sights (ADS) mode, grants an immense passive bonus of +10% Critical Hit Rate and +15% Critical Damage. Because precision hand-cannon shooting is always conducted via ADS, this buff remains active throughout combat.
5. Gloves — Crit Amplifier <Violent>
Effect: Grants +10% Critical Hit Rate and +15% Critical Damage. Alternative: Crit Boost <Violent> (+15% flat Crit Rate) if your gear is missing baseline critical chance.
6. Boots / Shoes — Covered Advance <Violent>
Effect: While character HP remains above 70%, grants +20% Weapon DMG. Perfectly stacks with the 1-piece Bastille Set bonus (+10% Weapon DMG above 70% HP), delivering an unpenalized +30% raw weapon damage boost.
Substat Optimization & Priority Hierarchy
When upgrading mods to their maximum tier, random secondary substats become the deciding factor between a good build and an elite one. Follow this strict priority hierarchy:
- S-Tier (Absolute Priority):
- Critical Damage (Crit DMG): The primary multiplier of this build. Aim for a total profile value above 200% to 240%+.
- Critical Hit Rate (Crit Rate): Maintain an unbuffed baseline of 70% to 80% (reaching 100% cap under Shaman Vulture Top).
- A-Tier (High Value):
- Blast DMG: Directly amplifies the explosion output of Unstable Bomber.
- Status DMG: Multiplies with blast bonuses to push detonation numbers higher.
- Weapon DMG: Enhances the physical impact of your heavy .50 caliber rounds.
- B-Tier (Tactical Utility):
- Magazine Capacity: Yields 1 to 2 extra bullets per cylinder.
- Reload Speed: Minimizes downtime between firing cycles.
- Trash Stats (Avoid):
- Flat elemental damage bonuses for other damage types (Fire, Frost, Shock).
- Melee damage and redundant recoil reduction on non-critical slots.
Comprehensive Mod Farm Guide: Silos & Monolith Locations
The table below outlines the exact drop locations for each core modifier across high-difficulty endgame content:
| Armor Slot | Mod Name (EN) | Required Suffix | Core Effect | Targeted Farming Location |
|---|---|---|---|---|
| Weapon (DE.50) | Reckless Bomber | <Violent> | +0.5% Unstable Bomber DMG per 1% Crit Rate. | Gaia Cliff Monolith (Treant) / Tundra Monolith (Secret Servitor) on Hard & Master difficulty. |
| Weapon (AWS.338) | Vulnerability Amplifier | <Precision> | Increases The Bull's Eye vulnerability from +8% to +16%. | Securement Silo PHI / Silo THETA. |
| Mask | Delayed Blast | <Violent> | Up to +25% blast damage for 4 hits landed before detonation. | Securement Silo SIGMA on Hard & Master difficulty. |
| Helmet | Momentum Up | <Violent> | Stacks Weapon DMG and Crit DMG on hit; instant max stacks on kill. | Securement Silo PSI. |
| Torso / Top | Quick Comeback | <Violent> | +15% movement speed and +25% reload speed after crit or kill. | Securement Silo PHI. |
| Pants | Deadshot | <Violent> | +10% Crit Rate and +15% Crit DMG while in ADS mode. | Securement Silo SIGMA. |
| Gloves | Crit Amplifier | <Violent> | +10% Crit Rate and +15% Crit DMG. | Eclipse Monolith (Arachsiam) / Silo EX1. |
| Boots | Covered Advance | <Violent> | +20% Weapon DMG while HP is above 70%. | Securement Silo THETA. |
With your mods farmed, calibrated, and upgraded, Section 05 covers combat deviations (Mr. Wish vs Lonewolf's Whisper), seasonal Cradle overrides, and optimal combat food buffs.
Top Combat Deviation #1: Mr. Wish — Automating The Bull's Eye
Combat Deviations in Once Human are far more than vanity pets; they serve as vital tactical partners that contribute significantly to your damage rotation. For the DE.50 - Jaws build, the premier combat partner is Mr. Wish, also cataloged as Chaos Mr. Wish:
Official Skill Trait: When summoned into battle, Mr. Wish materializes alongside the player wielding a miniature submachine gun, opening rapid fire on your designated target and automatically inflicting The Bull's Eye status.
Why Mr. Wish completely transforms the gameplay of this archetype:
- Zero Weapon Swapping Required: In a manual rotation, you are forced to interrupt your pistol fire every 10 seconds, draw your sniper rifle, fire a shot to refresh the mark, and switch back. Mr. Wish takes over this entire process: as long as he is active on the field, the boss remains continuously debuffed with The Bull's Eye (+16% incoming damage with Vulnerability Amplifier).
- 100% Focus on Jaws Firepower: You can dedicate all your attention to positioning, precision aiming, and rapidly emptying DE.50 cylinders into boss weakspots, maximizing explosive procs per second.
- Distraction and Aggro Control: The rapid chatter of Mr. Wish's SMG generates light threat, occasionally diverting aggro from surrounding minions while you reload.
Where to Obtain Mr. Wish: Mr. Wish drops from securement units upon clearing Securement Silo SIGMA on Hard and Master difficulties. Aim to secure an instance with Power and Mood ratings of 3/3 or higher to extend his deployment uptime during boss fights.
Top Combat Deviation #2: Lonewolf's Whisper — Peak Solo Burst DPS
If your objective is to achieve maximum single-target burst records during vulnerability phases while manually executing sniper rifle swaps, the legendary deviation Lonewolf's Whisper is your ideal companion:
- Phantom Wolf Pack: Summons spectral wolves that charge the boss, dealing physical bite damage and drawing boss aggro, allowing you to freely unload into the monster's weakspots from safety.
- Devastating Weapon Damage Aura: While the wolves engage the target, an aura surrounds the player granting +12% to +25% Weapon DMG and additional Critical Damage depending on the deviation's combat rating.
- Optimal for Stun Phases: Elite speedrunners utilize Lonewolf's Whisper during boss stagger phases: manually tag the boss with the AWS.338, summon the wolves, gain the maximum damage aura, and burn through millions of health in two DE.50 cylinders.
Where to Obtain Lonewolf's Whisper: Acquired as an endgame reward from the Monolith of Thirst upon defeating the Shadow Hound on Hard and Master difficulties.
Seasonal Cradle Overrides Configuration
The Cradle interface allows players to configure passive override perks tailored to active weapon archetypes. To fully unlock the critical blast potential of this loadout, activate the following 5 core Cradle nodes:
| Override Category | Recommended Cradle Node | Combat Utility & Synergy |
|---|---|---|
| Weapon Proficiency | Handgun Boost | Increases movement speed by 10% while wielding a handgun, and boosts reload speed by 30% for 5 seconds following a kill. |
| Status Amplification | Status & Blast Enhance | Increases the damage of all status effects and blast shockwaves by +15% to +20% against targets above 50% HP. |
| Mark Exploitation | Hunter's Mark (Bullseye Synergy) | Damaging an enemy affected by The Bull's Eye grants +15% Critical Damage for 8 seconds. |
| Tactical Mobility | Tactical Roll / Sprint | Performing an evasive combat roll grants 20% damage reduction and instantly refunds 1 round into your active weapon's magazine. |
| Deviation Synergy | Deviant Sync | While your combat deviation (Mr. Wish or Lonewolf's Whisper) is deployed, character Weapon DMG is increased by +10%. |
Combat Cooking, Beverages, and Consumables
Food buffs in Once Human last 30 minutes, persist through fast travel, and provide multiplicative stat bonuses that significantly enhance your combat numbers:
1. Top Specialty Dish: Mixed Fried Hot Dog
- Buff Effect: Grants +20% Damage toward enemies affected by The Bull's Eye for 30 minutes.
- Build Value: The quintessential dish for this archetype. Because your primary target is permanently marked with The Bull's Eye (via manual swap or Mr. Wish), this +20% multiplier applies to every bullet and every Unstable Bomber detonation throughout the entire encounter.
2. Alternative Dishes: Crumbly Bread & Bacon Burger
- Crumbly Bread: Grants a flat +25% Weapon DMG bonus for 30 minutes, directly scaling the physical bullet impact of your heavy .50 caliber rounds.
- Bacon Burger: Grants +20% Weakspot DMG for 30 minutes. Ideal when running the AWS.338 sniper rifle and Old Huntsman Boots setup.
3. Tactical Beverages & Sweets:
- Stargazy Pie: Restores character Sanity over time and boosts Pollution Resistance, essential when clearing heavily contaminated zones in deep Silos and Monoliths.
- Ghost Cookies: Increases elemental blast damage and status amplification by 10%.
- Spring Water: Reduces sprint and dodge stamina consumption by 20%, ensuring you can outmaneuver hazardous boss mechanics.
- Activators & Adrenaline: Keep standard HP activators and adrenaline shots on your hotbar for emergency self-healing and quick ally revives during raid encounters.
With our deviation deployed, Cradle configured, and food buffs consumed, Section 06 breaks down the step-by-step combat rotation and tactical strategies for high-tier PvE and PvP.
Flawless Burst Rotation: Step-by-Step Execution
Achieving peak damage numbers in the hundreds of thousands within seconds requires disciplined combat execution. The synergy between the DE.50 - Jaws hand cannon and the AWS.338 - Bullseye sniper rifle relies on a structured 7-phase sequence where each ability directly primes the next:
- Phase 1: Pre-Combat Preparation (Pre-Buff):
- Ensure your 30-minute food buff from Mixed Fried Hot Dog (+20% damage toward enemies affected by The Bull's Eye) or Crumbly Bread (+25% Weapon DMG) is active.
- Just before engaging the boss, equip your Long Axe and execute a heavy melee smash into the ground: this deploys a Fortress Warfare zone providing +20% Weapon DMG and super armor for 5 seconds.
- Phase 2: Deviation Deployment:
- Summon your combat deviation: deploy Mr. Wish for automatic vulnerability mark maintenance, or Lonewolf's Whisper for maximum weapon damage aura amplification.
- Phase 3: Quick-Swap Vulnerability Application:
- Instantly swap to your AWS.338 - Bullseye ("Bingo") sniper rifle and fire a single shot into the boss's center mass.
- Mechanical Trigger: The first shot from the draw is guaranteed to inflict The Bull's Eye (amplifying incoming damage by +16% via the Vulnerability Amplifier mod) and simultaneously grants the wielder a personal buff of +15% Weapon DMG for 10 seconds!
- Phase 4: Aim-Down-Sights (ADS) Hand-Cannon Stance:
- Immediately switch back to your DE.50 - Jaws and enter Aim-Down-Sights (ADS) mode.
- Aiming down sights instantly activates the Deadshot pants mod, granting an additional +10% Critical Hit Rate and +15% Critical Damage.
- Phase 5: Critical Bullet Chain & Bomb Detonation:
- Fire 1 to 2 precision rounds into the boss's weakspot. Your first critical strike has a 100% chance to attach an Unstable Bomber micro-charge to the target.
- After a 1.2-second delay, the bomb detonates. Because the Jaws pistol allows bombs to crit with an innate +25% bonus, the explosion deals catastrophic critical blast damage.
- The detonation instantly triggers the signature perk of the Shaman Vulture Top, granting your character a staggering +35% Critical Hit Rate buff for 3 seconds!
- Phase 6: Full Cylinder Dump & Lone Shadow Stacking:
- With your effective Crit Rate locked at 100%, rapidly empty the remaining rounds from your cylinder. Every shot critically strikes, builds "Lone Shadow" stacks from the 4-piece Lonewolf set (scaling up to +60% Crit DMG), and attaches fresh bombs, continuously resetting the 3-second timer of the Shaman top.
- Phase 7: Tactical Reload & Loop Reset:
- Scoring crits accelerates your reload by 25% via the Quick Comeback mod. The moment your cylinder snaps shut, the 4-piece Lonewolf bonus grants +10% Crit Rate for 2 seconds, ensuring your next magazine initiates the explosive cycle without dropping momentum.
Manual Rotation Without Mr. Wish: If you are running Lonewolf's Whisper instead of Mr. Wish, repeat Step 3 (quick-swapping to the AWS.338 for a single shot) every 9 to 10 seconds to ensure the +16% vulnerability debuff never expires on your target.
High-Tier PvE Strategy: Silos, Monoliths, and the LEA Lab
Adapting your positioning and target selection based on encounter mechanics is critical for surviving endgame scenarios:
1. Clearing Dungeon Rooms & Elites in Securement Silos
Inside Silos, Rosetta troopers and Vultures often spawn in dense clusters. Do not waste time drawing your sniper rifle for every minor enemy. Target the largest elite in the pack (such as a Rosetta Crusher or Vulture Barrier Breaker) and land two fast shots with the DE.50. The resulting Unstable Bomber detonation deals wide-area splash damage within a 5 to 7-meter radius, instantly wiping out surrounding minions.
2. Monolith Boss Strategies
Positioning dictates your success against colossal Monolith anomalies:
- Treant (Gaia Cliff Monolith): Maintain a mid-range distance of 15 to 20 meters. Quickly mark and destroy the floating buds on the giant's back using Jaws blast explosions. When the Treant collapses into its vulnerable stagger phase, execute your full burst rotation into its exposed chest core.
- Shadow Hound (Monolith of Thirst): A highly mobile boss that frequently leaps across the arena. Deploy Lonewolf's Whisper so your wolf pack distracts the beast, allowing you to deliver rapid ADS headshots into its massive maw from behind cover.
- Arachsiam (Eclipse Monolith): Avoid standing in ground poison puddles. The mobile nature of the DE.50 allows you to kite continuously while aiming down sights, blasting the spider's soft abdomen through webbing.
3. Pinnacle Endgame: LEA Research Lab
The final seasonal challenge—the LEA Research Lab—features the Forgotten Giant and Chaosweaver, protected by immunity shields and elite casters:
- Do not waste ammunition firing into phased immunity barriers—conserve your cylinder until weakpoint vulnerabilities are exposed.
- The Bull's Eye mark is invaluable for burning elite adds: a single shot from your AWS.338 equipped with Vulnerability Amplifier enables your entire fireteam to focus down priority targets before mechanics overwhelm the room.
- Monitor your Sanity and Stamina: heavy hand-cannon fire requires stable footing, so avoid lingering inside environmental corruption zones.
PvP Application: Cargo Scramble & Territory Wars
In player-versus-player (PvP) engagements, the combination of heavy .50 caliber rounds and critical blast detonations dispatches opposing Meta-Humans in the blink of an eye:
- Two-Tap Elimination Potential: A single .50 caliber bullet paired with a critical Unstable Bomber explosion easily deals over 12,000 to 16,000 total damage, instantly shattering heavy Bastille shields and dropping full-health players.
- Blast Damage Around Thin Cover: The blast radius of Unstable Bomber curves around wooden barricades, low walls, and building corners. If an enemy ducks behind cover, attaching a bomb to the adjacent wall or doorframe deals full splash damage.
- Countering Camouflage & Stealth: The luminous blue outline of The Bull's Eye cannot be concealed. If a marked player attempts to use camouflage, drop a smoke grenade, or hide in foliage, the glowing outline exposes their position to your entire warband.
- PvP Movement Discipline: Never traverse the map while perpetually locked in ADS mode—doing so severely reduces movement speed and turns you into an easy target for enemy snipers. Snap into ADS for the split-second required to fire, then immediately break into a sprint or tactical slide.
With our rotation mastered and combat tactics established, Section 07 reviews the top 5 build-breaking mistakes, endgame stat targets, and frequently asked community questions.
Top 5 Build-Breaking Mistakes with DE.50 - Jaws
The combination of the DE.50 - Jaws hand cannon and The Bull's Eye status boasts an immense damage ceiling, but even seasoned Meta-Humans frequently commit critical build errors that slash their effective DPS in half:
Sacrificing Critical Hit Rate for Pure Elemental / Status DMG:
The most common mistake among beginners is treating Unstable Bomber as a traditional spell. Players stack their mod substats exclusively with Elemental and Status DMG bonuses, allowing their unbuffed Crit Rate to fall below 45%–50%. As a consequence, pistol shots fail to crit, bombs do not reliably attach, and most critically—the Shaman Vulture Top (+35% Crit Rate) fails to trigger, causing the entire critical loop to collapse. Always maintain an unbuffed baseline Crit Rate of at least 70% to 75%!
Neglecting Your Secondary Weapon and The Bull's Eye Debuff:
Firing exclusively with your pistol without first applying the blue hunter's mark forfeits a massive +16% team vulnerability multiplier and a personal +15% Weapon DMG buff. If manually quick-swapping to the AWS.338 sniper rifle during intense boss mechanics feels cumbersome, farm and deploy the combat deviation Mr. Wish to maintain the mark automatically.
Hipfiring in Close Quarters Instead of Aiming Down Sights (ADS):
Firing from the hip completely deactivates the premier pants mod Deadshot, stripping your character of +10% Crit Rate and +15% Crit DMG. Furthermore, the inherent bullet spread of heavy .50 caliber ammunition will cause rounds to miss critical weakspots. Always snap into ADS (holding right-click) even when firing at point-blank range.
Ignoring Psi Intensity Upgrades on Mask and Gloves:
Many players invest all their resources into 5-starring their pistol while leaving armor pieces neglected. However, the base blast damage of Unstable Bomber scales directly from your total Psi Intensity, the vast majority of which is provided by your Mask and Glove slots. Prioritize star upgrades and calibration on these two gear pieces to maximize your explosion baseline.
Equipping Random Mod Suffixes Instead of <Violent>:
Slotting mods with survival (<Survival>) or handle suffixes results in a devastating loss of burst damage. Every single armor and weapon mod in this loadout must feature the <Violent> suffix, which cumulatively adds over +100% Critical Damage across your equipment compared to un-suffixed mods.
Endgame Stat Benchmarks & Attribute Targets
To gauge whether your character is prepared to tackle Pro-tier Silos, Master Monoliths, and the LEA Research Lab, compare your profile attributes against these benchmark standards:
| Combat Attribute | Early Endgame (Mid-Tier Gear) | Pinnacle Meta (Top-Tier Gear) | Optimization Notes |
|---|---|---|---|
| Critical Hit Rate (Crit Rate) | 55% – 65% | 75% – 85%+ | Reaches the guaranteed 100% cap under Shaman Vulture Top (+35%) and Lonewolf bonuses. |
| Critical Damage (Crit DMG) | 130% – 150% | 200% – 240%+ | The primary damage engine scaling the devastating critical explosions of the Jaws pistol. |
| Psi Intensity | 800 – 950 | 1,250 – 1,450+ | Drives the raw base damage of each Unstable Bomber detonation before percentage multipliers. |
| Blast DMG Bonus | +20% – +30% | +45% – +60%+ | Stacked via "Reckless Bomber", "Delayed Blast", and combat consumables. |
| Magazine Capacity | 9 rounds | 11 – 13 rounds | Achieved through an Extended Pistol Mag accessory and the 1-piece Lonewolf set bonus. |
| Weapon DMG Bonus | +30% – +45% | +65% – +85%+ | Combined output of the 1-piece Bastille set, "Covered Advance" mod, and Bingo buff. |
Frequently Asked Questions (FAQ)
1. Where can I acquire the DE.50 - Jaws blueprint guaranteed?
The DE.50 - Jaws legendary blueprint can be purchased directly from the Wish Machine in your territory. Open the machine interface, navigate to the dedicated handgun blueprint category, and select the direct purchase option for 8,000 Starchrom. This guarantees unlocking the weapon immediately without relying on randomized banner draws.
2. How do I obtain the epic Shaman Vulture Top?
The blueprint for the Shaman Vulture Top is obtainable through specific armor prize pools in the Wish Machine for Starchrom, or as a rare random drop from Mystical Crates scattered across high-level strongholds in the Blackfell region.
3. Why do my Unstable Bomber explosions sometimes fail to critically strike?
Unstable Bomber detonations roll their critical strike check independently from the bullet that planted them. While the DE.50 Jaws provides an innate +25% explosion crit rate bonus, if your character's baseline Crit Rate is only 30% to 40%, the explosion has roughly a 55% to 65% chance to crit, leaving more than a third of detonations un-crit. To ensure 100% critical consistency, push your baseline Crit Rate to 70%+ and maintain the Shaman Vulture Top buff (+35%).
4. Which is better for solo play: AWS.338 - Bullseye or Recurve Crossbow?
If you already possess optimized endgame gear with an unbuffed Crit Rate exceeding 70%, the AWS.338 - Bullseye is superior due to its guaranteed body-shot mark on draw and lingering +15% Weapon DMG buff. If your gear is still progressing and you struggle to crit reliably, the Recurve Crossbow with its immediate +15% character Crit Rate buff delivers far greater consistency.
5. Can I run this build using the KV-SBR - Little Jaws SMG?
Yes, the legendary submachine gun KV-SBR - Little Jaws also operates on the Unstable Bomber mechanic. However, it attaches bombs every 20 hits rather than on critical strikes. While Little Jaws is an excellent and forgiving weapon for open-world farming, the semi-automatic DE.50 pistol remains the uncontested leader for single-target boss burst DPS.
6. Does The Bull's Eye mark clear during boss phase transitions?
Yes. Whenever a boss enters an invulnerability phase (such as burrowing underground, activating phased barriers, or transitioning phases like the Shadow Hound or Treant), all active debuffs are cleansed. When the boss becomes vulnerable again, restart your rotation by landing an AWS.338 or crossbow shot to reapply the mark before unloading your pistol.
Build Summary & Conclusion
The synergy of Unstable Bomber & The Bull's Eye—anchored by the DE.50 - Jaws hand cannon, the AWS.338 - Bullseye sniper rifle, the Shaman Vulture Top, and the 4-piece Lonewolf Set—stands firmly at the pinnacle of endgame boss-clearing setups in Once Human. By mastering quick-swap mark management, snapping into precision ADS fire, and stacking critical multipliers, you will tear through the most challenging raid encounters with devastating explosive efficiency.