Once Human Burn Build Guide (2026): Best KVD - Boom! Boom! Loadout, Shelterer Set & Mods
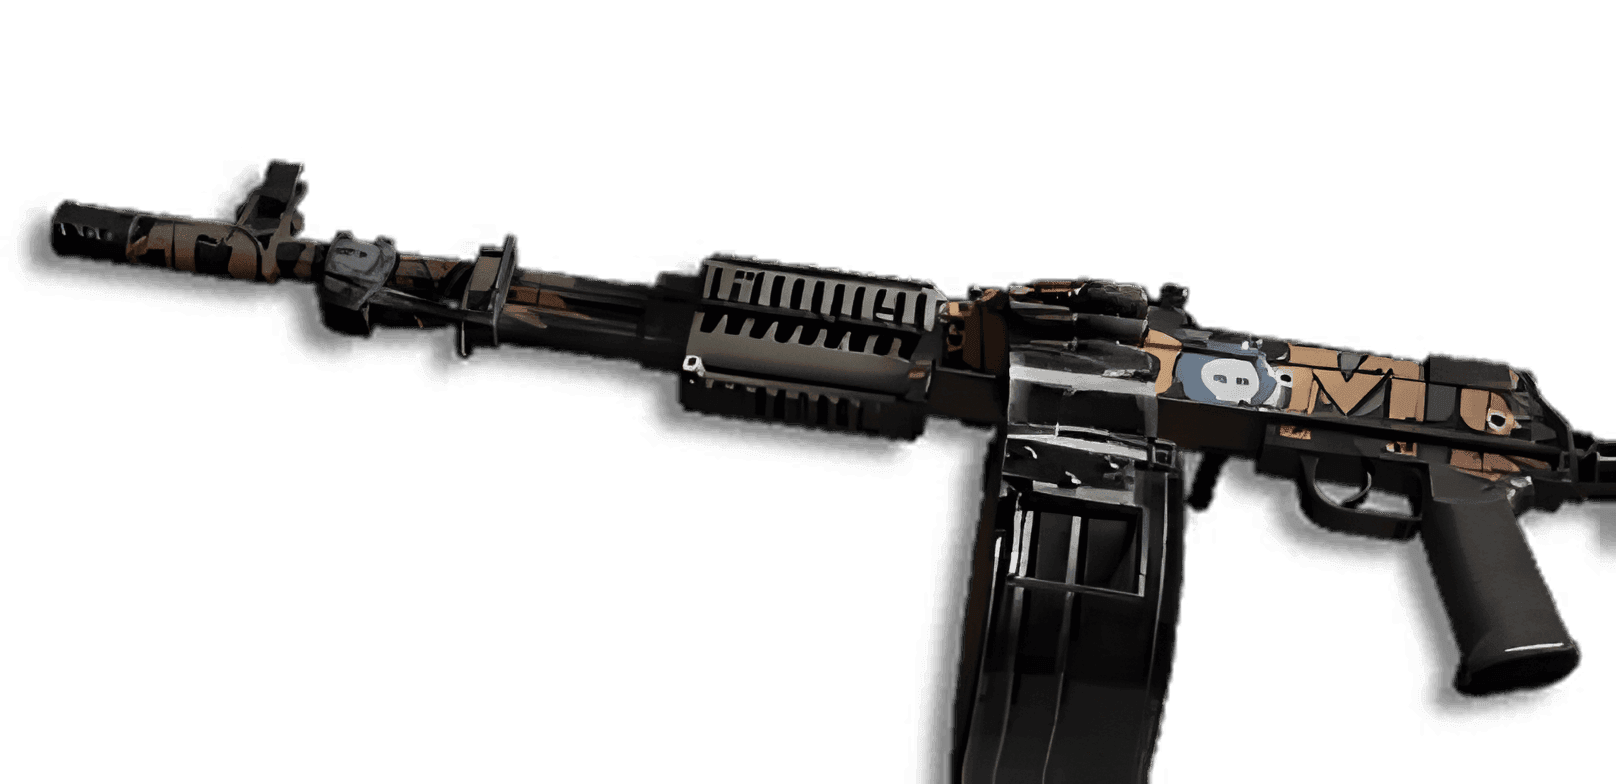
The Burn status build built around the legendary light machine gun KVD - Boom! Boom! is the undisputed king of AoE wave clearing and one of the most comfortable endgame setups in Once Human. While physical rifle players have to track and snipe tiny weakspots on every moving target, a gunner wielding KVD - Boom! Boom! simply holds down the trigger into the center of the pack, turning the screen into a cascade of chain pyro explosions and melting health bars. In the current 2026 meta, this archetype effortlessly clears Securement Silos speedruns, dense wave defenses in the Endless Dream scenario, the LEA Research Lab, and Nightmare Manibus bosses alike.
Quick Take: Burn is an elemental damage-over-time status (Blaze DMG) that ticks every 0.5s for 6 seconds, dealing a base 12% of your Psi Intensity per stack. By default, neither Burn ticks nor the LMG's pyro explosions can crit, scale with weapon Attack, or benefit from weakspot hits. Your entire damage output is built around stacking Psi Intensity on your armor pieces and balancing two multiplicative stat buckets: Elemental DMG and Status DMG.
How the Burn Status Works & Damage Scaling in 2026
The biggest mistake players make when transitioning from physical crit rifles (such as the SOCR - The Last Valor Shrapnel Build) to an elemental LMG is trying to stack Crit Rate or Weapon DMG. The Burn keyword follows elemental status scaling rules, which rely on a completely different set of multipliers.
To avoid wasting your Starchrom and mod parts, keep these five fundamental laws of fire scaling in mind:
- Armor Psi Intensity Is Your Base Stat, Not Weapon Attack: Every Burn tick deals base Blaze DMG equal to 12% of your Psi Intensity per active stack. Psi Intensity comes exclusively from your six equipped armor pieces (with the Mask and Gloves slots providing the highest base values) and ignores the Attack stat on your gun. Even if you hold an unupgraded 1-star LMG while wearing 6-star Tier V armor, your fire ticks and pyro explosions will hit at full power!
- Stack Cap & Decay Mechanics: By default, any target can hold up to 5 stacks of Burn (taking 60% Psi Intensity every half-second at 5 stacks). Equipping the weapon mod Flame Resonance or using the KAM - Burning Rage rifle raises this cap to 7 stacks. Base Burn duration is 6 seconds: when the timer expires, your stacks do not drop to zero all at once—instead, they are cut in half (and with the Embers weapon mod, stack loss is reduced by 50%, meaning you only lose 25% of your stacks and can maintain max stacks on a boss indefinitely).
- Tick Frequency Doubles Your DPS: The base interval between Burn ticks is once every 0.5 seconds (2 ticks per second). However, the build's core key armor piece—the epic BBQ Gloves—increases Burn tick frequency by up to +100%. With these gloves equipped, your fire ticks every 0.25 seconds (4 times per second!), effectively doubling your sustained single-target DoT damage.
- Zero Crits or Weakspots Required by Default: Neither periodic Burn ticks nor the AoE pyro explosions from KVD - Boom! Boom! can score critical hits or benefit from weakspot multipliers (outside of a specialized hybrid setup using the legendary Gilded Gloves, covered below). You can shoot a boss in the foot or clip the edge of its hitbox while sprinting—your fire damage will not lose a single point.
- Multiplicative Scaling Between Elemental DMG and Status DMG: In the damage formula, Elemental DMG (Blaze DMG) and Status DMG sit in separate multiplicative buckets. Stacking 150% of one while leaving the other at 20% results in diminishing returns—your highest peak damage comes from keeping both stats balanced close to a 1:1 ratio.
Best Primary Burn Weapons: Blueprint Tier List
The Once Human arsenal features five primary firearms with the built-in Burn keyword. Three of them belong to the legendary (gold) tier and can be unlocked via the Wish Machine using Starchrom, with each gold blueprint offering a distinct combat playstyle.
Legendary Light Machine Gun (Juggernaut foundry, base 100-round box magazine, base stats: Crit Rate 10%, Weakspot DMG 40%, Crit DMG 30%). Its dominance comes from combining two synergistic mechanics—massive AoE burst explosions and relentless damage over time:
- Every bullet hit has an 18% chance to inflict a stack of Burn on the target.
- Hitting a target triggers a fiery pyro explosion that instantly deals 300% of your Psi Intensity as Blaze DMG to all enemies within a 5-meter radius (explosion internal cooldown is just 2 seconds; damage against Meta-Humans in PvP is reduced to 40%).
- The pyro explosion itself automatically applies +1 stack of Burn to every enemy caught in the blast radius, igniting the entire room in a chain reaction.
- The LMG's built-in passive grants a flat +30% Blaze Elemental DMG bonus.
Thanks to its massive magazine capacity, you can hold down the trigger for half a minute straight, detonating enemy packs for hundreds of thousands of damage every 2 seconds while keeping maximum Burn stacks ticking on the boss.
Legendary automatic shotgun (Juggernaut foundry, base stats: Crit Rate 8%, Weakspot DMG 15%, Crit DMG 27%) that received substantial base pellet damage buffs in the 2025–2026 balance patches. It operates as an aggressive close-quarters brawler:
- Features a 27% chance on hit to inflict Burn and a 20% chance to spawn a Deviant Particle orb on the ground (1s generation cooldown).
- Picking up each Deviant Particle grants 1 buff stack for 60 seconds. On your next reload, the shotgun consumes all stored stacks and loads your magazine with special Dragon's Breath rounds.
- Every Dragon's Breath shot deals 95% of your Attack as Blaze elemental status damage, which simultaneously scales with all of your Burn DMG and Attack bonuses!
- Passively increases Blaze DMG by +20%, plus an additional +8% per stack consumed upon reload (up to 4 stacks = +32%, totaling a massive +52% Blaze DMG!).
Paired with the key Fire Rune Boots, this automatic shotgun shreds ground bosses and elite guardians in Silos at point-blank range.
Legendary semi-automatic marksman/sniper rifle (Wanderer foundry, Crit Rate 5%, Weakspot DMG 50%, Crit DMG 40%). Has a 50% chance to inflict Burn on hit. Whenever a target reaches max Burn stacks, a 6-meter fiery ring erupts beneath them, dealing heavy periodic Blaze AoE damage to all enemies inside. The rifle reduces max Burn stacks by 3, but compensates with a massive +75% Burn DMG and +20% Crit Rate—tailor-made for a hybrid Crit-Burn setup using Gilded Gloves and the Lonewolf Set.
The epic assault rifle KAM - Burning Rage (known in CBT as KAM - Crank) triggers Burn on every 7th hit, increases Burn DMG by +15% at max stacks, and passively grants +2 Max Burn Stacks. Alongside the rare blue rifle M416 - Scorched Earth (12% Burn chance), it serves as an excellent free-to-play stepping stone during the opening days of a new scenario before you unlock KVD - Boom! Boom!.
Best Secondary & Melee Weapons for Damage Amplification (Stat-Sticks)
Because KVD - Boom! Boom! boasts a huge ammo pool and handles both single-target bosses and mob packs on its own, your secondary firearm and melee weapon slots are used exclusively to apply external multiplicative debuffs on bosses right before your main LMG spray.
| Slot | Weapon Name | Rarity | Role in Rotation & Exact Burn Synergy |
|---|---|---|---|
| Secondary (Top-1 BiS) | AWS.338 - Bullseye | Legendary (Gold) | Upon swapping to this sniper rifle, your very first shot on any body part of the boss is guaranteed to apply The Bull's Eye mark for 12 seconds. With the Vulnerability Amplifier weapon mod installed, the mark increases all damage taken by the target (including Burn ticks and LMG pyro explosions!) by +16% to +20%. |
| Secondary (Budget) | DE.50 - Wildfire | Epic (Purple) | An accessible purple alternative to AWS.338: has a 60% chance on hit to apply the exact same The Bull's Eye vulnerability mark and spreads it within a 15-meter radius. Saves your Starchrom early in the season. |
| Secondary (Crit-Burn & ACS12) | Recurve Crossbow | Epic (Purple) | Hitting a weakspot applies The Bull's Eye and grants an additional +15% Crit Rate to all attacks against that target for 10 seconds. The ideal companion for hybrid Crit-Burn setups with Gilded Gloves and EBR-14 - Octopus! Grilled Rings!. |
| Melee (For ACS12) | Kukri | Legendary (Gold) | A quick melee strike against an enemy grants a +30% Attack buff for 10 seconds. While Attack does not affect KVD - Boom! Boom! Burn ticks, it provides a massive damage multiplier for ACS12 - Pyroclasm Starter (whose Dragon's Breath shells scale with 95% of your Attack)! |
| Melee (Universal Utility) | Long Axe | Epic (Purple) | A heavy melee attack (hold LMB) deploys a Fortress Warfare zone beneath your feet for 5 seconds, granting Super Armor (knockback immunity) and damage reduction while you stand your ground firing your LMG. |
Best Weapon Calibration for KVD - Boom! Boom! & ACS12 (2026 Rules)
Quick Take: The best-in-slot calibration for KVD - Boom! Boom! in the current meta is Rapid Shot Style with Elemental DMG as the secondary attribute. Because both Burn ticks and the LMG's pyro explosions scale exclusively with your armor's Psi Intensity, the -10% Attack penalty on Rapid Shot Style does not reduce your fire damage at all, while +20% Fire Rate and +15% Magazine Capacity maximize your explosion procs and stack generation! Remember the golden rule of 2026: your calibration blueprint must be slotted at the exact moment you craft the weapon on the workbench.
Before spending your rare crystals and tungsten, keep in mind the major Weapon Calibration overhaul introduced in 2026. Older guides from 2024–2025 advised crafting your LMG first, upgrading it to +10, and swapping calibration blueprints afterward. That legacy system was completely removed to eliminate redundant RNG grinding.
In the current version of Once Human, you insert your Calibration Blueprint into a dedicated slot directly on the weapon crafting screen at the Gear Workbench. Your freshly crafted LMG immediately comes off the bench with your chosen firing style, a built-in base Attack bonus (up to +50% with a legendary gold blueprint), and a focused secondary stat. If you later loot a better calibration blueprint, you cannot overwrite an existing gun—instead, you craft a fresh KVD - Boom! Boom! with the new blueprint embedded, and salvage spare calibrations at the Disassembly Bench (which also received convenient style-sorting filters in Patch 3.1.1).
| Calibration Style | Style Modifiers | Best Secondary Attribute | Best Weapon Match & Mechanics Breakdown |
|---|---|---|---|
| Rapid Shot Style (#1 Meta Choice) | Fire Rate +20%, Magazine Capacity +15%, Stability -20%, Attack -10%. | Elemental DMG | Undisputed BiS for KVD - Boom! Boom!. Here is the mechanical secret: since neither Burn ticks (12% Psi Intensity) nor pyro explosions (300% Psi Intensity) use the weapon's Attack stat, the -10% Attack penalty is completely free for this build! In return, you get +20% Fire Rate (instantly ramping up to 5–7 Burn stacks, 30 Shelterer Set stacks, and triggering the 2s pyro explosion right on cooldown) plus a 115-round base box magazine. |
| Heavy Style (Sustained Boss Alternative) | Magazine Capacity +50% to +75%, Attack +15%, Reload Speed -30%, slight Movement Speed penalty. | Elemental DMG | A fantastic alternative for KVD - Boom! Boom! during drawn-out raid boss encounters (Forsaken Giant, Nightmare Manibus). Expands your LMG box magazine to 150–175+ rounds! Since the Shelterer Set loses half of its stacks every time you reload, an oversized drum lets you hold down the trigger for nearly 90 seconds straight with uninterrupted +38% Elemental DMG uptime. |
| Assault Style or Rapid Shot Style (Tailored for ACS12 & EBR-14) | Boosts Fire Rate or Magazine Capacity and Reload Speed without sacrificing base Attack (in Assault Style). | Elemental DMG (for ACS12) or Crit Rate (for EBR-14) | For the ACS12 - Pyroclasm Starter shotgun, weapon Attack matters because its Dragon's Breath shells deal 95% Attack as Blaze status damage. Meanwhile, for EBR-14 - Octopus! Grilled Rings! in a Gilded Gloves setup, stacking Crit Rate is your top priority. |
Best Weapon Accessories (Attachments) for KVD - Boom! Boom!
Out of the box, KVD - Boom! Boom! suffers from noticeable recoil during sustained full-auto fire and a sluggish box-swap animation. Equipping the right legendary gold attachments—unlocked once by solving open-world puzzles on our Once Human Interactive Map and permanently saved across seasons—turns this heavy LMG into a laser-accurate flamethrower with snappy reloads:
| Accessory Slot | Best Gold Attachment | Where to Find & Exact Stat Benefits |
|---|---|---|
| Muzzle | Hammer Compensator or Large Muzzle Brake | Provides the highest boost to Stability and Accuracy, completely offsetting the -20% Stability penalty from Rapid Shot Style calibration. Found in mystical puzzle chests in the Red Sands region. |
| Optic | Compact Reflex Sight or Alpha Sight | Increases Accuracy and ADS speed while keeping a wide, unobstructed field of view. Since Burn does not require sniping tiny weakspots, a clean reflex sight is far superior to heavy scopes inside fast-paced Silos. |
| Tactical | Small Infrared Indicator or Angled Tactical Grip | Delivers a balanced boost to Stability, Hip-Fire Accuracy, and weapon handling after dodging or throwing a grenade. |
| Magazine | Large Drum LMG Mag or Tactical LMG Mag | The Large Drum LMG Mag pushes your ammo capacity even further (reaching 130–175 rounds depending on calibration) and adds Stability, while the Tactical LMG Mag offers a balanced mix of extra rounds and faster Reload Speed. |
Best Ammo Choice: Do Armor-Piercing Rounds Affect Burn Damage?
A common question in the community is whether it is worth spending precious Stardust Source to craft top-tier armor-piercing ammo for a fire LMG when Burn scales with Psi Intensity. The answer depends on the content you are running and which Burn firearm you are holding:
- For 95% of Content (Silos, Open World, Dream Zones) — Standard Tungsten LMG Ammo: Regular green/blue Tier V tungsten rounds can be mass-produced cheaply using Tungsten Ingots and Acid. Because periodic Burn ticks and KVD - Boom! Boom! pyro explosions scale off armor Psi Intensity, you will barely notice any difference against regular mobs and elites compared to expensive AP rounds. Be sure to pick up the Memetic Specialization Supplies Workbench: Ammo Factory, which increases your copper, steel, and tungsten ammo crafting yield by +50%.
- For ACS12 - Pyroclasm Starter, EBR-14 & Nightmare Manibus Speedruns — Tungsten AP Ammo: Dragon's Breath shells on ACS12 - Pyroclasm Starter deal 95% of your Attack, and during prolonged boss fights in Nightmare Manibus and the LEA Research Lab, direct bullet hits from KVD - Boom! Boom! (the white numbers ticking alongside your orange fire damage) still account for a solid 15–20% of your total damage output while benefiting from the boss suppression multiplier on AP ammo. To craft them efficiently, use the Memetic Specialization Supplies Workbench: Anti-Armor (+30% AP ammo yield and -50% crafting time).
Best Key Armor Piece: BBQ Gloves vs Hardy Gloves vs Fire Rune Boots vs Gilded Gloves
Quick Take: In Once Human, you can only equip one Key Armor piece at a time. For the classic KVD - Boom! Boom! setup, the best-in-slot choice against bosses and elites is the epic BBQ Gloves, which double your Burn tick frequency (up to 4 ticks per second) while keeping maximum stacks active permanently. The legendary Hardy Gloves are used for explosive AoE room clearing in Silos (strictly paired with the Embers weapon mod), Fire Rune Boots unlock the full potential of ACS12 - Pyroclasm Starter, and Gilded Gloves enable the hybrid Crit-Burn archetype. For armor sets, your gold standard is 4pc Shelterer Set (Full-HP) or the Savior + Treacherous Tides combo (Low-HP Patch 3.0.6 meta).
Unlike physical weapon builds where the key armor piece almost always occupies the helmet slot, the Burn archetype offers four specialized exotic armor pieces (three pairs of gloves and one pair of boots). Each one fundamentally changes how Burn behaves in combat:
Official Effect: Gain Burn frequency increase based on Burn stacks, up to +100%.
Why Purple Gloves Beat Gold Gloves on Bosses: First, at maximum Burn stacks, the interval between damage ticks shrinks from 0.5s down to 0.25s—hitting the boss with 4 powerful fire ticks every single second. Second, BBQ Gloves never consume or reset your Burn stacks! That means the boss stays locked at 5–7 stacks 100% of the time, guaranteeing permanent full uptime on your most important mask mod, Blaze Amplifier (which grants +3% Psi Intensity DMG per active Burn stack). Finally, because it is an epic (purple) blueprint, it is much easier to upgrade to 5–6 stars early in the season, giving you a massive boost to base Psi Intensity!
Official Effect: When Burn reaches max stacks, remove Burn and trigger an Explosion, dealing 300% Psi Intensity as Blaze DMG in a small area.
When to Use & Crucial Trap to Avoid: Ideal for speed-clearing packed dungeon rooms, as it adds a second independent AoE blast on top of KVD - Boom! Boom!'s built-in pyro explosion. However, never equip Hardy Gloves without the Embers weapon mod! Without Embers, the glove explosion wipes all Burn stacks down to 0, killing your DoT damage and resetting your Blaze Amplifier mask bonus. With Embers installed, the explosion only consumes half of your stacks (leaving 2–3 stacks active), allowing your LMG to immediately top them back up to max.
Official Effect: When any target nearby is inflicted with Burn, there is a 50% chance to generate a Deviant Particle. Picking it up increases Blaze DMG by +30% for 15 seconds.
Where They Shine: For an LMG gunner standing 25 meters away from a boss, running into melee range to pick up floor orbs is impractical. However, when fighting at point-blank range with the ACS12 - Pyroclasm Starter shotgun, you automatically vacuum up every orb as it spawns, fueling infinite Dragon's Breath reloads while maintaining a permanent +30% Blaze DMG buff.
Official Effect: Unlocks the Critical Hit ability for Burn (allowing fire ticks to utilize your character's Crit Rate) and grants +20% Burn Crit DMG. This completely changes your gearing philosophy: it is built specifically around the EBR-14 - Octopus! Grilled Rings! sniper rifle and the Lonewolf Set. (Another niche glove option is Drifter Gauntlets, which grant +15% Weapon DMG and +15% Crit Rate while you are burning yourself with a Molotov, though they see almost no play in the 2026 PvE meta.)
Build Option #1 (Core Full-HP Meta): 4pc Shelterer Set + Blackstone / Savior
For 90% of players, the most reliable, consistent, and forgiving setup for KVD - Boom! Boom! is the classic Full-HP configuration built around 4 pieces of the Shelterer Set. The LMG's enormous box magazine naturally offsets this armor set's only drawback—losing half of your stacks upon reloading.
| Armor Slot | Equipped Item | Active Set Bonus & Slot Role |
|---|---|---|
| Helmet | Shelterer Hat / Shelterer Hood | 4-Piece Shelterer Set Bonus: • 1pc: Status DMG Reduction +15%. • 2pc: Elemental DMG (Blaze, Frost, Shock, Blast) +8%. • 3pc: Every weapon hit grants 1 stack of Deviant Energy (+1% Elemental DMG per stack, base cap 20 stacks). Reloading removes half of your stacks. • 4pc: Increases max Deviant Energy stacks by +10 (up to 30 stacks = +30% Elemental DMG), and weakspot hits grant +2 stacks per hit. In total, the 4pc set provides +38% Elemental DMG! |
| Mask | Shelterer Mask | |
| Top (Jacket) | Shelterer Top / Shelterer Jacket | |
| Shoes | Shelterer Shoes | |
| Gloves (Key Armor) | BBQ Gloves or Hardy Gloves | Key Armor Slot: Equip BBQ Gloves for bosses and Nightmare Silos (+100% tick rate), or swap to Hardy Gloves for fast AoE trash clearing. |
| Bottoms (6th Flex Slot) | Savior Pants or Blackstone Pants | 6th Flex Piece: 1 piece of the Savior Set reduces Activator healing cooldowns by -20%, while 1 piece of the Blackstone Set grants +2.5 Cold & Heat Resistance (handy in The Way of Winter). |
Alternative "3 + 2" Setup (Shelterer + Blackstone): If you are running the ACS12 - Pyroclasm Starter shotgun (where you constantly reload to load Dragon's Breath shells) or dislike micromanaging reload stacks, run 3 pieces of the Shelterer Set (+28% Elemental DMG at 20 stacks) + 2 pieces of the Blackstone Set (such as Blackstone Pants and Blackstone Boots). Two pieces of Blackstone grant +10% Elemental DMG (5 stacks of Warm Sensation at 2% each) that never drop when you reload your weapon!
Build Option #2 (Nightmare Manibus Patch 3.0.6 Meta): Shield & Low-HP (Savior + Treacherous Tides)
In the 2026 endgame, speedrunners pushing Nightmare Manibus and Dream Zones use a Low-HP / Permanent Shield setup that unlocks the massive damage multipliers of seasonal mods with <Lunar> and <Crescent> suffixes.
Why This Setup Skyrocketed After Patch 3.0.6 (September 2026): Prior to Patch 3.0.6, the Treacherous Tides Set required you to intentionally corrupt your Sanity by drinking dirty water or eating spoiled food. For status builds, that was a massive anti-synergy because your strongest drink buff—Whimsical Drink (+25% to +35% Status DMG)—only works when your Sanity is 100% clean! In Patch 3.0.6, the developers completely removed the Sanity requirement from Treacherous Tides: the set now grants its Status DMG bonus simply by having HP below 70%, while 3 pieces of the Savior Set automatically drain 6% current HP on hit to generate an unbreakable 60% Shield—all while keeping your Sanity at a spotless 100%!
- Key Gloves: BBQ Gloves (6 Stars).
- 3 Pieces of the Savior Set (Savior Helmet, Savior Mask, Savior Shoes): Grants +10% Status DMG while shielded and converts 6% current HP into a 6% Max HP Shield on weapon hit (stacking up to a 60% Shield), safely bringing your HP below the 70% threshold.
- 2 Pieces of the Treacherous Tides Set (Treacherous Tides Top and Treacherous Tides Pants): Grants +10% Weapon DMG Reduction and an extra +10% Weapon DMG and Status DMG whenever HP is below 70%. (For pure glass-cannon min-maxing without Savior's shield, players also pair 3pc Shelterer + 2pc Treacherous Tides.)
- Double Mod Synergy: Staying below 70% HP under a thick shield simultaneously powers up the Rush Hour shoe mod (+4% Status DMG per 10% missing HP) and activates the huge Status/Elemental DMG substats on <Lunar> and <Crescent> helmet and top mods.
Build Option #3 (Crit-Burn Hybrid for EBR-14 & Gilded Gloves)
If you unlocked the legendary Gilded Gloves and the EBR-14 - Octopus! Grilled Rings! sniper rifle, you can assemble a hard-hitting hybrid where every Burn tick and fire ring scores critical hits:
- Key Gloves: Gilded Gloves (unlocks Critical Hits for Burn and adds +20% Burn Crit DMG).
- 4 Pieces of the Lonewolf Set (Helmet, Mask, Jacket, Pants): Grants +10% Magazine Capacity, +15% Crit Rate, and up to +60% Crit DMG at 10 stacks.
- 1 Piece of the Ghost Link Set (Shoes): A 2026 armor set whose 1-piece bonus grants a clean +3% Crit Rate (or use 1 piece of Shelterer / Bastille).
Best Animal Hides for Crafting & Blueprint Star Priority
Here is the number one secret of veteran status build min-maxers: always invest your blueprint fragments (and use free Blueprint Conversion star transfers) into your Mask and Gloves first! In Once Human, the Mask and Gloves slots provide the largest share of base Psi Intensity across your entire gear loadout. Upgrading your Tier V Mask and Gloves from 1 star to 6 stars gives a much bigger Burn damage boost than upgrading the stars on your KVD - Boom! Boom! LMG itself.
When crafting your final Tier V armor pieces at the Gear Workbench, always use rare animal hides (for details on hunting and breeding rare traits, check out our Farming, Taming & Cooking Guide):
- Helmet & Mask — Golden Wool: The undisputed best-in-slot hide for elemental builds. Provides a direct boost to Psi Intensity and stacks bonus Elemental DMG upon hitting enemies.
- Gloves, Top, Pants & Shoes (4 Pieces) — Rabbit Hide: Crafting 4 armor pieces with Rabbit Hide increases jump height, reduces stamina consumption, and grants +20% mid-air damage. Paired with seasonal <Aero> mods, simply hopping while spraying your LMG activates a massive damage multiplier.
- Survivability Alternative for Top & Pants — Wolf Skin or Deer Hide: If you prefer grounded gunplay without jumping, craft your jacket and pants with Wolf Skin or Deer Hide for a hefty increase to Max HP, stamina, and boss damage mitigation.
Best Primary & Secondary Weapon Mods
Quick Take: On your KVD - Boom! Boom! LMG, slot either Flame Resonance (+2 Max Burn Stacks—best-in-slot with BBQ Gloves on bosses) or Embers (-50% stack decay—mandatory when running Hardy Gloves). Across your armor slots, your core damage comes from Deviation Expert or Elemental Havoc (helmet), the irreplaceable Blaze Amplifier (mask), Elemental Resonance (bottoms), the glove version of Flame Resonance (+20% Status DMG), and Covered Advance or Rush Hour (shoes). Farm the <Deviant Energy> (<Talents>) suffix across your armor pieces while balancing Elemental DMG and Status DMG in a 1:1 ratio.
Dedicated Burn weapon mods drop from the spider boss Arachsiam in the Monolith of Mirage, and can also be selected from guaranteed Level 17 mod crates in Nightmare Manibus (check out our Bosses, Silos & LEA Research Lab Drop Guide for the full loot table). Your choice of weapon mod on KVD - Boom! Boom! and ACS12 - Pyroclasm Starter depends directly on which key gloves you are wearing:
- Flame Resonance — #1 Choice for Peak Boss DPS with BBQ Gloves: Increases Max Burn Stacks by +2 (raising your cap from 5 to 7 stacks!), at the cost of -20% Burn duration. Why do those 2 extra stacks yield such an explosive DPS increase against bosses? First, 7 stacks tick for 84% Psi Intensity instead of 60%. Second, they ramp up the BBQ Gloves tick frequency bonus to +100% much faster. Third, your Blaze Amplifier mask mod grants +3% Psi Intensity DMG per active stack—giving you a +21% independent multiplicative multiplier at 7 stacks instead of +15%!
- Embers — Mandatory for Hardy Gloves & Easy Stack Maintenance: Whenever Burn expires or is removed, stack loss is reduced by -50% (plus a special +5% Burn DMG attribute for <Burn>). Under normal conditions, when the 6-second timer runs out, you only lose a quarter of your stacks (dropping from 5 to 3–4); and if you are wearing Hardy Gloves, their detonation leaves half of your stacks ticking on the target instead of wiping them to zero!
- Burning Wrath — Best Choice for ACS12 - Pyroclasm Starter: Triggering Burn has a 25% chance to immediately inflict +1 extra Burn stack while boosting overall Burn damage. Perfect for the automatic shotgun and EBR-14, where reaching max stacks in just a couple of shots is key.
- Blaze Blessing — Solo Dungeon Sustain Mod: Restores 5% Max HP whenever a burning enemy dies or Burn expires. If you are solo-farming tough Silos without a healer and want to save your Activators, keep a secondary LMG with this mod for hallway clearing.
In your secondary weapon (AWS.338 - Bullseye or DE.50 - Wildfire), always install Vulnerability Amplifier. It boosts the incoming damage vulnerability from The Bull's Eye mark by an extra +8% (and higher with substat upgrades), directly amplifying every Burn tick and LMG pyro explosion after you swap back.
Best Armor Mods per Slot (BiS Meta & Alternatives)
Below is the complete breakdown of the best legendary gold mods across all six armor slots. Pay special attention to your Gloves and Bottoms mods—they are your primary tools for balancing Elemental DMG and Status DMG:
| Armor Slot | Best-in-Slot Mod | Exact Effect (Level 5) | Alternative Mods & When to Swap |
|---|---|---|---|
| Helmet | Deviation Expert | Firearm Range -25%, Fire Rate +10%, Status DMG +20%. Best-in-slot for KVD - Boom! Boom! in Silos and mid-range boss fights: +10% Fire Rate triggers more pyro explosions and stacks fire almost instantly! | Elemental Havoc (+10% Elemental DMG unconditionally, plus another +10% above 90% HP = +20%) — use against long-range raid bosses (Forsaken Giant, Manibus) where the -25% range penalty hurts. Work of Proficiency (+5% Reload Efficiency and +20% Elemental DMG after an empty reload) — great for ACS12. |
| Mask | Blaze Amplifier (Unconditional BiS) | Each active Burn stack on the target increases Psi Intensity DMG by +3% (at 5 stacks = +15%, at 7 stacks = +21%). Because it directly multiplies your base Psi Intensity, it acts as a separate multiplicative bucket on top of all other damage bonuses! | Retrusion Explosion (hitting burning targets grants +8% Crit Rate and +20% Crit DMG) — used exclusively in the hybrid Crit-Burn build with Gilded Gloves and EBR-14. |
| Top (Jacket) | Any Gold Mod with God-Roll Substats (Quick Comeback / Rejuvenating) | The chest slot has no direct offensive core perks, so equip whichever mod rolled gold Status DMG + Elemental DMG substats with your desired suffix (<Deviant Energy>, <Lunar>, or <Crescent>). | Ardent Shield (reduces the next hit taken by 30% after losing 20% HP in one hit) or Status Immune — great for Nightmare survivability. |
| Bottoms (Pants) | Elemental Resonance | Every elemental hit landed with your previous magazine grants +1% Elemental DMG for 15s upon reloading, up to +24%. With a 115–175 round LMG box, you are guaranteed the full +24% after every reload! | Reload Rampage (kills refill ammo into the magazine and grant +10% Weapon & Status DMG until your next reload) — #1 for dungeon clearing in 4pc Shelterer so you never have to reload or drop your 30 set stacks! Abnormal Increase (up to +30% Status DMG after 3 empty reloads). |
| Gloves | Flame Resonance (Gloves Mod / Status Enhancement) | Grants a flat +20% Status DMG! Perfectly balances the 4pc Shelterer Set, since the set and LMG passive already flood you with Elemental DMG (+68% combined), making Status DMG your highest-value multiplier. | Elemental Overload (grants a flat +18% Elemental DMG) — slot this when running the Savior + Treacherous Tides setup (where your sets give +20% Status DMG and you need more Elemental DMG). |
| Shoes | Covered Advance (For Full-HP Builds) | Taking no damage for 4 seconds grants +20% Melee, Weapon, and Status DMG for 30 seconds. Effortless, high-uptime multiplier for ranged LMG play. | Rush Hour (+4% Weapon & Status DMG per 10% missing HP) — #1 choice for the Low-HP Savior + Treacherous Tides setup. Ferocious Charge (+20% DMG for 8s after a kill within 10m) — best for the ACS12 shotgun. |
The Golden 1:1 Ratio (Elemental DMG vs Status DMG) & Level 17 Mod Suffixes
To squeeze maximum damage out of your Level 17 mod crates (farmed in Nightmare Manibus), you need to understand how the game multiplies your stats on every fire tick and pyro explosion:
Tick / Explosion Damage = Base Psi Intensity × (1 + Mask Blaze Amplifier) × (1 + Total Elemental DMG & Blaze DMG) × (1 + Total Status DMG) × (1 + Enemy Type DMG Bonus).
This formula reveals the golden rule of status min-maxing: because the Elemental DMG and Status DMG brackets multiply each other, your highest final DPS is achieved when both stats on your character sheet (press C ➔ Detailed Stats) are kept roughly equal (a 1:1 ratio). For example, 100% Elemental DMG × 100% Status DMG yields a 4.0x total multiplier (`2.0 × 2.0`), whereas an unbalanced 160% Elemental × 40% Status drops your multiplier to 3.64x (`2.6 × 1.4`).
When farming and upgrading mod substats, prioritize the following suffixes:
- Weapon & Mask — <Burn> or <Deviant Energy> Suffix: From your Nightmare Manibus selector crates, open your weapon mods (Flame Resonance / Embers) and mask mod (Blaze Amplifier) with the specialized <Burn> suffix. Aim for gold substat rolls in Burn DMG, Burn Duration, Elemental DMG, and Status DMG.
- Helmet & Top (Jacket) — Seasonal <Lunar>, <Crescent>, or <Aero> Suffixes: If you are running the Low-HP Shield build (Savior + Treacherous Tides), slot <Lunar Deviant Energy> or <Crescent Deviant Energy> mods into your helmet and chest. If you play Full-HP with 4 pieces of Rabbit Hide armor, use <Aero Deviant Energy> for bonus damage while jumping.
- Gloves, Bottoms & Shoes — <Deviant Energy> Suffix (also known as <Talents>): Mandatory across your remaining armor pieces. A god-roll Level 17 mod combines three core substats at once: Elemental DMG + Status DMG + DMG to Great Ones (Bosses) (with DMG to Normal/Elite Enemies or Magazine Capacity as the fourth line).
Best Cradle Override Setup
Quick Take: Inside your Cradle Override grid, slot the nodes for Automatic Weapons, Burn damage/duration, elemental buffs while your Deviation is active, and weapon-swap damage. Your undisputed best-in-slot combat companion is Pyro Dino (or its winter counterpart Chaosaurus), which debuffs bosses to take up to +50% Blaze DMG. For food and drink buffs, pair Whimsical Drink (+25% to +38% Status DMG at full Sanity) with Canned Spicy Rabbit Dices or Surprise Spring Roll cooked by a high-rating Chefosaurus Rex at your base.
The Cradle Override system gives your character 8 active seasonal passive slots unlocked by clearing Monoliths and scenario milestones (for a full breakdown of Cradle mechanics and specialization tiers, check out our Memetics, Specializations & Cradle Guide). While specific anti-mutant node names shift slightly between Manibus, The Way of Winter, and Endless Dream, your core offensive setup for KVD - Boom! Boom! always follows this template:
| Cradle Slot | Node Name | Combat Effect & Build Synergy |
|---|---|---|
| 1. Weapon Class | Automatic Weapon or Shotgun | Boosts base damage and magazine capacity for LMGs and Assault Rifles (KVD - Boom! Boom! and KAM - Burning Rage), or increases shotgun damage and reload speed (when running ACS12 - Pyroclasm Starter). |
| 2. Status Amplification | Status Enhancement / Sustained Burn | Your core seasonal archetype node: directly increases Status DMG and Burn DMG by +20% to +30% while extending the duration of active Burn stacks on the target. |
| 3. Blaze Amplification | Heat Agglutination / Elemental Boost | Grants stacking Blaze DMG bonuses for every Burn stack applied or after triggering a pyro explosion. |
| 4. Deviation Sync | Deviant Pact / Deviation Master | While your combat Deviation (Pyro Dino or Chaosaurus) is summoned and fighting on the field, you gain +20% to +25% Status and Elemental DMG. |
| 5. Weapon Swap & Mark | Tactical Combo or Bounty Hunter | Grants a burst damage bonus for several seconds after swapping from your secondary AWS.338 - Bullseye sniper rifle back to your LMG, or increases damage dealt to marked targets. |
| 6–8. Anomaly Suppression & Utility | Anti-Void, Anti-Phase, Master Sprinter | Allows your LMG to shatter Void and Phase elite shields inside Nightmare Silos, while providing movement speed or shield sustain upon using an Activator. |
Best Combat & Territory Deviations: Pyro Dino, Chaosaurus & Chefosaurus Rex
No other build in Once Human gains a bigger damage multiplier from its companion pet than the Burn archetype. We covered every cradle companion in our dedicated Once Human Complete Deviations Guide, and for a fire LMG gunner, three dinosaurs are mandatory pickups:
How It Works in Combat: When summoned (press E for auto-target or hold E to aim), this fiery dinosaur teleports to the enemy and bombards them with fireballs and flame breath. Every attack applies a unique vulnerability debuff on the boss that increases all Blaze DMG taken by the target by +20% to +54% (scaling with the Deviation's Skill Rating from 1 to 5)! Even better, Pyro Dino's own explosions scale directly with your character's Psi Intensity. In The Way of Winter scenario, Chaosaurus serves as its direct functional counterpart.
Where to Farm: Drops in Securement Silo - Phi (can spawn both inside the secret side-boss room and from the final boss chest).
How It Works in Combat: When deployed, it hovers above the battlefield like a miniature star, pulsing with scorching energy waves that deal continuous Blaze DMG to all nearby enemies. Against single-target bosses, it falls far behind Pyro Dino because it lacks the +50% Blaze vulnerability debuff, but it is handy for stationary territory defenses and public events.
Why Every Burn Player Needs One: This Territory Deviation lives in your base and assists your Advanced Stove. The dinosaur chef amplifies the numerical stat buffs of every dish and drink cooked at your stove by up to +38% (at 5/5 Skill Rating)! Best of all, Chefosaurus Rex drops inside the exact same dungeon—Securement Silo - Phi—where you farm Pyro Dino.
Best Food, Drinks & Tactical Consumables for Burn
In Once Human, you can maintain one active Food buff and one active Drink buff simultaneously (plus Whim potions). When cooked on a stove with the Memetic Specialization Advanced Stove: Gourmand (+30% dish effect) alongside an active Chefosaurus Rex, your kitchen buffs add nearly +60% combined damage to your LMG (for all recipe locations, visit our Cooking Recipes & Farming Guide):
- Best-in-Slot Drink (Hydration Slot) — Whimsical Drink: An absolute must-have for every status build. While your Sanity is full, this drink boosts Status DMG by a base +25%—and when cooked with Chefosaurus Rex and Gourmand, that buff climbs to +35% to +42% Status DMG! Remember that thanks to the Patch 3.0.6 Treacherous Tides Set rework, you keep 100% Sanity and enjoy full Whimsical Drink uptime even in the Low-HP Shield build.
- Best-in-Slot Food (Satiety Slot) — Canned Spicy Rabbit Dices, Surprise Spring Roll, or Flaming Egg Tart: Canned Spicy Rabbit Dices and Flaming Egg Tart directly boost Blaze DMG and Burn effectiveness, while Surprise Spring Roll provides a universal Elemental DMG buff (+15% base, scaling up to +25% with a chef pet). If you rolled the Spicy Pepper Memetic Specialization, dishes cooked with Hot Pepper become +30% more effective and periodically ignite nearby foes!
- How to Get Mid-Air Jumps for Rabbit Hide Without Losing Whimsical Drink: Many players drink Stardust Energy Drink for Double Jump, not realizing it overwrites their Whimsical Drink slot and costs them +35% Status DMG! To keep both your drink multiplier and airborne uptime for <Aero> mods, use Whim potions crafted from Frog the Leaper (Spring Legs) or Atomic Snail (Aero Leap), which occupy the separate Whim slot without overwriting your drink buff.
- Best Tactical Item for Bosses — Molotov Cocktail or Thermite Grenade: Tossing a Molotov or Thermite Grenade beneath a boss one second before its spawn animation finishes immediately applies your first stack of Burn. That ensures the very first bullet from your KVD - Boom! Boom! hits an already burning target, activating your Blaze Amplifier mask mod from the first millisecond of the fight!
Boss Combat Rotation: How to Maximize Peak DPS (KVD & ACS12 Loop)
Quick Take: Your KVD - Boom! Boom! boss rotation revolves around stacking external multipliers right before your sustained LMG spray: summon Pyro Dino (up to +54% Blaze DMG vulnerability) ➔ fire a single shot from AWS.338 - Bullseye (blue vulnerability mark) ➔ swap to KVD - Boom! Boom! and empty the entire box magazine without reloading early so you maintain 30 Shelterer Set stacks and 7 Burn stacks. For the ACS12 - Pyroclasm Starter shotgun, your loop starts with a Kukri melee slash, picking up 4 Deviant Particle orbs, and reloading into Dragon's Breath rounds.
One of the biggest advantages of the Burn build is how forgiving and mechanically accessible it is in combat: you never have to track tiny weakspots on erratically jumping bosses. Even so, executing your button sequence in the right order boosts your final damage output by over 2.5x by lining up external debuffs and preserving your armor set stacks:
- Pre-Fight Buff Check Before Entering the Arena: Cleanse your Sanity to 100%, drink Whimsical Drink (+25% to +42% Status DMG), and eat Canned Spicy Rabbit Dices or Surprise Spring Roll.
- Summon Your Combat Deviation (Key E) & Pre-Ignite: One second before the boss finishes its spawn animation, send in Pyro Dino (or Chaosaurus) and optionally toss a Molotov Cocktail at the boss's feet. The dinosaur's opening fireballs immediately apply a massive Blaze DMG vulnerability debuff (up to +54%) while activating your Deviant Pact Cradle node (+20% to +25% Status DMG).
- Apply the Secondary Mark (Key 2): Swap to AWS.338 - Bullseye (or DE.50 - Wildfire) and fire a single shot into any part of the boss's body. The Bull's Eye mark paired with the Vulnerability Amplifier mod increases all damage taken by the boss (including every fire tick and every pyro explosion!) by another 16–20%.
- Unleash Full-Auto Fire with KVD - Boom! Boom! (Key 1): Swap to your LMG and hold down the trigger. Thanks to Rapid Shot Style calibration and the Deviation Expert helmet mod, you will hit max 5–7 Burn stacks within 2–3 seconds (unlocking +15% to +21% Psi DMG from your Blaze Amplifier mask mod and +100% tick speed from BBQ Gloves) while rapidly capping your Shelterer Set at 30 stacks (+38% Elemental DMG) and triggering a 300% Psi Intensity pyro explosion every 2 seconds!
- Reload Discipline & Boss Kiting: Never reload your LMG halfway through a box! Every reload strips away half of your Shelterer Set stacks. Always fire your 115–175 round drum all the way to empty: not only does this maximize your set bonus uptime, it also fully charges your Elemental Resonance pants mod for +24% Elemental DMG (or Abnormal Increase) on your next magazine. And if the boss enters a dangerous mechanic phase forcing you to dodge or reposition, remember that your Burn stacks keep ticking 4 times per second on their own! Just fire a brief burst on the move every 4–5 seconds to refresh the Burn timer without dropping your stacks.
Special Rotation for the ACS12 - Pyroclasm Starter Shotgun: Here the combat loop works differently. First, strike the enemy up close with your Kukri (+30% Attack for 10s), then fire a short burst of regular buckshot at point-blank range. Thanks to the shotgun's passive and your key Fire Rune Boots, 3–4 glowing orbs—Deviant Particles—will immediately pop out around you. Sidestep to vacuum up the orbs (gaining +30% Blaze DMG from the boots) and immediately press R (Reload). The shotgun consumes your stored charges to load scorching Dragon's Breath rounds (with a built-in bonus of up to +52% Blaze DMG), letting you unload the entire magazine straight into the boss!
3-Stage Seasonal Progression: From Level 1 to Nightmare Manibus
One of the best perks of starting a season with a Burn build is its smooth, budget-friendly progression curve. Because your best-in-slot key armor piece (BBQ Gloves) is an epic purple blueprint and your damage does not rely on hitting a high Crit Rate cap, the build starts melting dungeons right from the opening server phases as you earn Starchrom for the Wish Machine:
| Progression Stage | Weapons & Key Armor | Armor Set Combination | Mods, Deviations & Primary Stage Goal |
|---|---|---|---|
| Stage 1: Season Start (Levels 1–39, Phases 1–2) Budget Fire Starter | • Primary: KAM - Burning Rage (purple AR) or M416 - Scorched Earth (or an early KVD - Boom! Boom! unlock). • Secondary: DE.50 - Wildfire. • Key Armor: Epic BBQ Gloves. | 3pc Heavy Duty Set (+8% unconditional Elemental DMG and +40% decaying Elemental DMG on kill) + 2pc HP/Stamina filler set. | Slot early Burn mods (Embers, Blaze Blessing). Your #1 goal in Phase 1–2 is running Securement Silo - Phi to secure your two core companions for the entire season: combat pet Pyro Dino and base chef Chefosaurus Rex! |
| Stage 2: Midgame (Level 50, Phases 3–4, Tier V) Classic Full-HP Shelterer | • Primary: Tier V KVD - Boom! Boom! (crafted with Rapid Shot Style Elemental DMG calibration). • Secondary: AWS.338 - Bullseye. • Key Armor: 5-Star BBQ Gloves (bosses) and Hardy Gloves (Silos). | 4pc Shelterer Set (up to +38% Elemental DMG) + 1pc Savior Set or Blackstone Set (or run the "3pc Shelterer + 2pc Blackstone" hybrid). | Farm Arachsiam (Monolith of Mirage) and Pro-difficulty Silos. Assemble all gold mods with the <Deviant Energy> suffix: Flame Resonance (in both LMG and gloves), Blaze Amplifier (mask), Deviation Expert, Elemental Resonance, and Covered Advance. |
| Stage 3: Endgame Min-Max (Phases 4–6, Nightmare Manibus) 6★ Psi Intensity & Low-HP 3.0.6 | • Primary: KVD - Boom! Boom! + ACS12 - Pyroclasm Starter. • Secondary: AWS.338 - Bullseye + Kukri. • Key Armor: 6-Star BBQ Gloves (via Blueprint Conversion star transfer). | Upgrade your Mask and Gloves to 6 Stars first for maximum Psi Intensity! Set: 4pc Shelterer or Low-HP 3pc Savior + 2pc Treacherous Tides. Craft with Golden Wool and 4pc Rabbit Hide. | Farm Level 17 mod crates in Nightmare Manibus: <Burn> suffixes on weapon and mask, plus seasonal <Lunar> / <Crescent> / <Aero> on helmet and top. Balance Elemental DMG and Status DMG 1:1 alongside Whimsical Drink and a Rating 5 Pyro Dino. |
Pros and Cons of the Burn Build in 2026
Quick Take: The Burn build powered by KVD - Boom! Boom! is the most aim-friendly yet devastating elemental archetype in Once Human. You never have to snipe tiny weakspots or chase a 50% Crit Rate cap: simply spray into the target's center mass, maintaining 7 stacks of fire with doubled tick frequency from BBQ Gloves while detonating enemy packs for 300% Psi Intensity every 2 seconds.
To help you decide whether to invest your seasonal Starchrom into this archetype, here is an objective breakdown of its strengths and weaknesses:
| Strengths (Pros) | Weaknesses (Cons) |
|---|---|
| Unrivaled AoE Wave Clear & Strong Single-Target DPS: Every 2 seconds, KVD - Boom! Boom! triggers a 300% Psi Intensity pyro explosion in a 5-meter radius that automatically spreads Burn to every enemy hit, while melting boss health bars with rapid 7-stack fire ticks (every 0.25s with BBQ Gloves). | Vulnerable to Fire-Immune Enemies: Certain elemental bosses and fire anomalies (especially in temperature-driven scenarios like The Way of Winter) are completely immune to Blaze damage, forcing you to swap to a backup physical firearm. |
| Zero Reliance on Weakspots or Crit Rate: Neither periodic Burn ticks nor the LMG's pyro explosions can crit or benefit from weakspot hits. You deal 100% of your theoretical damage even when firing into the torso of heavily armored bosses or shooting on the move. | Set Stack Penalty on Early Reloads: Every LMG reload removes half of your accumulated Deviant Energy stacks from the Shelterer Set, requiring strict reload discipline and a 115–175 round drum magazine. |
| Enormous Ammo Capacity per Box: With a drum magazine and Rapid Shot Style or Heavy Style calibration, KVD - Boom! Boom! holds 115 to 175+ rounds, letting you spray through an entire boss phase without pausing. | Short Damage Ramp-Up Time: Unlike instant-hit sniper rifles or Shrapnel, Burn needs 1.5–2.5 seconds at the start of an encounter to ramp up to 7 fire stacks and 30 Shelterer Set stacks. |
| Cross-Build Mod Sharing & Cheap Key Armor: Your best-in-slot key armor (BBQ Gloves) is an easily upgraded purple blueprint, and your <Deviant Energy> (<Talents>) armor mods can be shared across three different elemental builds. | Heavy Reliance on Armor Blueprint Stars: Because all fire damage scales off Psi Intensity, reaching peak endgame DPS requires upgrading the blueprint star ratings of all 6 armor pieces (especially Mask and Gloves) rather than just upgrading one gun. |
Comparison with Related Meta Builds: Which Archetype Fits Your Playstyle?
If you want a secondary loadout to handle rare fire-immune encounters or want another build that shares your <Deviant Energy> mods and Shelterer Set armor pieces, check out our Once Human Best Builds & Weapons Tier List:
- For an Instant Swap Without Changing Armor or Mods — Frost Vortex Build (M416 - Silent Anabasis & KAM - Abyss Glance): The ultimate partner loadout for a Burn player. Frost Vortex uses the exact same 4pc Shelterer Set and the exact same <Deviant Energy> armor mods with Elemental DMG and Status DMG—simply swap your key armor piece and mask mod to gain crowd control and bypass fire immunities!
- For Fast-Firing Shock Damage on the Same Set Base — Power Surge Build (MPS7 - Outer Space & ACS12 - Corrosion): The status SMG build built around MPS7 - Outer Space also scales with Psi Intensity, the Shelterer Set, and <Deviant Energy> mods, delivering instant lightning strikes with zero DoT ramp-up time.
- For Guaranteed Boss Immunity Bypass — Shrapnel Build (SOCR - The Last Valor): Pure physical shrapnel damage that ignores all elemental resistances and automatically seeks out hidden weakspots on the back and tentacles of Nightmare Manibus.
- For Explosive Hybrid AoE Crits — Unstable Bomber Build (DE.50 - Jaws): A hard-hitting hybrid archetype bridging bullet and blast damage, where explosions scale with Psi Intensity while still scoring devastating critical hits.
Frequently Asked Questions (FAQ) About the Burn Build
1. Why Does Upgrading Mask and Gloves Blueprint Stars Give More Damage Than Upgrading KVD - Boom! Boom! Stars?
Because the damage formulas for both KVD - Boom! Boom! and the Burn status scale off Psi Intensity rather than weapon Attack. Your LMG provides zero Psi Intensity—that stat comes exclusively from your 6 equipped armor pieces. Among all armor slots, the Mask and Gloves carry the highest base Psi Intensity values, meaning every star upgrade on their blueprints (easily transferred via Blueprint Conversion) directly raises the base damage of both your fire ticks (12% Psi Intensity per stack) and your LMG pyro explosions (300% Psi Intensity).
2. Do I Need Crit Rate, Crit DMG, or Weakspot DMG for KVD - Boom! Boom!?
No, those stats do nothing for KVD's fire damage. In Once Human's base mechanics, neither periodic Burn ticks nor KVD - Boom! Boom! pyro explosions can score critical hits or benefit from weakspot multipliers (unlike the specialized hybrid setup using Gilded Gloves and EBR-14 - Octopus! Grilled Rings!). Those stats only affect the raw physical bullet damage of your LMG belt, which accounts for less than 15–20% of your total damage output. Always prioritize Elemental DMG and Status DMG.
3. Which Key Armor Piece Is Better Overall: BBQ Gloves or Hardy Gloves?
For KVD - Boom! Boom! against Monolith bosses and in sustained endgame fights, the epic BBQ Gloves are best-in-slot (BiS): they double your Burn tick rate (up to +100%, ticking every 0.25s instead of 0.5s) and keep all 7 stacks permanently active on the boss for the full +21% multiplier from your Blaze Amplifier mask mod. The legendary Hardy Gloves—which trigger an extra 300% Psi Intensity explosion at max stacks while consuming Burn—shine during fast AoE room clearing in Silos (and strictly require the Embers weapon mod so the explosion only consumes half of your stacks).
4. Why Are There Two Different Mods Named "Flame Resonance" in the Game Client and in This Guide?
In the official Once Human client, two completely different legendary mods share the exact same name—Flame Resonance—but go into different equipment slots and grant different effects:
- Weapon Mod Flame Resonance (<Burn> category): Equips exclusively in your weapon and increases Max Burn Stacks by +2 (from 5 to 7 stacks) while reducing Burn duration by 20%.
- Gloves Mod Flame Resonance (listed in some older databases as Status Enhancement): Equips exclusively in your gloves and grants a flat +20% Status DMG bonus.
In a top-tier KVD - Boom! Boom! loadout, you can equip both mods simultaneously—one in your LMG and the other in your gloves.
5. What Should I Do If a Boss or Anomaly Is Completely Immune to Fire?
For fire-immune encounters, your secondary weapon slot already holds a high-precision sniper rifle like AWS.338 - Bullseye or Recurve Crossbow, and you can also keep a physical rifle in your bag. Even while wearing the Shelterer Set, applying The Bull's Eye mark lets you quickly snipe out the weakspot nodes of fire anomalies with physical sniper shots before switching back to your LMG for the rest of the Silo.