Runes of Magic: A Complete Beginner's Guide
Runes of Magic is a free-to-play fantasy MMORPG built around one idea that most other games in the genre never quite commit to: you don't have to choose a single class and live with it forever. Developed by Runewaker Entertainment and published by Gameforge since 2009, the game is set in the world of Taborea, a fairly standard high-fantasy setting on the surface — kingdoms, ancient ruins, monsters in the woods — but the way you interact with it is anything but standard.
The feature that defines the whole game is the Dual Class System. Every character starts with one class, and at level 10 picks a second one on top of it. From that point on, you're not playing "a Mage" or "a Warrior" — you're playing whatever hybrid the two classes create together, with skills from both trees available at once and a handful of unique combo abilities that only appear when specific pairs are equipped. A Priest who picks up Rogue stops being a pure healer and starts landing sneak attacks between heals. A Warrior who adds Mage gets to throw fireballs while still tanking in plate. With ten classes in total, the number of viable pairings runs into the dozens, and switching your secondary class later is a matter of visiting a trainer, not rerolling a character.
What else the game brings to the table
Dual classing tends to get all the attention, but Runes of Magic backs it up with a handful of systems that were unusually generous for a free-to-play title when they launched, and still hold up. Player housing lets you buy, decorate, and actually live in your own place in the world rather than just owning a menu screen. Guilds can build and fight over castles, turning guild membership into something with real stakes instead of a chat channel with a tag attached. Crafting runs deep enough that a dedicated player can specialize and sell gear other players genuinely want, rather than producing filler items nobody needs.
Where the game stands now
Runes of Magic is still running on official Gameforge servers as of 2026, more than fifteen years after launch. The population is smaller than it was during the game's peak, and it doesn't try to hide that — but what's left is a community that has stuck around specifically because it likes this game, not because it hasn't found anything better yet. That has practical upsides for a newcomer: guilds tend to be genuinely welcoming to new faces, since every fresh player is good news for everyone, and the auction house economy is calm enough that you're not competing against thousands of other people for the same resources.
One thing worth knowing before you start: the official servers don't offer a Russian client. If Russian is your preferred language, you'll most likely end up on a fan-run private server instead of the official one, and terminology on those servers can vary from one to another. This guide is written for the official Gameforge English version; where a Russian version of this guide exists, its terms are our own working translations rather than an official localization.
Who this game actually suits
Runes of Magic rewards patience and a willingness to experiment more than it rewards speed. If your idea of a good MMO is one where you can rebuild your character's identity every time you get bored of your current playstyle, without touching character creation again, the dual class system alone makes this worth trying. If you're drawn to games with tangible, ownable spaces — a house, a guild castle — rather than purely instanced content, that's here too. It's not a game built for players chasing the newest visuals or the fastest leveling curve; it's a game built for players who want systems they can sink real time into and actually master.
The next section walks through character creation itself — the three races on offer, the classes available at the start, and how to pick a combination that won't leave you regretting your choice by level 20.
Character Creation: Races and Starting Classes
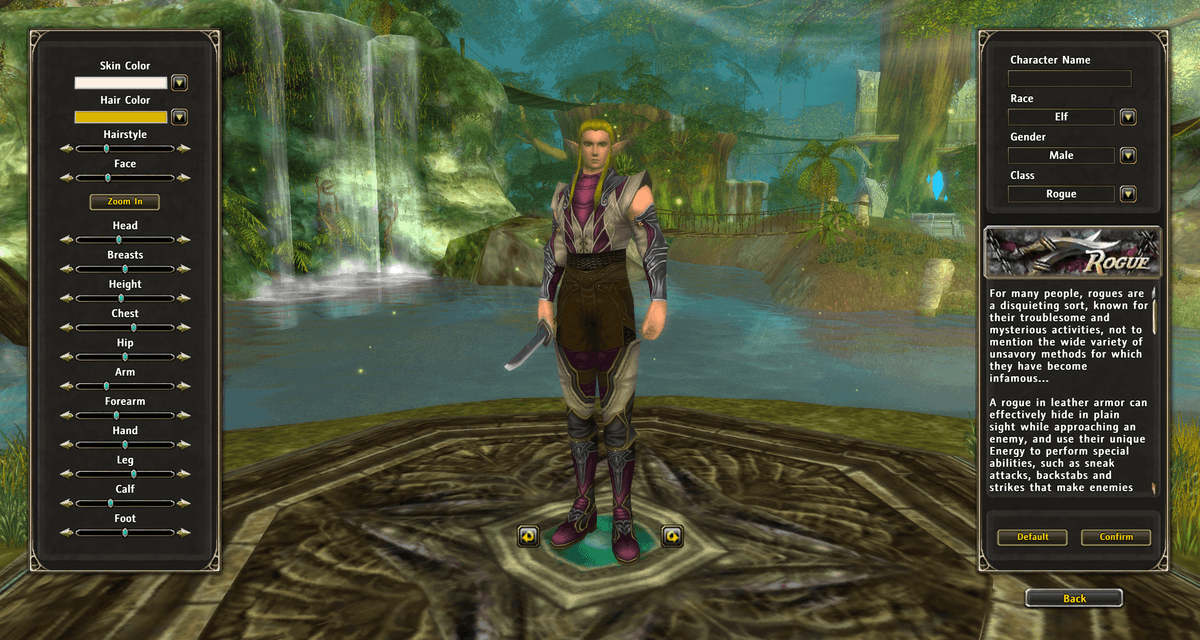
Character creation in Runes of Magic asks three questions, in this order: which race, which class, and then how you want that combination to look. None of these choices are permanent traps — you'll add a second class at level 10 regardless of what you pick now, and a name change or full character reset is always technically possible later — but a sensible first pick still saves you a lot of relearning.
The three races
You can play as a Human, an Elf, or a Dwarf. This choice matters more than it looks like on the surface: race in Runes of Magic directly gates which classes you're allowed to play, both as primary and secondary. Pick a race first with your preferred class in mind, not the other way around, or you may find the class you wanted simply isn't in the dropdown.
Starting classes, by race
Three classes are open to everyone regardless of race: Warrior, Mage, and Rogue. Beyond that, each race unlocks three more classes of its own:
- Humans add Scout, Priest, and Knight
- Elves add Scout, Druid, and Warden
- Dwarves add Priest, Champion, and Warlock
Notice that Scout is shared between Human and Elf, and Priest is shared between Human and Dwarf — everything else on that list is exclusive to one race. This applies to your secondary class too, not just your first pick: a Human can never add Warden as a secondary class no matter how you build the rest of the character, since Warden belongs to Elves only. If a specific dual-class combination is your goal from the start, check both halves against this list before committing to a race.
Each class has a distinct combat identity and its own resource to manage. Warriors and Knights fight in melee with heavy or hybrid armor; Knights in particular are built to soak up damage and can equip the heaviest gear and shields in the game, which makes them the straightforward pick if you want to tank from level 1. Scouts fight at range and in melee using Focus as their resource, built around controlling and holding down enemies rather than pure burst damage. Rogues rely on Energy to chain sneak attacks and high-damage combos, favoring stealth and burst over sustained fighting. Mages and Priests both use Mana: Mages sling elemental damage from two schools of magic at once, while Priests are built primarily to heal, with just enough survivability from robes and shields to not immediately die if the fight goes sideways. Druids and Wardens are Elf-only nature fighters, mixing physical combat with nature magic and pet support. Champions and Warlocks are Dwarf-only: Champions are rune-forging melee tanks who can shift stances, while Warlocks fight at range with curses and dark magic.
If this is your first character and you're not sure what you want long-term, Knight and Priest are the two classes that are hardest to regret early on — Knight because survivability forgives mistakes while you're still learning your rotation, and Priest because healing is always in demand for group content, and you'll never struggle to find a party. Both require a Human (or, for Priest, a Dwarf), so if either appeals to you, that settles your race question too. Warrior is the other safe default if you'd rather deal damage than manage a resource bar, and it's open to every race.
Appearance customization
Once race and class are locked in, the game hands you a fairly granular set of sliders: skin color, hair color and style, face shape, and separate adjustments for head, chest, hips, arms, forearms, hands, legs, calves, and feet. None of this affects gameplay, so there's no wrong answer here — take the time to get a look you're happy with, since armor in the early levels tends to look fairly similar across characters, and your face and build are what will actually distinguish your character on screen.
Once you confirm your character, you'll land in the game's current starting region on the continent of Xaviera — the next section walks through what to expect there and how the early leveling path is structured.
The Dual Class System
The class you picked during character creation is only ever half the picture. At level 10, a class trainer will offer you a second class on top of it, and from that moment on your character stops being defined by one skill tree and starts being defined by the specific pair you chose. This section is about how that pairing actually works day to day, not just why it's a good idea.
Primary and secondary aren't equal
Your primary class determines your armor type, your base stats, and which weapons you can equip — this is the class doing the heavy lifting on your character sheet. Your secondary class contributes its skills to your action bar, but at roughly half effectiveness compared to using it as a primary, and it doesn't change what you can wear. A Priest/Rogue, for example, still dresses and gears like a Priest; the Rogue side only adds sneak-attack skills to the mix, it doesn't turn you into a leather-wearing melee fighter. This is the detail that trips up a lot of new players — picking a secondary class for its damage skills without checking whether your armor and stats can actually support using them well.
Both classes level independently and track separate experience bars, visible side by side in the character panel. Grinding on your primary class doesn't advance your secondary at all — the game splits experience between the two roughly evenly whenever you're gaining XP, which means your secondary class's level will typically trail a few levels behind your primary unless you deliberately manage it.
Switching classes without starting over
None of this locks you in. Visiting a class trainer lets you swap which of your two unlocked classes is currently primary and which is secondary, instantly changing your available gear and stat allocation without touching your character's level or progress. The game also gives you a dedicated Equipment Swap button once you've unlocked a second class — it lets you save a full gear set for each class configuration and flip between them with one click, instead of manually re-equipping every slot every time you switch roles. This matters more than it sounds: switching from a tanky Knight/Priest setup to a damage-focused Priest/Knight setup for a different fight becomes a couple of clicks rather than a five-minute inventory shuffle.
You're also not locked to just two classes forever. At level 20 in both of your current classes, a quest chain unlocks a third class slot, and the game lets you keep learning more from there — you simply choose which two are active as primary and secondary at any given time, and can bank the rest for later. This is worth planning for early: leveling a third or fourth class later means starting that class's experience bar from zero, so there's no real penalty to picking one now and letting it sit unused for a while as you focus on your first pairing.
Elite Skills: the reward for committing to a pair
The reason dual-classing isn't just "two half-classes stapled together" is Elite Skills — abilities that exist only for a specific primary/secondary combination and aren't available to either class on its own. Starting at level 15 in both classes, and again every 5 levels after that, you become eligible to learn one for each side of the pairing, provided you visit the right trainer and hand in the crafting materials the quest asks for. A Mage paired with Rogue, for instance, unlocks a dark-magic, vampiric-themed skill set that neither class would ever get on its own — a genuinely different playstyle from a Mage paired with Warden.
This is also the mechanic that makes switching your secondary class later a bigger decision than it first appears. Elite Skills are tied to the exact pair, so changing your secondary class means losing access to that combination's unique abilities and starting the Elite Skill unlock chain over with the new pairing. It's not a punishment — the game is built around trying things — but it's worth knowing before you commit serious playtime to one pairing that you plan to abandon soon after.
Picking a first pairing that actually works together
The easiest mistake to avoid at level 10 is picking a secondary class purely because its skills look flashy, without checking whether it complements your primary's stats and armor. A melee primary generally benefits more from a secondary that adds damage or control skills usable in melee range, while a caster primary gets more value from a secondary that patches its weaknesses — a Mage picking up Priest for a small amount of self-healing, for instance, rather than a Mage picking up Rogue and never getting close enough to land the sneak attacks. There's no single correct pairing, since the reward for experimenting is built into the game, but thinking about what your primary is missing — survivability, control, ranged options — before choosing a secondary will save you from a level-10 pick you outgrow by level 20.
Interface and Controls
Runes of Magic runs on the same interface conventions most tab-target MMOs from its era settled on, so if you've played anything similar, little of this will feel unfamiliar. What's worth walking through is where the game's own systems — dual classing, weapon skills, talent points — actually live on screen, since those are the parts a generic MMO instinct won't cover.
The heads-up display
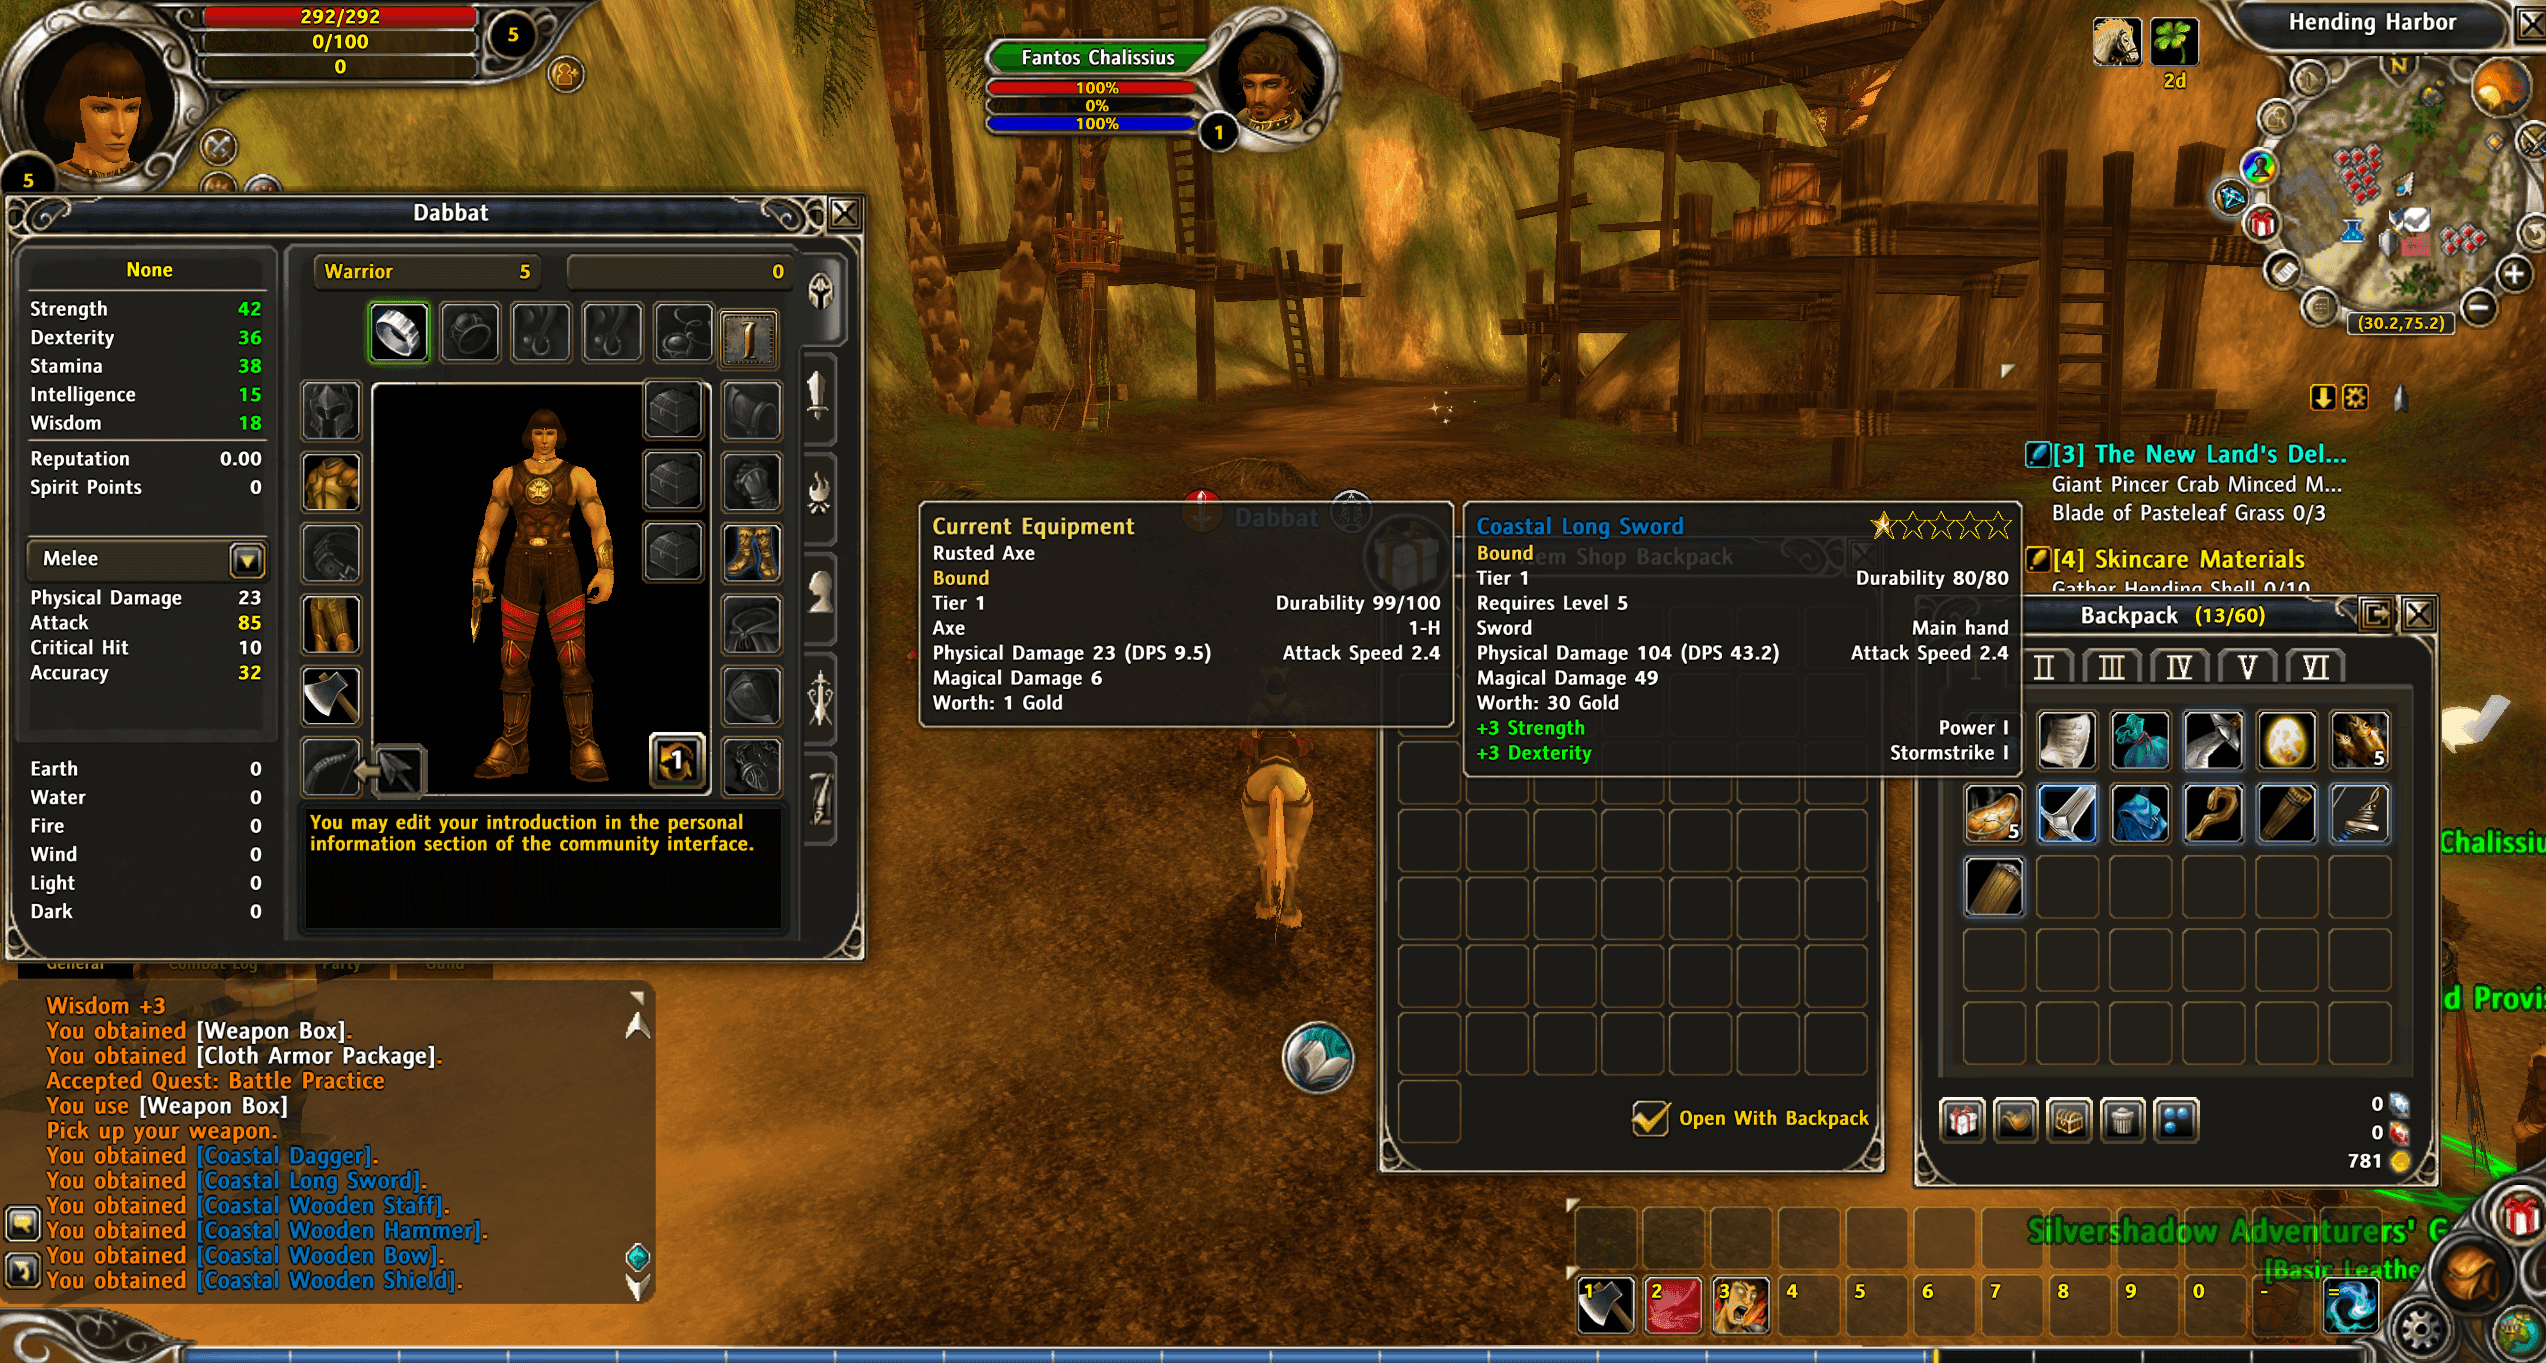
Your character panel sits top-left: portrait, health bar, and a resource bar underneath it that changes label and color depending on your class — Mana for casters, Focus for Scouts, Energy for Rogues, Rage or a similar resource for melee classes. Directly above or beside it, once you've unlocked a second class, you'll see both classes' names and levels tracked separately, exactly as described in the previous section. Your target's frame appears top-center when you click an enemy or NPC, showing the same health/resource layout so you can read a fight at a glance. The minimap sits top-right, and the full map opens on a dedicated key, showing named zones, quest markers, and points of interest.
The action bar along the bottom holds your skills and items, mapped to number keys 1 through 0 by default, with additional bars available if you run out of room. The quest tracker sits on the right side of the screen by default, listing your active quests with progress counters updating live — useful, since Runes of Magic quest text can be dense and you generally don't need to reopen the quest log just to check how many crab claws you still need.
Skills and weapon skills — two different systems
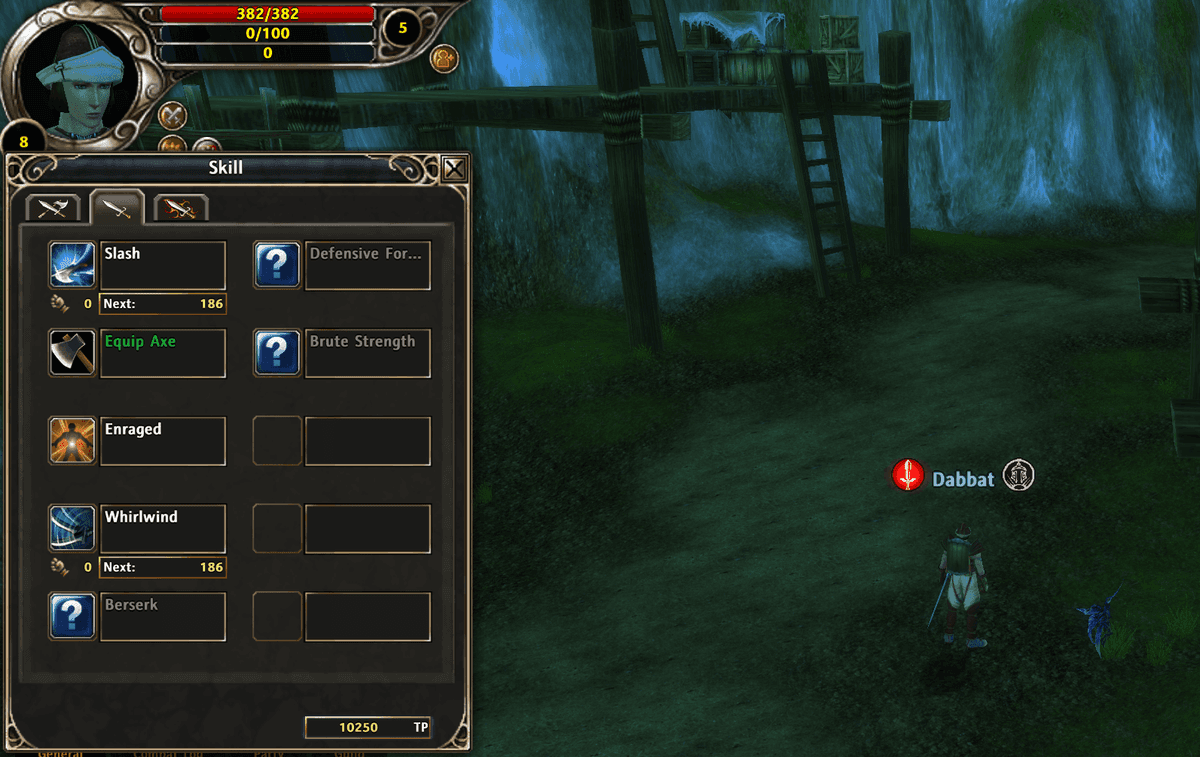
Two separate interfaces control how your character grows in combat ability, and it's worth not confusing them. The skill menu, opened with K, is where your class abilities live, organized into tabs. Before you unlock a second class, you'll see three: a General tab holding skills every character has regardless of class — your basic attack, a recall-to-town skill, and teleport skills to specific towns you've unlocked — plus two tabs for your primary class itself, one holding its core combat skills and weapon proficiencies, the other holding skills specific to that class's identity (a Warrior's General tab, for comparison, holds things like Slash and Enraged, while its class-specific tab holds skills like Frenzy and Thunder). Once your second class is unlocked at level 10, expect a further tab to appear for it alongside these. Skills here are upgraded using Talent Points (TP), which you earn from completing quests and from leveling your weapon skills, not from character level directly — and the TP cost to rank up a given skill is shown right on its entry in the menu.
The Weapon Skills panel, opened with V, is a separate, quieter system: every weapon type you own — One-Handed Sword, Dagger, Wand, Axe, Hammer, Two-Handed Sword, Staff, and so on — has its own hidden skill level that rises simply from landing hits with that weapon type in combat. A weapon skill leveling up hands you a burst of TP on the spot, along with a small stat bump tied to that weapon. In practice this means your effectiveness with a weapon is partly a habit you build through use, not just a number tied to your character level — switching weapon types resets you back near zero on the new one, which is worth knowing before you swap a dagger for an axe on a whim mid-leveling.
Swapping gear for your second class
Once your second class is unlocked, the character panel gains an Equipment Swap option, covered in more detail in the previous section — it saves separate gear sets per class configuration so you're not manually re-equipping every item when you switch which class is primary. It's worth setting this up the moment you unlock your second class rather than waiting until you actually need it mid-fight.
Inventory and currency
Your backpack starts with 60 slots, expandable later through purchased bag upgrades, and item tooltips show the same kind of detail you'd expect — tier, durability, stat bonuses, and any rune slots already filled. Gold is the primary currency for vendors and the auction house; quest rewards frequently also hand out smaller amounts of a zone-specific token currency alongside gold, used for turn-ins at that zone's quartermaster rather than general purchases. A more detailed breakdown of currencies, including the premium diamond currency and what's worth spending it on, is covered later in this guide.
Equipment, Runes, and Stats
Character level gets you access to better gear, but in Runes of Magic your actual combat effectiveness comes overwhelmingly from what you're wearing and what's socketed into it — two characters at the same level can hit noticeably different numbers depending on how much attention they've paid to this system.
Tiers, durability, and what a tooltip is telling you
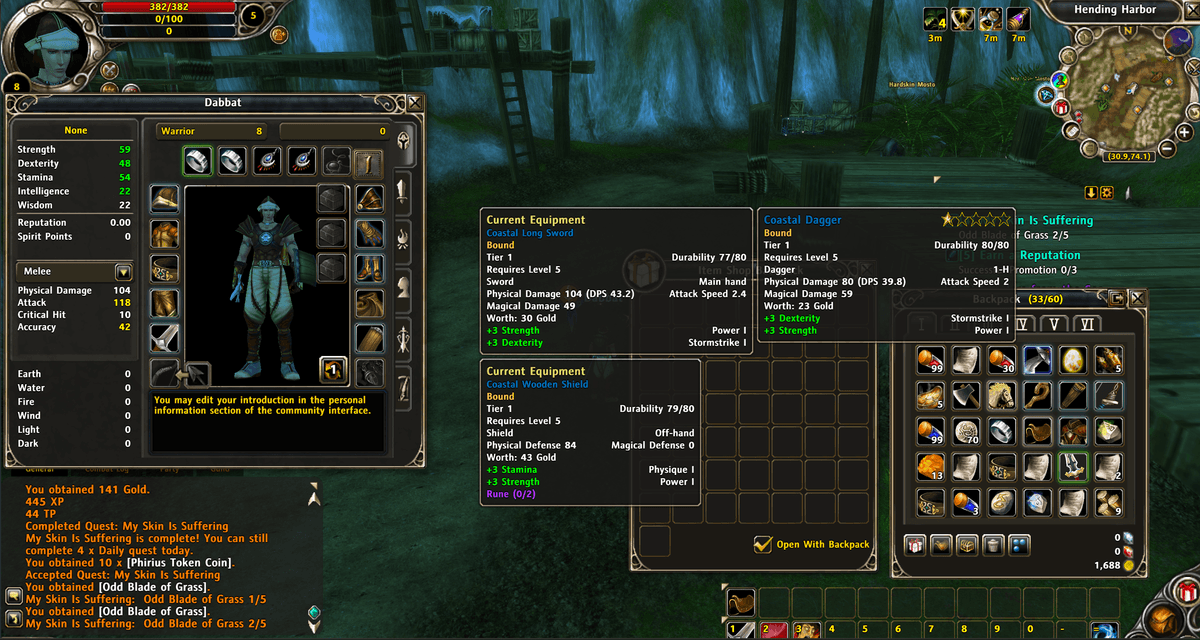
Every piece of gear carries a tier, a rough power bracket that scales alongside level requirements, and a durability value that ticks down as you fight and eventually caps how usable the item is if it hits zero — a periodic visit to a craftsman or vendor to repair your gear is routine maintenance, not something to ignore until it becomes a problem. Weapon tooltips list Physical Damage and Attack Speed (and Magical Damage where relevant), which together determine your actual DPS; armor tooltips list Physical and Magical Defense. Some gear is Bound the moment you pick it up or equip it, meaning it can't be traded or sold afterward — worth checking before you casually vendor something you might have wanted to keep.
Runes: the system that actually differentiates two players
Many items — more of them, and with more slots, the higher their rarity — have one or more rune sockets. Dropping a rune into a socket adds a flat bonus on top of the item's base stats: a strength bonus, a resistance, a chance-on-hit effect, and so on. Runes are ranked with roman numerals (I through X), and the rule that matters most for a beginner is that a socketed rune's rank can't exceed the tier of the item it's going into — a high-rank rune is wasted in a low-tier item, since it'll be capped down to what the socket allows.
You'll pick runes up naturally from monster drops and from disenchanting gear you don't need, and you can also buy them outright on the auction house if you know what you're after. Once you're gathering enough of the same type and rank, the Arcane Transmutor — accessible from your backpack — lets you combine five matching runes into one of the next rank up, which is generally a better use of a pile of low-rank duplicates than selling them individually. The Transmutor can also merge different runes into new ones entirely, though that's a rabbit hole worth exploring once you're past the early levels rather than something to chase on day one.
What to actually do with all this early on
For your first twenty or so levels, the practical version of all this is simple: don't ignore socketed runes just because a quest reward looks shinier on the surface, repair your gear before it becomes a problem rather than after, and don't sell anything with an empty socket without at least checking whether a cheap low-tier rune would make it worth keeping a bit longer. The deeper optimization — chasing specific rune combinations for a min-maxed build — is something that matters much more once you're gearing for group content, which later sections of this guide cover in more detail.
Your Early Leveling Path
The moment you confirm your character, you land on the Coast of Opportunity, a region on the continent of Xaviera, arriving by ship at Hending Harbor. This is the current starting flow for new characters — older guides you'll find online, including some official wiki pages, still describe a different opening sequence through Varanas and Silverspring, which reflects an earlier version of the leveling path rather than what you'll actually see today.
Your first quest hub
From Hending Harbor, quests point you toward Heffner Camp, which functions as your main hub for the first stretch of levels. Expect a steady mix of kill quests, gathering quests, and a handful of dailies right from the start — early quests here include things like collecting crab meat and grass blades along the coast for a cook, or getting your character used to combat against a practice dummy. None of it is complicated, and that's the point: this stretch of the game is about teaching you the interface and the quest flow more than testing you.
It's worth doing every daily quest available in this camp once you unlock it, every day you're playing — they're a reliable, low-effort source of experience, gold, and a camp-specific token currency that gets exchanged for gear and consumables at that camp's quartermaster rather than spent like regular gold.
How to actually pace your leveling
Runes of Magic's quest experience follows a curve: a quest gives noticeably reduced XP once you outlevel its intended range, and stops being worth doing at all once you're too far above it. As a rule of thumb, look for quests roughly level-appropriate to slightly above your level rather than clearing out everything indiscriminately — quests sitting more than five or so levels below you are better skipped in favor of newer ones. Grinding on random mobs between quests is rarely efficient early on; the quest chain in each zone is tuned to keep you moving at a reasonable pace on its own.
Priority one: reaching level 10
Everything before level 10 exists mainly to get you to the point where you can pick up your second class, covered in an earlier section. Once you hit it, a class trainer becomes available, and from there your effective power roughly doubles as both classes start contributing skills. There's no reason to delay this — head to a class trainer as soon as you're eligible rather than continuing to quest on a single class for its own sake.
The road ahead
Beyond the earliest levels, Runes of Magic opens into a much longer curve — the current level cap sits at 100, with an additional layer of post-cap progression called Peak Levels for players who've already hit it. Covering that full path zone by zone is beyond the scope of a beginner's guide and deserves its own dedicated section later on; what matters for your first days is simpler — follow the quest chain your camp gives you, don't skip your dailies, and get your second class the moment you're able to.
The Ten Classes and Their Roles
You've already seen the three starting-class-agnostic options and the six race-locked ones in the character creation section — this is where each of the ten classes gets a proper look at what it actually plays like, grouped by the role it tends to fill.
Tanks: Knight and Champion
Knight (Human only) is the game's dedicated tank — the only class that can equip plate armor, built around soaking damage while wearing the heaviest gear in the game and keeping enemy attention locked on itself rather than your party. If your goal is simply not dying while you learn the game, Knight is the most forgiving primary class available. Champion (Dwarf only) fills a similar niche with a different flavor — a rune-forging melee tank that can shift between combat stances to trade defense for accuracy or vice versa, generally considered a strong off-tank rather than a first-choice main tank.
Melee damage: Warrior and Rogue
Warrior (open to all races) is straightforward melee damage using a resource built around building and spending rage, wearing chain armor and everything short of plate — durable enough to function as a backup tank in a pinch, which makes it a comfortable, low-maintenance choice for someone learning the combat system. Rogue (also open to all races) trades that durability for burst: leather armor, an Energy resource, and a kit built around sneak attacks and combos that hit hard but leave you fragile if a fight drags on.
Ranged and control: Scout
Scout (Human and Elf) fights at range using a bow and Focus as its resource, built more around controlling and holding enemies in place than pure burst damage. It's a comfortable class for players who'd rather kite and manage positioning than stand and trade hits, and it pairs its leather armor with Rogue's, which matters if you're planning to combine the two — no need to gear two completely different armor types.
Casters: Mage and Warlock
Mage (open to all races) is the traditional elemental caster, drawing from two schools of magic at once for high burst and area damage in cloth armor, at the cost of being one of the squishier classes in melee range. Warlock (Dwarf only) fights at range too, but leans on curses and dark magic rather than raw elemental damage, contributing more debuffing and support than a Mage's straightforward burst.
Healers and hybrids: Priest, Druid, Warden
Priest (Human and Dwarf) is the primary dedicated healer, wearing robes with just enough defensive options — including shields — to survive a fight going wrong rather than folding immediately. Druid (Elf only) covers similar ground with a nature-magic flavor, contributing both healing and damage rather than leaning purely into one. Warden (Elf only) is the most hybrid of the three: chain armor, a wide weapon selection, pet summons, and a kit built around buffing allies and debuffing enemies rather than filling a single clean role.
What this means for picking a primary
If none of this settles it for you, the practical shortcut is this: pick Knight or Warrior if you want to worry less about dying while you learn the game, pick Priest or Druid if you enjoy being the person a group can't do without, and pick Mage, Rogue, or Warlock if burst damage and a faster kill speed matter more to you than survivability. Whatever you land on, remember your secondary class at level 10 is where you patch whatever your primary is missing — the next section covers pairings that tend to work particularly well for a first character.
Best Class Pairings for a New Character
At level 10, the game hands you a second class slot and gets out of the way — there's no wrong pairing in the sense that anything can eventually clear content, but some combinations are noticeably easier to level and solo with than others, especially before you've learned to compensate for a class's weaknesses through gear and skill. These are the pairings the community consistently points new players toward, with the reasoning behind each.
Knight/Priest — the easiest character to keep alive
This is the pairing most often recommended to players who want to solo comfortably without much risk of dying mid-fight. Knight as primary gives you plate armor and the survivability to tank hits that would drop a squishier class, while Priest as secondary adds self-healing on top of that — the combination is durable enough to solo dungeon content that would be rough for other pairings, at the cost of a slower kill speed than a pure damage build. If your priority is patience over speed, this is close to a safe default.
Warrior/Priest — similar idea, more damage
Community opinion regularly points to this as one of the strongest general-purpose solo builds — Warrior's chain armor and rage-based melee damage paired with Priest's self-healing gets you noticeably more damage output than Knight/Priest, while still being durable enough that most solo fights aren't genuinely risky. It trades a bit of the Knight's raw survivability for meaningfully faster leveling.
Priest/Scout — for players who'd rather heal than tank
If Priest as a primary appeals to you more than as a support secondary, pairing it with Scout adds ranged pressure and control on top of your healing kit, without sacrificing much survivability — a comfortable pick for someone who wants to be self-sufficient while questing but still values having a proper healer's toolkit as their main identity.
Warden/Druid — the Elf-exclusive comfort pick
If you're set on playing an Elf, this pairing is the one players most often land on for a hardy, self-sufficient solo experience — Warden's pets and buffs combined with Druid's nature magic and healing produce a character that's slow to kill things but genuinely difficult to kill in return, which suits players who'd rather not manage cooldowns under pressure.
Worth knowing before you commit
Combinations built around raw damage output and endgame group efficiency — the kind you'll see discussed on min-max tier lists — are a different conversation entirely, and generally not worth optimizing for on your first character. Those tier lists are written with fully-geared, high-level play in mind, and following one at level 10 usually means dragging a fragile pairing through content it isn't ready for yet. Pick something durable for your first run through the leveling curve; there's nothing stopping you from rolling a second character once you understand the systems well enough to chase a min-maxed combo on purpose.
Pets and Mounts
Two systems round out your early toolkit that have nothing to do with classes or gear: pets that fight alongside you, and mounts that get you across Taborea faster. Both are worth understanding early, since the first pet in particular is genuinely useful rather than purely cosmetic.
Combat pets vs. cosmetic pets — don't confuse them
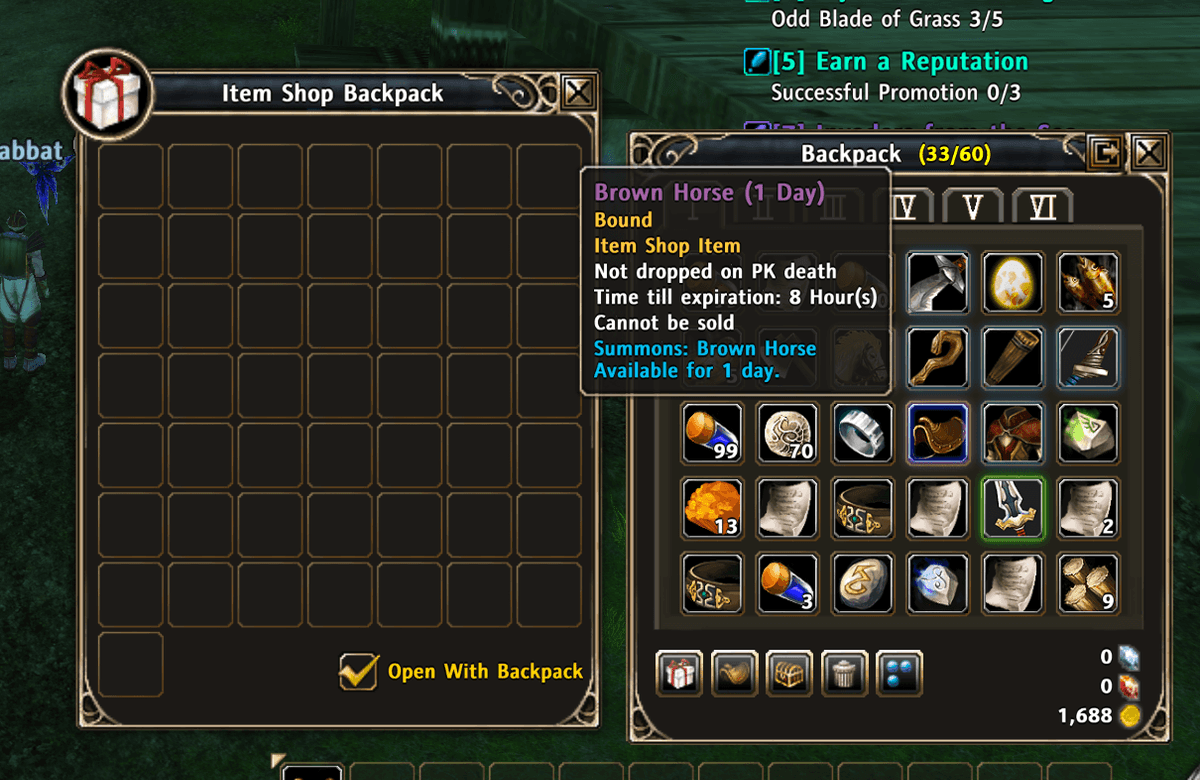
Runes of Magic has two entirely separate pet systems, and it's easy to mix them up when browsing the item shop. Cosmetic pets, sold as vanity items, follow you around and do nothing else — no combat assistance, no stat bonuses. Magic pets (sometimes called combat or rune pets) are the ones worth your attention: raised from an egg, they fight alongside you, cast buffs, and can assist with gathering, provided you've invested the time to raise one properly.
Getting your first pet
Every starting region has a Pet Hunter NPC who runs a short tutorial on catching pets — in the current starting area, this NPC is stationed in Heffner Camp. Completing the tutorial hands you a bound level 1 Rune Pet egg for free, which is enough to get started without spending any gold. From there, killing regular monsters anywhere in the world has a small chance of spawning a Magic Cavy; catch it with a Huntsman's Trap and it drops a pet egg you can hatch.
What actually matters when picking an egg
Three things determine how good a pet egg turns out to be: rarity, element, and level. Rarity comes in five tiers, from Wild up to Holy, and it's fixed the moment you get the egg — it directly sets how much your pet's stats grow as it levels, so a pet raised from a rare egg will always outperform one raised from a common egg at the same level, and since raising a pet is a slow, often costly process, it's generally worth holding out for a better egg rather than investing heavily in a mediocre one. Element determines which stats the pet favors as it grows — Fire pets lean toward Intelligence and Wisdom, which suits a Mage; Water pets lean Wisdom, suiting healers; Earth pets lean Strength and Stamina, suiting Warriors and Knights; and so on. Matching your pet's element to your class's primary stats is a reasonable rule of thumb if you're not sure where to start. A pet's loyalty toward you also needs to reach a threshold, generally cited around 60, before it reliably jumps into fights and casts buffs — a poorly-fed, neglected pet with low loyalty is mostly dead weight.
Mounts: getting around faster
Mounts in Runes of Magic increase your movement speed substantially — the standard range runs from roughly 55% faster than walking for basic mounts up to 65-75% for pricier ones, and the difference is very noticeable once you're covering the distances later zones expect of you. New characters typically get access to a free temporary mount early on, and beyond that, rental mounts can be rented from a stable master with gold for a fixed duration, while permanent mounts are purchased from the item shop using diamonds, the game's premium currency — a bigger investment, but a one-time one rather than a recurring gold sink. For your first stretch of leveling, a rented mount is more than adequate; permanent mounts are worth considering once you have spare diamonds and a clearer sense of which mount's look you actually want to commit to.
Professions and Crafting
Crafting in Runes of Magic runs entirely separately from your class and level — every character can dabble in it, and a character who ignores it completely is leaving a real source of gold and self-sufficiency on the table.
Nine professions, two categories
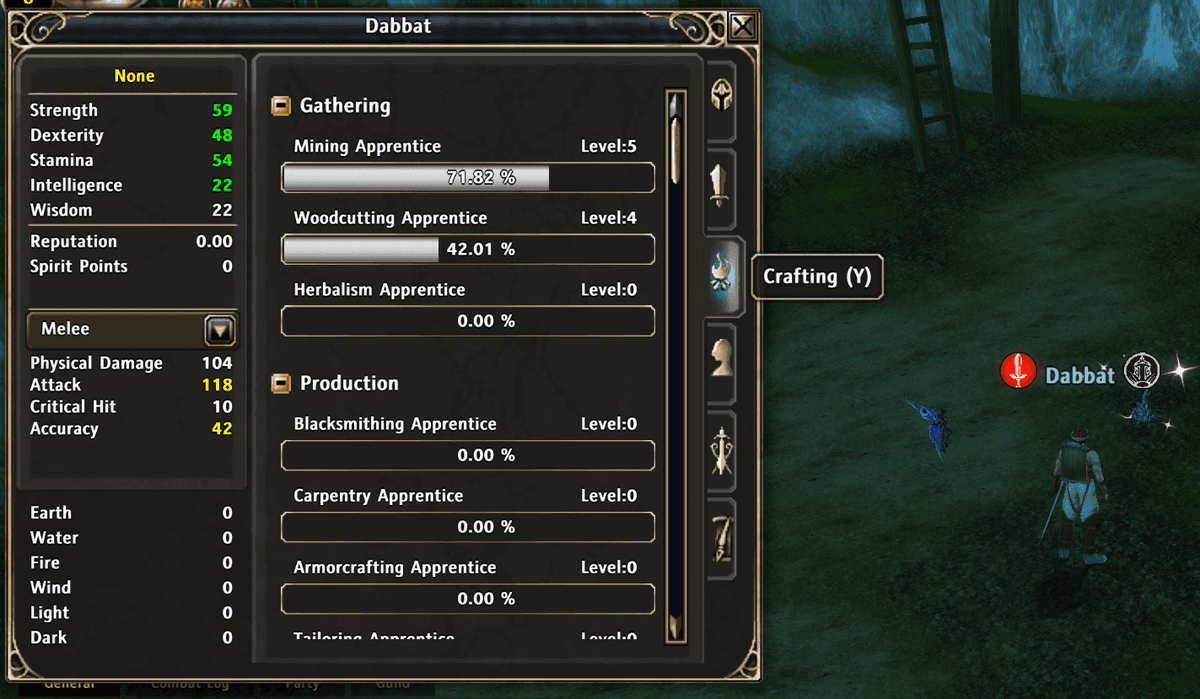
Professions split into Gathering and Production. Gathering covers Mining, Woodcutting, and Herbalism — pulling raw ore, wood, and plants out of the world, usable the moment you're standing near a resource node. Production covers Blacksmithing, Carpentry, Armor Crafting, Tailoring, Cooking, and Alchemy — turning those raw materials into finished weapons, armor, furniture, food, and potions, usable near the right crafting station. You'll want at least a couple of gathering professions feeding into whichever production professions you actually plan to invest in, since production recipes consistently call for two types of raw material.
Learning recipes from instructors
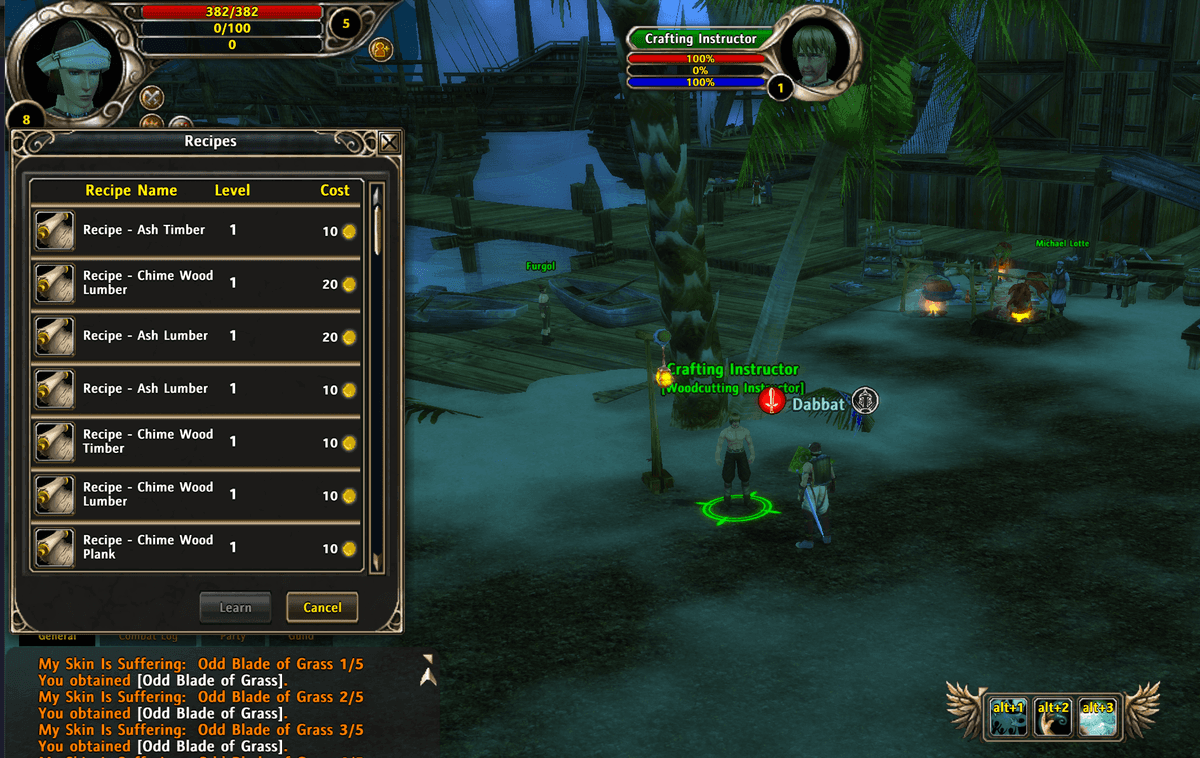
Each profession has its own instructor NPC, and every starting hub has a full set — in the current starting area, they're clustered right around Hending Harbor. Talking to an instructor gives you the option to learn their craft outright or to buy specific recipes for gold, priced individually and rising sharply for higher-tier recipes — a basic recipe might cost 10 gold, while a recipe several skill levels higher can run into the hundreds. Recipes also carry a minimum skill level requirement, shown directly in the purchase list, so don't expect to buy your way straight to advanced recipes before your skill level actually supports them.
Ranks and the limits that force you to specialize
Every profession — gathering or production — progresses through ranks: Apprentice, Craftsman, Expert, Master, and Legend. Reaching Apprentice is open to every profession you want to dabble in, no restrictions. Past that, the game deliberately limits how far you can specialize: you can push six professions to Craftsman, three to Expert, and only a single profession all the way to Legend. Once you hit the skill cap for your current rank, simple use stops raising it further — you need to visit that profession's trainer and complete a promotion quest to unlock the next rank's cap.
This means picking your long-term specialization early is worth thinking about, even if you dabble broadly at first. A character trying to master everything ends up mastering nothing; a character who identifies one or two production professions worth pushing to Expert or Legend, backed by two or three gathering professions to feed them, ends up with something genuinely valuable to sell rather than a pile of half-finished skills.
Why bother at all
Beyond the obvious gold from selling finished goods on the auction house, crafted gear is frequently competitive with what quests hand out at the same level, and a character who can repair, upgrade, or replace their own equipment without relying entirely on drops and purchases has a real head start over one who can't. It's not mandatory to enjoy the game, but ignoring it entirely means leaving money and convenience on the table for no real benefit.
Currencies and the Item Shop
Runes of Magic runs on four distinct currencies, and knowing what each one is actually for saves you from either hoarding something useless or, worse, spending something valuable on the wrong thing.
Gold — your everyday currency
Gold is earned constantly from quests, monster drops, and selling items, and it's what you'll use for nearly everything: vendor purchases, auction house trades, repairs, and recipes from crafting instructors. It belongs to the individual character rather than your account, so gold doesn't carry over automatically if you're playing multiple characters — something worth knowing if you're planning to fund a second character's early levels from your main's wallet.
Zone tokens — spend them locally, don't hoard them
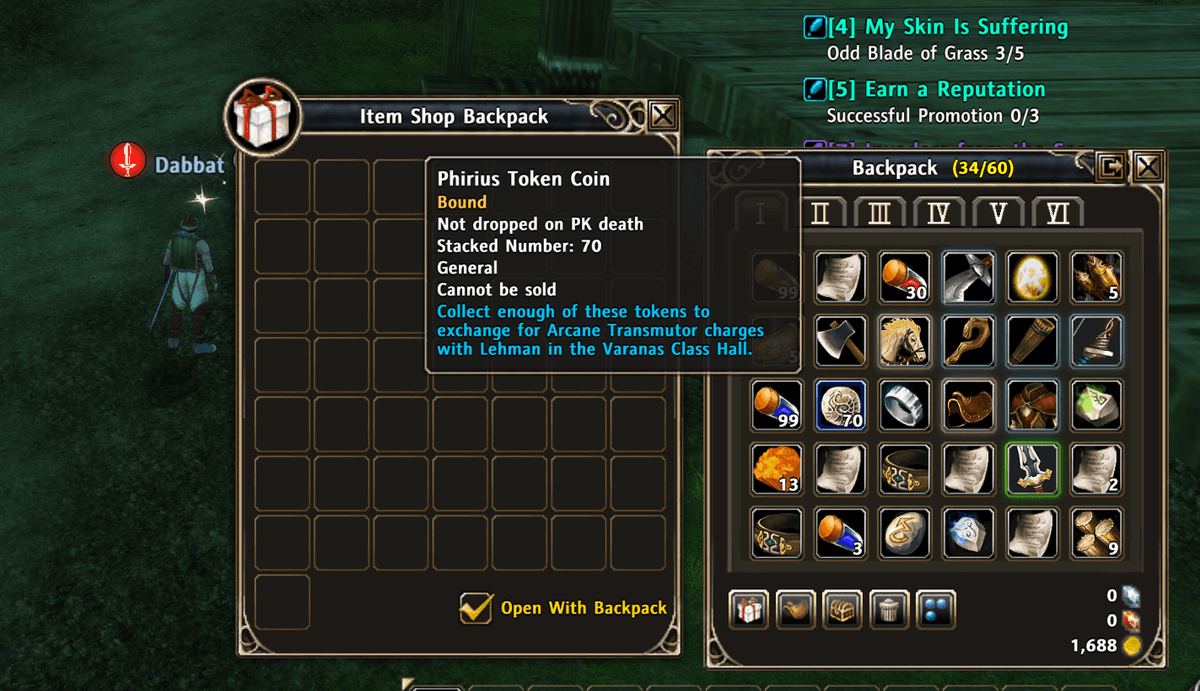
Many quest hubs hand out a token currency alongside gold and experience — in the current starting area, this is Phirius Token Coin. These tokens are tied to that specific hub's quartermaster and generally aren't useful anywhere else, so there's little reason to sit on a pile of them — check what the local quartermaster sells and spend them down as you go rather than carrying them into a later zone where they'll likely be dead weight.
Diamonds — the premium currency
Diamonds are purchased with real money and unlock the item shop's more exotic offerings — permanent mounts, cosmetic pets, convenience items like inventory expansions, and boosts to experience or talent point gain. Diamonds belong to your account rather than a single character, so they're shared across everyone you play on that server. Runes of Magic is genuinely playable without ever spending real money — nothing diamond-locked is required to progress through content — but if you do want diamonds without paying, the game lets you buy a limited daily amount using a large sum of gold instead, through an NPC in Varanas, which is a slow but real alternative for a patient free-to-play player.
Rubies — diamonds' quieter cousin
Rubies work similarly to diamonds in that they unlock their own section of the item shop, but you can't buy them directly with real money — they're earned as a byproduct of spending diamonds in the shop instead. In practice, this means rubies aren't something to plan around early on; they accumulate naturally if you do end up buying diamonds later, and the ruby shop is worth a glance at that point rather than something to chase deliberately as a new player.
Where to actually spend, as a beginner
For your first stretch of the game, gold management matters far more than the other three currencies combined: keep enough on hand for repairs and recipes, don't be afraid to spend zone tokens the moment you have something worth buying with them, and treat diamonds as something to think about later rather than a currency you need to chase from day one.
The Auction House and Trading
Player-to-player trade in Runes of Magic runs mostly through the Auction House, accessed by talking to a dedicated NPC rather than through a universal hotkey — every major town has one, usually somewhere central and easy to find once you know to look for it.
How a listing actually works
Listing an item puts it up for sale for up to three days, and buyers can either bid on it or pay a buyout price to grab it immediately. Whichever happens — a successful sale or the listing simply expiring unsold — the result lands in your in-game mail rather than your inventory directly, so it's worth checking your mailbox regularly rather than assuming a listing failed just because the item isn't back in your bags. Most categories carry a small listing fee, but a few — recipes, pet eggs, and Monster Compendium cards among them — list for free, which is worth knowing if you're trying to offload a stack of duplicate recipes without bleeding gold on fees each time.
Reading the market instead of guessing
There's no official price guide, and for good reason — prices vary meaningfully from server to server and shift over time as the population and available supply change. The practical approach is to browse before you list: search for what you're selling, see what similar items are currently asking, and price competitively rather than either underselling out of impatience or overpricing and having your listing quietly expire. The same applies in reverse when buying — a quick browse before committing to a buyout price saves you from paying well above what the item is actually moving for that week.
What sells reliably
Items tied to popular daily quests tend to move fast and consistently, since players who'd rather buy the turn-in material than farm it themselves are a dependable source of demand. Crafted gear with useful stat combinations, runes, and stones follow the same logic — anything that saves another player time is generally worth more than its raw material cost. If you're producing anything through crafting, keeping half an eye on what's actually selling on your server is a better guide than assuming a recipe is valuable just because it looked impressive when you learned it.
Guilds and Guild Castles
Guild membership in Runes of Magic goes well beyond a chat channel and a name tag — a well-established guild owns a physical castle in the world, and defending or attacking one of those castles is one of the largest-scale things the game lets you do.
Joining early is worth it
There's little reason to wait on joining a guild while you're still learning the game — most guilds are happy to take on new players, since a guild's strength depends partly on having active members at every level, not just a handful of veterans. Guild chat is also a faster, more reliable source of answers to specific questions than any guide, including this one, since guildmates can see your exact situation rather than a general description of it.
Guild Castles: a real base, not a menu screen
Once a guild reaches level 5, it can claim a Guild Castle — an actual physical stronghold with a vault for shared storage, starting at 100 slots and expandable further, along with buildings that grant combat and utility bonuses to guild members. Access to the vault is controlled by guild rank, so leadership decides who can pull from shared resources rather than it being a free-for-all. Owning a castle isn't purely cosmetic — it's the guild's base of operations and the prerequisite for the game's largest PvP content.
Siege Wars: guild vs. guild for the castle itself
Siege Wars are scheduled, large-scale battles where two guilds fight directly over each other's castles, following a fixed daily schedule of registration, preparation, and battle windows rather than something you can queue into at will. Each side starts with a Guild Honor Crystal and a handful of defended towers; capturing towers and, eventually, the enemy's Honor Crystal earns points, and a guild that loses its Crystal has a short window to retake it before the siege is lost outright. Along the way, both sides gather resources — Crystals to power the castle's defenses and Merits earned individually — and can deploy siege engines like ballistae and catapults bought and upgraded through the castle's Armory.
Any guild member can generally take part in a siege regardless of character level, and rewards scale with both individual and guild performance — typically titles with stat bonuses, honor points tradeable for PvP gear, and crafting materials for the guild itself. It's genuinely large-scale, coordinated content, closer to a scheduled event than a drop-in activity, so it's worth checking with your guild about when sieges happen on your server and what role they expect from newer members before jumping in blind.
Dungeons and Group Content
Most of Runes of Magic's early hours are solo by design, but scattered through the leveling path are instances — separated, party-based areas with tougher enemies and better rewards than the open world offers at the same level.
What makes an instance different from open-world content
An instance is its own private copy of a location, entered as a party, with monsters and bosses noticeably harder than anything outside — the tradeoff for that difficulty is loot that's usually a genuine upgrade over quest rewards at the same level. Instances are built around progression: your party starts at the entrance and fights its way toward a final boss, generally getting harder as you go, though not always in a straight line. One visual cue is worth learning early: a boss displaying a small crown instead of a level number is a special, unusually dangerous encounter, and treating one like a normal fight is a common way to wipe a party that isn't paying attention.
Finding a group without a proper finder tool
Be aware going in that Runes of Magic doesn't have a reliable automated matchmaking tool the way many newer MMOs do — there's a group-finder function, but in practice most players don't rely on it, since it can't filter for role or specific instance the way a modern dungeon finder can. In practice, groups form through guild chat, world or zone chat channels, and dedicated LFG channels that populate on more active servers. This is one more reason joining a guild early pays off — a guild with active members at your level range is a far more reliable source of instance groups than shouting into general chat and hoping.
What to expect your first few runs
Early instances are generally forgiving of a slightly under-geared or inexperienced party — a full group of tank, healer, and a mix of damage classes handles most early content comfortably, and even a rough approximation of that composition (say, a durable dual-class pairing standing in for a dedicated tank) usually gets through. Don't be shy about asking your group to slow down or explain a mechanic you don't recognize; a wipe from a misunderstood boss ability costs everyone time, and most players would rather answer a question than repeat a fight.
As you level, you'll also notice some content is gated behind specific times, reputation, or a quest chain rather than being open on demand — if an instance portal doesn't respond the way you expect, it's worth checking whether it has a prerequisite rather than assuming something's broken.
Housing
Player housing in Runes of Magic isn't a late-game reward — every character has access to a house from the very start, entered by talking to a House Fairy NPC in town and left by speaking to the House Maid waiting inside.
What a house actually gives you
Beyond the obvious appeal of a personal space to decorate, a house is genuinely useful. Placing crafting tools inside means you can craft in private without other players interrupting to request items, which matters more than it sounds like once you're actually running a profession. Mannequins let you save and instantly swap between full outfits with one click — handy for switching gear sets fast without digging through your inventory — and personal storage chests give you extra space separate from your regular bags and the shared bank.
Decorating without a rigid grid
Furniture is bought mostly from NPCs and the item shop rather than crafted, and placing it is refreshingly unstructured — items are dragged into the room and can be freely moved, rotated, and even overlapped with other pieces, without an invisible grid forcing everything into fixed positions. Every house starts with a baseline number of free furniture placement slots, expandable further by spending House Energy as you accumulate it, so a starter house won't feel cramped for long even if you enjoy decorating heavily.
Bigger houses later
Your starting house can be upgraded to larger layouts — two-story wooden or mud houses, and more elaborate versions beyond that — using a house contract item purchased from the item shop's housing section. Switching layouts this way unplaces all your existing furniture, so it's worth deciding on a floor plan you're happy sticking with rather than upgrading impulsively and having to redecorate from scratch each time.
Not just for you
Housing isn't limited to individual characters — guilds can maintain their own guild house separately from the guild castle covered earlier, giving members a shared social space distinct from the castle's more functional, siege-focused role. Between the personal and guild versions, housing ends up being one of the more consistently rewarding systems to invest a little time into early, since the benefits — private crafting, quick outfit swaps, extra storage — start paying off immediately rather than requiring high-level content to matter.
Where to Go From Here
By the time you've spent twenty or thirty levels in Taborea, you'll have touched most of what makes Runes of Magic distinct from other MMOs in this guide's earlier sections — a second class contributing its own skills, a rune or two socketed into your gear, maybe a pet fighting alongside you and a mount cutting your travel time down. That's the foundation. What comes next is less about learning new systems and more about deciding which of them you want to actually invest in.
A rough checklist before you push further
A few things are worth confirming you've done before diving deeper into the game: your second class should be active and not sitting untouched several levels behind your first, your gear's rune sockets shouldn't be sitting empty just because you haven't gotten around to it, and if you haven't joined a guild yet, this is a good point to stop putting it off — group content and Siege Wars only get more relevant from here, not less. If none of your professions have pushed past Apprentice, it's worth picking one or two worth committing to before the promotion quests start asking for materials from content you've already leveled past.
Where the game opens up from here
Past the early levels, Runes of Magic stops holding your hand quite as much. You'll start seeing group content that genuinely expects a coordinated party rather than a rough approximation of one, professions that reward specialization over dabbling, and — if it interests you — Siege Wars that ask for guild-wide coordination rather than individual skill. None of this is required to keep enjoying the game; plenty of players spend all their time on solo questing, professions, and housing without ever touching PvP or high-end instances, and that's a perfectly complete way to play.
A game that rewards sticking around
Runes of Magic isn't the newest MMO on the market, and it doesn't pretend to be — but the dual class system, the housing, and the genuinely player-driven economy this guide has walked through are still doing what they were built to do more than fifteen years in. The community you'll find on official servers today is smaller than it once was, but it's there because it still finds something worth showing up for, and a new player who takes the time to actually engage with these systems rather than rushing past them tends to find the same thing. Take your time with the dual class combinations, don't be afraid to redecorate your house more than once, and if a guildmate offers to walk you through your first instance, take them up on it — that's usually how this game is best played.