
Genshin Impact: The Definitive Beginner’s Handbook
Getting Started in Teyvat: First Steps, Roadmap AR 1–45, and World Level Scaling
You have downloaded the game, watched the opening cinematic with the Unknown God, and awakened on a sunlit beach beside your floating companion Paimon. Ahead of you lies the vast continent of Teyvat: six unlocked nations, hundreds of mechanics, and thousands of treasure chests. It is remarkably easy to feel overwhelmed by the sheer volume of choices.
Where should you go first? Should you grab every quest in sight? Should you comb every inch of the map or sprint strictly through the story? This guide provides your essential roadmap for the early game: concrete data, proven paths, and exactly what to focus on right now.
Quick take: Focus exclusively on the Mondstadt Archon Quests until Adventure Rank 20. Avoid the hazardous Dragonspine mountain for now, and collect every Anemoculus along your path to expand your maximum Stamina. Unlock Daily Commissions at AR 12 for a steady 60 Primogems per day, claim free Barbara at AR 18, and clear Floor 3, Chamber 3 of the Spiral Abyss at AR 20 to secure Xiangling. Never hesitate to advance your World Level, provided you keep your primary DPS character's weapon maxed out.
1. Platform Selection, Cross-Progression, and Account Security
Genshin Impact offers full cross-platform multiplayer and unified Cross-Save across PC, PlayStation 4/5, Xbox Series X|S, and iOS/Android mobile devices. You can clear your daily commissions on your phone during your morning commute, then explore the peaks of Liyue on your PC or console in the evening.
Three Essential Account Security Rules:
- Register directly via email: Create your HoYoverse account using an email address rather than third-party social media logins. Using a dedicated email prevents authentication issues when switching between different platforms.
- Enable Two-Factor Authentication (2FA): Link both your mobile number and email in your account settings on the official website. Account theft targeting accounts with high-value 5★ characters is a real risk. Secure your progress immediately.
- PlayStation Network (PSN) specifics: If you start your journey on PS4 or PS5, the game links your progress directly to your PSN account. To play on PC or mobile later, link an external HoYoverse email within the in-game account settings on your console BEFORE creating an account on your computer.
2. Choosing the Traveler: Aether or Lumine?
Your first gameplay decision is selecting your twin: Aether (male) or Lumine (female). The twin you do not select is captured during the prologue and becomes a pivotal figure on the opposing side of the storyline.
| Parameter | Aether | Lumine |
|---|---|---|
| Character Model | Tall male model | Medium female model |
| Movement Speed | Sprinting, swimming, and climbing are roughly ~5% faster | Standard female model movement speed |
| Combat Multipliers | Standard sword attack animation speed | Charged sword attack is faster, with approximately ~8% higher damage scaling |
Verdict: Pick whichever design and voice you prefer. There is no PvP in Genshin Impact. The Traveler can resonate with every element in Teyvat at Statues of The Seven, acquiring new abilities in each nation (Anemo, Geo, Electro, Dendro, Hydro, Pyro). In later team compositions, they are frequently replaced by specialized 4★ and 5★ characters.
3. "What Should I Do Right Now?": Step-by-Step Early Game Roadmap
The most common beginner roadblock is arriving in Mondstadt, seeing dozens of map markers, and spending hours collecting berries without clear progression. Remember this rule of thumb: until Adventure Rank 20, the game guides your path directly. Stay on the Prologue Archon Questline unless blocked by an AR requirement.
- Start (Starfell Beach): Complete Archon Quest Prologue: Act I "The Outlander Who Caught the Wind".
- AR 8: Unlock Wishes (claim guaranteed Noelle from the Beginner's Wish at a discount).
- AR 12: Unlock Daily Commissions (a guaranteed 60 Primogems daily).
- AR 16: Unlock Co-Op mode to team up with other players.
- AR 18: Complete "A Long Shot" (receive free 4★ Hydro healer Barbara).
- AR 20: Unlock the Spiral Abyss (clearing Floor 3, Chamber 3 awards top-tier Pyro sub-DPS Xiangling).
- AR 25: First World Ascension Quest and claim free Anemo character Lynette.
Day 1: Mondstadt Storyline and Your First Ten-Pulls (AR 1–8)
- Follow the golden quest markers: Work through the Archon Quest Prologue: Act I "The Outlander Who Caught the Wind".
- Unlock every Teleport Waypoint and Statue of The Seven on your way: Never bypass an unactivated (grey) waypoint. Walking up and activating it grants Adventure EXP and eliminates tedious backtracking later.
- Collect Anemoculi (floating teal orbs): When a four-pointed star icon appears on your minimap, grab the Anemoculus. Offer them to Statues of The Seven: this grants Adventure EXP and permanently expands your maximum Stamina bar. Without Stamina, you cannot scale tall cliffs or dodge effectively in battle.
- Do not wander onto the snowy mountain (Dragonspine)! If your quest marker routes around it, stay on the road. Newcomers often venture south into the blizzard, accumulate "Sheer Cold", freeze to death in thirty seconds, and become frustrated. Dragonspine is tuned for AR 25–30+. Bypass it entirely at the start.
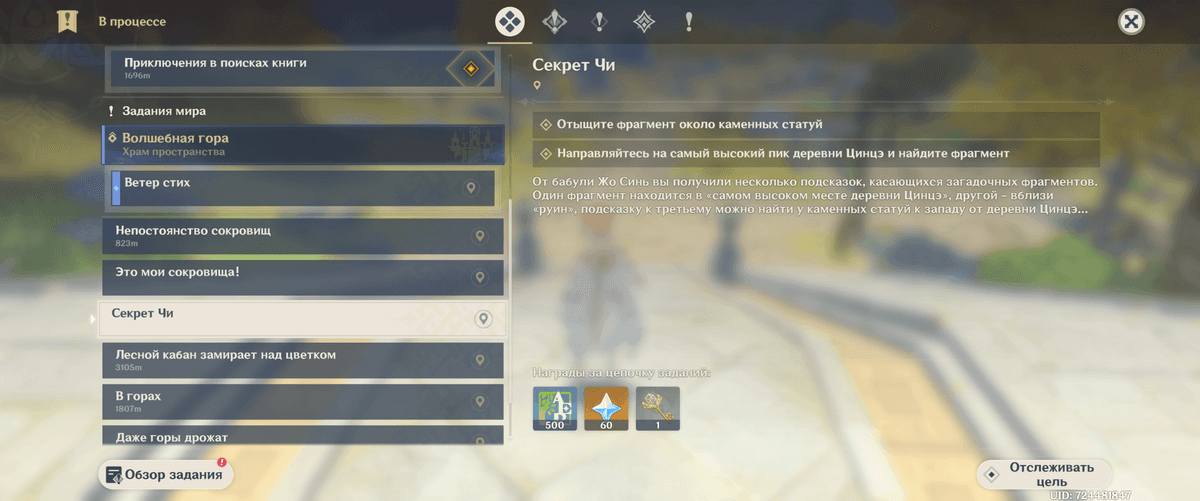
- Reaching AR 8: The Wish menu unlocks (hotkey
F3). Collect your complimentary mail rewards and pull on the Beginner's Wish banner.
Day 2: Daily Routine and First Multiplayer Steps (AR 9–16)
- Progress through the Knights of Favonius storyline: You will recruit your starter companions for free: archer Amber (Pyro), swordsman Kaeya (Cryo), and mage Lisa (Electro).
- Reaching AR 12: You unlock Daily Commissions. From this point forward, every play session should begin here: four quick commissions yield 60 Primogems in total. Do not skip them.
- Spend your Original Resin: Check the top-right corner of your map screen (capacity 0/200). Beginning around AR 12–14, spend accumulating Resin on Blossoms of Revelation (blue orbs) and Blossoms of Wealth (golden orbs) across Mondstadt. These provide substantial quantities of Mora and Hero's Wit EXP books, which become scarce later.
- Reaching AR 16: You unlock Co-Op Mode, allowing other adventurers to join your world.
Days 3–4: Free Meta Units and Entering the Abyss (AR 18–20)
- Reaching AR 18: Complete Prologue: Act III (defeating the dragon Dvalin). The game rewards you with Barbara, a 4★ Hydro healer. Her presence solves early-game sustain, healing your party on the go with her Elemental Skill.
- Reaching AR 20: At Cape Oath in southeastern Mondstadt, activate the wind current using three Seelies and jump through the portal to Musk Reef. This is the entrance to the Spiral Abyss.
- Key Milestone — Clear Floor 3, Chamber 3: Push through the first three floors of the Abyss. Clearing Chamber 3-3 awards you Xiangling for free—one of the game's strongest off-field Pyro sub-DPS units, widely utilized even at AR 60 in competitive endgame speedruns.
4. Exploring the Map vs. Rushing the Story: The Golden Mean
Extremes hinder your overall progress:
- Pitfall A (Over-exploring): Spending 40 hours combing every field before finishing the prologue. This inflates your Adventure Rank prematurely, scales enemy levels up, and keeps essential game systems locked behind unplayed Archon Quests.
- Pitfall B (Hyper-rushing): Skipping every chest, puzzle, and side dialogue to chase only main story markers. This leaves you starved for Primogems, lacking weapon enhancement materials, and facing an empty inventory.
The Corridor Exploration Principle: Explore the terrain within roughly 50–70 meters of your active quest route. Spot a chest near the trail? Defeat the hilichurls and open it. Spot an Anemoculus in a nearby tree? Grab it. Spot iron or white iron ore? Shatter it with Noelle's claymore. Avoid wandering far into distant wilderness until you have completed the region's current Archon chapter.
5. Adventure Rank and World Level: Progression Table
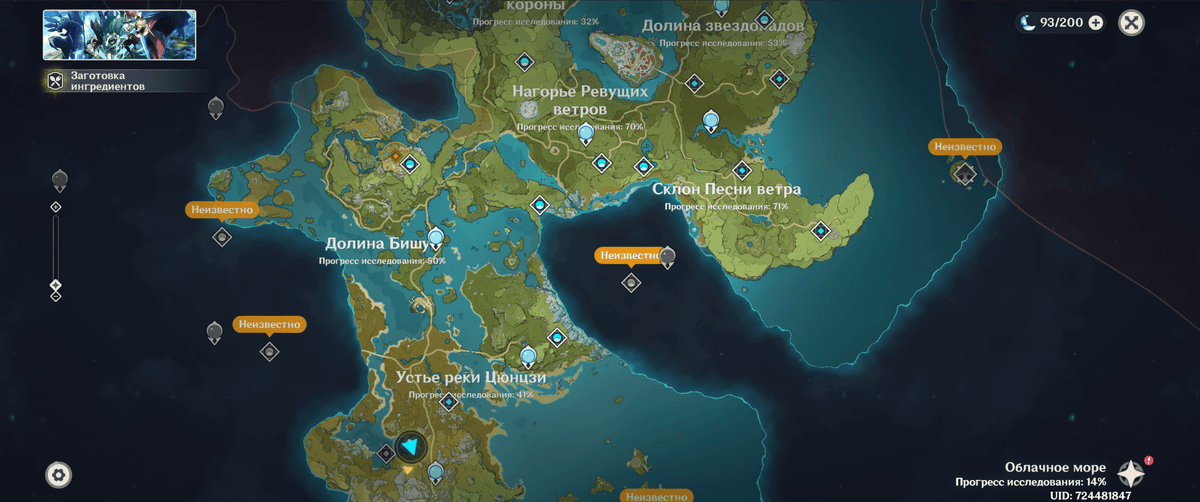
Adventure Rank (AR) measures your overall account level, while World Level (WL) governs enemy difficulty and the rarity of dropped loot.
| Adventure Rank (AR) | World Level (WL) | Ascension Quest? | Enemy Level | Key Unlocked Content |
|---|---|---|---|---|
| AR 1–19 | WL 0 | No | Lv. 1–25 | Prologue story, Wishes (AR 8), Daily Commissions (AR 12), Co-Op (AR 16), Barbara (AR 18) |
| AR 20–24 | WL 1 | Automatic | Lv. 20–38 | Spiral Abyss (AR 20), Battle Pass (AR 20), Xiangling via Floor 3-3 |
| AR 25–29 | WL 2 | Yes (Ascension I) | Lv. 30–48 | Free Lynette (AR 25), Story Quests, Journey to Liyue |
| AR 30–34 | WL 3 | Automatic | Lv. 40–58 | Liyue storyline, Dragonspine unlocking, Parametric Transformer (AR 31) |
| AR 35–39 | WL 4 | Yes (Ascension II) | Lv. 50–68 | Serenitea Pot (housing system), Inazuma storyline prerequisite (AR 30+) |
| AR 40–44 | WL 5 | Automatic | Lv. 60–78 | World Level lowering feature unlocked, increased world boss drop rates |
| AR 45–49 | WL 6 | Yes (Ascension III) | Lv. 70–88 | CRITICAL MILESTONE: Guaranteed 5★ artifact drops in Level 90 domains for 20 Resin! |
| AR 50–54 | WL 7 | Yes (Ascension IV) | Lv. 80–94 | Character and weapon maximum level cap raised to Lv. 90 |
| AR 55–57 | WL 8 | Automatic | Lv. 90–100 | Maximum baseline open-world drop rates |
| AR 58–60 | WL 9 | Yes (Ascension V) | Lv. 100+ | Peak boss drop rates (guaranteed 3 character ascension materials), endgame scaling |
6. The "World Ascension Trap": How to Avoid Brick Anxiety
A frequent player concern on community forums reads: "I completed the Ascension Quest at AR 35, and now standard open-world mobs defeat me in two hits while world bosses take twenty minutes. Is my account ruined?"
This situation is known as the "difficulty cliff." It happens when a player accumulates large amounts of Adventure EXP through chest hunting and exploration while neglecting party combat stats. The world jumps forward by 15 levels, but character damage output remains stagnant.
| Recovery Method | Location | How It Works |
|---|---|---|
| Method 1: Manual World Level Lowering | Paimon Menu → click the "i" icon beside World Level | Select "Lower World Level by 1" (available starting at WL 5 / AR 40). Enemies become noticeably easier; this toggle has a 24-hour cooldown. |
| Method 2: Co-Op Signature Call for Help | Edit signature in player profile menu | Change your signature to: "Need help with boss ascension mats!" High-AR players frequently drop into lower-level worlds via Co-Op and can eliminate bosses in seconds. |
Core Rules for Safe World Level Transitions:
- The Single Main DPS Rule: Do not attempt to level 8–10 characters simultaneously from your early pulls. You will quickly run out of Mora and EXP books. Designate one reliable on-field damage dealer (such as Kaeya, Yanfei, Razor, Noelle, or an event 5★ character). Keep this character's level and weapon maxed out before taking on World Ascension quests.
- Weapons matter more than character level: Your character's Base ATK is derived primarily from their equipped weapon. A Level 50 hero wielding a Level 20 weapon hits for negligible damage. Always keep your main damage dealer's weapon elevated to the highest level permitted by your current AR cap.
- Level your Plume of Death artifact: Look at your character's second artifact slot: the Plume of Death. It provides flat attack power (+ATK). Enhance any 3★ or 4★ feather to +8 or +12 immediately. This single upgrade can double or triple your early-game attack damage.
- What if you struggle between AR 25 and 35 (before WL lowering is available)? Leverage Co-Op. Place a polite note in your signature: "Need assistance with ascension bosses, please." Experienced AR 60 players frequently join lower-rank worlds to help farm ascension materials.
7. Leveling Characters from Late-Game Nations (Fontaine and Natlan)
You may pull a character featured on the current limited banner who hails from Fontaine (such as Neuvillette or Furina) or Natlan (such as Mualani, Kinich, or Xilonen).
Opening their character ascension menu reveals that their required local specialties and boss drops are located halfway across Teyvat. Older guides often advise: "You must walk on foot for fifty hours through Liyue and Sumeru."
This information is completely outdated. The developers have streamlined early access for new players:
- Automatic Teleport Waypoints: As soon as you complete the Mondstadt Archon Quest Prologue ("Song of the Dragon and Freedom", roughly AR 15–18), the game automatically unlocks gateway Teleport Waypoints leading into distant regions: one near the border between Sumeru's desert and Fontaine, and another near the entrance to the Tequemecan Valley in Natlan.
- Fast Material Gathering: Open your world map, pan west toward the unlocked waypoints, and teleport directly to Natlan or Fontaine. You can collect the required regional flora for your character's 1st and 2nd ascensions in ten minutes, without having to clear the regional story quests first.
- The Exception — Inazuma: The isolated nation of Inazuma remains strictly story-locked. You cannot cross the ocean on foot or by boat (lightning strikes will push you back). Access to Inazuma unlocks strictly through the main storyline at Adventure Rank 30. If you pull Inazuma characters (Kamisato Ayaka, Raiden Shogun, Arataki Itto, or Yoimiya), you can obtain their initial ascension materials up to Level 40 directly from their character trial runs in the Events menu.
Early Game Departure Checklist:
- Account secured with an email and Two-Factor Authentication (2FA) enabled.
- Mondstadt Prologue cleared and all waypoints along the route activated.
- Daily Commissions (AR 12) cleared daily without skipping.
- Original Resin spent on Revelation and Wealth Ley Line Outcrops (EXP and Mora).
- Main DPS weapon and Plume of Death artifact enhanced to current caps.
- Xiangling claimed by clearing Spiral Abyss Floor 3, Chamber 3.
Survival Economy: What to Hoard, What to Spend, and What to Recycle
After a couple of weeks in Genshin Impact, a beginner's inventory resembles an overcrowded attic: dozens of herbs, regional ores, colorful EXP books, potion vials, rusted iron swords, and grey artifacts. The instinctive reaction of any classic RPG player is: "Where is the nearest merchant so I can sell all this junk for gold?"
Surprise: Teyvat features no conventional vendor gear shops to liquidate equipment. Instead, the game contains dozens of finite or strictly time-gated resources where an accidental waste can turn progression into an uphill battle. This chapter provides a rigorous inventory audit: what to lock under key, how to recycle surplus materials, and whether you can truly "brick" an account.
Quick take: Never consume Fragile Resin before Adventure Rank 45—at AR 45, level 90 domains guarantee 5★ gold artifacts. Immediately lock the chest-exclusive 3★ polearm White Tassel (it cannot be replaced once fed into weapon EXP), and recycle unwanted 5★ artifacts at AR 45+ through the Alchemy Mystic Offering (Artifact Strongbox 3-for-1). Dispelling the biggest beginner anxiety: you cannot permanently brick an account in Genshin Impact; any early mistake is easily corrected by disciplined resource allocation.
1. The "Vault": What to Hoard and Never Waste
Some resources replenish daily on automatic timers. Others are distributed in strictly limited quantities over months of active play. Spending them carelessly means you cannot easily get them back.
| Resource | Acquisition Source | Usage Rule | Critical Importance |
|---|---|---|---|
| Fragile Resin | Adventure Rank rewards, Battle Pass levels | Hoard until AR 45. Never spend a single one earlier! | Critical (prevents gear progression loss) |
| Primogems | Chests, quests, daily commissions, events, Abyss | Convert exclusively into Intertwined Fate (pink wishes) | Absolute (premium gacha currency) |
| White Tassel (3★ Polearm) | Exclusively Exquisite/Precious chests in Liyue & The Chasm | Refine one copy to R5 and lock it immediately | Irreplaceable finite drop |
| Crown of Insight | Major flagship patch events, regional offering trees | Reserve strictly for crowning core talents (Lv. 9 to 10) | Ultra-rare (only ~6–8 per year) |
| Dream Solvent | Weekly boss trounce domains (random drop) | Convert weekly boss materials at the alchemy bench | High (saves weeks of talent farming) |
1. Fragile Resin — A Strict Taboo Until Adventure Rank 45!
Shaped like a blue crescent moon in the consumable tab of your inventory, each Fragile Resin instantly restores 60 Original Resin. The game rewards them generously as you gain Adventure Ranks and level your Battle Pass. By AR 40, you will likely have accumulated 40 to 50 of them.
- The classic beginner mistake: Burning 30 Fragile Resins at AR 30–35 on artifact domains.
- Why this is catastrophic: At AR 30–35, artifact domains drop inferior 3★ blue and 4★ purple gear. Within two weeks, you will replace every single one of them.
- The efficiency math: At Adventure Rank 45 (AR 45), you unlock the highest difficulty level (Level 90) in all artifact domains. At this tier, every 20 Resin spent guarantees at least one 5★ gold artifact drop.
- The Golden Rule: Preserve every single moon until AR 45. The day you hit AR 45, you can burn this reserve and gear your primary team in complete 5★ sets over a single weekend.
2. Chest Exclusives: Why the 3★ White Tassel Must Never Be Foddered
Most 3★ weapons drop by the hundreds from Wish banners. However, there are unique exceptions that inexperienced players frequently dismantle by mistake:
3. Other 3★ Gems That Belong at R5 in Your Arsenal:
- Harbinger of Dawn: 3★ Sword. Features CRIT DMG secondary stat and an extra +28% CRIT Rate from its passive while HP remains above 90%. Exceptional for off-field sub-DPS sword users like Albedo or Chiori.
- Thrilling Tales of Dragon Slayers (TTDS): 3★ Catalyst. When switching from the wielder to another character, the incoming unit gains a massive +48% ATK buff for 10 seconds! Even in Floor 12 of the Spiral Abyss, veteran players equip this 3★ catalyst on Barbara, Mona, or Sucrose to hyper-buff their main DPS.
- Black Tassel: 3★ Polearm. Provides massive pure HP% scaling. The premier budget shield stick for Zhongli, Thoma, or Chevreuse.
Collect one Refinement Rank 5 (R5) copy of each of these weapons and lock them in your inventory. Once you have a locked R5 copy of each, duplicate drops can be safely used as weapon enhancement fodder.
2. Managing Inventory Clutter: Recycling, Crafting, and Vendors
Genshin Impact features no standard merchant shops to sell unwanted gear for coins. However, your backpack has hard capacity limits (2,000 weapons, 1,800 artifacts). How should you handle surplus items?
- 1★ and 2★ Weapons (Grey and Green): Feed them directly into your primary weapons as enhancement fodder. Click "Enhance" on your equipped 4★ or 5★ weapon and utilize the auto-add low-rank option.
- 1★, 2★, and 3★ Artifacts: The primary source of artifact EXP in the early game. Feed them directly to upgrade functional artifacts (prioritizing the flat ATK Plume of Death). While the "Destroy" option converts artifacts into Mora, beginners should avoid this: artifact EXP is vastly more scarce than early-game Mora.
- Unwanted 5★ Gold Artifacts (The 3-for-1 Artifact Strongbox): Never use 5★ gold artifacts as EXP fodder! Approach any Crafting Bench and navigate to the Artifact Strongbox (Mystic Offering) tab. Here you can trade 3 unwanted 5★ artifacts for 1 fresh strongbox reliquary containing an artifact from your chosen set. This allows you to target elite sets like Viridescent Venerer, Noblesse Oblige, or Emblem of Severed Fate without spending Resin in their domains.
- Parametric Transformer: Unlocked at Adventure Rank 31 by completing the world quest "Tianqiu Treasure Trail" in Liyue. Once every 7 days, you can feed 150 units of common junk (Mint, Berries, Slime Condensate, Damaged Masks) into the device, strike it with elemental attacks, and generate free talent books, weapon ascension ores, and Mora.
3. "Can I Brick My Account?": Five Critical Mistakes Deconstructed
A recurring fear among new players is: "I spent my early resources on the wrong characters. Did I permanently ruin my account? Should I reset and reroll?"
The definitive answer is NO: you CANNOT permanently brick an account in Genshin Impact. There are no irreversible stat penalties, no dead-end talent trees, and no mechanisms that permanently lock you out of content. However, five major missteps can slow down your progression by several weeks:
| Critical Mistake | The Consequence | How to Fix It |
|---|---|---|
| 1. Spreading resources across 10+ characters | Mora and EXP books deplete to zero; your entire roster is underleveled and struggles to defeat basic enemies | Halt investment on all auxiliary units immediately. Direct 100% of your daily Resin into leveling one primary DPS and one healer/shielder. |
| 2. Burning Fragile Resin before AR 45 | Inventory fills with obsolete 4★ purple gear, leaving you with zero reserve Resin when guaranteed 5★ gold domains unlock at AR 45 | Stay calm. Farm the AR 45 artifact domains using your regular daily regenerating Resin. Within 2 to 3 weeks, your gear progression will stabilize. |
| 3. Buying standard blue wishes (Acquaint Fate) with Primogems | Wastes valuable gacha pulls on the non-rate-up standard banner instead of securing limited promotional 5★ characters | Enforce strict currency discipline: from this moment forward, every single Primogem must be converted exclusively into pink Intertwined Fates. |
| 4. Foddering the 3★ White Tassel polearm | Losing one of the best free-to-play polearms in the game for normal-attacking spear characters | Immediately lock any remaining copies found in Liyue/Chasm chests. If all copies were consumed, craft an alternative 4★ forge weapon (such as the Kitain Cross Spear or purchase Blackcliff Pole). |
| 5. Leaving weapons underleveled relative to character level | Abysmally low damage output caused by low Base ATK scaling | Inspect your main damage dealer's weapon slot. Spend 1 to 2 days farming weapon ascension material domains to bring their weapon to the max level allowed by your current AR. |
Economic Security Checklist:
- Fragile Resin is hoarded safely in your inventory until Adventure Rank 45.
- White Tassel, Harbinger of Dawn, and Thrilling Tales of Dragon Slayers are locked at Refinement 5.
- Primogems are never spent on Acquaint Fates or Resin refreshes.
- Resource investment is focused on a single carry rather than dispersed across your entire roster.
- The Parametric Transformer is activated on cooldown once every 7 days.
Wish System: Pity Math, Banner Mechanics, and Paimon's Bargains
The gacha system is the most thrilling yet potentially treacherous component of Genshin Impact. It is where players experience the elation of pulling a coveted 5★ character or the acute frustration of squandering three months of diligent farming on a lost coinflip.
While the developers display baseline odds openly, they present them within layers of specialized terminology. Beginners often assume pulls are ruled by pure chaotic chance. That is a costly misconception: the Wish system operates on strict mathematical probability curves. Once you master its underlying mechanics, you will stop relying on luck and begin systematically securing high-priority characters without needing to spend real money.
Quick take: Spend Primogems strictly on pink Intertwined Fates and never purchase blue Acquaint Fates. Soft Pity begins at pull 74, drastically scaling up your 5★ drop rate, while Version 5.0+'s "Capturing Radiance" mechanic increases your effective 50/50 win rate to approximately ~55%. In Paimon's Bargains, always hoard 34 Masterless Starglitter to bypass gacha RNG and purchase essential meta supports like Bennett (May/November) and Xingqiu (March/September).
1. Currencies and Wishes: Never Confuse Fate Colors!
The game uses four interconnected currencies to make Wishes. Learn their specific roles and boundaries:
| Currency | Resource Classification | Exchange Rate | Permitted Usage |
|---|---|---|---|
| Primogems | Free premium currency | 160 Primogems = 1 Wish | Convert exclusively into pink Intertwined Fates |
| Genesis Crystals | Paid premium currency | 1:1 ratio to Primogems | Convert to Primogems or purchase character outfits |
| Intertwined Fate | Pink/Purple wish tokens | 1 token = 1 Wish pull | Limited promotional Character and Weapon banners |
| Acquaint Fate | Standard blue wish tokens | 1 token = 1 Wish pull | Standard Wish and Beginner's Wish only |
2. Banner Anatomy: Where Should You Pull?
Opening the Wish interface (hotkey F3 on PC) reveals several banner tabs:
| Banner Type | Required Currency | Featured Loot | Duration | Beginner Pull Recommendation |
|---|---|---|---|---|
| Beginner's Wish | Acquaint Fate (20% discount) | Guaranteed Noelle + 4★/5★ pool | 20 pulls total | MANDATORY: Exhaust all 20 pulls for 16 blue fates |
| Character Event Wish | Intertwined Fate | Limited 5★ character + three rate-up 4★ units | 21 days | PRIMARY BANNER: Direct all your savings here |
| Weapon Event Wish | Intertwined Fate | Two featured 5★ signature weapons + 4★ weapons | 21 days | AVOID UNTIL AR 50+: Characters trump stat sticks |
| Standard Wish | Acquaint Fate | Standard 5★ characters and standard 5★ weapons | Permanent | Pull strictly with free Acquaint Fates received in-game |
| Chronicled Wish | Intertwined Fate | Curated regional pool of older 5★ units and weapons | Limited event | Only pull with 160–180 fates in hand |
3. Pity Mathematics: How the Pity System Operates
Genshin Impact's gacha contains a built-in mathematical pity system that guarantees items after designated thresholds:
- Base Probability (Pulls 1–73): The flat probability of pulling a 5★ character on any individual pull sits at a modest 0.6%.
- Soft Pity (Pulls 74–85): Starting at pull 74, hidden drop probabilities spike dramatically with each subsequent wish. Over 90% of all 5★ characters are acquired between pull 75 and pull 82.
- Hard Pity (Pull 90): The absolute ceiling with a 100% guarantee. Reaching pull 90 without a 5★ is an extreme statistical outlier that rarely happens in practice.
- The 50/50 Rule and "Capturing Radiance": When a gold comet streaks down, you have a baseline 50% chance of pulling the featured promotional character. If you are about to lose the 50/50, Version 5.0+ introduces the "Capturing Radiance" mechanic, which can trigger and convert a loss into a win. This raises the effective limited character win rate to roughly ~55%!
- Guaranteed Pity After a Loss: If you lose the 50/50 to a standard 5★ character (Diluc, Jean, Mona, Keqing, Qiqi, Tighnari, or Dehya), your next 5★ character on that banner is 100% guaranteed to be the featured promotional hero.
- Pity Carry-Over: Both your pull count and your guarantee status carry over seamlessly between limited character banners. Reached 65 pulls without a 5★ before a banner ends? You start the next character banner at 65/90 with your guarantee intact.
4. The Weapon Banner: Why Beginners Should Stay Away
The weapon banner is enticing with its sleek golden swords and bows, but it enforces strict economic rules:
- Soft Pity starts earlier at pull 63, with Hard Pity capped at 80 pulls.
- The banner features TWO promotional 5★ weapons running concurrently.
- Epitomized Path: Starting in Version 5.0+, the system requires only 1 Fate Point instead of the previous 2. If you pull an off-target 5★ weapon, your subsequent 5★ pull is 100% guaranteed to be your chosen weapon.
Why should beginners avoid the weapon banner? New characters unlock novel elemental combinations, team archetypes, and gameplay experiences. Weapons provide numerical stat improvements. Until your account has established two fully functional, well-built teams for the Spiral Abyss (at least 8 invested characters), spending Intertwined Fates on weapons is strongly discouraged.
5. Paimon's Bargains: Guaranteed Bennett and Xingqiu
Pulling on banners generates cashback currencies: Masterless Stardust (from 3★ weapons) and precious Masterless Starglitter (from duplicate 4★ and 5★ pulls).
- Masterless Stardust: On the 1st day of every calendar month, purchase the monthly discounted batch of 5 Intertwined Fates and 5 Acquaint Fates (costing 375 Stardust for each batch of 5). Never spend Stardust on Mora, ores, or common enemy drops!
- Masterless Starglitter: Save up exactly 34 Starglitter. The shop operates on a fixed, predictable 6-month rotation offering top-tier 4★ units without gacha RNG:
| Calendar Months | Characters Available (34 Starglitter) | Account Value Assessment |
|---|---|---|
| January / July | Fischl / Xiangling | Fischl is TOP TIER: Premier off-field Electro turret and particle battery |
| February / August | Beidou / Noelle | Situational (skip if Starglitter is limited) |
| March / September | Xingqiu / Ningguang | Xingqiu is HIGHEST PRIORITY: Backbone of Vaporize, Freeze, and Hyperbloom squads |
| April / October | Razor / Amber | Safe skip for progression purposes |
| May / November | Bennett / Lisa | Bennett is ESSENTIAL: Massive team-wide ATK buff and powerful healing |
| June / December | Barbara / Kaeya | Kaeya constellations are rare (he never appears on limited banners) |
Always hold a reserve of 34 Masterless Starglitter. When March or May arrives and your account still lacks Xingqiu or Bennett, you can purchase them directly with zero RNG risk.
6. Free-to-Play Primogem Income and Spending Strategy
A completely free-to-play player who clears events, daily commissions, and new map exploration earns approximately 55 to 75 pulls per 6-week patch cycle. Major patches introducing brand-new regions push this yield past 90–100+ pulls. This pacing guarantees a limited 5★ character of your choice roughly every 2 to 3 patches.
Cost-Effective Spending Options (If You Choose to Spend):
- Blessing of the Welkin Moon: The most cost-efficient purchase in the game (~$5/month). It provides 300 Genesis Crystals immediately and 90 Primogems daily for 30 days (totaling 3,000 Primogems ≈ nearly 19 pulls).
- Battle Pass (Gnostic Hymn): Highly resource-dense (large amounts of Mora, EXP books, talent books, Fragile Resin, and wishes), alongside exclusive 4★ weapons with CRIT Rate secondaries (such as the Serpent Spine or The Black Sword). Only purchase if you have already reached Level 40–50 on the BP track.
- Banner Discipline: Never pull on a banner solely to chase a 4★ rate-up character if you do not want the featured 5★ hero! "Building pity" is a trap; an unwanted 5★ can appear at pull 20, resetting your pity counter and wiping out your savings.
Wish Management Checklist:
- Beginner's Wish exhausted (20 pulls completed for 16 Acquaint Fates; Noelle secured).
- Zero Primogems spent on the Standard Wish or Resin refreshes.
- Active pity counter tracked manually via the Wish History tab.
- 375 Stardust reserved for the monthly shop reset on the 1st of each month.
- 34 Masterless Starglitter banked for Bennett or Xingqiu shop rotations.
Combat Mechanics: 7 Elements, Elemental Reactions, and Damage Physics
Most beginners fall into a common combat rut: picking a favorite character, walking into an enemy encampment, and monotonously spamming the Normal Attack button. The resulting damage numbers are underwhelming—200, 300, or 500 damage per strike—turning even a routine skirmish with hilichurls into a sluggish grind.
Genshin Impact is not a hack-and-slash game centered on single-button spam. Meaningful damage is born strictly at the intersection of two distinct elements. Once you grasp the physics of elemental reactions, even a basic Level 50 roster can unleash bursts of 20,000 to 40,000 damage, vaporizing elite foes in seconds.
Quick take: Amplifying reactions (Vaporize and Melt) multiply base attack damage directly by 1.5x–2.0x and can critically strike. For beginners, Hyperbloom is the ultimate progression shortcut: Dendro cores transform into homing projectiles upon contact with Electro, dealing massive damage scaling purely off character level and Elemental Mastery (EM) without needing expensive CRIT gear. Always field two characters of the same element to unlock permanent teamwide Elemental Resonances (such as +25% ATK from Pyro Resonance).
1. Fundamental Controls and Survival Mechanics
Your active party consists of four characters, with one character on-field at any given time. Hotkeys 1, 2, 3, and 4 allow instantaneous character switching.
| Action | Default Control | Role in Combat Mechanics |
|---|---|---|
| Normal Attack | Left Click | A sequence of rapid physical strikes. For Catalyst users, this deals native elemental damage. |
| Charged Attack | Hold Left Click | Consumes Stamina to deliver a high-multiplier attack with unique stagger properties. |
| Elemental Skill | E key | Short cooldown (3–15s). Deals elemental damage and generates elemental energy particles. |
| Elemental Burst | Q key | Ultimate ability. Requires energy accumulation, delivering high damage or game-changing team utility. |
Sprinting and Invulnerability Frames (i-frames)
Genshin Impact lacks a universal block button (with few exceptions like specific parry skills). Your primary defensive tool is the dash/sprint (Right Click or Shift).
- Activating a sprint grants approximately 0.3 seconds of complete invulnerability (i-frames). Dashing directly into an incoming fireball or boss cleave negates all damage if timed properly.
- Dashing consumes Stamina. Chaining three rapid dashes empties your stamina bar, leaving you vulnerable and unable to evade.
- Burst Invulnerability: Triggering a 5★ character's Elemental Burst animation provides a generous 1.5 to 2.0-second window of total invulnerability to all incoming damage.
2. The Seven Elements: Aura and Trigger Mechanics
Combat revolves around seven elements: Pyro (Fire), Hydro (Water), Anemo (Wind), Electro (Lightning), Dendro (Nature), Cryo (Ice), and Geo (Earth).
- Aura (The Foundation): The initial elemental strike applies an elemental status to the enemy, indicated by an elemental icon floating above their head (e.g., a Hydro droplet or Pyro flame).
- Trigger (The Finisher): A subsequent strike with a differing element interacts with the existing aura, triggering an elemental reaction.
- Reaction Ownership: The damage and scaling of the reaction depend strictly on the stats of the triggering character (whoever lands the second blow). If a low-level Barbara applies Hydro, but an invested Diluc triggers Vaporize with a high-CRIT Pyro slash, the damage scales entirely off Diluc's stats.
3. Group 1: Amplifying Reactions (Vaporize and Melt)
Amplifying reactions do not deal separate, flat damage instances; instead, they multiply the triggering hit's damage directly. They can critically strike and scale with ATK, Elemental DMG Bonus, CRIT Rate/DMG, and Elemental Mastery (EM).
| Reaction | Elemental Interaction | Damage Multiplier | Practical Application |
|---|---|---|---|
| Reverse Vaporize | Pyro applied onto Hydro aura | x1.5 Multiplier | The premier meta staple: off-field Hydro application enables continuous Pyro hits |
| Forward Vaporize | Hydro applied onto Pyro aura | x2.0 Multiplier | Doubles raw damage; ideal for massive single-instance Hydro Burst nukes |
| Forward Melt | Pyro applied onto Cryo aura | x2.0 Multiplier | Pyro melts ice with double baseline damage multiplier |
| Reverse Melt | Cryo applied onto Pyro aura | x1.5 Multiplier | Cryo arrows or slashes triggered against continuously burning targets |
4. Group 2: Transformative Reactions
Transformative reactions deal a distinct instance of flat damage that scales exclusively with the triggering character's level and Elemental Mastery (EM). They cannot crit, and ignore the character's ATK and weapon damage:
- Overloaded (Pyro + Electro): Triggers an explosive AoE blast that knocks back lighter enemies and shatters Geo shields.
- Electro-Charged (Hydro + Electro): Shocks enemies with sustained damage ticks over time, chaining electricity to nearby wet targets.
- Superconduct (Cryo + Electro): Deals minor Cryo AoE damage and shreds enemy Physical RES by 40% for 12 seconds. Mandatory for Physical DPS characters like Razor or Eula.
- Swirl (Anemo + Pyro/Hydro/Electro/Cryo): Spreads the contacted element across an area. When combined with the 4-piece Viridescent Venerer artifact set, it reduces enemy resistance to the swirled element by a massive 40%!
- Frozen (Hydro + Cryo): Completely immobilizes enemies for several seconds. Hitting frozen enemies with heavy claymore strikes triggers Shatter.
5. The Dendro Revolution: Why Hyperbloom Breaks Progression
The introduction of Dendro redefined team building. Historically, reaching endgame damage required months of farming double-CRIT artifacts. Dendro teams, by contrast, shred difficult content even while equipped with budget 3★ and 4★ gear.
- Bloom (Dendro + Hydro): When Hydro meets Dendro, green seed pods called Dendro Cores drop onto the ground.
- Hyperbloom (Dendro Core + Electro): Striking a Dendro Core with an Electro attack (such as Fischl's Oz, Kuki Shinobu's ring, or Lisa's attacks) transforms the core into a high-speed homing missile.
- Why It Is Overpowered: The missile's damage scales entirely off the Electro character's level and total Elemental Mastery. Stack basic EM main stat artifacts on Kuki Shinobu or Lisa, and each missile deals 25,000 to 35,000 flat damage every 0.5 seconds—no CRIT investment required!
6. Elemental Resonances: Passive Party Buffs
Including at least two characters of the same element in your four-person party activates an Elemental Resonance, granting permanent passive buffs to your team:
| Elemental Resonance | Party Requirement | Teamwide Passive Bonus |
|---|---|---|
| Fervent Flames (Pyro) | 2 Pyro characters | Increases entire party's ATK by +25% |
| Soothing Water (Hydro) | 2 Hydro characters | Increases entire party's Max HP by +25% |
| Shattering Ice (Cryo) | 2 Cryo characters | Increases CRIT Rate by +15% against Frozen or Cryo-affected enemies |
| Enduring Rock (Geo) | 2 Geo characters | Shield Strength +15%; characters protected by a shield gain +15% all DMG dealt |
| Impetuous Winds (Anemo) | 2 Anemo characters | Stamina consumption -15%, Movement SPD +10%, Skill Cooldown -5% |
| Sprawling Greenery (Dendro) | 2 Dendro characters | Increases party Elemental Mastery by 50 to 100 points |
Combat Readiness Checklist:
- Understood the core cycle: Aura is applied first, followed by the Trigger hit scaling off high stats.
- Mastered sprint invulnerability frames (i-frames) to negate heavy boss mechanics.
- Built a beginner-friendly Hyperbloom team for high damage with minimal artifact grinding.
- Activated an Elemental Resonance in your active roster (at least 2 characters of matching element).
Team Building: Roles, Free Characters, and "Secret 6★" Units
Throwing four favorite characters into a party and hoping for effortless victory is a guaranteed path to frustration. When a team contains four selfish carries who all demand continuous field time, they end up fighting for screen time while tanking overall team damage output.
In Genshin Impact, a functional combat team operates like a symphony: one conductor dispenses offensive buffs, two off-field performers maintain a relentless barrage from behind the scenes, and the lead soloist takes the stage for an 8–10 second burst window to unleash devastating damage. This chapter details the foundational "1+1+1+1" team-building formula, audits the free starter roster, and examines the legendary "Secret 6★" characters who outperform most standard 5★ options.
Quick take: Structure every team around the balanced "1+1+1+1" formula: Main DPS (on-field carry) + Sub-DPS (off-field elemental damage) + Buffer/Battery (ATK/EM/energy support) + Sustain (healer or shielder). Genshin Impact features a revered quartet of 4★ "Secret 6★" characters (Bennett, Xingqiu, Xiangling, Fischl) whose kits outperform most standard 5★ characters. When selecting your free 5★ from the annual standard selector, prioritize Tighnari (premier Dendro Spread DPS) or Jean (universal teamwide healing and Anemo Swirl resistance shred).
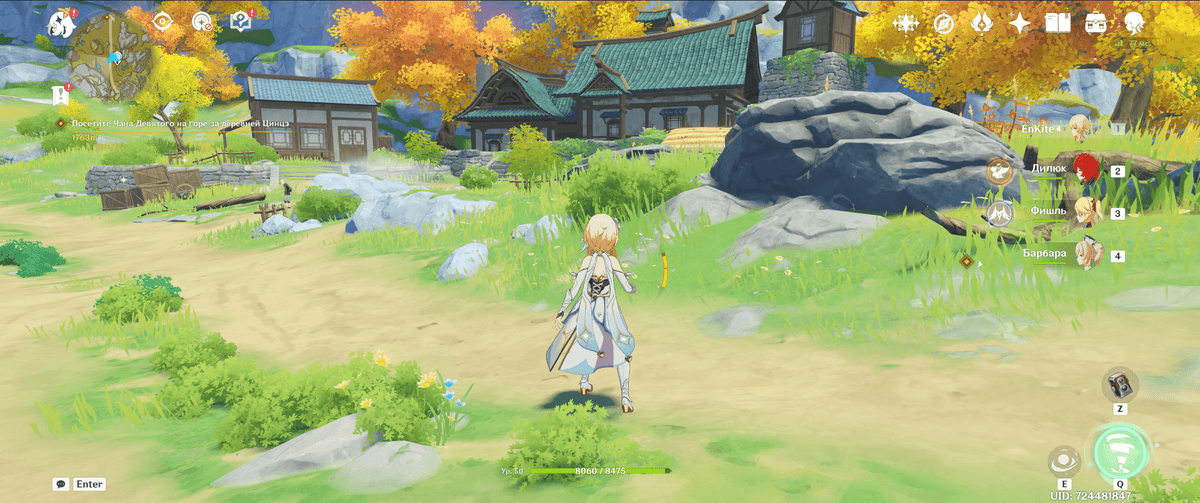
1. Anatomy of an Ideal Team: The 1 + 1 + 1 + 1 Framework
| Party Role | Field Time | Primary Objective | Representative Characters |
|---|---|---|---|
| Main DPS (On-field Carry) | 60–70% of rotation | Drives primary damage using normal/charged attacks while standing inside team buffs | Diluc, Neuvillette, Kamisato Ayaka, Kaeya |
| Sub-DPS (Off-field Carry) | 1–2 seconds (Skill + Burst) | Deals heavy off-field damage and applies elements while sitting in your pocket | Xiangling, Xingqiu, Fischl, Yelan |
| Support / Buffer / Battery | 1–2 seconds | Provides team ATK/EM buffs, crowds enemies, or funnels energy particles | Bennett, Sucrose, Kaedehara Kazuha |
| Sustain (Healer / Shielder) | Situational as needed | Restores party HP, provides shields, and prevents interruption | Zhongli, Barbara, Noelle, Kuki Shinobu |
2. The "Secret 6★" Roster: 4★ Units Outclassing 5★ Legendaries
Within the theorycrafting community, these units are known as the "Secret 6-Star Characters". They are launch 4★ heroes whose foundational kit designs are so mathematically potent that HoYoverse has never released direct powercreeping replacements:
His Elemental Burst (Fantastic Voyage) creates an Inspiration Field: inside it, active characters regenerate HP at blistering speed while receiving an enormous flat attack buff (+800 to 1,200 ATK scaling off Bennett's Base ATK). Constellation 1 removes the 70% HP threshold restriction, granting the ATK buff unconditionally.
His Burst summons orbiting raincutters: with every normal attack launched by the active hero, coordinated sword strikes deal damage and apply Hydro continuously. He also grants ~40% damage reduction and substantial interruption resistance.
Her Burst (Pyronado) orbits the active character for up to 14 seconds with zero Internal Cooldown (ICD) on its Pyro application. Every single hit of Pyronado can trigger a Vaporize reaction off Xingqiu's Hydro aura for double multiplier damage.
Summons her night raven Oz, who continuously snipes targets with Electro bolts from off-field while generating abundant energy particles. Essential for Quicken/Aggravate and Electro-Charged team shells.
Pulls monsters together, triggers Anemo Swirl, and shares a generous percentage of her own Elemental Mastery with the entire team (+150 to 250 EM). The premier 4★ holder of the 4-piece Viridescent Venerer artifact set to shred enemy elemental resistances by 40%.
3. Free Starter Roster Audit: Who Deserves Investment?
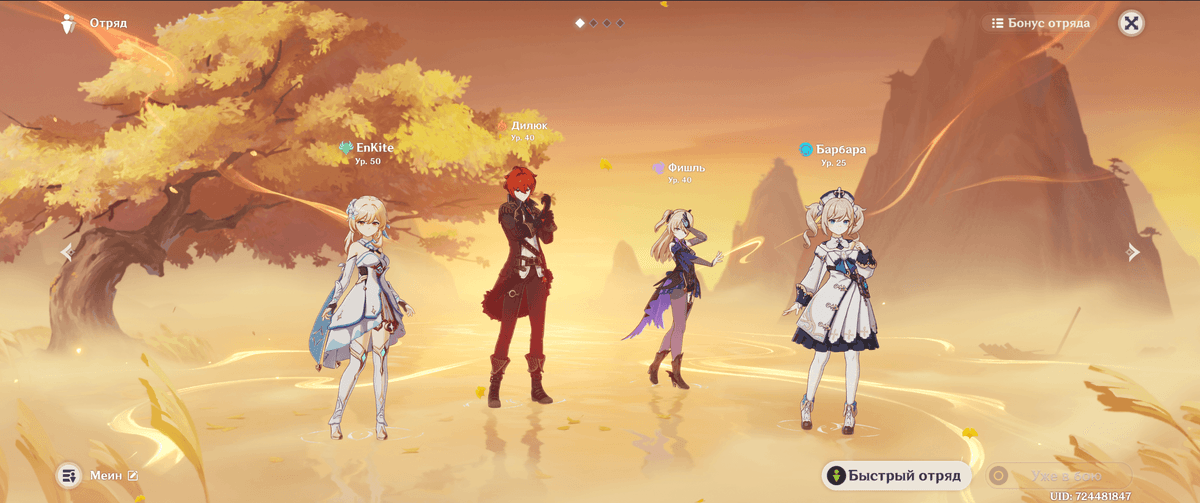
| Character | Element / Weapon | Acquisition Source | Early-Game Assessment | Endgame Worthiness? |
|---|---|---|---|---|
| Traveler | Variable / Sword | Game Start | Anemo and Geo feel clunky, but Dendro resonance from Sumeru is top-tier | Dendro: YES; other elements: No |
| Noelle | Geo / Claymore | Beginner's Wish | Provides shields, party healing, and easy ore mining. Great safety net | Stop at Lv. 50–60 (unless C6) |
| Kaeya | Cryo / Sword | Prologue Quest | Strong early on-field attacker and consistent off-field Cryo applicator | Yes, reliable off-field Cryo sub-DPS |
| Barbara | Hydro / Catalyst | AR 18 Reward ("A Long Shot") | Pure mobile healing with her Skill; applies Wet status on nearby enemies | Stop at Lv. 60–70 (healers scale well with low investment) |
| Xiangling | Pyro / Polearm | Spiral Abyss Floor 3, Chamber 3 | The undisputed best off-field Pyro sub-DPS in the game. Secure immediately! | MANDATORY: Invest to Lv. 80–90 for endgame |
| Collei | Dendro / Bow | Spiral Abyss Floor 4, Chamber 3 | Ranged Dendro application, shoots flying weak spots, gathers Sumeru flora | Lv. 60–70 as a reliable Bloom/Quicken enabler |
| Lynette | Anemo / Sword | AR 25 Reward | Fast sprint mechanic for overworld exploration; reliable Swirl applicator | Situational (valuable Ousia Arkhe alignment) |
| Kachina | Geo / Polearm | Natlan 5.0 Archon Quest | Rides her Turbo Twirler up sheer cliffs. Premier holder of Natlan's support artifact set | Yes, excellent modern support buffer |
4. Annual Free 5★ Standard Character Selector: Who Should You Pick?
Starting with Version 5.0, players receive a free 5★ character selector from the standard banner pool during each anniversary event. Which character offers the best account value for a beginner?
- Top Priority: Tighnari (Dendro / Bow) — The strongest DPS in the standard pool. Fast, homing charged arrows, rapid quickswap burst damage when paired with Electro for Spread reactions. Highly intuitive to play and fully competitive in Floor 12 of the Spiral Abyss.
- Second Priority: Jean (Anemo / Sword) — Universal sustain and buffer. Instantly restores entire team's HP with her Burst, groups smaller foes, and triggers 4-piece Viridescent Venerer elemental resistance shred. An ideal partner for Furina teams.
- Third Priority: Mona (Hydro / Catalyst) — Her Burst applies the Omen debuff, delivering a massive damage amplification window for your team's biggest attacks. Features an alternate sprint for rapid water travel.
- Fourth Priority: Diluc or Keqing — Dependable, comfortable baseline damage dealers who make clearing the overworld campaign straightforward.
- Lower Value: Qiqi and Dehya — Not recommended for your primary selector pick due to poor energy particle generation and low damage scaling multipliers.
5. Three Reliable Free-to-Play Starter Team Templates
| Team Archetype | Party Composition | Combat Rotation and Strategy |
|---|---|---|
| F2P Starter Vaporize | Xiangling + Xingqiu / Barbara + Bennett + Kaeya | Apply Hydro with Barbara/Xingqiu, place Bennett's Inspiration Field, activate Xiangling's Pyronado inside the ring to vaporize foes continuously. |
| Budget Hyperbloom | Dendro Traveler + Barbara + Lisa / Kuki Shinobu + Collei | Combine Dendro and Hydro to spawn Dendro Cores on the ground. Strike them with Lisa's or Kuki's Electro attacks to fire homing Hyperbloom missiles scaling purely off EM. |
| Starter Permafreeze | Kaeya + Barbara + Anemo Traveler / Lynette + Noelle | Kaeya and Barbara freeze opponents into helpless ice statues, Anemo spreads the freeze across groups, and Noelle provides impenetrable shield security. |
Team Building Checklist:
- Party follows the "1+1+1+1" framework: Main DPS, Sub-DPS, Buffer/Battery, and Sustain.
- Priority investment directed into the "Secret 6★" heroes (Bennett, Xingqiu, Xiangling).
- Free 5★ anniversary selector allocated to high-impact picks like Tighnari or Jean.
- Combat flow relies on continuous elemental reactions rather than raw physical button-mashing.
Energy Mechanics, Batteries, and Rotations: Casting Bursts on Cooldown
You have assembled a promising combat team, stepped onto the battlefield, and unleashed the Elemental Bursts of all four party members in sequence... The damage is spectacular! The boss loses half of its health bar in an instant.
Then comes an awkward, painful stall: your ability cooldowns finish, but your Elemental Burst icons remain grey, dim, and empty. You run around in circles frantically landing weak normal attacks while the boss winds up a counterattack and wipes your squad. This is the primary hurdle plaguing most accounts before Adventure Rank 45.
Roughly 70% of total team damage output in Genshin Impact originates from Elemental Bursts. If your characters cannot cast their Bursts strictly on cooldown every 15 to 20 seconds, your team's DPS plummets. This chapter explores the hidden physics of elemental particles, the immense utility of the Favonius weapon series, and the art of sustaining flawless combat rotations.
Quick take: Absorbing an elemental particle off-field of a differing element provides one-fifth the energy compared to collecting a matching-element particle directly on-field. Master the art of Energy Funneling: cast an Elemental Skill with a battery (like Bennett) and swap immediately to your energy-hungry carry (like Xiangling) so they catch the incoming particles directly. Build Energy Recharge (ER) to 180–220% on primary supports, and equip Favonius or Sacrificial weapons to eliminate rotation downtime.
1. Particle Generation: The Hidden Physics of Energy
Every character's Elemental Burst demands a specific energy cost: from inexpensive 40-cost Bursts (Diluc, Keqing) to demanding 80- and 90-cost Bursts (Xiangling, Xingqiu, Raiden Shogun, Kamisato Ayaka).
Energy does not passively regenerate over time on its own. It is accumulated strictly when you collect elemental particles and orbs dislodged from opponents by dealing damage and landing Elemental Skills.
| Particle Absorber | Matching Element Particle | Different Element Particle | Clear (Neutral) Orb |
|---|---|---|---|
| Active Character (On-field) | 3.0 Energy | 1.0 Energy | 2.0 Energy |
| Off-field Character (In pocket) | 1.8 Energy | 0.6 Energy | 1.2 Energy |
2. The Technique of Energy Funneling
Xiangling's Pyronado demands a steep 80 Energy, while her companion Guoba generates particles slowly and erratically. To recharge her Burst within seconds, experienced players rely on the fundamental technique of "Energy Funneling":
- Deploy a battery character sharing the same elemental affinity (e.g., Bennett).
- Cast Bennett's Elemental Skill (
E). Hitting an opponent releases three red Pyro particles. - Do not stand idle: Immediately swap to the character who needs energy (Xiangling).
- Particles travel through the air for approximately 0.5 to 1.0 second. This allows Xiangling to take the field just in time to absorb the particles directly, gaining a full 9.0 raw Energy instead of the 1.8 she would have received off-field!
- Repeat this cycle twice per rotation, and her high-cost Elemental Burst is fully charged and ready for the next wave.
3. Energy Recharge (ER): Essential Benchmark Thresholds
The Energy Recharge (ER) stat acts as a direct multiplier on all incoming energy particles and orbs. If a character reliant on an 80-cost Burst lacks sufficient ER, they become dead weight in your party.
| Character | Burst Energy Cost | Minimum Solo ER Threshold | Target ER With Team Battery |
|---|---|---|---|
| Xiangling | 80 Energy | 220–240% (very difficult to sustain) | 180–200% (funneled by Bennett) |
| Xingqiu | 80 Energy | 220–240% | 180–200% (equipped with Sacrificial Sword) |
| Bennett | 60 Energy | 200–220% | 180% |
| Dendro Traveler | 80 Energy | 220–240% | 190% (paired with Collei) |
| Kuki Shinobu | 60 Energy | 100% (Burst is optional; kit focuses on Skill) | 100% |
| Diluc / Keqing | 40 Energy | 110–120% (achieved through minor substats) | 100% |
The Support Building Golden Rule: It is always preferable to sacrifice 15–20% ATK or CRIT stats to equip an Energy Recharge Sands of Eon. An Elemental Burst executed reliably on cooldown every 15 seconds will always produce vastly superior team DPS compared to an over-invested CRIT build that takes two minutes to recharge.
4. Favonius and Sacrificial Weapons: Account Saviors
The Favonius and Sacrificial weapon families represent some of the most potent utility assets in Genshin Impact. Never dismiss them simply because they are 4★ weapons:
- Favonius Series: Scoring a CRIT hit has a 60–100% chance to spawn 3 clear (neutral) energy orbs. These orbs grant 6 pure energy to the active character regardless of element. Putting a Favonius Lance or Favonius Warbow on your support completely resolves partywide energy deficiencies.
- Sacrificial Series: Damaging an opponent with an Elemental Skill has a 40–80% chance to instantly reset that skill's cooldown. Xingqiu wielding a Sacrificial Sword can cast his Skill twice in immediate succession, generating double hydro particles and filling almost his entire Burst gauge in one rotation.
5. Snapshotting Mechanics and Clean Rotations
Snapshotting: Certain persistent abilities lock in ("snapshot") a character's active stats at the exact millisecond of activation, retaining those amplified values for the entire duration of the ability, even if external buffs expire mid-cast.
Xiangling's Pyronado is the textbook example. When Xiangling casts Pyronado while standing inside Bennett's Inspiration Field, the skill snapshots Bennett's +1,000 ATK buff. Even if Bennett's circle disappears or you sprint to the opposite side of the battlefield, Pyronado continues hitting with maximum buffed attack power for its entire 14-second duration!
Textbook Rotation Example (The National Team Core):
- Xingqiu: Cast Skill
E(twice with Sacrificial Sword proc) → cast BurstQ(applies Hydro status to targets). - Bennett: Cast Burst
Q(establishes field with massive ATK buff) → cast SkillE. - Xiangling: Swap in immediately, absorb Bennett's Pyro particles → cast Burst
Qinside the ring (snapshots ATK buff) → deploy GuobaE. - Main DPS / Driver: Execute normal attacks, continuously triggering Xingqiu's raincutters and enabling Pyronado to trigger Vaporize reactions on every spin.
Energy Management Checklist:
- Energy Recharge on core supports reaches recommended thresholds (180–220%).
- Character swap timing mastered to successfully funnel matching particles.
- Xiangling's Burst is cast strictly inside Bennett's field to snapshot his ATK buff.
- At least one Favonius or Sacrificial weapon is equipped across your support slots.
Gearing and Progression: Weapons and Artifacts Without Grind Anxiety
Gearing represents the single most intimidating aspect of Genshin Impact for new players. Open any online character guide and you are immediately confronted with demands: "Farm a 4-piece 5★ set, roll an elemental damage goblet with 40% CRIT Value in substats, and obtain a 5★ signature polearm." A player at Adventure Rank 30 looks at these guides and feels entirely demoralized.
Take a breath: endgame min-maxed builds are completely unnecessary for clearing 95% of the game. Equipment progression splits cleanly into two distinct eras: before Adventure Rank 45, and after Adventure Rank 45. Understanding the foundational logic of gear allows you to deal massive damage even in cobbled-together 3★ green and 4★ purple items, without wasting weeks trapped in frustrating domain loops.
Quick take: Upgrade your primary carry's weapon before anything else—percentage ATK bonuses from artifacts multiply strictly off your weapon's "white" Base ATK. The foundational rule of early-game artifacts: Main Stat beats Set Bonus (Main Stat > Set Bonus). Enhance your flat ATK Plume of Death to maximum level, run ATK% or Energy Recharge on your Sands, and postpone dedicated artifact domain farming strictly until Adventure Rank 45.
1. Weapons: Why Your Weapon Outweighs Your Character Level
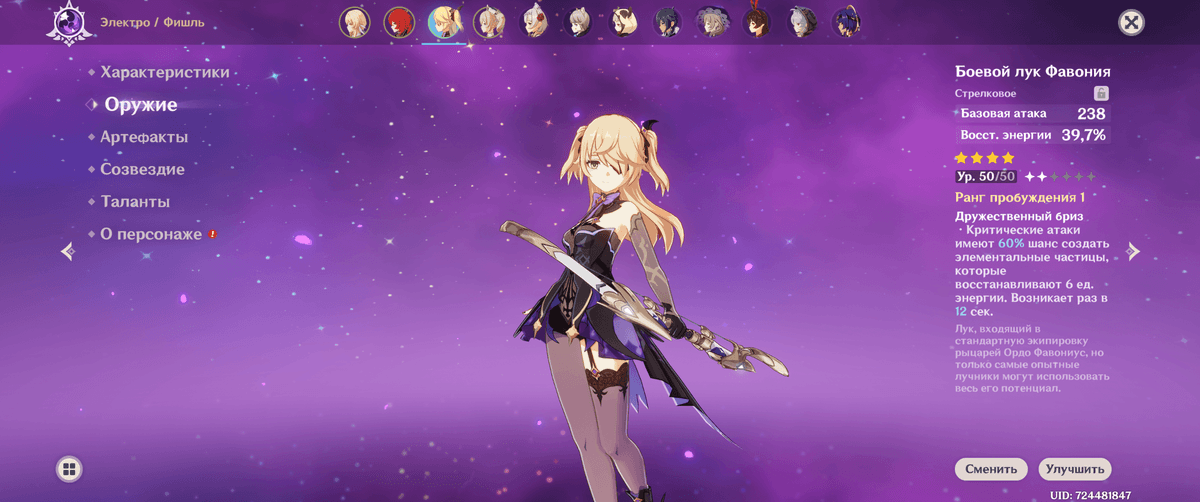
Every character in Genshin Impact is locked to one of five weapon categories: Sword, Claymore, Polearm, Bow, or Catalyst. A character cannot equip a weapon outside their native archetype.
The Law of Base ATK: White Numbers vs. Green Numbers
In your character's detailed attributes menu, total ATK is displayed as a simple equation: White Numbers + Green Numbers.
- White ATK (Base ATK): Composed strictly of two sources—the character's innate base attack by character level, and the flat Base ATK value of their equipped weapon!
- Green ATK (Bonus ATK): Every percentage-based attack boost (+ATK%) from artifacts and buffs multiplies EXCLUSIVELY OFF YOUR WHITE BASE ATK.
- If a Level 60 character equips an unupgraded Level 20 sword with a meager 100 Base ATK, a +50% ATK artifact provides only +50 flat damage. Equip a fully leveled sword with 450 Base ATK, and that exact same artifact provides a staggering +250 to 350 attack!
- Takeaway: Your main carry's weapon must always be elevated to the highest level cap permitted by your current AR. Leveling weapons requires vastly fewer resources than leveling characters.
Weapon Refinement (Refinement 1 to 5)
Every weapon possesses a unique passive ability. When you obtain duplicate copies of a weapon, select "Refine" in the weapon interface: passive rank upgrades from R1 to R5, typically doubling its numerical values. Useful 3★ weapons and craftable 4★ weapons should always be brought to Refinement Rank 5 whenever feasible.
2. Top Free-to-Play and Craftable Weapons (F2P)
| Weapon | Type / Acquisition | Key Passive Bonus (R5) | Ideal Character Pairings |
|---|---|---|---|
| "The Catch" | Polearm / Inazuma Fishing Association | Energy Recharge substat, +32% Burst DMG, and +12% Burst CRIT Rate | Xiangling, Raiden Shogun (the best F2P 4★ polearm) |
| White Tassel | Polearm / Liyue & Chasm Chests | CRIT Rate substat, +48% Normal Attack DMG | Cyno, Hu Tao, Arlecchino |
| Thrilling Tales of Dragon Slayers | Catalyst / 3★ Wishes | Incoming character gains +48% ATK for 10 seconds upon swapping | Barbara, Sucrose, Mona |
| Harbinger of Dawn | Sword / 3★ Wishes | CRIT DMG substat, grants +28% CRIT Rate while HP is above 90% | Albedo, Chiori, off-field Kaeya |
| Amenoma Kageuchi | Sword / Inazuma Blacksmith Forge | Refunds up to 36 flat energy particles after casting Elemental Burst | Jean, Kamisato Ayaka, Kaeya |
| Iron Sting | Sword / Mondstadt Blacksmith Forge | High Elemental Mastery secondary stat for reaction carries | Kaedehara Kazuha, Kuki Shinobu |
3. Artifact Anatomy: 5 Slots and Stat Allocation Rules
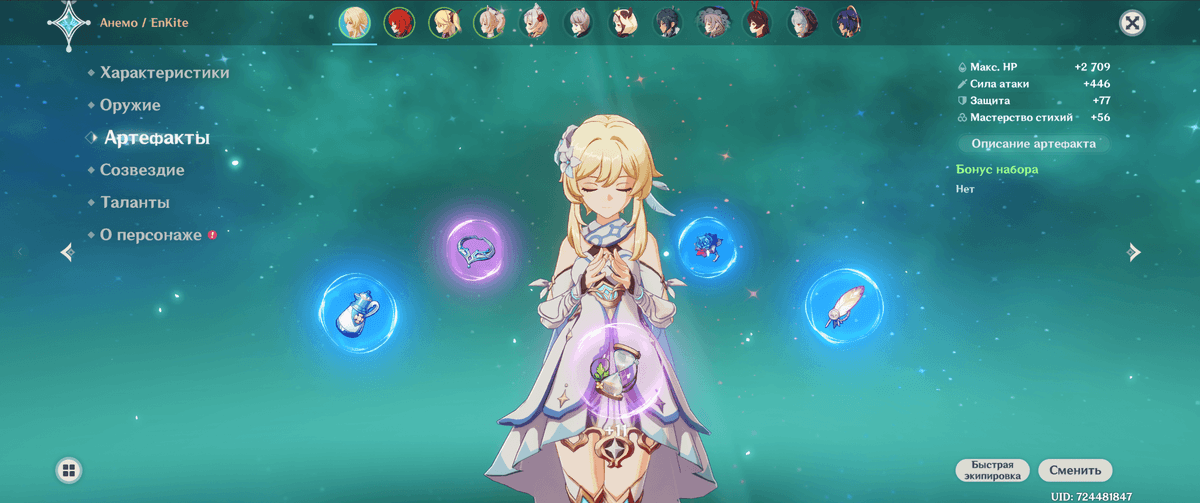
Every character equips five artifact slots. Each artifact possesses one Main Stat alongside up to four random Substats:
| Artifact Slot | Possible Main Stats | Beginner Selection Strategy |
|---|---|---|
| 1. Flower of Life (Flower) | Flat HP ONLY | Fixed stat. Provides raw survivability across early levels. |
| 2. Plume of Death (Plume) | Flat ATK ONLY | PRIMARY EARLY-GAME SLOT: Upgrade to maximum level immediately! |
| 3. Sands of Eon (Sands / Clock) | ATK%, HP%, DEF%, ER%, EM | Equip ATK% for main carries, or Energy Recharge% for supports. |
| 4. Goblet of Eonothem (Goblet / Cup) | Elemental DMG Bonus%, Physical DMG%, ATK%, HP%, DEF%, EM | RAREST SLOT: Equip an on-element damage cup (Pyro DMG%, Hydro DMG%, etc.). |
| 5. Circlet of Logos (Circlet / Hat) | CRIT Rate%, CRIT DMG%, Healing Bonus%, ATK%, HP%, DEF%, EM | Equip CRIT Rate% or CRIT DMG% (or ATK% early on). |
4. Gearing Strategy: Before AR 45 vs. After AR 45
- Before Adventure Rank 45: Maintain a strict ban on spending Original Resin in artifact domains. Equip what drops naturally from exploration chests and weekly/world bosses: reliable sets like Berserker (+12% CRIT Rate), Instructor (+120 party EM), and The Exile (+energy regeneration for the team). Enhance your Plume and Sands to +8 or +12.
- The AR 45 Milestone: Reaching Adventure Rank 45 unlocks the highest Level 90 tier in artifact domains, where every single run guarantees at least one 5★ gold artifact drop. Uncap your hoarded Fragile Resin and farm your core sets.
- The Universal Farming Strategy: Spend 80% of your initial AR 45 Resin at the Momiji-Dyed Court domain in Inazuma. This domain drops the two most versatile sets in the game: Emblem of Severed Fate (BiS for Xiangling, Xingqiu, Raiden Shogun, Yelan) and Shimenawa's Reminiscence (+18% ATK 2pc). Recycle all unwanted gold artifacts from this domain at the Crafting Bench via the 3-for-1 Artifact Strongbox to craft Viridescent Venerer and Noblesse Oblige sets!
Gearing Security Checklist:
- Primary carry weapon enhanced to current AR ceiling.
- Key 3★ utility weapons (TTDS, White Tassel, Harbinger of Dawn) refined to R5 and locked.
- Plume of Death on your main DPS enhanced to +12 or higher.
- Main stats prioritized over matching set bonuses.
- Fragile Resin preserved until unlocking guaranteed 5★ gold domains at AR 45.
Resin Management, World Exploration, and 20-Minute Daily Routine
Many prospective players hesitate to dive into Genshin Impact because of a widespread live-service stereotype: "It is an MMO-adjacent live game; I will be forced to grind 4 to 5 hours every single day just to keep up!" That is an unfounded assumption.
Unlike traditional Korean MMORPGs, Genshin Impact respects personal schedules: there is no forced endless grind. The developers have designed streamlined systems allowing you to complete your entire daily account progression in just 15 to 20 minutes over a morning coffee. In this concluding chapter, we break down the mathematics of Original Resin, the revolutionary Long-Term Encounter Points system, open-world exploration shortcuts, and key endgame horizons.
Quick take: The Original Resin cap sits at 200 units (replenishing from zero in 26 hours and 40 minutes), meaning you only need to log in once per day without fear of overflowing. Craft Condensed Resin at any alchemy bench to claim double domain rewards in a single run. Forget tedious daily fetch quests: the modern Long-Term Encounter Points system automatically completes all 4 Daily Commissions simply by spending Resin at the crafting bench.
1. Original Resin: The Energy Resource Engine
Original Resin is the primary resource governing character and account progression:
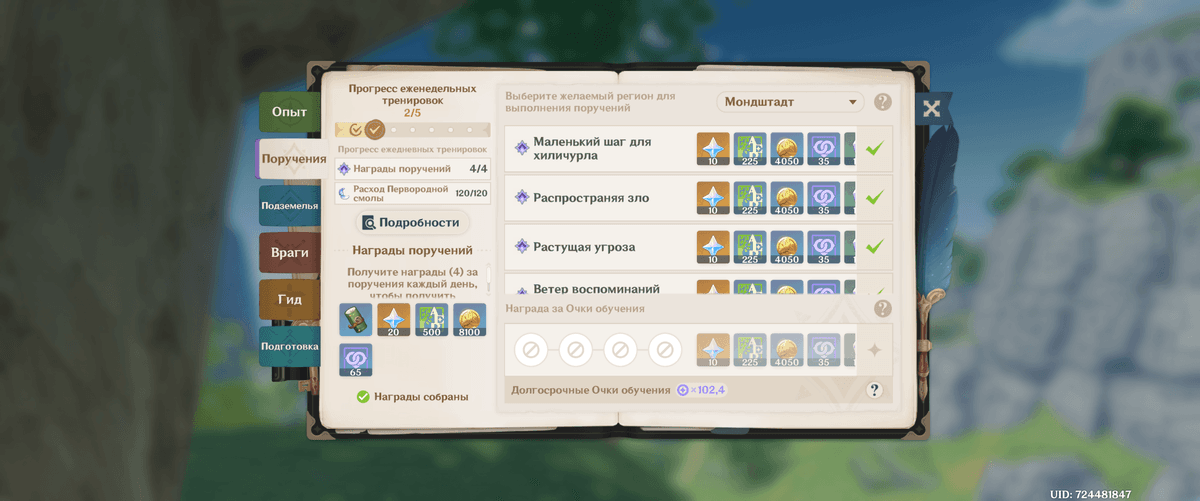
| Parameter | Numerical Value | Practical Application |
|---|---|---|
| Maximum Energy Pool | 200 Units | Increased ceiling prevents overflow even with 24-hour gaps between sessions |
| Regeneration Rate | 1 unit per 8 minutes (7.5 units/hour) | Generates exactly 180 Resin per 24-hour cycle |
| Full Recharge (0 → 200) | 26 hours 40 minutes | Log in once daily at whatever hour best suits your schedule |
Resin Spending Priorities (From Highest to Lowest):
- Weapon Ascension Materials: Weapon domains follow specific weekday schedules; prioritize capping your main carry's weapon.
- Talent Books: Talent domains rotate by day of the week—level core combat talents to Lv. 6–8.
- World Boss Ascension Drops: Hypostases, Regisvines, and Automaton bosses (40 Resin per claim) to ascend characters.
- Weekly Trounce Domains: Dvalin, Childe, Signora, Raiden—your first three weekly boss claims cost a discounted 30 Resin instead of 60!
- Ley Line Outcrops (Mora & EXP Books): Farmed as needed to replenish depleted character level materials and gold reserves.
- Artifact Domains: STRICTLY AFTER ADVENTURE RANK 45! Never spend a single unit of Resin in artifact domains before AR 45.
2. Condensed Resin: Halving Your Dungeon Time
Do you dread running the same domain 8 to 10 times in a row? Use Condensed Resin. The crafting blueprint is unlocked by reaching Reputation Level 3 in Liyue.
- Crafting Recipe: Combine 40 Original Resin + 1 Crystal Core at any Crafting Bench.
- Effect: Clearing an artifact/talent domain or claiming a Ley Line Outcrop using Condensed Resin yields DOUBLE rewards for a single run!
- Holding Capacity: You can hold up to 5 Condensed Resins in your inventory simultaneously.
- Where to catch Crystalflies: Abundant around the Dawn Winery in Mondstadt and outside the Domain of Guyun in Liyue. Keep Sayu or Yaoyao in your party—their passive talents prevent Crystalflies from startling and flying away as you approach.
3. Long-Term Encounter Points: Skipping Daily Quests
Historically, players had to complete four repetitive daily commissions every morning: clearing hilichurl outposts or delivering letters. Modern versions of the game (4.8+) feature the streamlined Long-Term Encounter Points system:
- Whenever you explore on weekends (opening chests, completing Archon or World Quests, participating in limited events), the game banks surplus Long-Term Encounter Points for your account.
- During busy weekdays, simply log in and spend your Resin at the crafting bench (e.g., crafting 3–4 Condensed Resins).
- For every 30 Resin consumed, the system automatically burns stored Encounter Points to complete one Daily Commission!
- No running around required: craft your Condensed Resin, open the Adventurer Handbook (
F1), claim 40 Primogems, and speak to Katheryne for the 20-gem completion bonus. Your dailies are cleared in two minutes flat.
4. World Exploration: The Interactive Map and QoL Tools
Teyvat is colossal. Trying to memorize the locations of hundreds of Oculi, puzzles, and hidden chests is unnecessary:
- Official HoYoLAB Interactive Map: Open the interactive map on a second monitor or mobile device. Log in with your game account: it syncs pins, tracks discovered chests, highlights regional specialty farming routes, and solves complex puzzles.
- Treasure Compasses and Resonance Stones: Reaching higher City Reputation tiers rewards blueprints for reusable exploration gadgets. An Anemo/Geo/Electro Treasure Compass directs you to nearby unopened chests, while Resonance Stones highlight missing Oculi on your minimap.
5. Multiplayer Etiquette and High-Rank Carries
Co-Op mode in Genshin Impact is an invaluable tool for overcoming early progression hurdles:
If you encounter difficulty defeating world bosses for character ascension (such as the Oceanid, Hypostases, or Maguu Kenki), change your profile signature to: "Need assistance with bosses, please!" AR 60 veterans with maxed-out teams routinely scan the Co-Op menu to help newer players dispatch bosses in seconds.
6. Daily Time-Management: The 15–20 Minute Routine
| Time Allocated | Objective | Execution Method |
|---|---|---|
| Minutes 1–3 | Craft Condensed Resin & complete commissions | Visit the Crafting Bench: condense 120–160 Resin to automatically consume Encounter Points. |
| Minutes 4–5 | Claim daily rewards & redeploy expeditions | Speak to Katheryne for +60 Primogems; dispatch 20-hour resource expeditions for Mora and weapon ores. |
| Minutes 6–15 | Run domains with Condensed Resin | Execute 3 to 4 fast domain runs (talent books, weapon mats, or artifacts) solo or via random Co-Op matchmaking. |
| Minutes 16–20 | Collect Serenitea Pot rewards (AR 35+) | Enter the Teapot realm, claim passive realm currency, and purchase weekly Transient Resin and EXP books. |
7. Endgame Horizons: Objectives Beyond AR 45
Crossing the Adventure Rank 45 threshold marks your transition from newcomer to seasoned adventurer:
- AR 45–50: Burn your reserve of hoarded Fragile Resin in Level 90 artifact domains. Equip your two primary carries with optimal 5★ gold artifact sets.
- AR 50: Final character and weapon ascensions to Level 90, elevating vital combat talents to Lv. 8–9.
- Spiral Abyss (Floors 9–12): The premier competitive proving ground, resetting every two weeks. Conquering Floor 12 grants veteran prestige and a steady stream of bi-weekly Primogems.
- Imaginarium Theater: The seasonal endgame combat mode requiring a versatile, wide roster of built characters spanning multiple elemental types.
Teyvat is expansive, vibrant, and packed with secrets. There is no rush to power through everything in three days: savor the orchestral soundtrack, experience character storylines, and explore at your own chosen pace. Welcome to your journey!