Royal Quest – A Comprehensive and Complete Guide for Beginners
Royal Quest Online is an isometric MMORPG set on the planet Aura, where old-fashioned magic sits comfortably next to steam engines and alchemy labs. It comes from BASE and Lesta Games, published by East Games, and it wears its Katauri Interactive heritage openly — the same studio behind Space Rangers and King's Bounty — in its warm hand-painted art and its habit of writing quest text with a wink. The plot runs on Elenium, a rare mineral that drew an invasion of Black Alchemists into the kingdom of Elenia. King Roland is calling for volunteers, and that's you.
The game is free-to-play and runs through Steam under the title Royal Quest Online. Registration takes a couple of minutes, the client pulls itself down automatically, and nothing about starting out costs money. Several regional servers exist (Pyros in Europe, Aztec and Ortos in the Americas, Astus in Asia), so pick whichever is closest to you and don't worry about picking "wrong" — trading and guild activity happen within each server's own economy, and any of them will have people around.
This guide walks you from the character-creation screen up to level 65, the current cap, and spends extra time on the things the game either doesn't explain or explains once and never again. A few of these trip up almost every new player — none of them are fatal, but all of them are annoying once you've lost an hour to them.
Controls, Interface, and Hotkeys
A handful of habits make the first few hours much smoother:
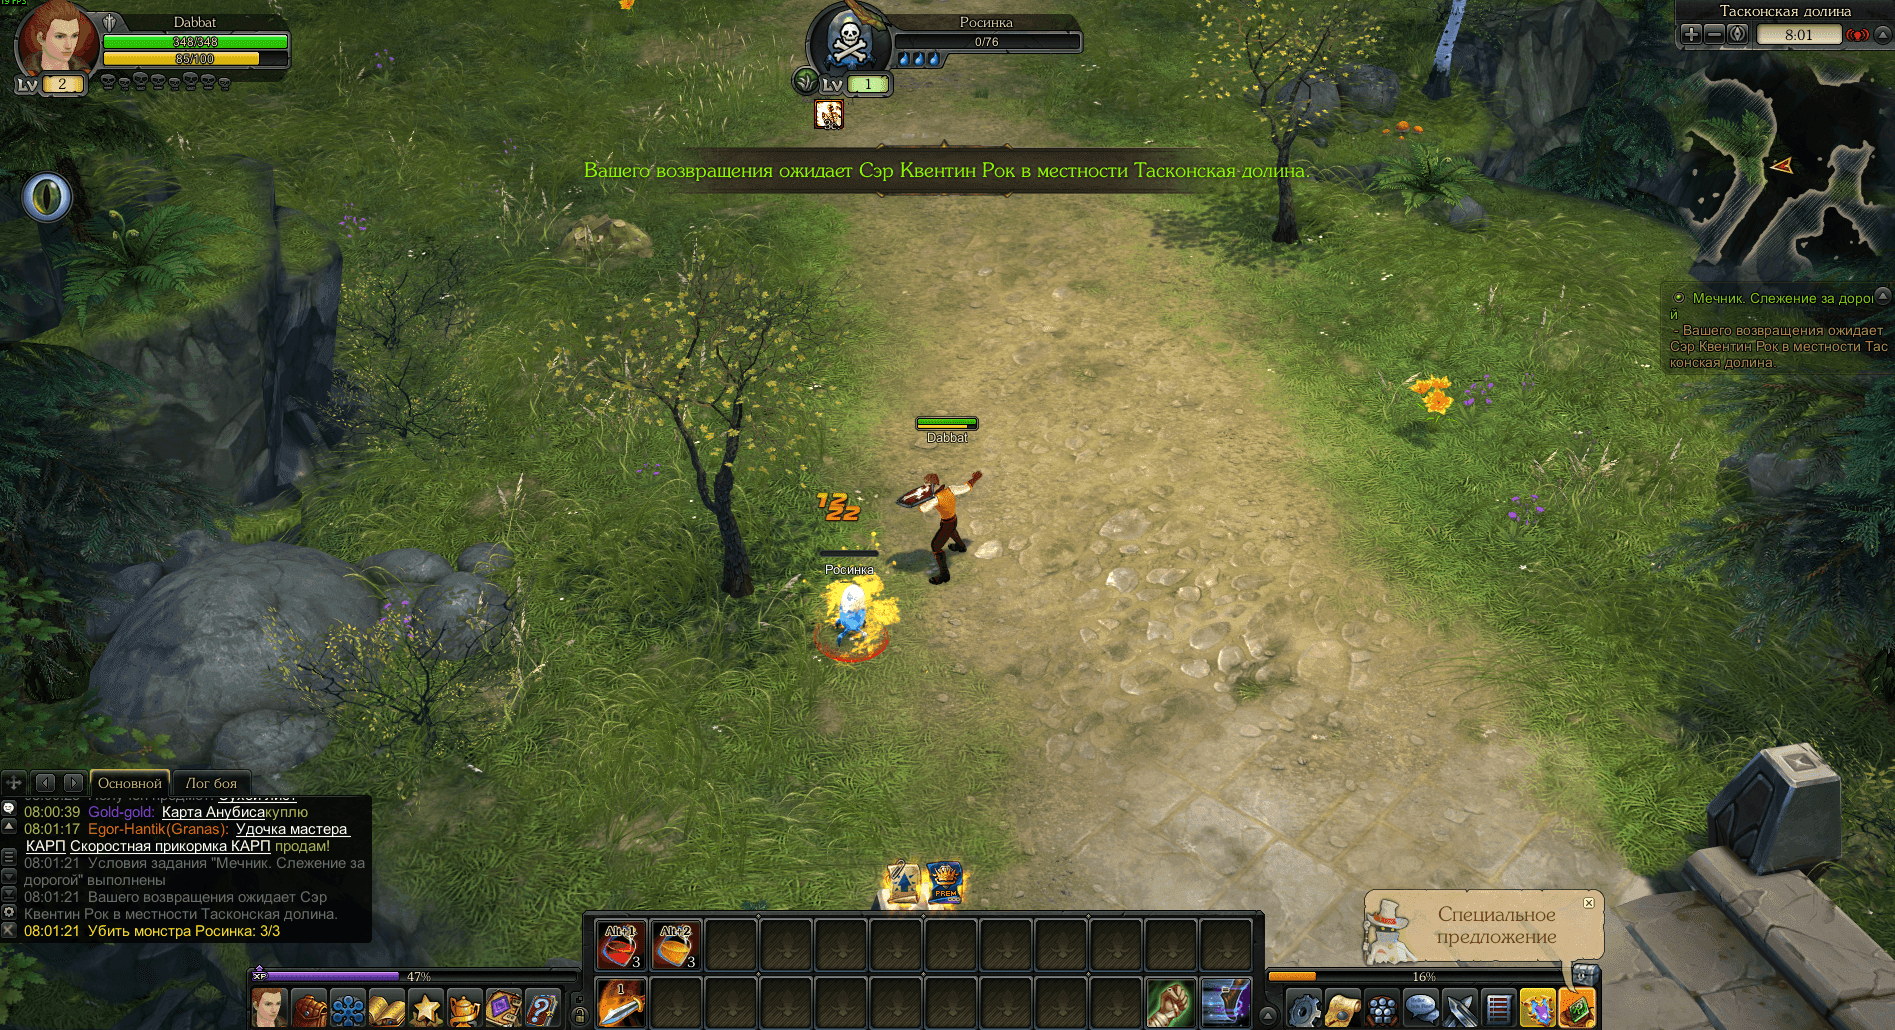
- Left Mouse Button (LMB): Move to a point, interact with objects, and auto-attack. Hold it down and your character runs after the cursor; click a target and your character closes the distance and starts swinging on its own, pathing around obstacles as it goes.
- Right Mouse Button (RMB): Hold to rotate the camera. The scroll wheel zooms in and out.
- Target info panel: Hover a monster and click LMB or RMB and you'll see its level, health bar, and — this is the important one — its protective element.
- Talents and Skills window (K): Every ability you've unlocked lives here. Drag what you want onto the skill bar at the bottom of the screen so you can trigger it with the mouse or a hotkey.
- Picking up loot: Walk up to a drop and click LMB or RMB, or use auto-loot (usually bound to mouse button 4). Loot sorts itself into backpack tabs — Equipment, Consumables, Trophies, Crafting, Quest Items — and if your backpack is full, it just sits there on the ground until you come back for it.
Chat and Item Handling
Out of the box you only get two chat tabs — a main channel and a Battle Log — but it's worth reshaping this early. In the settings, under the chat section, you can recolor messages by channel (trade chat and party-finder chat each get their own color, for instance) and recolor nicknames by class, so you can tell at a glance who's talking.
Further down in the same settings menu you can create custom tabs. Type a name, hit "Add Tab," and you get a new window where you tick which channels feed into it. This is the easiest way to build one tab that's stripped of trade spam and keep everything you actually care about in the main one.
You aren't stuck typing into whatever channel is currently active, either — click the smiley icon next to the chat box and a dropdown lists every channel you can post to. Whispering someone works two ways: right-click their name and choose the whisper option, or just click their highlighted nickname directly in the chat log.
Splitting a stack in your backpack has three flavors: hold Alt while dragging to type an exact amount, Shift to peel off a single item, and Ctrl to split the stack in half. And if you want to show someone the stats on something in your bag without handing it over, you can post it into chat so it renders as a linked, hoverable icon — a habit worth picking up before your first trade negotiation.
Character Creation: What You Can Change Later, and What You Can't
There's exactly one playable race — Human — so character creation really only asks about appearance, gender, name, and starting class. Appearance is cosmetic and has zero effect on stats. Class, on the other hand, is permanent: there's no respec-your-class option, only rolling a new character on the same account.
Four starting classes are on offer: Warrior, Archer, Mage, and Rogue. At level 20 each one splits into two professions, and that choice matters far more than the starting class, since it shapes what you're doing for the next forty-five levels. We'll come back to that fork separately.
The opening levels go by fast and offer almost no resistance — you're handed a starter set of gear, early monsters barely scratch you, and quests basically walk you by the hand. Use that window to get a feel for your class's combat rhythm rather than just clicking through it. If half an hour in you already dislike it, reroll now; doing it at level forty stings a lot more.
The Four Classes: What You Actually Do With Them
The in-game class blurbs all sound equally heroic, so here's what each one actually feels like to play.
Warrior — melee, shield, heavy armor. This is the class that eats hits, knocks enemies down, and pulls monster attention onto itself rather than the squishier members of the group. It gets a defense-boosting group aura fairly early, which is the reason parties invite warriors on sight, and at higher levels it picks up a mount and a spear, unlocking a set of cavalry skills built around mounted charges.
Archer — ranged, bow, traps, high mobility. It's forgiving early on: mark a target, get a flat damage bonus against it, and pepper it from a safe distance. Traps and a group-speed aura come online within the first ten levels. If you're not sure which class to start with, this is the safe pick — it needs the least gear investment in the early game.
Mage — the most fragile class and the most gear-dependent. Strong magical defense, very little health, almost no physical defense, so the whole playstyle is about staying at range and never letting anyone close the gap. In exchange you get elemental magic, and at level 20 a choice between a support-leaning path and a pure-damage one.
Rogue — fast, unarmored melee. It survives on evasion, crits, and stealth rather than a health pool — a couple of unlucky hits and you're dead. In return, it puts out some of the best single-target damage in the game. This is the least forgiving class of the four, and new players usually feel that within the first few fights.
One caveat worth remembering: class balance before level 20 doesn't reflect how classes actually play later. Warriors and Archers feel stronger early, while Mages and Rogues come into their own further in. Don't judge a class by its first ten levels.
Resources: What You Spend to Use Skills
Every skill costs something, and in this game that something isn't always mana. Mages spend Mana, the familiar blue bar that regenerates on its own and scales with Intelligence. Warriors, Archers, and Rogues instead spend Energy, whose pool size is tied to Stamina.
On top of that, each class has a second resource that sets the actual rhythm of combat. Warriors build Fury from dealing and taking hits; it drains fast out of combat and gets spent on the biggest cooldowns, so the goal isn't to hoard it but to cash it in before it evaporates. Archers build Focus instead, which powers up their strongest shots when spent — there's a skill around level 14 that instantly refills it, worth keeping in reserve for the moment you actually need it. Rogues run on Cunning, which accumulates the same way and gets spent similarly.
The point of the system is that mashing one button is a losing strategy. Cheap skills build the resource, expensive skills spend it, and combat turns into short accumulate-then-spend cycles. Understand that early and your character starts hitting noticeably harder than someone the same level who's just holding down auto-attack.
The Skill Bar and Hotkeys
Everything you've unlocked — and a preview of what's still locked — lives in the Talents and Skills window, opened with K. Some entries unlock purely by level, others need a specific talent picked first, and the window shows you which is which, so you can plan ahead rather than get surprised.
To actually use a skill in combat, drag it onto the skill bar. The main row runs on keys 1 through 0, with a second row available on Alt+1 through Alt+0. Hovering an icon shows its cost, cast time, and cooldown — worth checking, because cooldowns in this game swing wildly, anywhere from a couple of seconds on a basic strike to half a minute on a hard crowd-control ability.
Skills fall into four rough buckets: direct damage, buffs or debuffs, movement, and support (healing, shields, cleanses). A well-built bar by level 30 has a bit of each — not five damage buttons in a row.
Stats and the "Every Ten Points" Rule
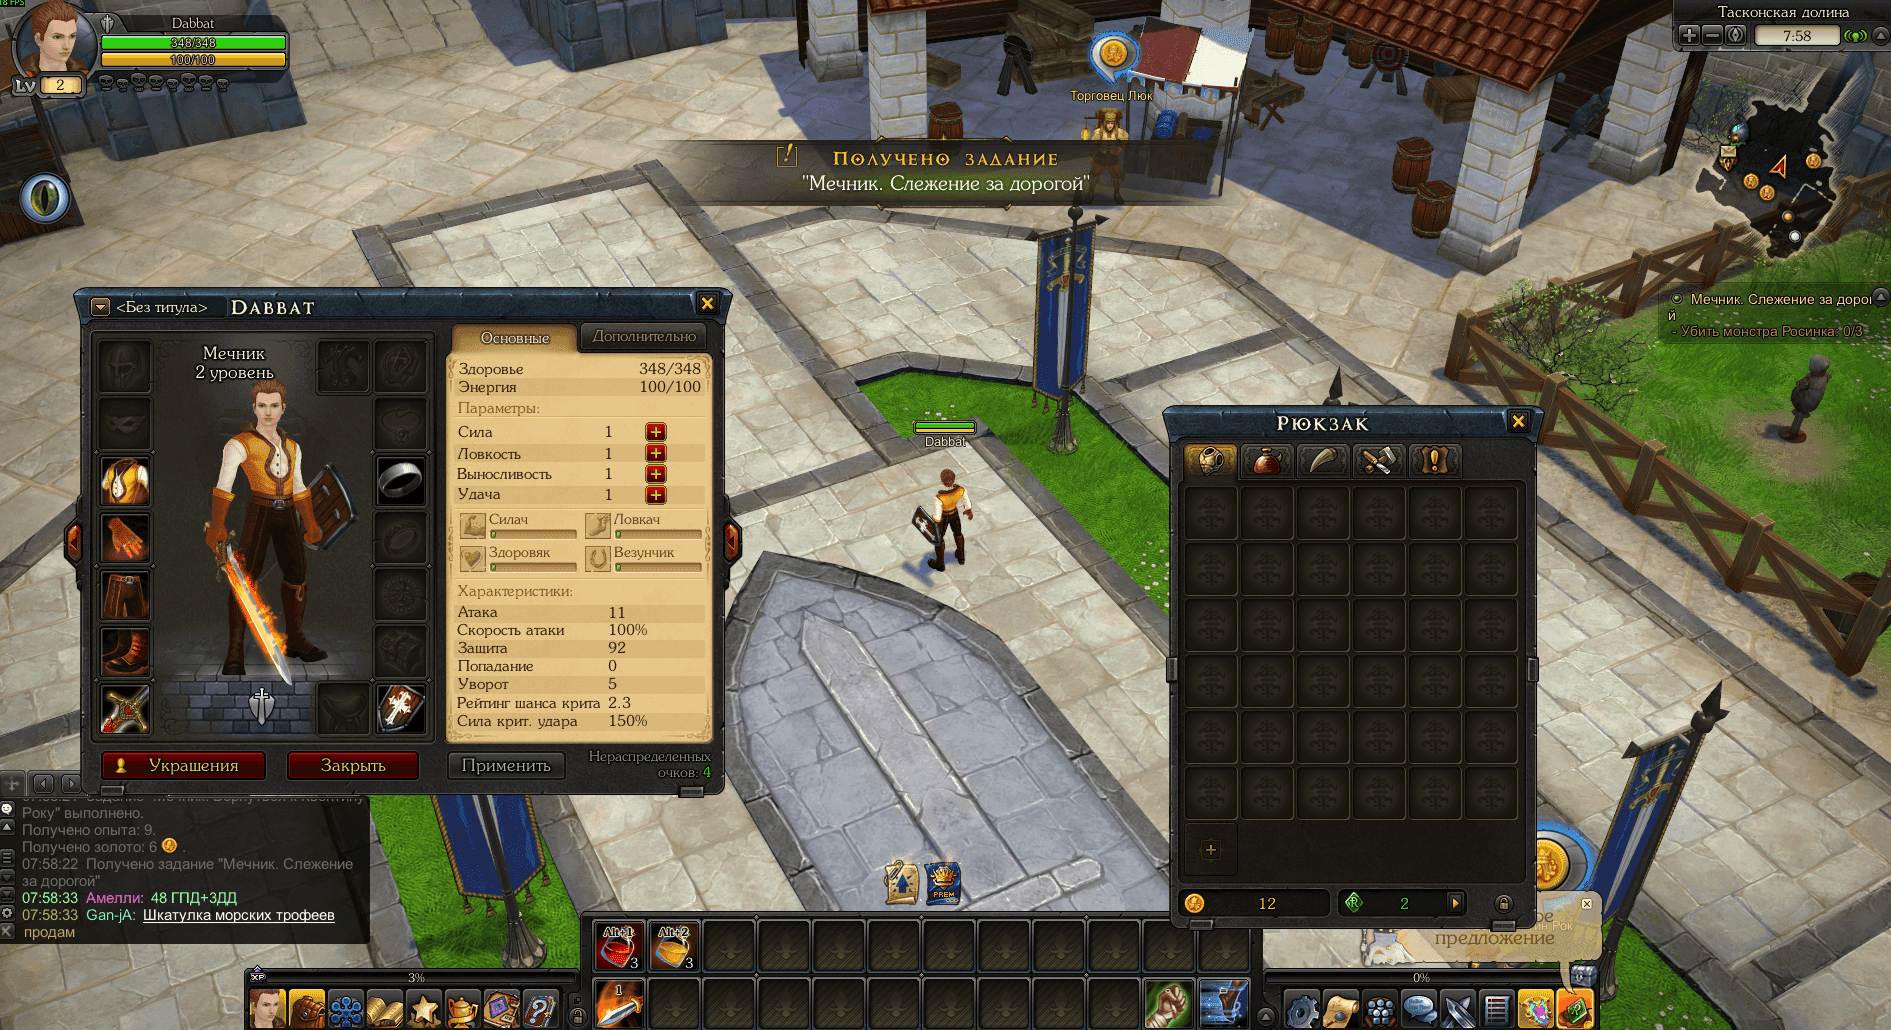
Every level hands you stat points to spend by hand. Only four stats matter per class — the game simply doesn't show you the ones that don't apply, so there's no clutter to sort through. Your main damage stat depends on class: Strength for Warriors and Rogues, Accuracy for Archers, Intelligence for Mages. The rest usually go into Dexterity, Stamina, and Luck.
What each does: Stamina adds health and expands your Energy pool, Dexterity increases attack speed and evasion, Luck raises crit chance, and Accuracy also affects crit damage and your overall chance to actually land a hit.
Now for the part the game never explains. Every ten points invested into a stat grants an extra bonus on top of the normal per-point gain. Luck, for example, gives a small fixed bump per point on its own, but every tenth point adds a further chunk to both crit chance and hit chance. Stamina works the same way with a flat bonus to your Energy pool at every tenth point.
The practical upshot: numbers like 47 or 68 are wasted points sitting between thresholds. Round every stat up to a clean multiple of ten and the same total investment does noticeably more — and the gap gets wider the higher your level climbs, since you're crossing more of these thresholds.
Don't chase a little bit of everything. A character spread thin loses on both damage and survivability. Pick two stats that match your playstyle, dump points into those, and let gear, seals, and cards cover the rest.
Talents: Passives That Rewrite Your Skills
Alongside stat points, your character earns talents. Unlike stats, talents aren't raw numbers — they're modifications to how a specific skill behaves, and they're what actually defines your build.
Talents almost always come with a trade-off attached, so read the full description rather than the headline. A talent that boosts a skill's damage might also add a knockback that either saves your life or launches you straight into a mob you were trying to avoid — the same effect, opposite outcome, depending on the room you're standing in.
A separate category of talents doesn't modify anything — it grants a brand-new skill outright. These are almost always worth grabbing first, since they add to your toolkit rather than just tweaking what's already there.
Level 20: The Fork Where Experience Stops Cold
Here's the trap this whole guide exists to warn you about. At level 20 the game offers you a profession — your second class — and until you pick one, experience simply stops accumulating. Not slower, not reduced — stopped. Every year, new players post on forums convinced their leveling is bugged, when really they're just sitting on an unaccepted profession offer.
So the moment you hit twenty, open the profession window and take the quest chain immediately. Your options:
- Warrior becomes a Crusader or a Dark Knight
- Archer becomes a Hunter or a Sniper
- Mage becomes a Sorcerer or a Warlock
- Rogue becomes a Thief or an Assassin
A quick rundown of what those actually mean. Crusader is the Warrior's supportive, healing-leaning half; Dark Knight leans into damage and life-drain instead. Hunter works with traps and tracking; Sniper is pure ranged single-target damage, including firearms rather than just bows. Sorcerer covers healing, shields, and crowd control — this is effectively the game's only proper support-and-healer class, since there's no separate priest archetype. Warlock trades elemental magic for chaos, hits far harder, and sustains itself off enemy pain instead of casting heals. Thief leans into crowd control and disarms with a pair of one-handed weapons or a weapon-and-shield setup. Assassin goes all-in on stealth and one precise, lethal strike.
This choice can't be undone, so spend five minutes reading the actual skill descriptions in the client before you commit. If you want to be the player groups always want, look at Sorcerer or Crusader. If solo farming is more your speed, Sniper or Warlock.
1 to 65: What the Road Actually Looks Like
The level cap is 65, and the path there is broken into tidy five-level chunks — quests come in blocks like 10–14, 15–19, and so on all the way up. You always know what's next, and you rarely end up stuck with no quests left and not enough level to progress.
The geography follows a straight line too. You start in the capital, Varlone, then move through Taskona Valley, the Forest of Shadows, Maragorne, Mistgan, Andynopolis, Worlax, Aloha, Eltane, Teuton, and Aranta. Each region hits noticeably harder than the last, so if monsters suddenly feel unfairly punishing, you've probably outrun your level and should backtrack a zone.
Your key travel tool is a "save portal point" skill available from level one — it drops a marker you can later warp back to using a Maiden's Ticket or the Portal skill. Drop a new marker every time you reach a fresh, far-off location; it saves real time over a session. The Portal skill itself only works with an active premium subscription, but tickets are available to everyone.
Beyond portals at zone borders, major cities host Maidens — NPC teleporters who move you instantly for gold, but only to a Maiden you've already spoken to once. Premium status also unlocks a talent letting you store up to seven saved locations at once for instant teleport between any of them.
Rest Points: Why Logging Off Is Sometimes the Right Move
The game rewards taking breaks, and it's worth using deliberately. Stay logged out for more than eight hours and you start accumulating Rest Points for every hour you're away. While that reserve lasts, you get double experience from both monster kills and quests.
A full reserve takes twenty hours to build — eight hours of waiting plus twelve hours of accumulation. If you log out again before spending it all, the counter keeps climbing rather than resetting, and the eight-hour wait doesn't restart. There's a workaround too: park your character in the capital and the Rest effect kicks in without the eight-hour delay. Max-level characters don't get this effect at all.
The bonus shrinks hard with level, and that's the part worth planning around: it covers up to 60% of the XP bar at the earliest levels, drops to around 40% by 15–19, 24% by 30–34, just 12% by 40–44, and a token 3% from level 50 onward. In other words, banking and burning Rest Points is only really worth optimizing for in the first half of the leveling journey. Log in after a break, burn the double XP on quests first, then settle into ordinary farming.
Elements: Why the Same Monster Dies Fast One Day and Slow the Next
Combat here revolves around elements. Every monster carries a protective element — Air, Earth, Fire, Water, Poison, Chaos, or none at all — and your own attacks carry an element too, set by your weapon and whatever cards you've slotted into it.
The elements form a cycle: Air beats Water, Water beats Fire, Fire beats Earth, Earth beats Air. A favorable matchup deals 120% damage instead of the baseline hundred, and a higher element level on your attack widens that gap further. Hitting a monster with its own element is a straight loss — damage drops to 80%.
Two elements sit outside the cycle. Chaos is a generalist: it deals bonus damage against all four elemental monster types but underperforms against neutral ones. Poison works the other way — slightly weaker almost everywhere, but strong against specific targets.
In practice, there's no single best weapon in the game. Experienced players carry two or three, swapped depending on what element the current zone favors. If monsters are taking forever to die, check the element mismatch before you check your gear upgrades — it's usually the actual problem.
Monster Basics: How to Read a Target
Right-click a target and you'll get its health bar, level, type, and element at a glance; hover the monster's own icon and you'll get a fuller readout of its resistances and weaknesses. Element display uses three small slots showing both element type and a level from zero to three — a higher level means the monster takes more damage from its opposing element and less from matching it. Monsters with all three slots empty are neutral, and only take extra damage from neutral-element attacks.
Monster Buffs Worth Watching For
Some monsters carry a fixed buff on top of their element, and spotting it before you engage saves you from learning the hard way:
- Speed: boosts both movement and attack speed.
- Poison: applies a poison effect on every successful hit against you.
- Elemental resistance: resists elemental damage but takes extra from non-elemental hits — swap to an unenchanted weapon if you're carrying one.
- General resistance: flatly reduces all incoming damage.
- Nimble: raises the monster's evasion and its chance to land a crit back at you.
- Thorns: reflects part of your own damage back at you — the single most dangerous buff on this list, especially for melee classes.
- Lifesteal: heals the monster off its hits on you — annoying, but the least threatening of the set.
Solo Monsters, Pack Monsters, and Odd Behavior
Beyond element and buffs, monsters differ in how they react to a fight breaking out nearby. Some are solo — engage one and its neighbors of the same type stay out of it entirely. Others pull as a pack: hit one and everyone standing near it joins in, even monsters that were otherwise passive. This is genuinely useful for farming — pulling one member of a pack type is usually enough to chain the whole group.
A few monsters don't move at all and still hit hard — a stationary type that periodically bursts a damaging gas cloud around itself is a good example, and it's easy to underestimate until it catches you off guard. Some ordinary monsters also have abilities beyond a basic auto-attack, like a bleed effect or a short stun on a follow-up hit. There's no shortcut here beyond fighting one carefully the first time and paying attention to what it does.
Elite Monsters and Bosses: The Subtypes That Matter
Elites come in three flavors. World elites simply patrol a zone, anyone can tag and kill them, and they respawn on a fixed cooldown — usually over an hour — dropping a reward chest when they go down. Dungeon elites live only inside instances and typically drop little beyond gold and ordinary loot, with the exception of the higher-tier 4- and 8-player dungeons, where they can drop a useful card. Summoned elites are called in using consumable seal items at a handful of specific spots around the world — some of these locations are free-PvP zones, and they also carry the best drop-rate bonus in the game, so summoning there is a real risk-reward decision.
Bosses split up the same way. Event bosses exist purely for a specific quest, don't attack, and drop nothing. Dungeon bosses hand out an instance reward chest on death — a dungeon can have more than one. World bosses announce their spawn in chat; you almost never make it there in time unless you've prepared ahead by saving a portal marker near a known spawn point and warping in the moment the announcement fires. A single hit is usually enough for quest credit against a world boss.
The single most valuable thing monsters drop is cards — they're often the real reason a particular farm route is worth doing. You can check roughly what a card is worth on the market, or sell one you don't need to the rarities buyer for currency you can spend on cosmetics elsewhere.
Equipment: C, B, and A Grades
All gear splits into three grades. C-grade is starter and mid-tier equipment, easy to get. B-grade is a solid mid-game workhorse. A-grade is endgame — the whole reason the late-game loop exists. Grade doesn't just set the base numbers; it also sets how expensive and risky improving the item gets.
Three independent systems layer onto gear, and they don't interfere with each other: enchanting, seals, and cards. A properly finished level-65 item has all three at once.
Enchanting: What It's Worth and What You Risk
Enchanting raises an item's base defense or attack. C-grade items can go up to +10, while B and A grade go to +11 — and that final +11 also adds a flat +1 to every one of your stats. The numbers scale hard: armor at +5 gives roughly +70% defense, at +10 it's exactly double the base, and +11 pushes it to around +260%. Weapons scale more slowly but still meaningfully.
The main consumable is a Philosopher's Stone, and every attempt can go one of three ways — the enchant level goes up, drops by one, or the item breaks outright. Odds are forgiving up to around +5, then they get brutal fast; pushing an A-grade item past +9 with a plain stone can leave you with better odds of destroying it than improving it.
That's why insurance items exist and are worth using. One cube-shaped consumable guarantees the item won't break, worst case dropping a level instead. Rune-type consumables, added alongside the main stone, go further and rule out both breaking and dropping a level entirely — on a failed attempt, the enchant level just stays where it was. Colored philosopher's stones raise the underlying success chance itself: black roughly doubles it, white quadruples it, and red multiplies it by six, with an even stronger tier reportedly available at higher rarity — useful enough at mid-tier enchant levels to make success close to guaranteed.
The practical advice for a new player is boring but correct: don't enchant anything past +5 before level 40, and don't burn expensive consumables on gear you'll replace in a few levels anyway. Save the investment for something you plan to keep.
Seals: A Four-Color Gamble
A seal is a separate layer of bonus stats applied on top of enchanting, put on by dedicated NPCs. The first seal on an item needs a gem matched to its grade — one gem type for C-grade, another for B, another for A. If an item already has a seal and you want a different one, a separate crystal consumable handles the swap.
Every seal has both a name and a color, and the color is what really matters. Four tiers exist, roughly doubling in strength from bottom to top: Green (Common), Blue (Rare), Purple (Epic), and Orange (Legendary).
Two items soften the randomness: one guarantees a floor of at least Blue quality, and a sealing-wax consumable locks in the seal's name while leaving only the color up to chance — so once you've rolled the seal you actually want, you're only re-rolling for a better color from then on, not starting from scratch.
One binding quirk worth knowing: re-sealing an item without that sealing wax turns an unbound item into one that becomes account-bound the moment it's equipped, closing off any chance to resell it later. Keep that in mind if you're improving something you might want to trade.
Cards: Your Main Source of Elemental Damage
The third layer is cards, slotted directly into gear. They're usually what actually sets your attack's element, so their impact is bigger than the short in-game description suggests.
The rules are simple: one card per slot, and no more than one elemental card per item — that single restriction is why weapon-swapping between elements is a whole system in itself. Some cards are grade-locked, and weapons in particular can have tighter restrictions than armor, sometimes down to a single specific weapon type.
Removing a card from an item, once it's in, is mostly a one-way door. Only boss and elite-monster cards can be pulled back out, for a fee — and once pulled, they become permanently account-bound. Ordinary cards can't be extracted at all; replacing one just destroys the original.
Mounts and Pets
Mounts equip into their own gear slot and summon on a hotkey (E by default). They speed up travel and add stat bonuses. Here's the part that isn't obvious: the first time you use a mount from your inventory, it also joins a permanent Collection, and every mount in that collection grants a passive stat bonus forever — even while unsummoned. The more mounts you've collected, the bigger the cumulative bonus, which makes even a mount you never actually ride worth picking up once.
Mounts run on an energy meter topped up by a specific consumable item; let it hit zero and the mount slows down hard, along with every collection bonus it was providing. New players are generally better off saving gold for one affordable early mount than skipping the system entirely.
Pets don't fight, but equipping one with the right accessory turns it into an auto-looter that scoops up drops for you while you fight.
Crafting: Alchemy and Salvaging
Crafting happens at an Alchemical Cauldron. You need a recipe (consumed on use) and the listed ingredients, which the cauldron pulls straight from your backpack. Success chance depends on the item's complexity, and a stabilizer consumable guarantees success if you'd rather not gamble on materials you worked for.
Unwanted gear can be salvaged into crafting material through a dedicated dismantling tool with multiple efficiency modes, and raw materials — ore, hides, and so on — get processed into usable ingots and fabric at dedicated stations in the capital.
Trade, Fishing, and the Economy
Beyond ordinary NPC vendors for dumping junk fast, there are Market Managers near the Maidens who run the player auction house. If you actually want to run a shop, though, you'll need a trading spot — a contract bought from the Head of the Merchant Guild that lets you plant your own personal stall right in a city.
For a change of pace, try fishing. Equip a rod (pricier rods land better catches but wear out faster) and head to any water marked with a hook icon. The main rule is that bait has to match the fishing spot — except for one universal bait that works everywhere. Watch the bobber and hook the catch at the right moment or the fish gets away.
Your Own Trading Spot: Selling to Other Players
A trading spot comes in four sizes — small, medium, and two large ones with longer durations — bought from the Head of the Merchant Guild in Varlone. The small and medium versions are almost always in stock; buying several in a row briefly puts the vendor on cooldown, which is normal.
In the capital, stalls only go into designated open slots, easy to find around the city's edges and near the Guild Head himself. Other towns skip the slot system entirely and let you place a stall anywhere near the marked trading zone — though setting up outside the capital rarely makes sense for a new player, since comparing prices means physically running between cities instead of checking one screen.
Name your stall after your own character rather than a slogan — if a buyer wants to reach you after you've logged off, a mailed message tied to your name will find you, but a shop called "cheap stuff here" won't. Contracts can be extended up to 24 hours, provided you're holding another matching contract when you do it.
Browsing the market works best filtered: if you don't know exactly what you need, filter by item level range first, then by gear category and your class, so you're not wading through gear for classes you're not playing. Sorting by price makes more sense once you already know exactly what you're after.
Don't undercut the market by a huge margin just to sell fast — it just drags prices down for everyone. The convention that actually works is undercutting the current lowest listing by the smallest possible amount: you're still the cheapest option, but you haven't crashed the price. Selling through your own stall keeps 95% of the sale for you with an active premium subscription, or 85% without — the rest goes to the market as a fee.
You can only sell items to another player if they're unbound or set to bind on equip; anything already personal can't be traded at all, and account-bound items only move between characters on the same account. Selling monster cards to the rarities buyer earns you a currency spendable on cosmetics and pets at a separate vendor — a card-album item that hands back a random monster card is usually the best value there. You'll also run into resellers on the open market buying up upgrade materials at a discount; if speed matters more to you than squeezing out the last bit of value, selling to them is a perfectly normal shortcut.
Groups: Why They're Worth Joining
Royal Quest Online is entirely soloable, but a group is a real upgrade, and not just because monsters die faster. Every class carries a group-wide aura, though only one aura can be active per character, which means a mixed-class party automatically stacks more buffs than four of the same class ever could.
Small things help too — an early marking skill lets the party leader tag a target so everyone can select it with one keypress, which sounds trivial until you're staring at twenty identical monsters in a dungeon. A basic self-heal is available to every class from level one, and it's your main sustain option before potions become the norm.
PvP: Where You Can Actually Get Killed
On paper, this is a peaceful-world game. Ordinary zones, the capital, and the areas around Maidens are all safe. Two exceptions matter, and it's better to know them in advance than to learn the hard way.
The first is the Elenium Caves — free-PvP dungeons split by level range, where anyone can kill anyone with no penalty, but drop rates and experience are both boosted to compensate. Walking in alone in weak gear is basically handing someone an easy kill; going in as a group ready to fight is one of the most efficient farming methods in the game.
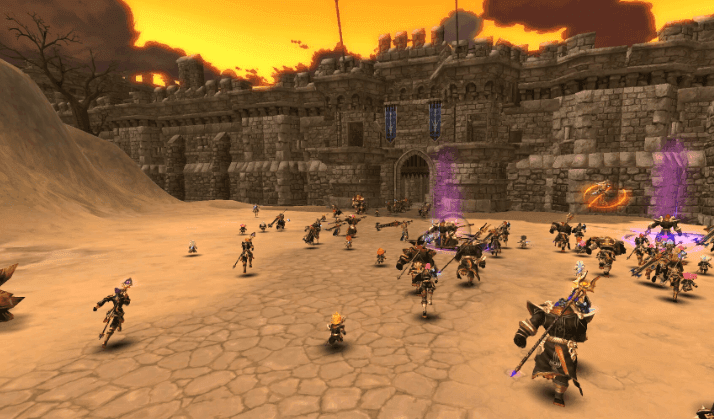
The second is guild warfare — members of rival guilds can fight each other almost anywhere outside the capital, starting zones, and a few small safe pockets near castles. Joining a guild isn't a purely upside decision because of this.
For structured, on-your-terms PvP, the Arena and Battleground exist specifically for that — a better place to get your first taste of player combat than stumbling into it unprepared elsewhere.
Guilds and Castles: What You're Eventually Playing Toward
A guild here is a real system, not just a chat room. Members contribute experience that levels the guild itself, unlocking development points spent on shared buffs, plus shared storage with rank-gated access. The real payoff, though, is access to castle warfare.
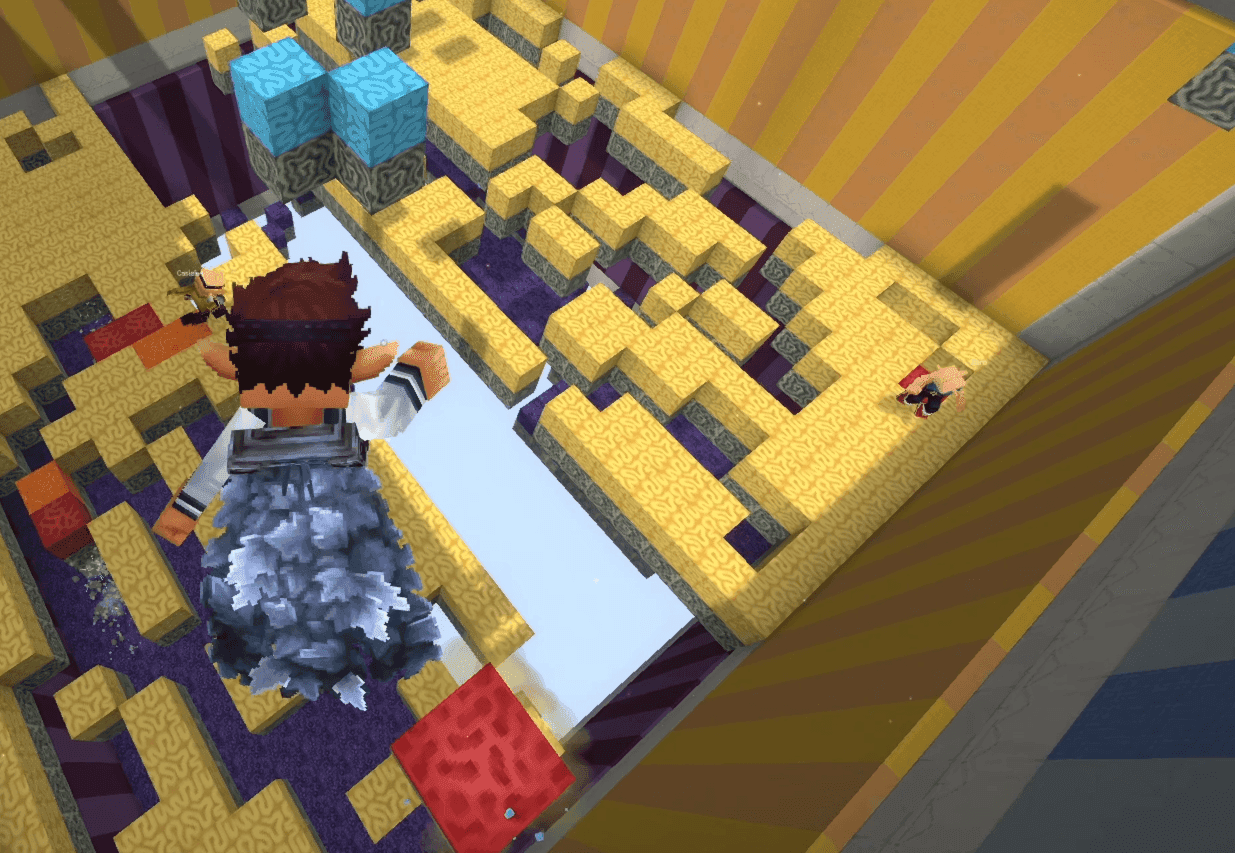
Siege battles play out unusually — rather than storming walls directly, competing guilds fight through a shared maze structure while also dealing with monsters and each other along the way. The winning guild claims the castle and the dungeon underneath it, a zone shared with neighboring castles and rich in both monsters and resources — also free-PvP.
Owning a castle also unlocks the ability for a guild leader to summon exclusive bosses onto its arena, on a limited weekly schedule. No castle means no access to that entire content branch, which is a big part of why organized guilds matter so much at the endgame.
Frequently Asked Questions
My experience stopped gaining at level 20 — is something broken? No — you just haven't picked a profession yet. Open the profession window and take the quest chain; XP starts flowing again immediately.
Monsters are taking forever to die — am I doing something wrong? Check three things in order. First, an element mismatch — look at the monster's protective element and switch to a weapon carrying the element that beats it. Second, wasted stat points — if your numbers don't land on clean multiples of ten, round them up. Third, you've probably outleveled the current zone by running ahead — back up a region and level a bit more there first.
Enchanting destroyed my item — how do I avoid that? Use an insurance consumable — one guarantees the item survives (worst case, it drops a level), while the rune-type consumables prevent both destruction and level loss entirely. And don't push anything past +5 if you're planning to replace it within a few levels.
Another player killed me and I thought PvP was off. You're either in the Elenium Caves, where PvP is always live, or your guild is at war with theirs. In the first case, bring friends next time. In the second, check with your guild officers about current conflicts.
Do I need premium status? Not for leveling — the whole game is completable free. Premium mainly buys back your time on instant teleports once zones get big, which starts to matter more the further you get. Start free and decide once you're around level 40 and know whether you're sticking with the game.
Can I redo my class or profession choice? No, neither can be changed on the same character — only starting a new one. Account character slots exist for exactly this reason, and keeping a couple of different classes around is common practice.
Where to Go From Here
Strung together, the early path looks like this: spend the first twenty levels just questing and getting a feel for your class, without spending money on anything. The moment you hit twenty, take the profession quest immediately — don't sit on it. From twenty to forty, focus on rounding stats to clean tens, learning the element cycle, and putting together a first real set for your build: +5 enchants, green-to-blue seals, basic cards. Past forty is where the real game opens up — A-grade gear, serious enchanting, chasing Purple seals, the Elenium Caves, and guild life.
Banking Rest Points is worth the effort mainly before level 50, while the bonus still covers a meaningful chunk of the XP bar. After that, it's farming, dungeons, and group content the rest of the way.
Royal Quest Online is unhurried on purpose. It doesn't rush you toward endgame and it isn't worried you'll get bored along the way — spending a week farming one map because it's a pleasant place to be is a completely normal way to play it. Give it time, roughly to level thirty, when your first genuinely good gear shows up and the whole loop starts to click.