Once Human: Complete Beginner Guide — Scenario Start, Survival, Base Building, Deviations, and Progression
Quick Take: The entire game revolves around a straightforward loop: play through the story of your chosen scenario (start with the classic "Manibus"), keep your character alive with food and water, and expand your base. The story unfolds in chapters, each ending in a boss showdown at a Monolith. Between boss fights, you explore abandoned towns, take down Deviants, and scavenge everything in sight—from ammo and crafting scrap to weapon and armor blueprints.
Once Human has a clear, accessible progression loop right from the start. You connect to a server with your selected scenario and follow a predictable survival path:
- Town Scavenging Runs: Head into ruins, clear out mutant threats, and loot everything you can carry. Look for weapons, ammo, salvage materials for your workbenches, and Mystical Crates holding equipment blueprints.
- Monolith Assaults: Every story chapter culminates at a Monolith—a massive alien complex housing a regional boss. Defeat the boss to claim high-tier loot and unlock the path to the next territory. For a detailed breakdown of seasonal progression, check out our guide on Scenarios, Seasons, and Eternaland in Once Human.
- Base Building and Upkeep: Between combat raids, return to your camp. Stash your loot into storage crates, boil water, cook meat, repair damaged gear, and build advanced workstations.
Choosing a Class at the Start of a Scenario
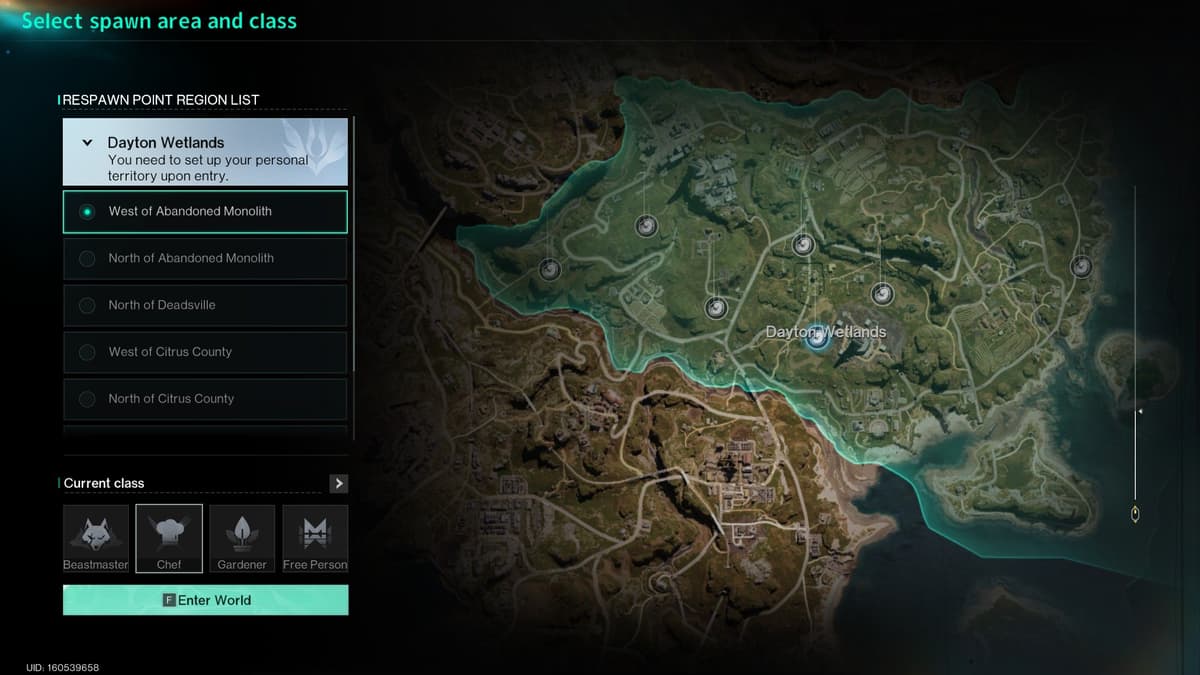
Before deploying onto the map, the game asks you to choose one of three specialized professions, or start without a class:
| Profession | Core Gameplay Feature | Starting Bonus | Best For |
|---|---|---|---|
| Animal Breeder | The game's druid: run with up to three active animal companions, level up their combat traits, and set up dairy farms. | A guaranteed starting pet of the highest S-Tier: pick a wolf, leopard, or bear. | The best choice for solo players. Pick the wolf: it has high mobility, never gets stuck in narrow doorways, draws enemy aggro, and provides a powerful pack damage bonus. |
| Chef | Builds a Field Kitchen, crafts meta meals with powerful combat buffs, leases food terminals near Monoliths, and sells dishes to other players via in-game mail. | Unlocks long-duration saturation recipes and Star Chef popularity progression. | Players who enjoy market trading and farming Energy Links. |
| Planter | Cultivates extensive crop plots, breeds mutated seeds, and supplies vital raw produce for high-tier cooking. | A starter seed kit and water-efficient planting boxes. | Cooperative players focused on agriculture and supporting clan cooks. |
| No Class | Standard survival gameplay without profession-specific bonuses. | Basic starter survival kit. | Players who want a pure shooter experience without managing pets or crops. |
If you are playing for the first time, pick Animal Breeder with a wolf—your pet will absorb incoming fire during tough early shootouts. If you are grouping up with friends, make sure someone takes Chef: team-wide food buffs significantly boost boss damage, as detailed in our guide on Farming, Taming, and Cooking Recipes in Once Human.
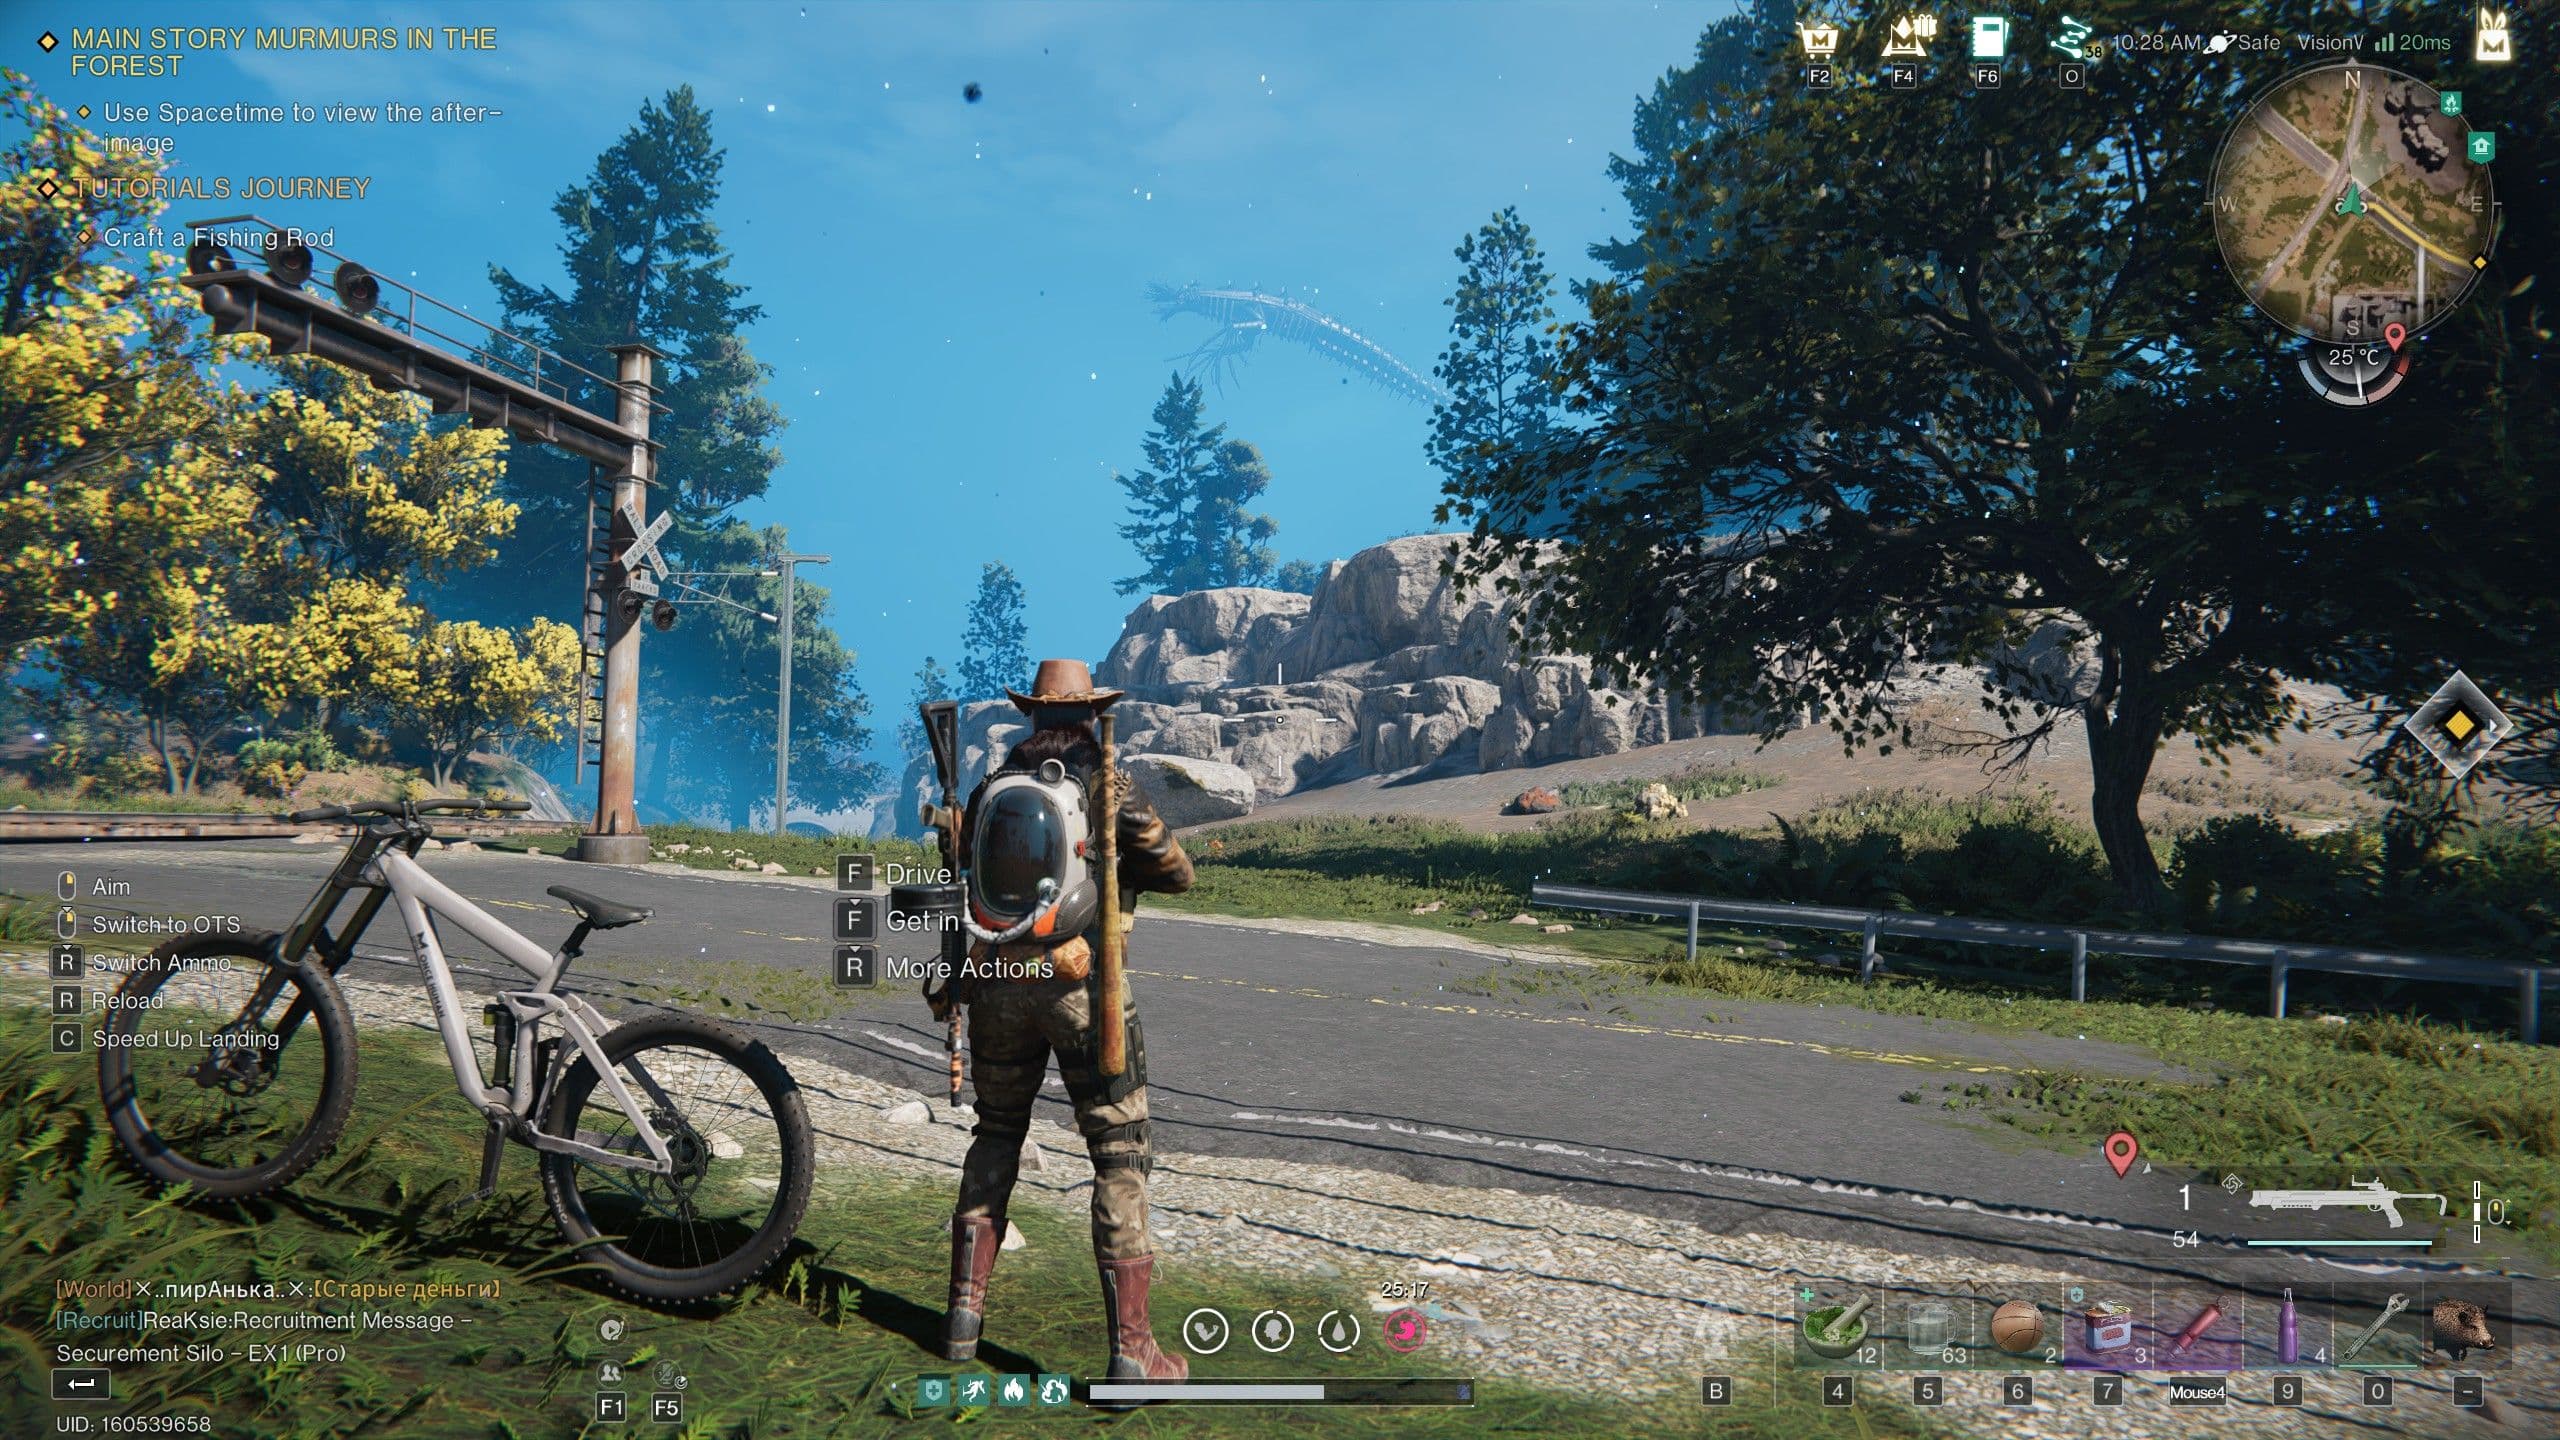
First Steps in Nalcott: Quests, Basic Controls, and the Spacetime Scanner
Quick Take: When starting out, resist the urge to rush across the map. Follow the beginner tutorial quests: they grant free starter weapons, ammo, clean water, and teach you how to set up camp. Your most vital survival habit is constantly pressing the Spacetime scanner on «Q»: it highlights hidden loot containers, crafting salvage, and disguised Morphic Crates through walls.
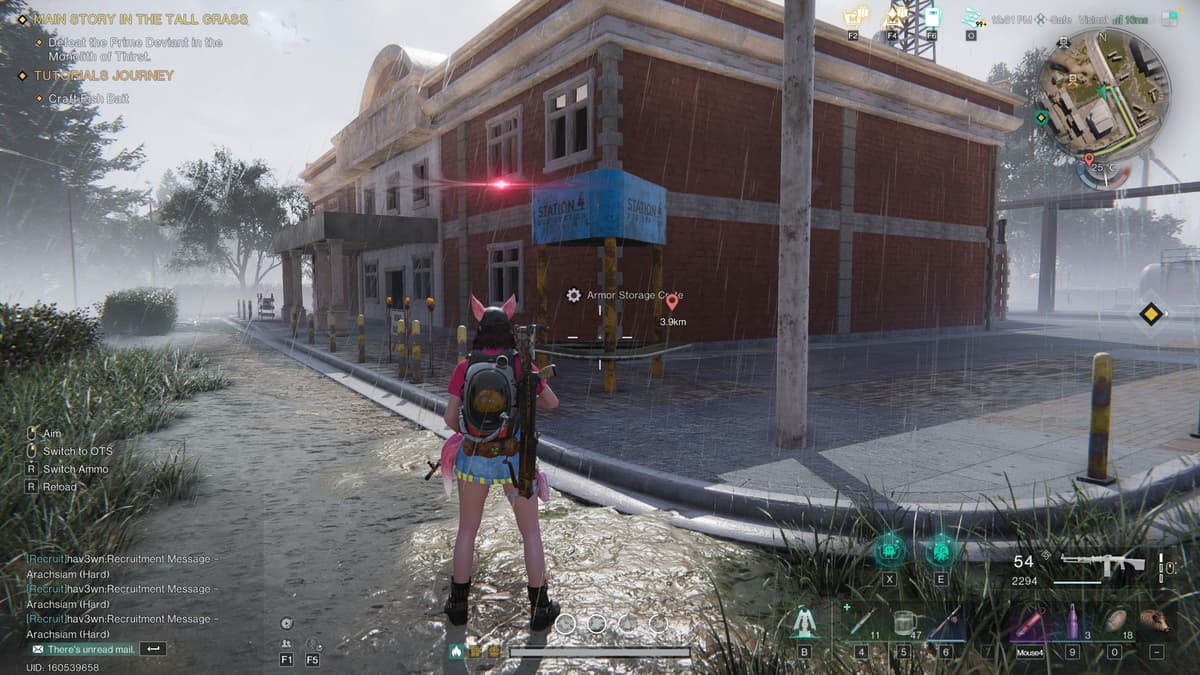
The most common beginner mistake is skipping early quests to explore high-level zones immediately. Without upgraded gear and a steady supply of ammunition, you will quickly die to radiation or mutant swarms. The Journey tutorial tasks smoothly cover your early survival essentials: they hand you weapons, canned rations, clean water, and guide you directly toward building your first territory.
The Spacetime Scanner «Q»: Spotting Hidden Loot and Crates
Your character carries a Cradle Moth on their back. Tapping «Q» fires an impulse wave that penetrates nearby structures within a 30-meter radius:
- White or Yellow Outlines: Standard ammunition crates, medical packs, filing cabinets, and general salvage containers.
- Cyan/Blue Glow: Morphic Crates. These are living mimic chests that disguise themselves as garbage cans, billboards, or traffic cones. A single shot or melee strike forces them to reveal their stash of high-value loot.
- Green Markers: Harvestable medicinal herbs and edible crops.
Press «Q» every time you enter a new building or gas station: valuable component boxes are frequently tucked beneath staircases or on rooftops. For exact map coordinates of every hidden cache, consult our guide on Interactive Map, Riddles, and Mystical Crates in Once Human.
Hotkeys: Essential Survival Controls
To avoid fumbling with controls mid-firefight, familiarize yourself with the default Universal Keyboard layout:
| Action | Hotkey | Practical Function |
|---|---|---|
| Interact / Loot / Skin Animal | «F» | Your all-in-one action key: open crates, pick up floor loot, talk to NPCs, use workbenches, and harvest raw meat and rawhide from hunted animals. |
| Spacetime Scanner | «Q» | Pings nearby loot containers, ore nodes, and hidden Morphic Crates through walls and terrain. |
| Item Backpack | «I» | Stores crafting materials, consumables, food, and weapon blueprints. |
| Gear Backpack | «K» | Shows equipped weapons, armor pieces, slotted weapon mods, and defensive ratings. |
| World Map | «M» | Brings up the map with resource tracking filters, Pollution Zones, and Monolith waypoints. |
| Flashlight | «N» | Toggles your headlamp. Essential for navigating pitch-black basements and nighttime ruins. |
| Roll / Dodge | «Ctrl» | Provides invulnerability frames to evade heavy boss attacks and mutant lunges. |
| Function Wheel | «Tab» | Quick-access wheel for healing salves, food buffs, and fishing bait. |
| Track Task | «Y» | Pins your active quest objective onto your HUD. |
Once you are comfortable with movement and clear your first settlement, the main storyline will prompt you to set up a permanent base—the heart of your crafting and storage.
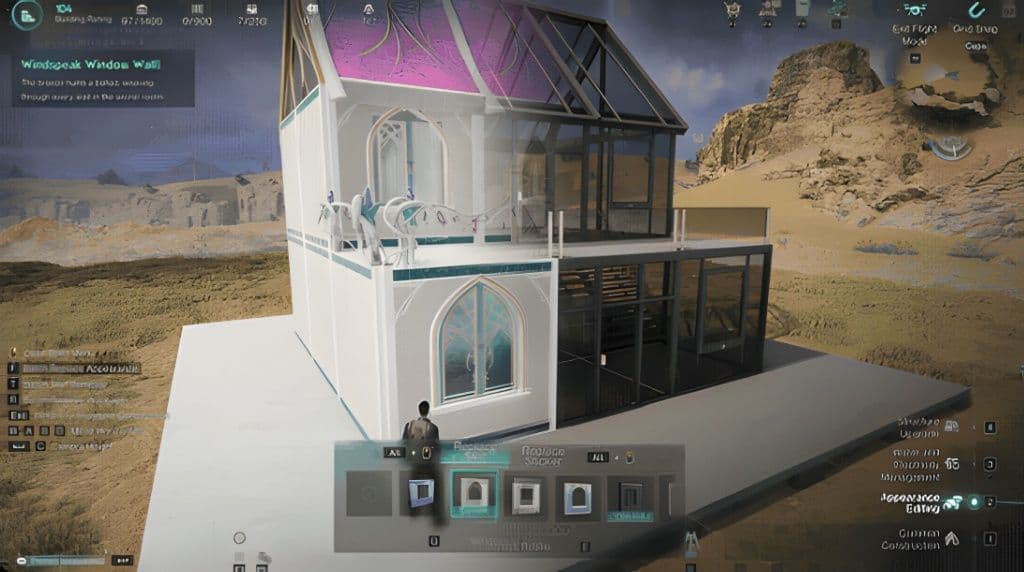
Building Your First Base: Territory Terminal, Free Flight Camera, and Workbenches
Quick Take: To start building, press «B» and place your Territory Terminal first—it establishes your base perimeter and activates claim protection. Immediately set up your starter production trio: the Stove (for clean water and cooked meat), the Gear Workbench (for weapons and armor), and the Supplies Workbench (for ammo and healing salves). When building second floors and roofs, toggle the free flight drone camera with «~» (Tilde).
You can establish your first base through the tutorial questline or manually as soon as you find flat, open ground. Do not spend hours searching for a flawless location: you can relocate your entire house, along with all workbenches and storage chests, to any new map spot in a single click.
Placing the Territory Terminal: Core of Your Base
Press «B» to enter Build Mode. You will see a holographic boundary grid:
- Placing the Terminal: If you have not claimed land yet, a placement prompt will appear on your screen. Pick a level area and left-click to drop the terminal. A cubic claim zone will instantly generate around it.
- Instant Relocation on «Z»: If you outgrow the area or exhaust nearby ore deposits, enter Build Mode on «B» and press «Z». Your entire base relocates in one piece without dismantling walls or forfeiting crafting materials.
- Base Repairs: Interact with the terminal to fix damaged structures after mutant attacks. You can repair everything at once or select specific categories, such as perimeter walls.
The Starter Production Trio: Stove, Gear, and Supplies
Lay down basic wooden foundations and place three indispensable workbenches to cover your combat and survival needs:
| Workbench | Early Game Purpose | Priority Crafts |
|---|---|---|
| Stove | Solves hunger and dehydration. | Boiling dirty river water and searing raw animal meat. |
| Gear Workbench | Manufactures and upgrades your personal loadout. | Crafting a starter crossbow or pistol, sewing fabric armor, and slotting your first calibration blueprint directly during weapon fabrication. |
| Supplies Workbench | Field logistics, healing, and tools. | Stockpiling copper pistol ammo, mixing Simple Healing Ointment, forging pickaxes, and building the Recycling Tool for city runs. |
Smart Construction: The Free Flight Drone Camera «~»
Do not waste time jumping across ceiling joists or building temporary wooden scaffolding to place roof tiles:
- While in Build Mode («B»), press «~» (Tilde). Your character locks in place, and the camera detaches into a free-flying drone.
- Fly using «W», «S», «A», «D», ascend with «Space», and descend with «C». Laying down high walls and roof caps from a top-down aerial view is vastly faster.
- Click your middle mouse button «MMB» while targeting an existing wall or floor piece to instantly select and copy that part from the catalog (eyedropper tool).
Once your starter house is secure, you will need to wire electricity and pipe fresh water. Check out our comprehensive guide on Base Building, Electricity, and Water Systems in Once Human.
Survival and Health: Water on «H», Healing Salves, and Restoring Sanity
Quick Take: Hunger and thirst in Once Human are tracked by your Hydration and Energy meters. Walk into any stream or lake and press «H» to gather Dirty Water, then purify it at a Stove. For energy, hunt wild game, skin carcasses with «F», and roast the meat. Craft Simple Healing Ointment (water plus any wild herb) for mid-combat healing, and clear the gray health penalty by sleeping in a bed or chewing Sanity Gummy.
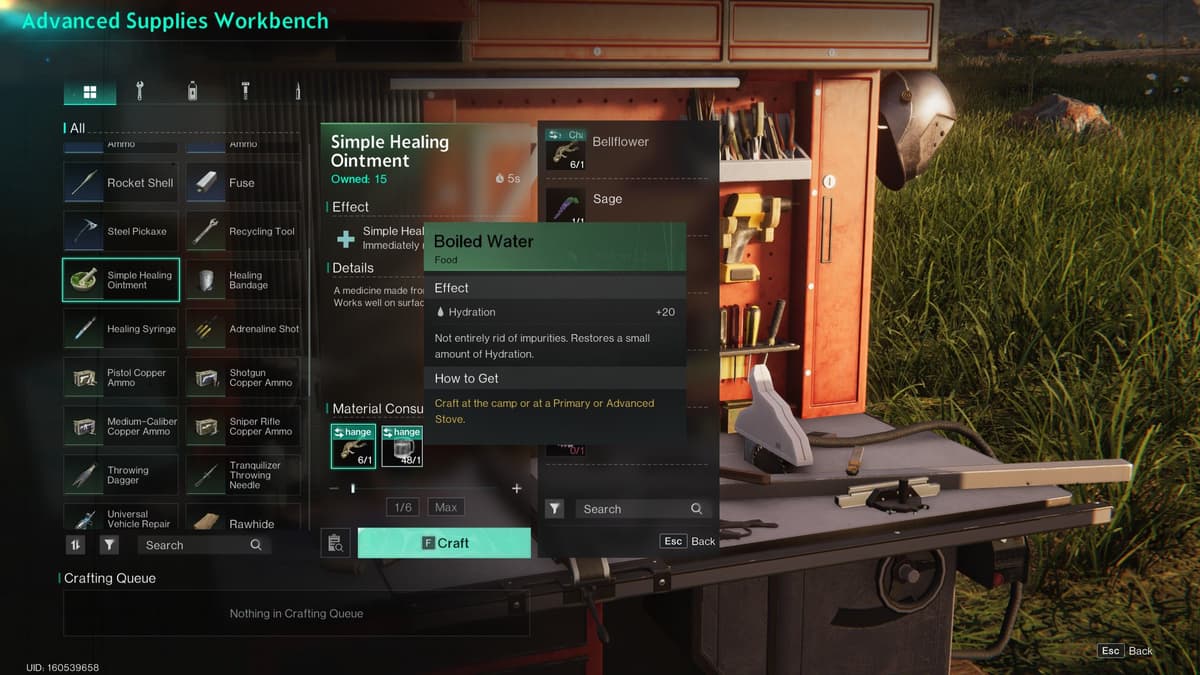
When your water or energy meters hit zero, your character slows to a crawl, loses sprint stamina, and rapidly bleeds health. The survival loop is straightforward once you know the exact steps.
Gathering Water on «H» and Boiling
Raw river and swamp water is tainted with Stardust. Never drink untreated water: you will crash your Sanity bar and contract debilitating gut illnesses.
- Wade into any freshwater lake, river, or creek and press «H» to collect Dirty Water.
- Return to base, open your Stove, and craft Boiled Water.
- Boiled Water restores +20 Hydration and acts as the universal liquid base for cooked dishes and medicine.
Hunting and Energy: Harvesting Meat on «F»
Your Energy gauge drains whenever you sprint, vault, or swing a pickaxe. To restore your stamina, you need cooked protein:
- Hunt down a wild boar, deer, or bird.
- Walk up to the carcass and hold «F» to skin the animal, harvesting raw meat and rawhide.
- Raw meat spoils quickly in your inventory. Throw it into the Stove immediately and cook seared steaks—roasted meat stays fresh for hours and rapidly refills your energy bar.
Combat First Aid: Simple Healing Ointment
Bandages and medical injectors are rare early on. Your primary lifesaver during firefights is Simple Healing Ointment. It restores 300 HP over a 5-second channel and is crafted at your Supplies Workbench.
| Ingredient | Quantity | Accepted Materials (Use the «Change» Button) |
|---|---|---|
| Purified Water | 1x | Boiled Water crafted at your Stove. |
| Any Wild Plant | 1x | Any gathered herb: Bellflower, Sage, Yellow Lotus, Honeysuckle, Scarlet Calamus, or Coneflower. |
In the workbench interface, click the «Change» button directly above the herb icon: you do not need to search for rare marsh reeds. You can select whichever common field flowers or sage you have piled up in your backpack.
Sanity: Removing the Gray Health Lock
Fighting inside polluted towns or near Monoliths drains your Sanity. As your sanity drops, a gray bar creeps over your health meter from the right, locking out your maximum HP pool. This can cut your effective survivability in half, leaving you vulnerable to one-shot deaths.
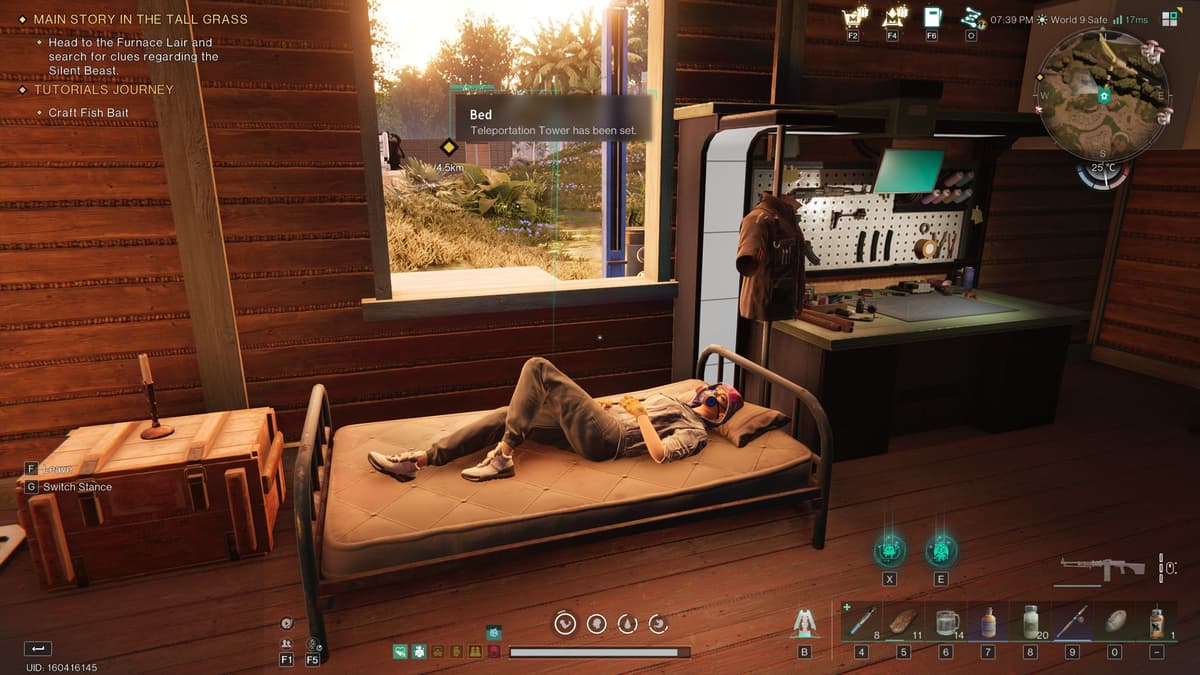
You can restore your Sanity using two reliable methods:
- Sleep in a Bed: The fastest and cheapest cure. Build a simple wooden bed at your base, approach it, and choose to rest. Fifteen seconds of sleep fully resets your Sanity and restores your HP to 100%.
- Sanity Gummy: Portable candy for dungeon runs. It restores +60 Sanity and cures one negative whim effect. Craft it at your Stove using sugar and purified water. You can also roast wild mushrooms over a campfire, as covered in our guide on Farming, Taming, and Cooking Recipes in Once Human.
Deviations: Combat Allies and Autonomous Base Workers
Quick Take: Deviations are your pocket companions and automated workforce in Once Human. Combat Deviations join your exploration runs: they grant two active skills bound to «E» (summon and attack) and «X» (ultimate ability). Territory Deviations live inside containment units on your base to handle manual chores: The Digby Boy mines ore deposits, while the Logging Beaver chops trees.
You unlock your first Deviation early in the tutorial, while others drop from Monolith bosses, mining nodes, or spatial anomalies. They split into three functional categories.
Three Deviation Types: Combat, Territory, and Crafting
| Category | Placement | Practical Role | Top Starter Examples |
|---|---|---|---|
| Combat | Equipped into your Cradle slot (accessed via inventory «I»). | Fights alongside you: deals damage, draws enemy aggro, exposes weak spots, or heals you under fire. | Festering Gel, Butterfly's Emissary, Lonewolf Whisper. |
| Territory | Housed in Isolated Securement Units across your base. | Automated base chores: roams your perimeter and deposits raw materials directly into containment storage. | The Digby Boy (mines ore), Logging Beaver (harvests lumber), Chefosaurus Rex (automates cooking). |
| Crafting | Housed in Isolated Securement Units across your base. | Generates rare alchemical reagents to brew defensive potions, throwables, and custom buffs. | Gingerbread House, Grabber, Hug-in-a-Bowl. |
Combat Controls: Mastering «E» and «X»
During firefights, your active combat Deviation is controlled using two keys:
- Combat Skill («E»): Tap to deploy your companion or command it to attack your crosshair target. Tap again to recall it back into your Cradle.
- Ultimate Ability («X»): Triggers a devastating ultimate once your Deviation's combat energy gauge fills up at the bottom of your screen.
The premier starter combat ally is Festering Gel. Dropped by the first Monolith boss, this jelly deploys a translucent tactical barricade: it absorbs incoming mutant fire, pulses healing waves to your health bar, and purges the gray Sanity lock during intense shootouts. For raw offensive scouting, use Butterfly's Emissary: it flutters over targets, highlighting weak points to guarantee critical hits.
Base Automation: The Digby Boy and Containment Units
Stop swinging your pickaxe by hand for hours. Build an Isolated Securement Unit on your base and house a miniature robotic companion called The Digby Boy, which drops when breaking copper or iron ore veins:
- Automated Mining: Once charged, Digby exits its containment pod, roams your base perimeter, chips away at nearby ore rocks, and neatly deposits metal ore into its pod storage. You only need to walk up and collect the haul.
- Comfort and Mood: Deviations recharge energy twice as fast when you satisfy their environmental preferences. The Digby Boy favors blue or green lamp lighting, upbeat radio music, and heat from a nearby Stove. Place these items right next to its pod.
- Power Grid Boosts: Capture an Electric Eel and place it near your power generators—it passively raises your base electrical output by 20% to 30%.
For a complete index of all 40+ Deviations and their exact spawn locations, check out our guide on Deviations in Once Human.
World Exploration, Pollution Zones, and Dismantling City Facilities on «H»
Quick Take: Stop wandering aimlessly: open your map on «M», switch to filters, and toggle Resource Tracking for ores, crops, or animals—the game draws green highlight circles around exact spawn clusters. Hover over Pollution Zones and hold «Ctrl» to lock the tooltip card in place, and press «+» inside a zone to view active hazards. In ruined towns, pack abandoned crafting benches into your inventory on «H» using a Recycling Tool.
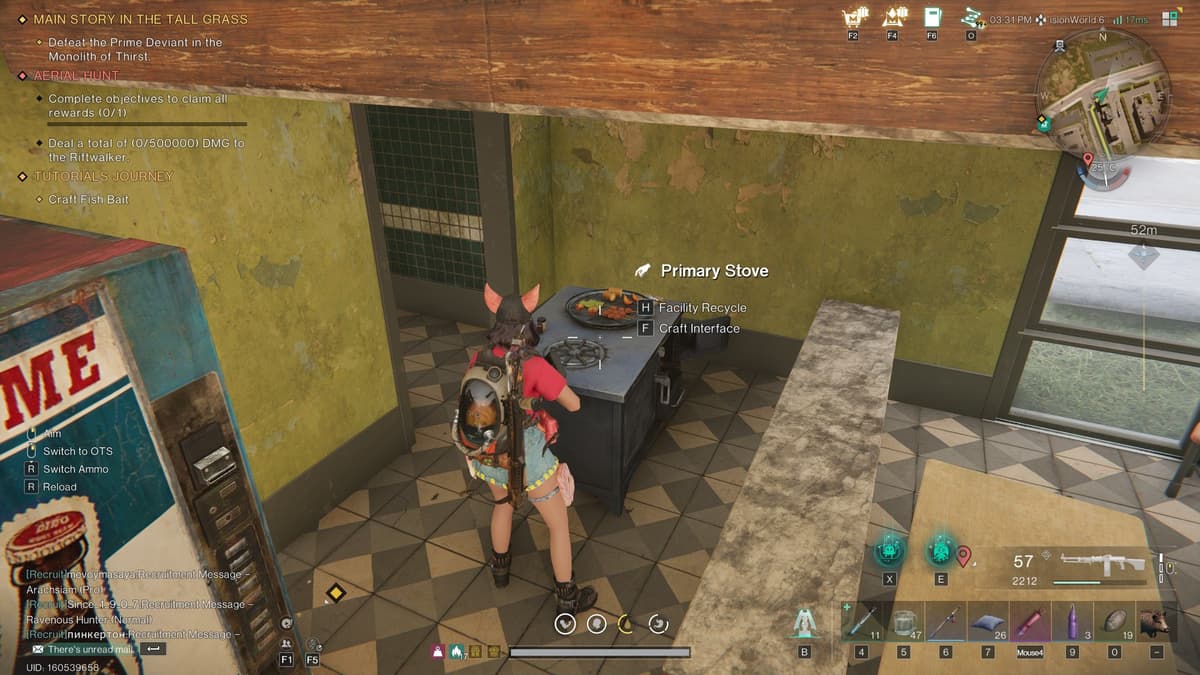
Exploring Nalcott without map filters wastes valuable hours. Built-in tracking tools and world salvaging allow you to gather necessary components in a single targeted raid.
Finding Resources via Map Filters «M»
When you urgently need copper ore, wheat for baking bread, or deer hides, configure your map filters:
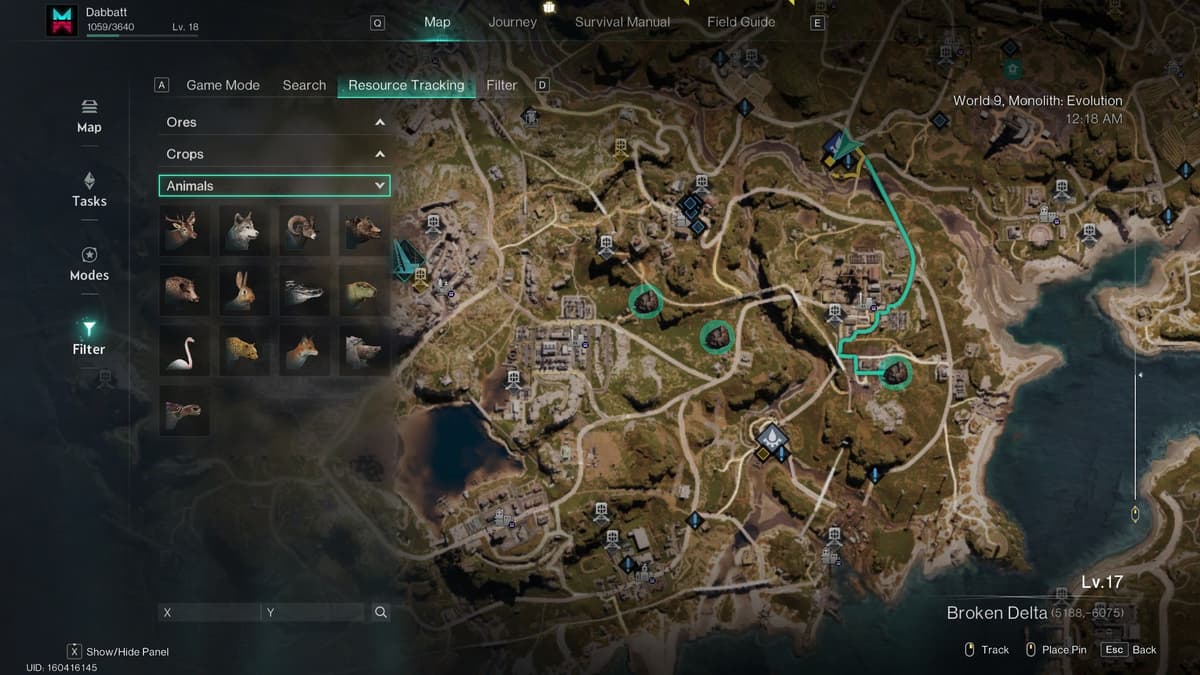
- Press «M» to bring up the World Map.
- Click the «Filter» tab in the left-hand menu.
- Select «Resource Tracking» along the top toolbar of the window.
- Pick any tracked entry under Ores, Crops, or Animals. The map will instantly highlight green geographic circles marking their spawn clusters. For complete deposit coordinates of every metal tier, check out our guide on Ores, Crystals, and Mining Locations in Once Human.
Pollution Zones: Pinning Tooltips on «Ctrl» and Reading Modifiers on «+»
Hazardous radiation hot spots and Monolith ruins are marked with biohazard icons across your map:
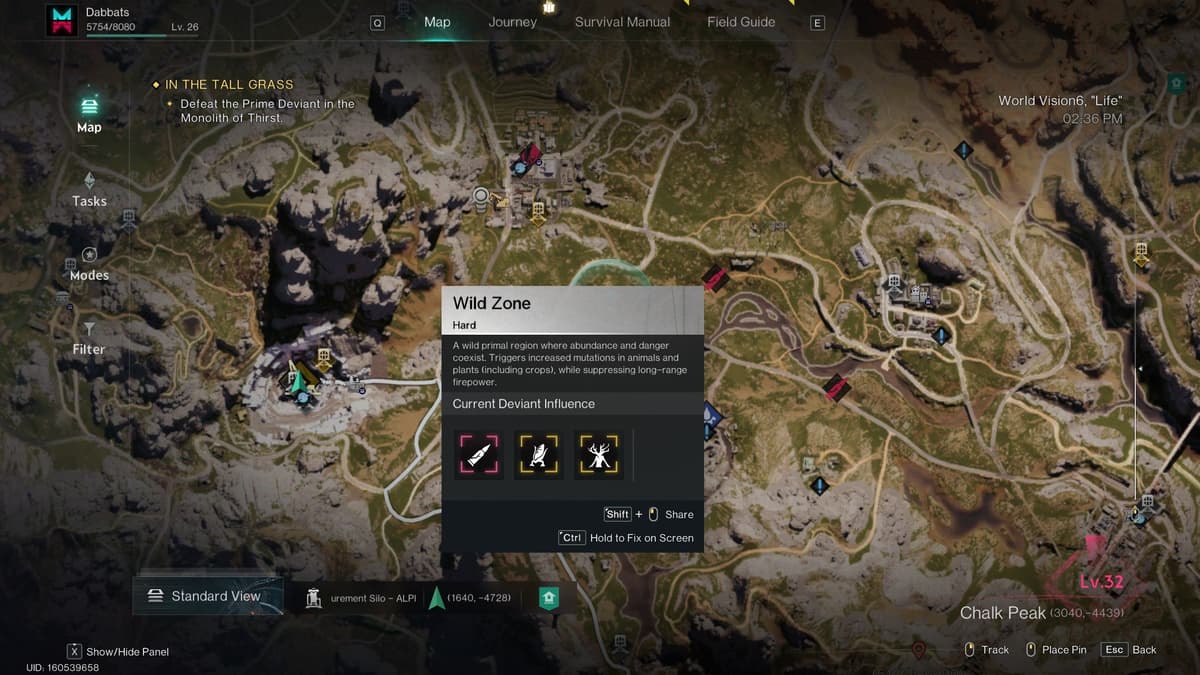
- Hold «Ctrl» to Pin Tooltips: Hover your mouse over a zone icon. To keep the pop-up box from disappearing as you move your cursor, hold «Ctrl»—the tooltip locks on screen, letting you inspect individual hazard icons. This same trick works inside workbench menus to freeze item descriptions.
- Quick Hazard Check Inside Zones («+»): When driving into a contaminated sector, hold «+» on your top number row to bring up an on-screen overview of all active environment penalties.
Secret Scavenging: Packing Up City Facilities on «H»
Inside abandoned factories, auto repair shops, and medical clinics, players often run past heavy machinery, mistaking it for static scenery. In reality, you can pack abandoned city workbenches directly into your backpack.
| Target Equipment | Required Tool | Hotkey | What to Do Back at Camp |
|---|---|---|---|
| Abandoned crafting tables, smelting furnaces, table saws, diagnostic stations, and lab cabinets. | Recycling Tool, crafted at your Supplies Workbench. | Approach the machine and hold «H». | The machine packs into a portable box in your inventory. Back at base, feed it into your Disassembly Bench for hundreds of diodes, cables, and welding tools, or analyze it inside your Tech Synthesis Workbench to unlock new blueprints and harvest blue Tech Points! |
Whenever you clear urban districts, pulse your Spacetime scanner on «Q»: harvestable machinery glows with a sharp highlight contour. A single salvage run through industrial districts like Blackfell with a Recycling Tool saves hours of manual field mining.
Tech Progression: Tech Tree, Research, and Scrapping Salvage
Quick Take: Advanced workbenches, weapons, and generator recipes are locked at the start: you unlock them in the Tech Tree on «O» using Tech Points. Earn points by leveling up, reading city manuals, scrapping flash drives at the Disassembly Bench, and analyzing scavenged machinery inside the Tech Synthesis Workbench. To never run dry on ammunition, raid towns: Gunpowder and Acid drop in bulk from mutant kills.
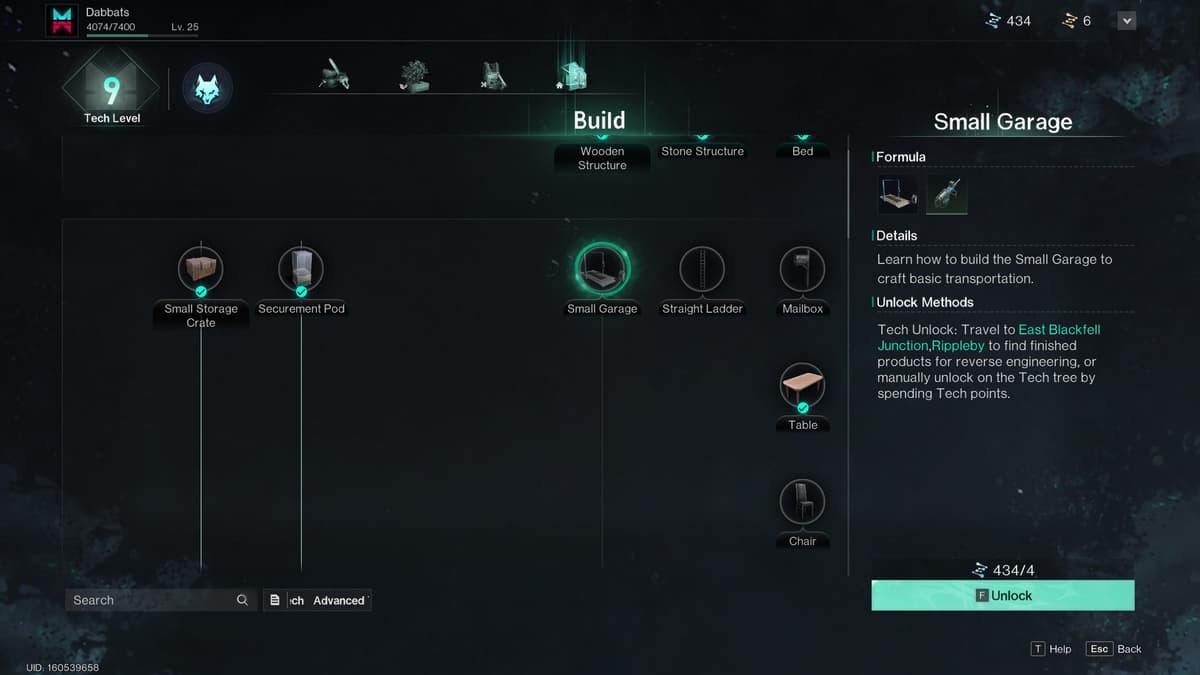
If you open Build Mode on «B» and cannot find solar panels, advanced stoves, or heavy weapon benches, do not worry. Their formulas must first be unlocked through your character's Tech Tree.
The Tech Tree on «O»: How to Stockpile Tech Points
Press «O» (or open your inventory on «I» and navigate to the «Tech - Cradle» tab). This interface contains branches for crafting, building, logistics, and territory management. Unlocking nodes costs blue Tech Points and gold Tech Development Points.
Four reliable point sources for beginners:
- Character Leveling: Clearing mob camps, finishing Journey tutorial milestones, and progressing the main story.
- Reading City Books: Search bookshelves in abandoned retail stores, schools, and offices. Interacting with any technical manual immediately awards bonus tech points.
- Recycling Digital Media: Do not throw away found floppy disks, USB sticks, or circuit boards. Feed them into your Disassembly Bench—it converts digital junk into valuable knowledge points.
- Workbench Analysis: Studying scavenged equipment inside your Tech Synthesis Workbench grants massive dumps of blue points.
Processing Workbenches: Research and Disassembly at Base
Set up two core processing stations in your house as early as possible:
| Station | Role | What to Feed It |
|---|---|---|
| Tech Synthesis Workbench | Research lab: scans scavenged appliances, unlocks embedded crafting formulas, and awards large bundles of blue Tech Points for duplicate studies. | City facilities packed up on «H», blueprint fragments, and damaged mechanical apparatuses. |
| Disassembly Bench | Salvage recycler: breaks down junk and broken gear into foundational engineering components. | Metal Scraps, Rubber, Parts, and Electronic Parts needed to forge armor sets and weapons. |
For optimal node prioritization across tech branches, consult our guide on Tech Tree, Specializations, and the Cradle in Once Human.
Where to Find Gunpowder and Acid for Ammunition
During early firefights, beginners often panic over ammunition, trying to conserve every bullet. You do not need to do this: Gunpowder and Acid drop in massive quantities from ordinary mutants whenever you clear any town or outpost. A single scavenging run fills your pockets with hundreds of units of raw materials—more than enough to craft copper and steel rounds at your Supplies Workbench.
Later on, when high-rate-of-fire machine guns demand thousands of bullets per dungeon, you can set up automated water pumps in polluted soil, as detailed in our guide on Acid, Fuel, and Oil Farming in Once Human.
The New Starchrom and Blueprint System: Unlocking and Upgrading Weapons
Quick Take: Weapons picked up off the ground break quickly and cannot be repaired. High-tier, durable gear is exclusively crafted from blueprints purchased with Starchrom. The outdated Stellar Staircase system has been removed: manage your blueprints directly inside your backpack by holding «F» to unlock and right-clicking «RMB» to upgrade star ranks. Hard rule: never open Starchrom crates when your weekly limit is at 100%, or the currency burns.
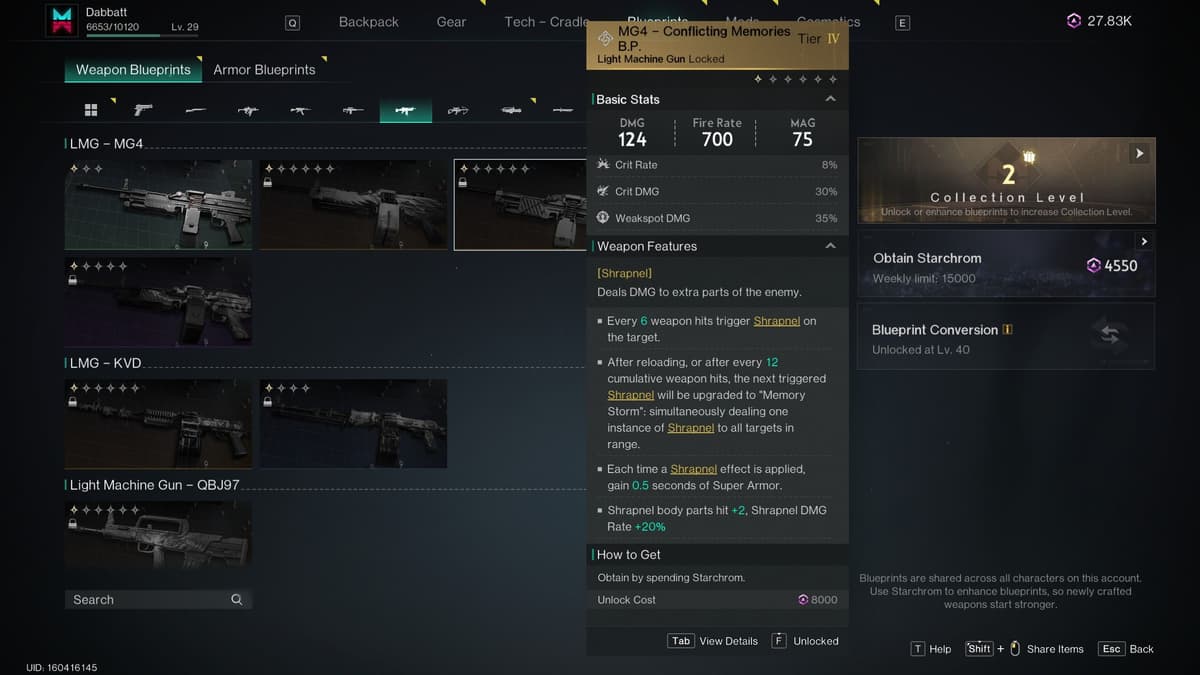
Blueprints represent your permanent account capital. They bind permanently to your profile and never reset between seasons. Once you assemble a legendary assault rifle or armor set formula, you can forge it repeatedly on any server.
Starchrom Income and the Weekly Limit Trap
Starchrom is awarded through major endgame activities, but earnings are capped by a weekly limit. You can track your active cap directly inside the blueprint interface.
Primary Starchrom sources:
- Scenario Journey («J»): Complete chapter milestones and claim milestone rewards for completing seasonal goals.
- Mystical Crates in Towns: Clearing major points of interest awards Active Starchrom Crates (containing 500 currency each). Never open these crates when your weekly cap is reached: the game will warn you of an overflow, and all excess currency will vanish permanently. Stash them in your base chests until the weekly reset on Monday.
- Territory Purification: Construct a Stardust Resonant Filter on your base. Load it with Eclipse Cortex crystals and defend your base against waves of attacking mutants. A successful defense grants up to 4,000 Starchrom per week.
- Monoliths and Securement Silos: First-time dungeon boss clears yield substantial one-off currency payouts. Check out our boss strategies in the guide on Monolith Bosses and Securement Silos in Once Human.
Unlocking and Enhancing Blueprints: «F» and «RMB»
Open your Item Backpack on «I» and switch to the «Blueprints» tab along the top toolbar:
| Action | Input | Result |
|---|---|---|
| Unlock New Formula | Hold «F» | Hover over an unlearned blueprint and hold the key. The weapon or armor piece is permanently added to your craftable catalog at the Gear Workbench. |
| Enhance Star Rank | Click «RMB» | Hover over an unlocked formula and right-click. Invest duplicate fragments of that weapon family to advance its star rating (from 1 to 5 stars). This permanently increases the base weapon damage and armor ratings of all future crafts! |
Once you stockpile a reserve of Starchrom, visit the Wish Machine arcade cabinet. Here you can play thematic gacha banners or outright purchase top-tier gold weapons for a fixed sum. For detailed banner analyses, read our guide on Starchrom, the Wish Machine, and Blueprints in Once Human.
Mobility, the Online Market, and Preparing for Mid-Game
Quick Take: Traveling on foot across Nalcott quickly becomes inefficient: the main storyline unlocks a personal vehicle summoned with «G» (a mountain bike or river raft). Reaching Tech Level 3 unlocks the global player market on «U», allowing you to liquidate surplus ingots and buy rare mods. At this stage, configure passive combat perks in your Cradle and transition toward automated base production—crude oil extraction, acid farming, and livestock breeding.
After locking down basic survival, you shift from manual scavenging to industrial automation. Your main goals at this stage are speeding up map traversal and setting up passive resource pipelines.
Personal Vehicles on «G» and Constructing a Garage
You receive your first personal mount through the main questline. Depending on your active scenario, this will be a mountain bike or a wooden raft for waterway navigation:
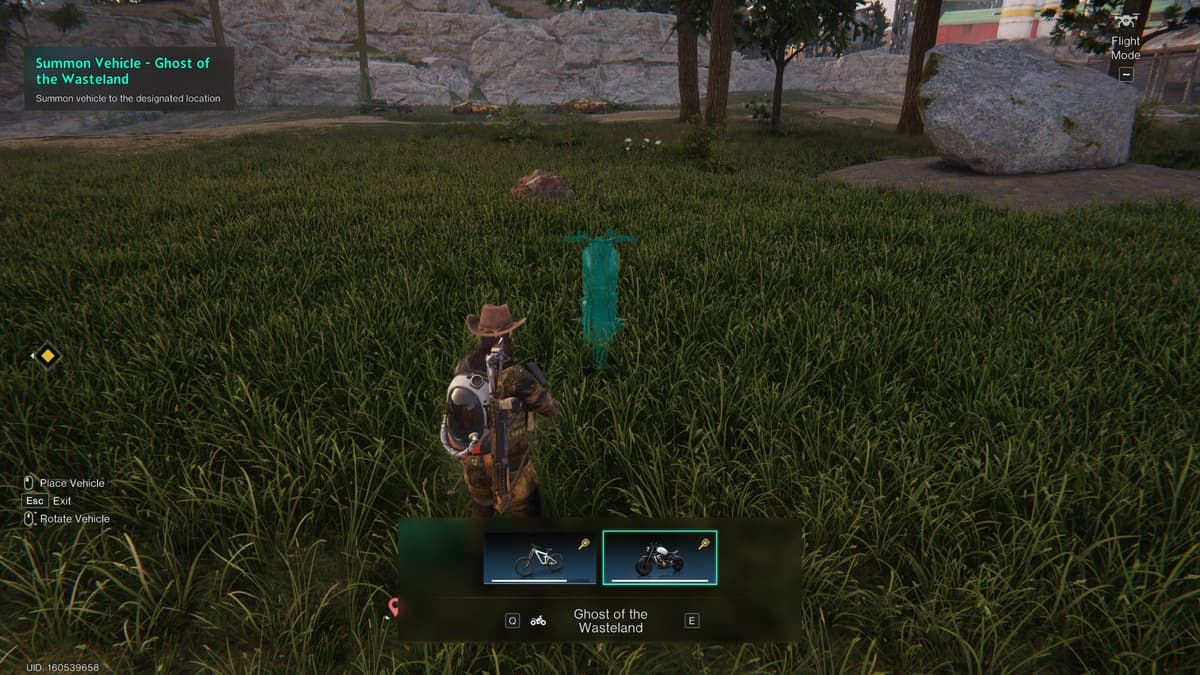
- Summoning Vehicles («G»): Press «G» while standing in an open area. A radial selection wheel will pop up: select your ride, and it will instantly materialize in front of you. If your motorcycle flips upside down or gets wedged into a ditch, walk five paces away and press «G» again to re-summon it cleanly onto its wheels.
- Building a Garage: To upgrade to a fast gasoline-powered motorcycle or four-wheel off-roader, unlock the Garage node in your logistics tech branch and place it at camp. The garage allows you to refuel, repair, and install upgraded engine and frame components. For in-depth motorcycle tuning, read our guide on Vehicles, Motorcycles, and Garages in Once Human.
The Global Player Market on «U»
Once your Tech Tree advances to Tech Level 3, global server trading becomes available. Tap «U» to open the trading post:
- Buying Vital Goods: Quickly purchase supplementary acid for ammunition, rare vegetable seeds, S-Tier animal pets, or specialized calibration blueprints from other players using Energy Links.
- Selling Surplus Stock: List extra refined ingots, surplus rounds, or cooked dishes to build up startup capital for high-end mods.
The Cradle Moth: Tuning Passive Combat Modifiers
Open your Item Backpack on «I» and click into the «Cradle» tab. Here you will find passive Cradle override sockets that significantly amplify your damage output:
- Automatic Weapon Enhancement: Boosts rifle and submachine gun damage while automatically feeding rounds back into your magazine whenever you eliminate a mutant.
- Tactical Hardening: Mitigates incoming damage from dungeon elites and bosses. For optimal perk configurations across all weapon archetypes, consult our Best Builds and Weapon Tier List in Once Human.
Transitioning to Mid-Game: Passive Base Income
As your character level climbs, manual labor should give way to automated machinery:
| Automation Goal | Required Infrastructure | Practical Payoff |
|---|---|---|
| Crude Oil and Fuel Refining | Water pumps placed on oil fields + a refinery facility. | Free fuel for motorcycles and raw stock for explosives. |
| Pure Acid Production | Water pumps in Pollution Zones + fermentation barrels. | A continuous flow of pure acid to craft tens of thousands of armor-piercing rounds directly at camp. |
| Automated Farming and Taming | Grow lights and automated sprinkler beds + livestock pens. | An endless harvest of fresh meat, milk, and rare mutated cooking ingredients. |
Season Inheritance, Hive Co-op, and Common Beginner Mistakes
Quick Take: Season resets in Once Human never delete your character: all unlocked weapon and armor blueprints, their star levels, accumulated Starchrom, mods, and cosmetics remain bound to your account permanently. Grouping into a Hive of up to four players lets you merge territories into a shared fortified outpost and share crafting benches. Avoid five frequent rookie mistakes to maintain smooth progression from your first hour on the server.
The term «wipe» often worries newcomers, but seasonal resets in Once Human are forgiving: the game preserves all core progress, eliminating the need to start over from scratch.
What Persists Across Scenario Resets
When a six-week scenario concludes, the server wraps up its campaign, and you transition into a new scenario carrying your account assets forward:
- Permanent Account Progression: All weapon and armor blueprints, star rank upgrades, Starchrom reserves, weapon and gear mods, captured Deviations, and cosmetic skins carry over permanently.
- Preserving Base Designs: Save your base layout as a House Blueprint. In the next season, you can drop this exact building footprint onto a new plot with a single click.
- Eternaland Depot: Any surplus resources, metal ingots, and machine components left in storage crates transfer to your personal pocket dimension. At the start of a fresh campaign, the game awards Material Points used to withdraw preferred weapons and gathering tools into the new world.
Cooperative Play: Why Joining a Hive Accelerates Progression
While the entire campaign is playable solo, joining a Hive—a tight squad of up to four survivors—removes several major bottlenecks:
- Combined Outposts: You can place four Territory Terminals directly beside each other, merging separate base borders into an expansive shared compound.
- Role Specialization: Grant teammates access to your storage crates and workstations. One player can focus on cooking high-tier buff dishes for the squad, another specializes in animal taming to breed combat pets, while a third supplies the team with ammunition.
- Squad Starchrom Defense: Defending the Stardust Resonant Filter against waves of aberrant mutants is substantially easier with four players, and every squad member receives the full weekly reward payout.
Death Penalties: What Happens When You Fall
If lethal damage depletes your health pool in combat, your character drops into a downed state. If you carry an Adrenaline Shot, you can revive yourself directly on the spot. Without adrenaline, choose to respawn at your camp bed or the nearest teleportation tower. Your crafted armor and weapons never drop from your character; they only suffer minor durability degradation, easily repaired at a gear workbench for a handful of ingots. You leave behind a small grave marker pouch containing only a fraction of raw materials, which you can retrieve upon returning to the death location.
Top 5 Beginner Mistakes to Avoid
| Mistake | In-Game Consequence | Proper Execution |
|---|---|---|
| Drinking untreated river water | Sanity collapse, losing 50% max HP, and digestive debuffs. | Collect raw water with «H» and boil it at a Stove before drinking. |
| Opening Starchrom crates while capped | Irreversible loss of hundreds of premium currency. | Monitor your weekly quota bar. If maxed out, store crates in camp chests until Monday reset. |
| Placing camp terminals in deep ravines | Frequent vehicle snags and blocked sunlight for solar generators. | Drop your Territory Terminal on flat open ground near paved roadways or mineral deposits. |
| Ignoring abandoned machines in towns | Forfeiting hundreds of electronics, parts, and tech ciphers. | Craft a Recycling Tool and harvest world facilities directly into your backpack by holding «H». |
| Leaving Cradle sockets empty | Losing up to 40% weapon damage and free auto-reloading perks. | Open the Cradle tab in your backpack on «I» and equip passive combat perks matching your weapon archetype. |
Once you secure your base infrastructure, crafting benches, and weekly Starchrom income, shift toward fine-tuning an endgame weapon build. The most dependable physical weapon setup for your first campaign is detailed in our guide on the Shrapnel Build with The Last Valor in Once Human.