Once Human Map Guide: Riddles, Mystical Crates, and Weapon Accessories
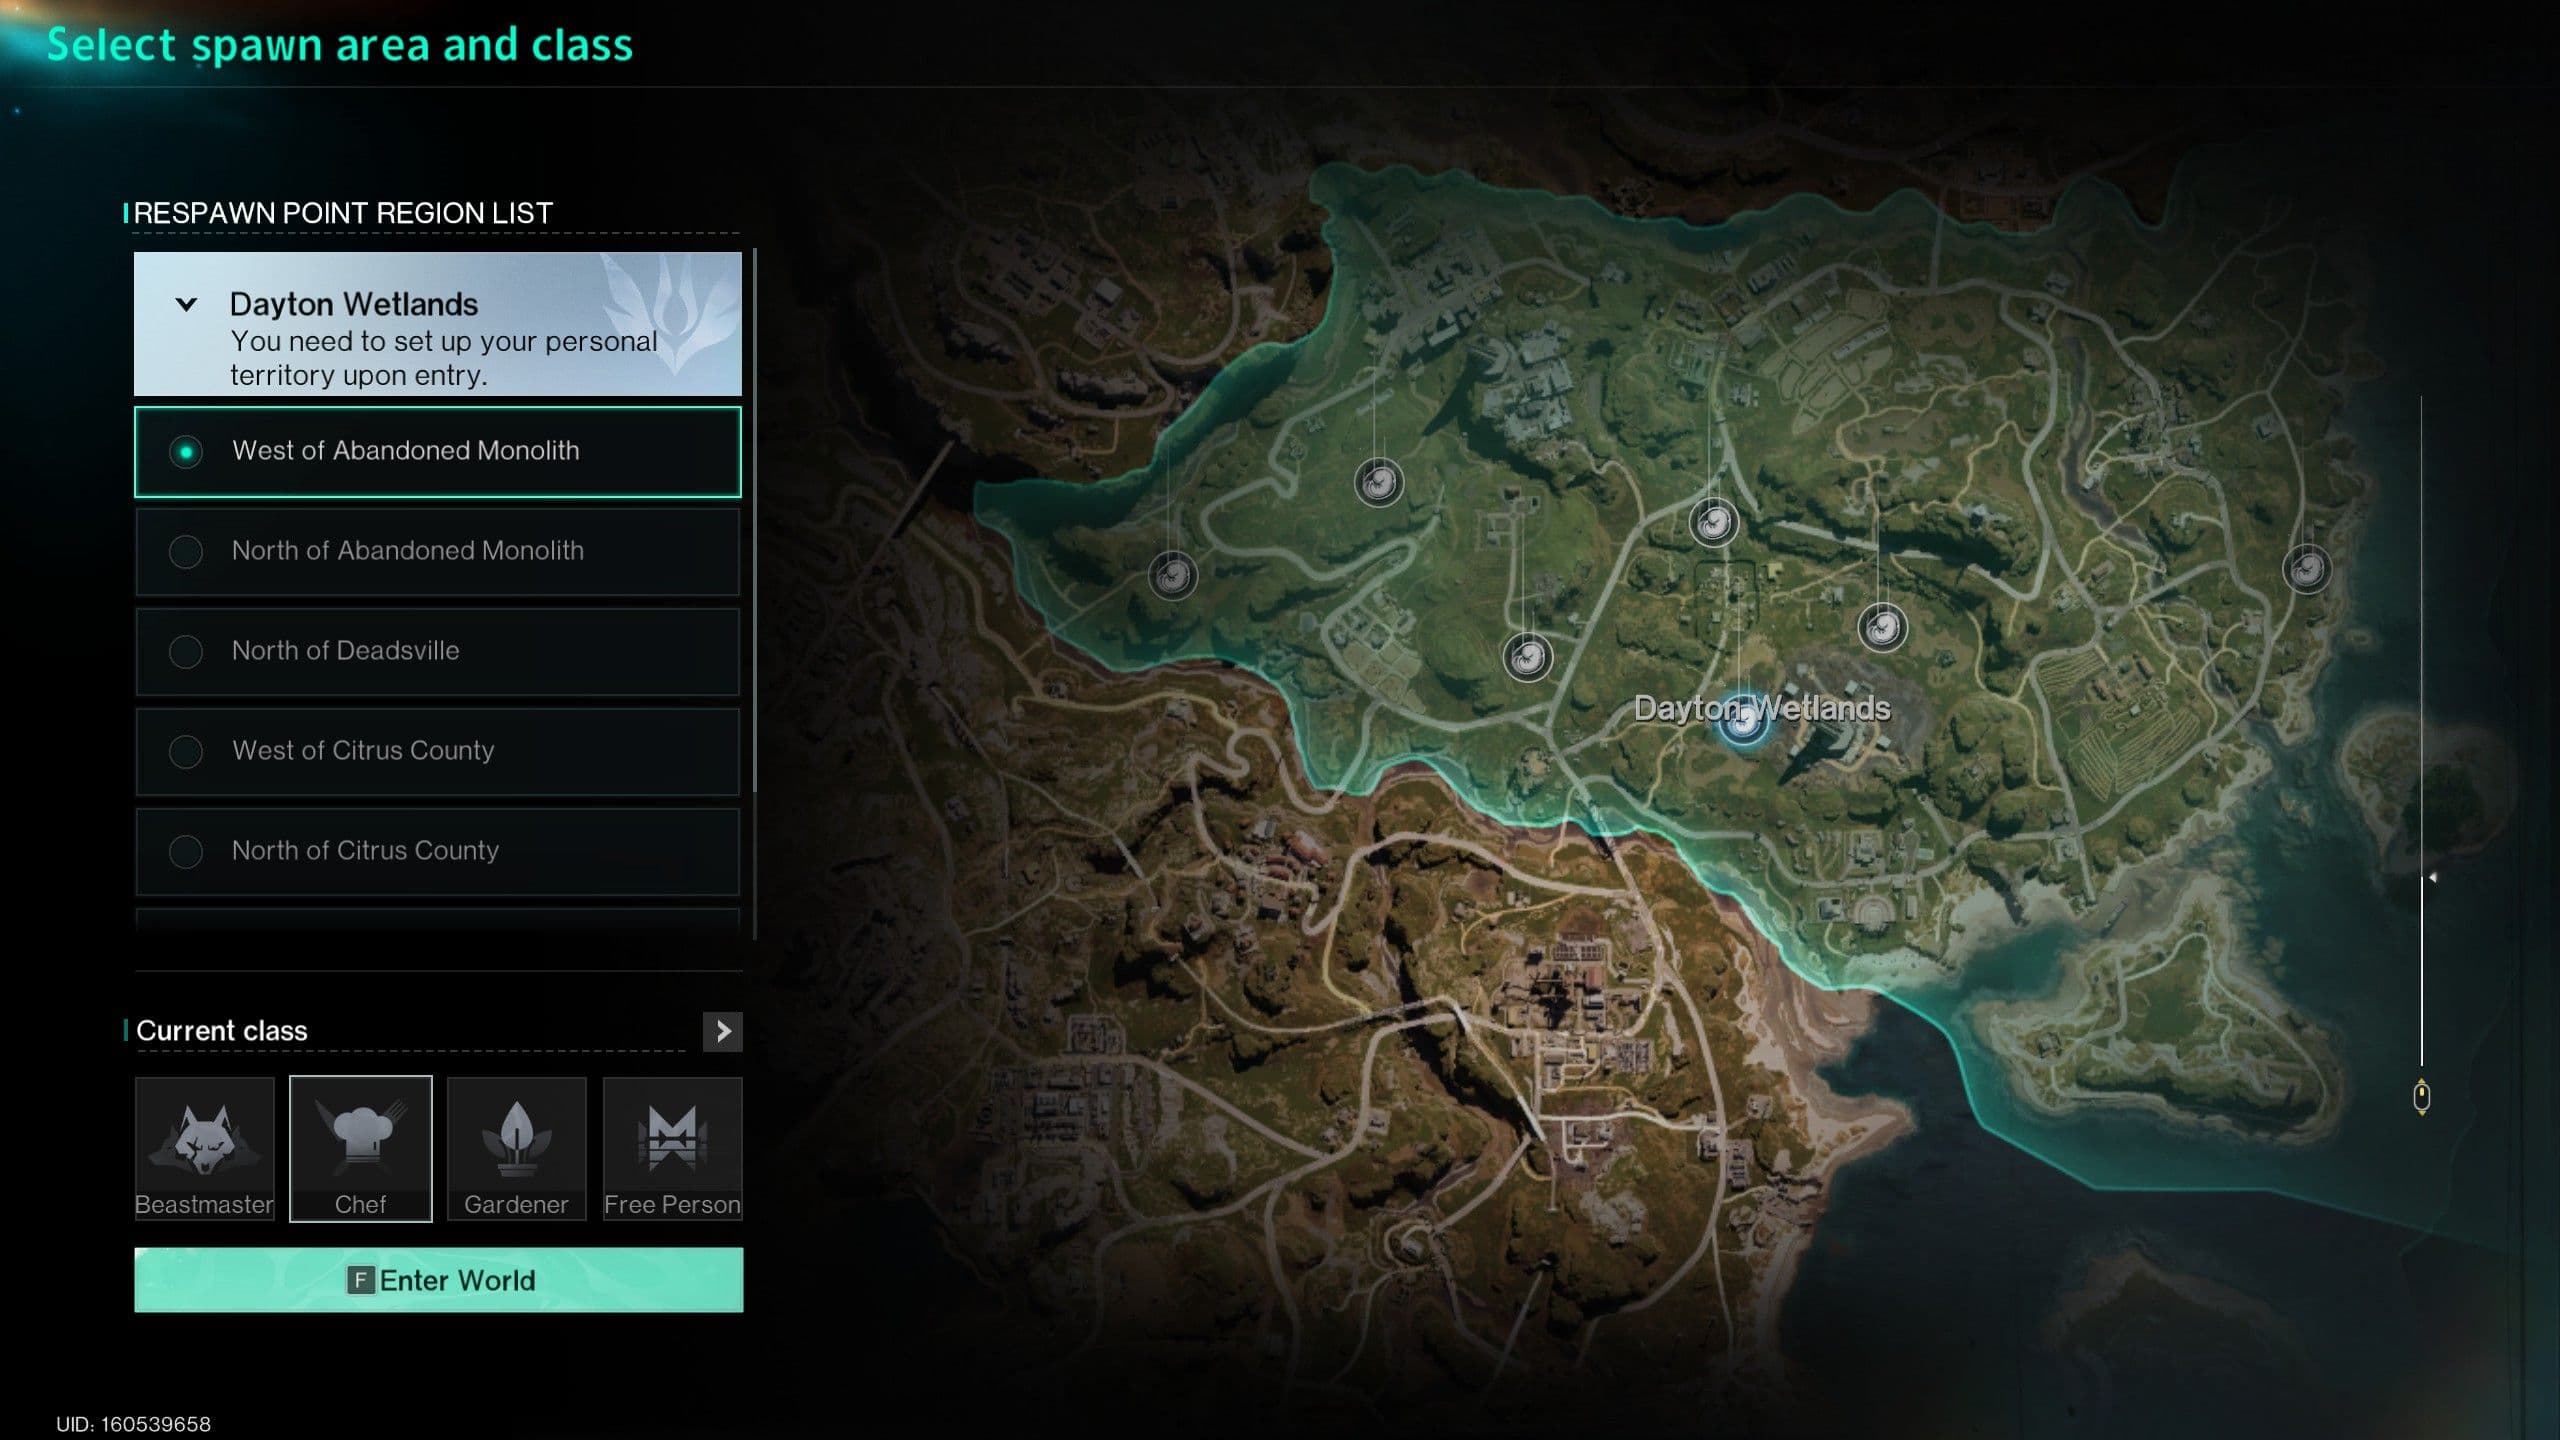
Quick Take: You do not need a third-party interactive map open on a secondary monitor to track down raw crafting materials. The built-in world map resource radar in Once Human accessed via «M» → «F» → Resource Tracking highlights dense gathering clusters for any previously discovered ore, crop, or wildlife species with bright turquoise circles. Right-clicking (RMB) any highlighted zone instantly projects an in-world GPS route directly along the terrain.
Scouring mountain ridges for aluminum veins or wandering meadows searching for wild saffron wastes hours of valuable exploration time. Stop wandering blindly. The in-game map features a dedicated navigation suite equipped with category filters and automatic waypoint pathfinding. Rather than marking sporadic single nodes, the radar identifies high-density spawn territories, saving vehicle fuel and tool durability.
Step-by-Step Guide to Enabling the In-Game Resource Radar
To activate the built-in tracking radar on your map, follow this sequence:
- Open the World Map: Press the «M» key.
- Access the Filter Menu: Press «F» or click the Filter icon located on the left toolbar.
- Switch to Resource Tracking: On the top horizontal navigation bar, select the third tab — Resource Tracking, situated between the Search bar and the standard world icon toggles.
- Select a Gathering Category: The tracker displays three drop-down menus — Ores, Crops, and Animals. Each section lists icons for materials your character has gathered or encountered at least once in the active scenario.
- Toggle Cluster Highlighting: Left-click (LMB) on the desired mineral, plant, or beast icon. The map will display turquoise radar circles indicating cluster density and territorial boundaries.
- Generate an Automatic GPS Route: Hover your mouse cursor over any highlighted radar zone and click Right Mouse Button (RMB). The game navigation system will project a luminous route marker leading from your coordinates directly to the center of the resource pocket. It works reliably.
Waypoints Persist in Real Time: The navigation marker appears both on your compass ribbon at the top of the HUD and as a visual light beam along the roadway ahead of your vehicle. For high-speed routes between distant resource nodes, review our guide on mining locations, metal ingots, and rare ores.
Trackable Categories and Practical Applications
The resource radar fulfills the gathering requirements of every major peaceful progression tree, from industrial smelting to greenhouse farming and culinary buffs.
| Tracker Category | Trackable Resources | In-Game Value and Practical Application |
|---|---|---|
| Ores | Copper, Tin, Iron, Aluminum, Tungsten, Sulfur, Silver, Gold. | Isolates heavily mineralized plateaus to fill vehicle trunks with raw ore for base smelting runs without aimless scouting. |
| Crops | Wheat, Corn, Saffron, Beet, Aloe Vera, Frost Mint. | Sources mutant wild crop seeds to establish automated hydroponic farms. Cross-breeding and planting mechanics are detailed in our guide on crop farming, animal taming, and cooking buffs. |
| Animals | Deer, Boars, Wolves, Bears, Crocodiles. | Identifies natural grazing grounds to capture high-grade combat companions using tranquilizer darts and gather leather hides. |
Filtering Settlements, Teleportation Towers, and Strongholds
Beyond tracking natural resources, the left filter menu («F») controls persistent world map markers. Hiding non-essential icons clarifies route planning for long-distance expeditions:
- Teleportation Towers: Vital fast-travel relays. Keep these enabled when exploring new territories; unlocking a tower permanently clears the fog of war across the surrounding sector.
- Monoliths: Regional dungeon domes housing core scenario bosses. Displays local threat levels and access status.
- Securement Silos: Instanced dungeons designed for farming weapon and armor gear mods. Toggles display difficulty tiers and active elemental modifiers.
- Strongholds: Abandoned towns, outposts, and highway checkpoints. Hovering over any stronghold icon reveals an inspection card detailing its Recommended Level, exploration checklist (Mystical Crates, weapon crates, rift anchors), and Possible Rewards. The rewards preview highlights gear body drop rarities (Green, Blue, Purple) to avoid blind scouting trips. Holding «Ctrl» pins the card to your screen, while pressing «Shift + LMB» sends the coordinates directly to your team chat.
- Custom Markers: You can place up to 100 custom colored pins to mark hidden caves, resource caches, or crude oil deposits.
Fog of War Restrictions: The resource radar only displays clusters within sectors where the local Teleportation Tower has been activated. If you enter an unexplored darkened zone, head directly to its tower first, activate it with «F», and only then will the tracker generate accurate navigation routes.
Stronghold Crate Hierarchy: Mystical Crates, Military Stashes, and Secret Mimics
Quick Take: Achieving 100% stronghold exploration in Once Human requires collecting three core container types: the singular Mystical Crate containing guaranteed equipment blueprint fragments (looted strictly once per scenario/season), and regular military Weapon Crates and Gear Crates operating on a 4-hour respawn timer. Outside the official settlement checklist, secluded wilderness corners conceal rare mutant ambushers — Mimics (internally labeled as Morphic Crates) disguised as chests and refrigerators.
Sweeping settlements without understanding container classifications turns into aimless wandering through empty hallways. Players often deplete ammunition on wandering zombies, search residential dressers, and leave the stronghold without ever uncovering the primary mystical chest hidden in a rooftop control room or underground bunker. The game enforces explicit objectives for every outpost: only claiming key containers completes a settlement to 100%.
Official Container Types for 100% Stronghold Completion
| Container Type | Visual Appearance | Respawn Timer | Primary Loot and Strategic Value |
|---|---|---|---|
| Mystical Crate | Large purple-gold sarcophagus emitting a soft neon glow. | One-time only (1 per scenario/season). | Guaranteed blueprint fragments for Epic and Legendary weapons or armor sets, Stellar Planula. The centerpiece of every stronghold. Blueprints are synthesized and starred via the Wish Machine and Starchrom system. |
| Weapon Crate | Elongated military footlocker finished in dark gray or olive drab. | Respawns every 4 hours. | Fully assembled weapons of the zone's tier, Calibration Blueprints, gunpowder, ammunition, and refined steel. Counts toward the settlement's military crate objective. |
| Gear Crate | Bulky rectangular chest marked with red or yellow hazard stencils. | Respawns every 4 hours. | Armor pieces, specialty fabrics, plastics, textiles, and armor repair chips. Counts toward the settlement's military crate objective. |
| Storage Crate | Small cardboard, metal, or plastic containers scattered across shelves. | Respawns every 15–30 minutes. | Scrap adhesives, electronic components, and raw salvage for disassembly benches. Excluded from 100% stronghold exploration credit. |
Stardust Mimics: Rare Ambush Predators, Not Static Chests
Many explorers comb through dozens of settlements and wonder why they never encounter so-called "morphic chests." The reason is simple: they are absent from the stronghold objective card. In the client enemy database, they are registered as «Morphic - Crate» or «Morphic - Fridge», but the community universally calls them Mimics.
Mimics are not loot chests — they are deceptive Stardust mutants capable of transfiguring into inanimate world objects. They sit motionlessly on high-rise balconies, perched within cliffside foliage, or tucked into shadowy corners of abandoned gas stations disguised as sealed wooden trunks or rusted refrigerators.
How to track and hunt down Mimics:
- Scanner Detection: Trigger a Spacetime pulse by tapping «Q». If a Mimic is lurking nearby, your scanner emits a distinctive rapid clicking tone and frequency pitch.
- Silhouette Reveal: The disguised mutant highlights with a phosphorescent purple outline through solid walls for several seconds.
- Awakening the Creature: Strike the disguised object with a melee attack («V») or fire a gunshot. The faux container instantly sprouts black arachnid limbs, emits a shrill screech, and attempts to retaliate or flee.
- Claiming Rewards: Defeating the Mimic yields a generous bundle of Stellar Planula, Stardust Source, and rare crafting materials. This serves as a lucrative wilderness bonus to supplement map exploration.
Vehicle Pulse Scanning: When navigating rough terrain on a motorcycle or off-road vehicle, you do not need to dismount for every scan. Pressing «Tab» while driving triggers the onboard vehicle Spacetime pulse, allowing you to sweep roadside structures at full cruising speed.
Stronghold 100% Completion Objectives and Monolith Access
Approaching any settlement or hovering over its icon on the world map («M») displays a consolidated objective tracker in the top-right corner of the HUD:
- Activate Rift Anchor: An energetic stele projecting a vertical purple beacon into the sky. Pressing «F» activates the anchor, unlocking access to the regional boss inside the Monolith. Activating every anchor in a biome is mandatory to dissolve the boss dungeon shield, as detailed in our guide on Monolith bosses, Securement Silos, and LEA Research Lab.
- Find Mystical Crate: The primary exploration goal. Exactly 1 per stronghold. Typically concealed inside control towers, locked upper-floor laboratories, or subterranean bunkers guarded by elite enemies.
- Find Weapon and Armor Crates: Requires looting the specified count of military crates (typically between 1 and 3).
- Defeat Elite Enemies: Eliminate the designated zone mini-boss (such as a Spotlight Gunner, Excavator Head brute, or Hive Mother).
- Defeat Normal Enemies: Eliminate the quota of standard infected units (ranging from 12 to 25 targets).
High-Level Loot Runs: Sweeping Blackfell
For recurring high-tier technology components, seasoned players focus their farming runs on the city of Blackfell in the Red Sands region. The multi-story civic complexes and central town hall of Blackfell feature the densest concentration of military crates and industrial benches per square kilometer in the entire game.
Every 4 hours, containers throughout the city refresh with critical crafting supplies: welding machines, steel pliers, diodes, and heat-resistant cables. To prevent encumbrance penalties from hundreds of kilograms of salvaged metal, always consume an Anti-Gravity Milkshake prior to your run for 45 minutes of unimpeded sprint with massive carrying capacity buffs.
Regional Progression and Crafting Body Farming: From Trent to Tier IV Outposts
Every stage of character leveling and equipment progression is anchored to distinct regional zones. Venturing into Red Sands with Tier I weaponry or lingering in starter wetlands beyond level 20 cripples your progression efficiency. The world map follows strict tier banding:
- Dayton Wetlands (Lv. 1–10): Starter Territory (Tier I–II). Settlements and the Monolith of Greed Exclusion Zone (Lv. 9) yield basic green weapon and armor crafting bodies.
- Broken Delta (Lv. 10–20): Transition Zone (Tier II–III). The primary early-game anchor is the Gaia Cliff Monolith (Lv. 20), home to the regional boss Treant. Groups can take down the Treant in under two minutes, making it a reliable source for early blue gear mods, controllers, weapon components, and Stardust Source.
- Iron River (Lv. 20–30): Mid-Game Core (Tier III–IV). This territory supplies essential Blue (Tier III) and Purple (Tier IV) crafting bodies: Medium-Caliber Weapon Body III & IV and Bulletproof Lining III & IV. These bodies are strictly mandatory to craft popular assault rifles (SOCR, KAM), the KVD machine gun, and Tier 3/4 armor sets at your Gear Workbench.
- Chalk Peak & Red Sands (Lv. 30–50+): Endgame Biomes (Tier IV–V). Strongholds like Evergreen (Lv. 42) and the Blackfell Fallen Zone (Lv. 45) supply steady drops of gold and purple Tier V components.
To verify available loot before traveling, open your world map («M») and hover over any outpost or checkpoint. The inspection card's Possible Rewards section displays color-coded icons indicating drop tiers:
| Reward Rarity on Map | Equipment Tier | Representative Workbench Components | Optimal Regional Farm Spots |
|---|---|---|---|
| Green (Common / Uncommon) | Tier I – II | Basic weapon receivers and light helmet linings. | Dayton Wetlands (Lv. 1–10). |
| Blue (Rare) | Tier III | Medium-Caliber Weapon Body III (Medium-Caliber Weapon Body III), Bulletproof Lining III (Bulletproof Lining III). | Broken Delta and Southern Iron River (Lv. 15–22). |
| Purple (Epic) | Tier IV | Medium-Caliber Weapon Body IV (Medium-Caliber Weapon Body IV), Bulletproof Lining IV (Bulletproof Lining IV). | Iron River and Chalk Peak (Lv. 22–35). |
| Gold (Legendary) | Tier V | Endgame Tier V weapon receivers, specialized electronics, and advanced alloys. | Red Sands and high-level Monoliths (Lv. 40–50). |
Tactical Checkpoint Farm Route via Teleportation: Avoid wandering between isolated camps. In Iron River, locate the checkpoint cluster directly adjacent to a Teleportation Tower: specifically, Pollution Inspection Point 77 (Lv. 22), Inspection Point 023 (Lv. 26), and East Blackfell Junction (Lv. 25). Unlock the nearby teleportation relay, board your motorcycle, and sweep all three checkpoints in a 5-minute circuit, clearing military weapon and gear crates. Repeating this loop every 4 hours guarantees you never suffer a shortage of purple Tier IV crafting bodies.
Weapon Accessories in Once Human: Permanent Progression, Slot Types, and Top Attachments
Quick Take: Weapon accessories and attachments in Once Human operate on a permanent account unlock model: each module is discovered once in the open world via field puzzles or mystical crates and permanently unlocks for all compatible firearms across your character profile. Attachments do not consume crafting materials, require zero maintenance resources, and transfer 100% across seasonal wipes and scenarios.
Many beginners mistakenly assume that after each seasonal transition they must re-scour dozens of map puzzles to reclaim optics and muzzle brakes. This is completely false. Weapon accessories belong to the account's permanent legacy collection alongside learned blueprints and cosmetics. Collecting key gold and purple attachments once guarantees you can start every fresh server scenario with perfectly stabilized weaponry.
Four Weapon Attachment Categories and Key Attributes
Firearms in Once Human feature up to four dedicated modification slots: muzzle, optic, tactical underbarrel rail, and magazine.
| Attachment Slot | Top In-Game Modules | Core Stat Enhancements | Optimal Firearm Types |
|---|---|---|---|
| Muzzle | • Hammer Compensator • Stretched Muzzle Brake • Tactical Suppressor | Dampens horizontal and vertical recoil while boosting Stability and Accuracy. Suppressors conceal gunfire from nearby mutant patrols and increase aim-down-sights (ADS) transition speed. | Assault Rifles (SOCR, KAM), Light Machine Guns (KVD, MG4), Submachine Guns. |
| Optic | • Compact Reflex Sight • Alpha Sight • 4x Tactical Scope • Sniper Scope (6x / 8x) | Provides crisp targeting reticles without obscuring peripheral vision, accelerates ADS snap speed, and extends effective engagement range. | Reflex sights for high-mobility assault; 4x and 8x scopes for bolt-action and semi-automatic precision rifles. |
| Tactical | • Small Infrared Indicator • Compact Infrared Indicator • Angled Tactical Grip • Vertical Tactical Grip | Laser indicators dramatically tighten hip-fire shot dispersion during sprint and strafe maneuvers. Tactical foregrips suppress vertical muzzle climb during sustained automatic bursts. | All automatic rifles, shotguns, and rapid-fire sidearms. |
| Magazine | • Small Capacity Rifle Mag (Gold) • Extended Rifle Mag • Large Drum LMG Mag | Expands base ammunition capacity by +10–30 rounds. The gold small-capacity rifle magazine delivers maximal ammo bonuses with virtually zero penalty to reload cycle speeds. | Crucial for machine guns and assault rifles during prolonged DPS phases on Monolith boss weakspots. |
Attachment Synergies with Meta Combat Builds
Selected attachments directly amplify weapon and armor mods within endgame builds:
- Shrapnel Assault Rifle Setup: For the premier SOCR – The Last Valor rifle, the primary objective is sustaining high magazine capacity and tight shot groupings. Combining the Hammer Compensator, Compact Reflex Sight, Small Infrared Indicator, and Gold Small Capacity Mag expands capacity to 52–58 rounds, enabling continuous critical hit stacking. Full build mechanics are detailed in our guide on the Shrapnel Last Valor build.
- Burn Machine Gun Setup: For the KVD – Boom! Boom! light machine gun, the mandatory module is the Large Drum LMG Mag. Expanding the ammunition belt to 100+ rounds triggers continuous Blaze explosions without reload downtime. Review fine-tuning details in our guide to the Burn Blaze build.
How to Equip and Modify Attachments in the Field
Configuring weapon attachments requires no settlement workbenches or maintenance parts:
- Open Gear Menu: Press the «K» key.
- Select Target Weapon: Hover your cursor over your equipped primary or secondary weapon and right-click (RMB) or select weapon customization.
- Navigate to Accessories Tab: Within the weapon modification interface, select the Accessories tab.
- Install Desired Module: Click any attachment category (Muzzle, Optic, Tactical, Magazine) and left-click any unlocked attachment to equip it instantly.
Instant Field Swapping: Accessories can be swapped freely anytime, anywhere — even in the middle of a dungeon. If entering tight bunker corridors demands a reflex red dot for fast close-quarters response, while the open road outside calls for a 4x tactical optic, simply open your gear screen («K») and swap sights in two seconds.
Once Human Field Riddle Directory: Solving Open-World Spacetime Anomalies
Quick Take: Secret field riddles and spacetime anomalies across Once Human are scattered along highways and throughout wilderness biomes outside of major strongholds. Solving each anomaly rewards Stellar Planula, gunpowder, and permanent weapon accessories. Most puzzles require correctly employing emotes via the «Z» key, applying direct fire damage, or aligning perspective angles.
Exploring the continent, you will routinely stumble across bizarre glowing objects: hovering violet spheres, security cameras mounted to derelict barns, or charred thorny brambles choking cellars. Firing regular kinetic bullets at them is entirely futile. Bullets will not help. Every anomaly category operates under distinct mechanical rules.
Complete Field Anomaly Registry and Step-by-Step Solutions
| Anomaly Type | Field Appearance | Step-by-Step Solution | Key Exploration Rewards |
|---|---|---|---|
| Floating Glitch Orb | Luminous purple distortion sphere hovering over hilltops or rooftop structures. | Approach closely or fire a single gunshot at the sphere. The orb chimes and zips forward by 15–20 meters. Track its trajectory across 3–5 waypoints until the orb descends to ground level and materializes a reward crate. | Stellar Planula, weapon accessory, ammunition. |
| Surveillance Camera | Wall- or mast-mounted security camera casting a flickering red conical spotlight. | Step directly into the center of the illuminated red light pool, press «Z» (Emote Wheel), and trigger any standard gesture (Bow, Wave, or Applaud). The camera light turns green, powers down, and spawns a container. In rare puzzle variants, shoot the camera lens during its brief LED flash. | Stellar Planula, storage batteries, electronics. |
| Praying & Rotating Statues | Cluster of 2–4 stone effigies arranged in clearings, rock outcrops, or ruins. | Variant 1 (Rotation): Approach each statue and press «F» to rotate them until all effigies face directly toward each other or toward the central basin. Variant 2 (Worship): Stand before the primary altar stone, hold «Z», and perform the «Bow» emote. The effigy glows brightly and unlocks the hidden cache. | Weapon accessories (optics, tactical rails), Stellar Planula. |
| Stardust Thorns / Vines | Black knotted briars and vines choking a loot chest, wellhead, or storm shelter. | Vines possess absolute immunity to kinetic gunfire, but burn instantly under open flame. Toss a Molotov Cocktail, ignite with a torch, or fire a weapon with the Burn status effect (such as KVD – Boom! Boom!). Flames consume the obstruction in 3 seconds. | Gear crate, Stellar Planula. |
| Musical Step Platforms | Luminous ground pressure plates or floating cubes inscribed with musical symbols. | Step onto the first illuminated plate. The mechanism plays a tone and highlights the next tile in sequence. Traverse the platform chain without falling to the ground until the final musical chord sounds. | Rare weapon accessory, crafting supplies. |
| Ghost Car | Stranded civilian sedan or truck parked on the highway shoulder with flickering headlamps. | Approach the vehicle and interact via «F»: either service the dead battery under the hood or enter the driver seat and switch radio stations via «X». The vehicle honks its horn and unlocks its trunk cache. | Vehicle fuel, spare parts, Stellar Planula. |
| Billboard Perspective | Fragmented pieces of painted signage scattered across separate walls and roadside billboards. | Scout the surrounding terrain to find the exact vantage point where the fragmented decals align into a unified image. Center your camera crosshairs to lock the optical illusion, materializing a hidden loot chest. | Weapon accessory, rare refined crystals. |
Deviant Captures at Anomaly Sites: Wild Deviations frequently congregate around dimensional fissures and roadside puzzles. For containment requirements and territorial habitats, consult our guide to all Deviations in Once Human.
Field Logistics: Sweeping Anomalies on Two Wheels
Field puzzles are spread hundreds of meters apart across regional expanses. Scouting them on foot wastes immense amounts of session time. The ultimate explorer setup is a nimble dual-sport motorcycle or off-road vehicle.
When riding across country trails, tap the «Tab» key to activate your onboard vehicle Spacetime pulse. The scanner reveals nearby distortion orbs and hidden Morphic mutants directly through ridgelines, allowing you to divert straight to active caches. For tuning and fuel specs, refer to our guide on vehicles, motorcycle garage, and mobile bases.
Public Events and World Encounters in Once Human: Mechanics, Schedule, and Rewards
Quick Take: Regular public events and world encounters across the map serve as the primary source for Sproutlets, storage batteries, acid, and refined Stardust Ore. Active events are marked on the world map («M») with specialized timed icons.
Beyond clearing static settlements and bases, dynamic events spawn along highway corridors and wilderness biomes. The most lucrative is intercepting the Rosetta transport truck, capable of covering a player's weekly controller requirements for dungeon bosses in just 10 minutes. High risk, immense reward.
«Cargo Scramble»: Convoy Mechanics and Farming Sproutlets
The Cargo Scramble event appears on the world map marked by a prominent red truck icon. A heavy Rosetta corporate transporter travels slowly along primary paved highways (most commonly in Red Sands or Iron River). The truck itself does not attack players; its sole objective is reaching its route terminus.
Step-by-step engagement tactics from veteran players:
- Intercept and Disable the Convoy: Firing weapons while driving motorcycles or bicycles is strictly disabled in Once Human. Board your vehicle, overtake the truck by 50–70 meters, dismount on the roadside with «F», and meet the convoy head-on with concentrated machine gun fire or explosive grenades. Once the vehicle's health bar depletes to zero, it halts and detonates.
- Claiming the Host Status: Purple Stardust bio-nodes appear at the wreck site. Approach and press «F». A Stardust Sprout attaches to your character's head, granting you Host status.
- Currency Payouts: While carrying the Sprout, Sproutlets automatically tick into your inventory every few seconds (at 10–20 units per tick). A full event run typically nets between 800 and 1,000+ Sproutlets.
- Safe PvP Mechanics: Claiming the Sprout automatically flags you for PvP combat, even when playing on PvE scenarios. However, this event features forgiving combat rules: death incurs zero inventory drop penalties and no gear durability loss. If another player eliminates you, they simply seize the Host status.
Solo Farm Strategy via World Hopping: If the convoy is contested by competing groups on your server channel, travel to the nearest Teleportation Tower, open the world channel selector (World 1, World 2, World 3...), and switch to a low-population mirror. On quiet channels, the truck frequently drives completely uncontested, allowing you to bank the full Sproutlet yield in peace.
Earned Sproutlets are spent in safe settlements at the vendor Nisa. Her shop provides a weekly allowance of discounted Controllers for boss vaults, concentrated acid, and legendary combat mods. Base production pipelines for acid are covered in our acid and crude oil automated farm guide.
Workshop Defense, The Ancient One, and Stardust Comets
| World Event | Location and Description | Tactical Walkthrough | Primary Rewards |
|---|---|---|---|
| Workshop Defense | Abandoned industrial processing plants with resource derricks on the map. | Insert storage batteries into the extraction console and initiate the drill. The noise draws 3–4 escalating waves of infected mutants. Erect sandbags and automated defense turrets around the drill to guard against suicide bombers. Electrical grid setups are detailed in our guide on base building, generators, and water pipes. | Hundreds of rare ores, refined fuel, acid, and storage batteries. |
| The Ancient One / Flying Wanderer | Gigantic floating bus drifting through high-altitude regional airspace. | Ascend a tall mountain ridge or nearby Teleportation Tower, deploy your glider («Space»), and ride thermal updrafts onto the bus roof. Destroy corruption pustules across the outer hull and inside the passenger cabin to unlock the elite reward chest. | Elite weapon blueprints, mods, controllers, and Stellar Planula. |
| Stardust Comet | Flaming meteor impact in contaminated wilderness zones. | Elite mutants protected by elemental shields converge on the crash site. Clear surrounding hostiles and shatter the celestial meteorite using heavy pickaxes or electric drills. | Concentrated Stardust Ore and high-tier regional minerals. |
Exploration Economy in Once Human: Stellar Planula, Vendor Severin, and Sproutlet Shop
Quick Take: Collecting open-world caches and solving field anomalies yields two foundational currencies: Stellar Planula and Sproutlets. Planula is traded with the exploration vendor Severin for guaranteed weapon blueprint fragments and dungeon controllers, while Sproutlets are redeemed at Nisa's shop for scarce crafting acid and endgame mods.
Many players hoard hundreds of Stellar Planula in their inventory and forget about it until the season ends. This is a critical mistake that deprives characters of guaranteed combat upgrades. In Once Human, thorough map exploration directly fuels character power: exploration currencies bypass RNG gacha banners to deliver specific blueprint shards required to enhance weapon star ratings.
Where to Find Vendor Severin and Inventory Breakdown
The regional exploration vendor Severin is permanently stationed within the central plazas of all primary safe havens:
- Meyer's Market: Core settlement hub in the Broken Delta region. Severin stands directly beside the disassembly bench and commissions notice board.
- Tall Grass Inn: Primary staging base in the Chalk Peak biome. Found on the outdoor wooden deck near the entrance to the main saloon lodge.
- Blackfell: Endgame municipal center in Red Sands. His kiosk is located adjacent to the vehicle summoning pad and repair bench.
| Severin's Inventory Category | Items Available for Stellar Planula | Player Purchasing Priority |
|---|---|---|
| Weapon & Armor Blueprint Fragments | Guaranteed blueprint shards for Epic and Legendary gear (rifles, sidearms, and armor set pieces). | Maximum Priority. Allows you to synthesize missing blueprints or fuse duplicates to upgrade star ratings via the Wish Machine and Starchrom system. |
| Controllers | Consumable activation keys required to extract rewards from boss blooms in dungeons. | High Priority. Mandatory for every Silo run and Monolith boss encounter. Without controllers, you cannot harvest the endgame loot detailed in our guide to Monolith bosses and Silos. |
| Unique Weapon Accessories | Rare tactical reflex sights, compensators, and extended magazines unobtainable through basic field chests. | High Priority. Purchased once and permanently unlocked across your account profile. |
| Furniture & Decor Formulas | Crafting blueprints for designer interior lighting, display shelving, and structural wallpapers. | Medium Priority. Recommended for territory decoration after fulfilling core combat gear requirements. |
The Sproutlet Shop: Optimal Purchases from Nisa
The vendor Nisa exclusively accepts Sproutlets, harvested during the highway Cargo Scramble event. Her catalog is specifically tuned to eliminate bottlenecks in dungeon grinding and weapon maintenance:
- Weekly Controller Allowance: Nisa offers a discounted weekly quota of Controllers. Buy out her entire stock every Monday upon weekly server reset.
- Concentrated Acid: The primary limiting component for calibrating weapons and smelting high-tier ingots. If your home base has not yet established automated production, Nisa's acid prevents severe crafting stalls.
- Legendary Gear Mod Crates: Blind crates containing randomized tier-appropriate combat mods to optimize secondary gear attributes.
Golden Rule for Spending Planula: Never spend Stellar Planula on random resource boxes containing gunpowder or basic scrap. Gunpowder and copper ore can be farmed in the open world in minutes, whereas Planula exists in finite quantities per scenario. Guard your Planula strictly for guaranteed blueprint shards, unique accessories, and controllers.
Common Explorer Mistakes in Once Human, Wipe Mechanics, and Detailed FAQ
Quick Take: The most frequent beginner mistake when exploring the world map is neglecting the Spacetime scanner via the «Q» key and blowing irreplaceable Stellar Planula on random resource crates. Regular seasonal wipes in Once Human do not erase all character progress: all unlocked weapon accessories, gear blueprints, and planula carry over permanently, while stronghold objectives reset, allowing you to re-loot all mystical crates in the new scenario.
Exploration in Once Human is anchored to a cyclical seasonal structure. Never fear the reset. Understanding which progression elements belong to a temporary server and which bind permanently to your master account profile removes the anxiety of losing hard-earned farm investments across seasonal transitions.
Top-5 Exploration Mistakes to Avoid
- Attempting to Burn Vines with Standard Ammunition: Stardust briars (Stardust Thorns) possess absolute immunity to kinetic ballistic damage. Emptying rifle magazines into them wastes valuable ammo. Always carry a couple of Molotov cocktails or a handheld torch in your pack.
- Overlooking Morphic Mutants Due to Haste: Sprinting through settlements without pulsing «Q» guarantees you leave behind 1–2 mimics disguised as storage crates or roadside boulders.
- Re-Clearing Explored Outposts for Blueprints: Mystical Crates are strictly one-time claims per scenario. Once you extract their blueprint shards, that container never respawns for the duration of the season. Only standard military crates refresh every 4 hours with assembled weapons and armor.
- Scouting Blind Zones Without Tower Synchronization: The built-in resource radar («F» → Resource Tracking) cannot project routes into regions obscured by fog of war. Prior to scouting ores or wildlife in an unfamiliar territory, synchronize the regional Teleportation Tower.
- Wasting Stellar Planula on Low-Grade Supplies: Purchasing gunpowder, metal ingots, or standard mods from vendor Severin is a severe blunder. Reserve Planula strictly for guaranteed blueprint shards, permanent accessories, and controllers.
What Transfers Across Seasonal Wipes and What Resets
| Progression System | Status Upon Seasonal Wipe | Transfer Rules and Availability |
|---|---|---|
| Weapon Accessories (Attachments) | Permanently Retained (100%) | All discovered optics, suppressors, compensators, and magazines are immediately accessible in your weapon modification menu from level 1 on a fresh server. |
| Weapon & Armor Blueprints | Permanently Retained (100%) | All learned formulas and star enhancement tiers remain fully unlocked. As soon as base crafting resources are gathered at your workbench, gear can be forged immediately. |
| Stellar Planula and Starchrom | Permanently Retained (100%) | Seasonal currencies transfer in full to your personal inventory or master account balance. |
| World Map and Teleportation Towers | Reset to Fog of War | Fog of war veils the world map anew. Teleportation relays must be re-synchronized, granting valuable early-game character experience. |
| Mystical Crates and Field Riddles | Refreshed (Reset) | All world containers and spacetime puzzles reactivate for renewed clearing. This is a primary benefit of seasonal wipes, allowing you to re-farm hundreds of Stellar Planula and massive EXP reserves. Seasonal mechanics are detailed in our guide on seasons, scenarios, and Eternaland wipes. |
Frequently Asked Questions (FAQ)
Question: Can the resource radar place a direct waypoint onto a Mystical Crate?
Answer: No. The in-game map radar («F») is dedicated strictly to natural resources: ores, wild crops, and fauna territories. Locating crates inside settlements requires visual scouting and Spacetime scanner pulses («Q»), with total crate counts tracked on the stronghold objective card.
Question: How do I verify if a stronghold is 100% completed?
Answer: Open your world map («M») and hover over the settlement icon. When all objective checklist items (Rift Anchor, Mystical Crate, military weapon/gear crates, elite enemy) display green checkmarks, the outpost is 100% cleared.
Question: What should I do if a Surveillance Camera ignores player emotes?
Answer: Ensure your character stands dead center inside the illuminated red floor circle, rather than on its outer rim. If the light continues blinking red, inspect the camera lens: in rare puzzle variants, you must shoot the lens during its momentary LED flash.
Question: Where can I obtain additional weapon attachments once all map puzzles are solved?
Answer: Check vendor Severin's catalog across hub settlements in Meyer's Market, Tall Grass Inn, and Blackfell. Several unique tactical modules are sold exclusively through his kiosk in exchange for Stellar Planula. For core survival mechanics, review our complete beginner's survival guide.